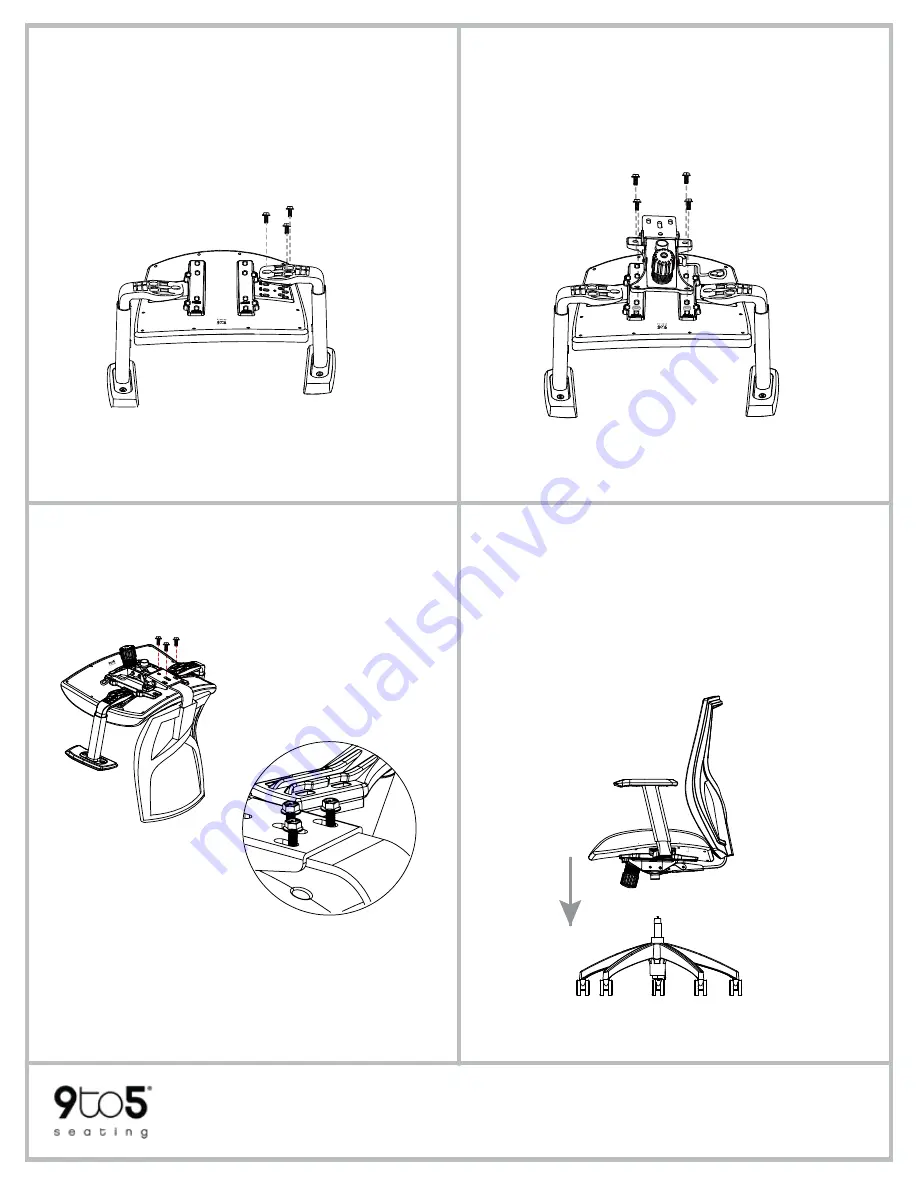
STEP 5
Insert the assembled back/seat unit onto the
cylinder, which was placed in the base in Step 1.
Press down firmly to secure.
3211 Jack Northrop Ave. Hawthorne, CA 90250
PHONE
888.925.SEAT
FAX
866.925.SEAT
9to5seating.com
©2021 9to5 Seating
STEP 4
Attach the back to the seat.
2B.
Place the back plate under
the seat as shown, aligning the holes. Using the
Allen wrench, reattach the bolts from the top.
4A.
Using the Allen wrench,
remove the 3 M8 bolts from
the back.
STEP 3
3A. Remove the ¼” bolts and that hold the
mechanism. There are 4 bolts and 2 spacers total.
STEP 2
2A. Invert the seat, fabric side down, and remove
the ¼” bolts for the arms from the seat with the
Allen wrench. There are 6 bolts total (3 per arm).
R
L
R
L
Join the back and seat with the cylinder and base.
Attach the arms to the seat.
Attach the mechanism to the seat.
2B. Adjust the left and right arms to be symmetrical,
then reattach the bolts to secure the arms.
3B. Place the mechanism on the underside of the
seat as shown, then reattach the bolts.
Updated 2/16/2021


