ENG 17
General Warnings for Maintenance
1. When cleaning the surface of the unit, take into consideration the
following points:
1.1. Never use detergent or chemicals.
1.2. Wipe the front and back of the product with water-soaked soft
cloth.
1.3. Do not directly spray water on the surface of the product.
1.4. If dust or other foreign substance has accumulated on the conden
ser, wipe off with water-soaked soft cloth.
1.5. After cleaning the product, completely dry it before applying electric
power.
2. If the product is not used for a prolonged period, take into
consideration the following points:
2.1. Unplug the power cord.
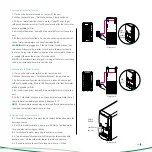
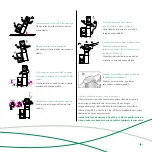
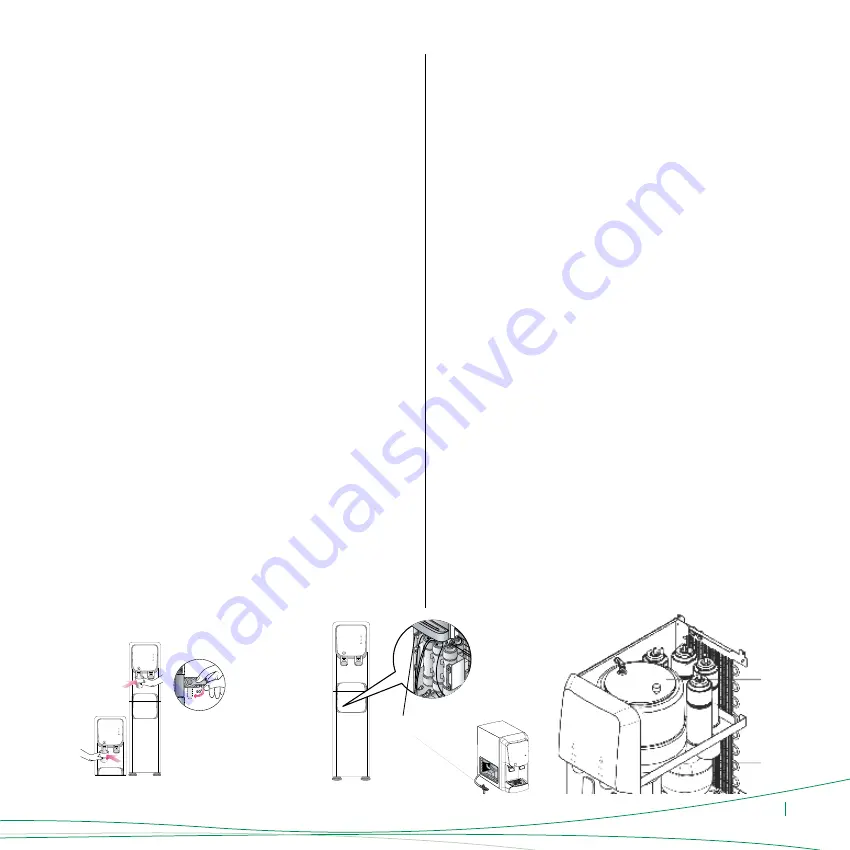
Water can be drained completely bu loosening the Hot and Cold water
caps. (Diagram 10)
2.2. Wipe dry any remaining surface moisture from each part of the
product. Damp surface will create rust.
2.3. Wrap the product in its original vinyl and corrugated paper used
for shipping, before storage, to prevent from being damaged by rust and
other foreign substances.
3.Interior Cleaning of the Unit:
3.1. Unplug the power cord.
3.2. Close the main feed water valve and drain water from the dispen
sing faucet of the product. (Diagram 10)
3.3. Frezya 300S: Open the drain valve (hot water) and drain remaining
water completely. Be careful as how water can cause burns.
Frezya 300TU: Drain valve is placed inside the lower front panel on the
left of the product. (Diagram 11)
3.4. Remove the left and right screws on rear side of product and remo
ve the top cover.
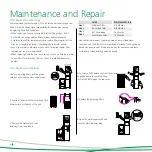
3.5. Open the lid of cold water tanki which is inside the product.
When separating tank cover, be careful not to damage rubber packing
of it. The cold tank is made of stainless steel, so be careful not to hurt
your hands. (Diagram 12)
3.6. Clean inside of the cold tank pouring water into it. Then, close
water drain valve and reassemble cold tank cover.
3.7. Open the water supply valve and check water leakage when cold
tank is fully filled with water. Then, reassemble the top cover.
3.8. Keep checking operation and water leakage state for a day.If there is
problem, contact customer service center.
7. After connecting to the power, before the tanks start to draw water, do
water flushing process to each filter for more than 10 mins, until white,
black or bubble water doesn't come out from the filter. For sediment and
pre-carbon filter, disconnect them from the membrane and dump the
water for 10 mins. For post carbon filter, disconnect it from the tank and
dump the water for 10 mins.
WARNING:
After replacing carbon filter, black carbon dust may remain on
the bottom of the unit. The dust is spilled from carbon filter which makes
water taste fine and harmless.
8. After replacing filters, check if there is any leakage at connection part
and interior hoses.
9. When flushing is done,assemble back the front cover and screw.
10. Dump first 20 liters of water coming from the unit.
CLOSE
Diagram 10
Diagram 11
Diagram 12
Cold Water
Tank Cover
Cold Water
Tank
Hot Water
Tank
Drain Valve


