16
A44-P
4.9 ITEMS TO BE PERFORMED BEFORE OPERATING THE MACHINE
Once the machine has been properly installed (as previously described), check that:
• The magazine is loaded with the type of Wedges suitable with the mouldings to be assembled
• The adjustment of the vertical and horizontal clamps are correct (chapter 4.8.2 and 4.8.3)
• The protective shield is properly positioned (see chapter 4.8.5)
• The working pressure is adequate to the wood hardness (see chapter 4.8.4)
• The mouldings to be assembled are properly positioned on the work bench
• Pressing down the pedal to activate the frontal clamps so to hold the frame properly
• Move the position handle to the inserting position and press half-down the pushbutton to activate the brake and the
verticla clamp
Press the pushbutton all the way down to insert the wedge
If you want to insert 2 or more wedges one upon the other in the same position, you must release the
pushbutton until halfway and then press it full down again to insert the second wedge
5. OPERATING MODES
5.1 OPERATORS
The machine has been designed to be used by only one operator.
The operator, as well as being adequately informed on the use of machinery, must possess skills and competence adequate
to the type of work to be performed.
Even after being adequately informed, during the first use, if necessary, simulate some operating maneuvers to identify the
controls, especially the ones for starting and stopping the machinery and their main functions.
How to operate in case of emergency , where to find the individual protection means and how to use them properly.
5.2 DESCRIPTION OF FUNCTIONS
The machine has only one possible operating mode:
• manual mechanic functioning by using the pneumatic foot pedal and the manual joystick.
Press the foot pedal down: the horizontal clamp is activated.
The handle/joystick allows the shift of positioning of Wedges firing group. According to the use of the foot pedal, the joystick
allows several operations:
If the foot pedal is pressed down:
• pressing the button half way, the vertical clamp and the brake are activated
• pressing the button full down, the Wedge is fired.
To make a junction, the operator must proceed as follows:
1. position the mouldings to be assembled on the machine
working bench
2. set the insertion limits by mean of the stops along the
joystick stroke
3. adjust the horizontal clamp position
4. adjust the vertical clamp height
5. press down the foot pedal to activate the frontal clamp
6. shift the joystick on the 1
st
inserting point
7. press the button half way to activate the vertical clamp
8. press the button full down to insert the Wedge
Take care: if you want to stack 2 or more Wedges in the same position, you must release the button up
to half way and then press again it full down to insert the 2
nd
Wedge and so on.
9. completely release the button to rearm the driver blade
and release the brake on position
10. shift the joystick in the next inserting point
11. repeat the steps 6, 7, 8, 9 and 10.
Summary of Contents for A44-P
Page 3: ...3 A44 P...
Page 21: ...21 A44 P...
Page 24: ...24 A44 P DWG A44 P 01...
Page 25: ...25 A44 P DWG A44 P 02...
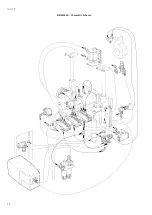
Page 26: ...26 A44 P SCHEMES B Pneumatic Scheme...
Page 27: ...27 A44 P...
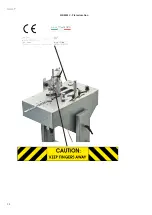
Page 28: ...28 A44 P SCHEME C Plates location...
Page 30: ...30 A44 P...
Page 31: ...31 A44 P...
Page 32: ......


