6
Getting Started
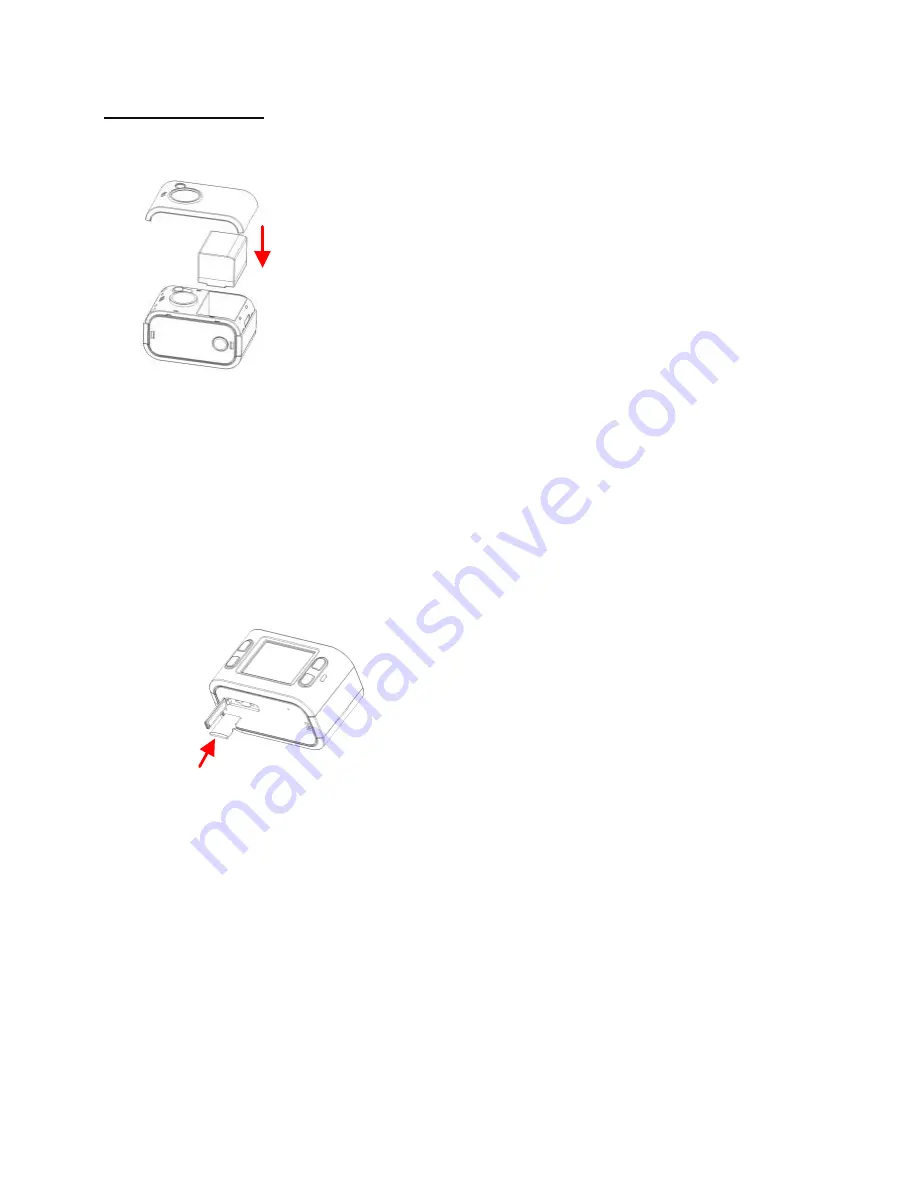
Install batteries
Charging
Connect the USB cable to camera USB port, insert the charger to socket and wait for 2-3
hours. During charging, the LED is yellow. When power full, the LED light will turn off
automatic.
Insert Micro SD Card
Hold the camera; make sure buttons are upward; confirm the Micro SD Card direction and
the side with words towards to display screen; Push Micro SD Card into card slot gently,
and pay attention to the directions. If insert the card opposite, it will get stuck; when totally
insert the card, with a "tick" sound. Press the card and take the card out, this will release
the lock, and card
will be pop out. Please take out the Micro SD Card
gently for the
spring is very powerful.
Setup your Cam
Press the menu button twice to get into menu, the step is:
Select the video resolution.
Set up the video mode (Auto/Sunny/Cloudy/Rainy/Snowy).
Format your SD Card.
Set up time and date (if with GPS, time update automatic, time zone location by
manual).
Select the video split option for your video.
Set the recording Quality.


