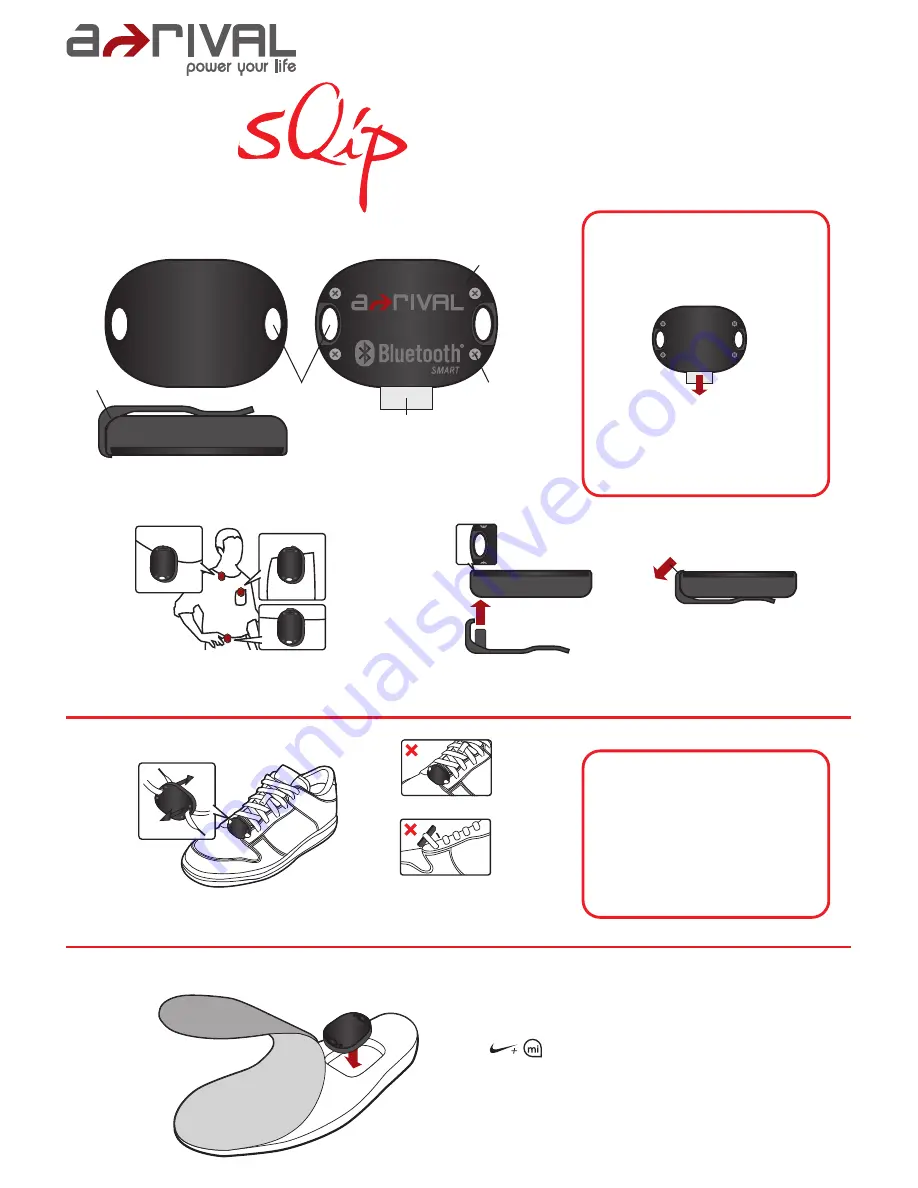
Device Overview
Important Notice
Installation
This device can also be installed in shoes that come with
insertion slot for this sensor, such as Nike or Adidas shoes with
special feature marks.
(Lift up sock liner and insert this sensor into the slot with LOGO
facing up)
Clip
To install the clip, slide the clip forward along
the back of the sensor until the sensor is
securely snapped into the clip latch.
This device can be clipped onto shirt pocket, collar or
around waist. Please make sure the device is securely
snapped into the clip before use.
To detach the clip from the sensor,
pull up the clip latch in order to
eject the sensor
.
User Manual
Pedometer
The device comes with a battery pre-inserted.
Before using the device, the insulation sheet
must be removed in order to use the device.
Please remove the insulation sheet as shown
in the image illustrated. (Improper removal of
the insulation sheet might end up breaking
the insulation sheet.) Once the battery fails to
activate, you will need to open the battery
cover, and remove scraps of the broken
sheet.
Rear Side
Shoelace Hole
Screw
Front Side
Insulation Sheet
Insulation Sheet
Battery Cover
Front Side
Install Device into the Slot of the Sneaker
Important Notice
While tying the shoelace, pull one through
from upward while the other from
downward, and make sure the front side
faces up.
Please try to keep the device at horizontal
level, for excessive tilting might cause
incorrect detection.
When the device is tightened on the shoelace, make sure the front side faces up, while
the shoelace should be pulled through the two shoelace holes aside the device and tied
with a knot to fasten the device
Use clip
Install & Uninstall Clip
Install the sensor on top of Sneakers
Front-side facing down
Excessive tilting
1b
1a
1c


