— 2 —
I
I
N
N
T
T
R
R
O
O
D
D
U
U
C
C
T
T
I
I
O
O
N
N
Congratulations on your purchase! Your new RF-Mouse is easy to install and offers you a host of useful features.
The Radio receiver can be conveniently placed to give you the freedom you need while working. The vertical
wheel allows you to scroll, or zoom in and out in a document. You can program the mouse buttons to launch the
NetJump or LuckyJump for a quick start to programs you run frequently. And, your RF-Mouse has a unique ID
code, so other RF (Radio Frequency) pointing devices won’t affect your system.
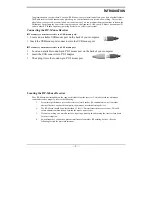
Connecting the RF-Mouse Receiver
To connect your mouse receiver to a USB mouse port:
1.
Locate an available USB mouse port on the back of your computer.
2.
Insert the USB mouse port connector into the USB mouse port.
To connect your mouse receiver to a PS/2 mouse port
1.
Locate an available round 6-pin PS/2 mouse port on the back of your computer
2.
Insert the USB connector to PS/2 adaptor.
3.
Then plug it into the round 6-pin PS/2 mouse port.
Locating the RF-Mouse Receiver
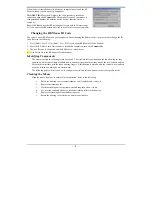
Your RF-Mouse has limitations on the range or distance from the receiver. To make sure that your mouse
sends and receives properly, refer to the following:
1.
For optimal performance, place the receiver at least 8 inches (20 centimeters) away from other
electrical devices, such as the computer, the monitor, or external storage drives.
2.
The RF-Mouse should be no farther than 3.3 feet (1.0 meter) from the mouse receiver. This will
ensure optimal communication between the mouse and receiver.
3.
If you are working on a metallic surface, try using a mouse pad and turning the receiver face down
for better reception.
4.
Switch frequency channels to prevent interference from other RF pointing devices. (See the
following section for more information.)


