Connections
S
ingle Wiring
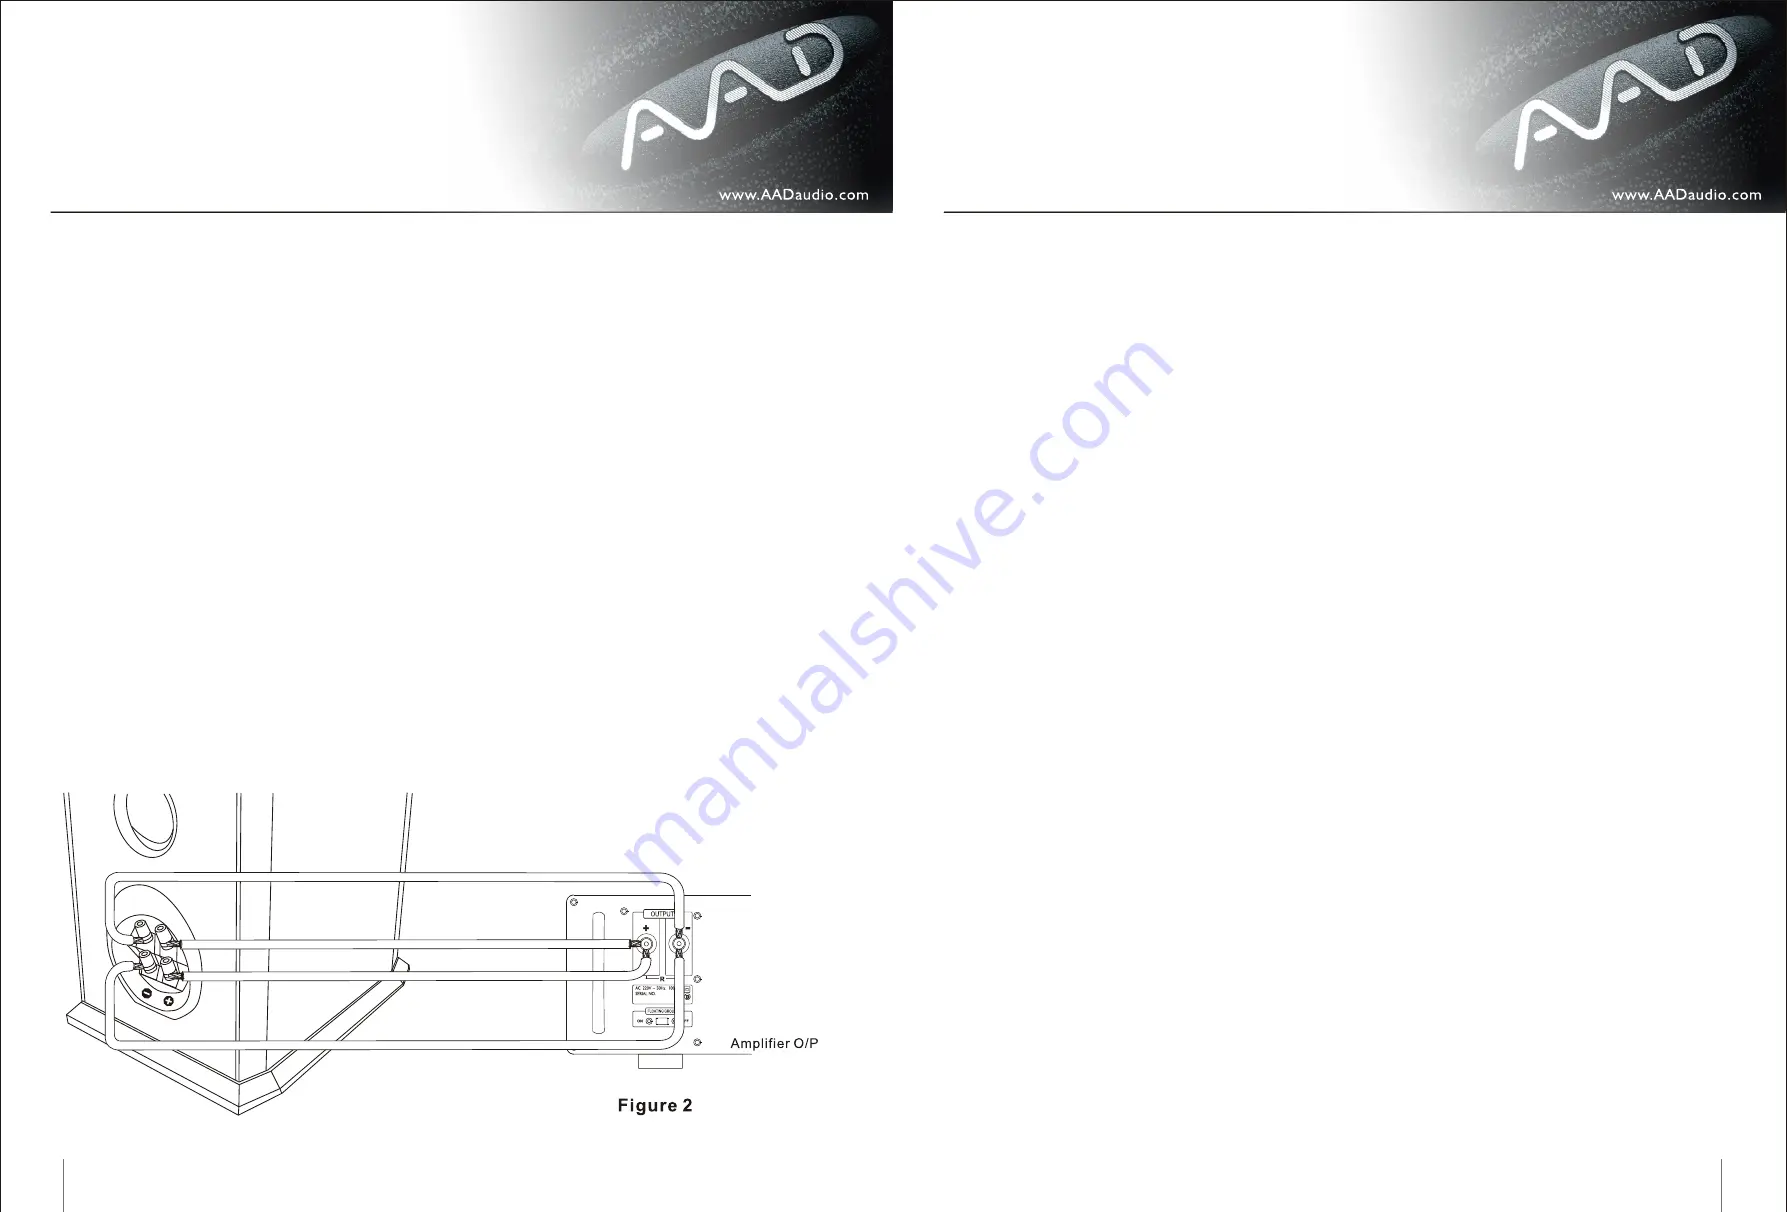
Bi-wiring increases the flow of current and will
usually improve the sound quality. This method
uses two pair of cables: one pair for the upper
two terminals and one pair for the bottom two
terminals ( as shown in Figure 2 ).
Connect the speakers to amplifier the same
manner as you do single wiring.
Note: remove the metal links.
Adding center and rear speakers to the left and
right channels will enhance the surround
effects of motion pictures. If you choose
smaller models, an active sub-woofer is
S
ingle Wiring
You will need one pair of cable for each speaker
in the system.
On the back panel of your AV amplifier, locate
the Front Speaker, Center Speaker, and Rear
Using the same method as connecting two
channel stereo speakers, connect left and
right, center, and rear speakers to the
c o r r e s p o n d i n g t e r m i n a l s o n t h e AV
amplifier. Again, be sure to match the
speaker cables to the appropriate terminals
on the components: (+) to (+) and (-) to (-)
to ensure sufficient bass and clear imaging.
For sub-woofer connection and operation,
please refer to Sub-woofer Owner's Manual.
Amplifier with only one set
speaker output
Note:
Care & Service
General Care
The loudspeaker cabinet may be cleaned
with a slightly damp cloth. Grilles should be
kept on the speakers to protect the drive
units when the speakers are not being played.
Never use any solvents to clean any part of
The grille is held in place by pins near the
edges. To remove the grille, grasp it by both
the system.
top and bottom edges and pull gently. To
replace the grille, reposition it carefully and
press gently at the corners. Do not push on the
center area of the grille. Keep the grille free
of dust and dirt. To clean, remove the grille
from the cabinet and vacuum lightly.
Warranty & Service
essential for adequate bass reproduction.
The C-Series speakers come with warranty
period of 3 years, starting from the date of
purchase. This warranty is provided to
o r i g i n a l o w n e r, a n d c o v e r s d e f e c t i n
materials or workmanship that occurs in
If this is not possible, call or write to:
Should you need service on your speakers,
please bring it to the dealer whom you
purchased from along with sales slip.
5
4
Speaker terminals.
support@aadaudio.com
Damage in shipment.
Damage caused by accidental or intentional
misuse or abuse.
Units not registered with American Acoustic
Development Int'l Ltd.
D a m a g e r e s u l t i n g f r o m u n a u t h o r i z e d
modifications or repairs.
The warranty is void if serial number on the
product has been removed.
normal use.
Liability is limited to the repair or replacement,
at our option, of any defective component and
shall not include property or consequential
damages which may result from the failure of
this product. You will void warranty if the
cabinet is opened without factory authorization.
a)
b)
c)
d)
e)
This warranty does not include:
Summary of Contents for C-Series
Page 1: ......


