background image


Appendix C – Standard Firewall Platform Setting 


83


Net
work 

Ap

plian
ce


FW

S-

22

71


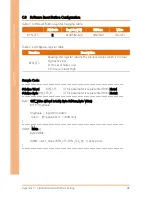
Sample Code: 
***************************************************************************************** 
#define Byte CPLD_SLAVE_ADDRESS  //This parameter is represented from Note1 
#define Byte OFFSET 


//This parameter is represented from Note2 

***************************************************************************************** 
bData = aaeonSmbusReadByte(CPLD_SLAVE_ADDRESS, OFFSET); 
 
switch( LED_FLAG) 

case 0: 


//LED Off 


//BIT2=0, BIT1=0, BIT0=0 


bData = bData & 0xF8; 


break; 


case 1: 


//Red LED On 


//BIT2=0, BIT1=0, BIT0=1 


bData = (bData & 0xF8) | 0x01; 


break; 


case 2: 


//Red LED Blink 


//BIT2=0, BIT1=1, BIT0=0 


bData = (bData & 0xF8) | 0x02; 


break; 


case 3: 


//Red LED Fast Blink 


//BIT2=0, BIT1=1, BIT0=1 


bData = (bData & 0xF8) | 0x03; 


break; 


case 4: 


//Green LED On 


//BIT2=1, BIT1=1, BIT0=1 

Summary of Contents for FWS-2271

Page 1: ...FWS 2271 Network Appliance User s Manual 1st Ed...

Page 2: ...n this manual is intended to be accurate and reliable However the original manufacturer assumes no responsibility for its use or for any infringements upon the rights of third parties that may result...

Page 3: ...ademark of Microsoft Corp Intel Pentium Celeron and Xeon are registered trademarks of Intel Corporation Core Atom are trademarks of Intel Corporation ITE is a trademark of Integrated Technology Expres...

Page 4: ...duct please make sure the following items have been shipped Item Quantity FWS 2271 1 SATA cable 1 SATA power cable 1 Power adapter 1 HDD bracket kit 1 Rubber foot 4 If any of these items are missing o...

Page 5: ...tailed descriptions and explanations on the product s hardware and software features if any its specifications dimensions jumper connector settings definitions and driver installation instructions if...

Page 6: ...ystem s hardware 6 No connections should be made when the system is powered as a sudden rush of power may damage sensitive electronic components 7 If the device is not to be used for a long time disco...

Page 7: ...18 If any of the following situations arises please the contact our service personnel i Damaged power cord or plug ii Liquid intrusion to the device iii Exposure to moisture iv Device is not working...

Page 8: ...osion if the battery is incorrectly replaced Replace only with the same or equivalent type recommended by the manufacturer Dispose of used batteries according to the manufacturer s instructions and yo...

Page 9: ...Preface IX Network Appliance FWS 2271 China RoHS Requirements CN AAEON Embedded Box PC Industrial System Pb Hg Cd Cr VI PBB PBDE O SJ T 11363 2006 X SJ T 11363 2006...

Page 10: ...O O O Wires Connectors for External Connections O O O O O O Chassis O O O O O O CPU RAM O O O O O O Hard Disk O O O O O O PSU O O O O O O O The quantity of poisonous or hazardous substances or element...

Page 11: ...Digital I O CN1 13 2 6 Hard Disk Drive Installation 14 Chapter 3 AMI BIOS Setup 24 3 1 System Test and Initialization 25 3 2 AMI BIOS Setup 26 3 3 Setup Submenu Main 27 3 4 Setup Submenu Advanced 28...

Page 12: ...up submenu Security 54 3 7 Setup submenu Boot 56 3 8 Setup submenu Exit 57 Chapter 4 Drivers Installation 58 4 1 Driver Installation 59 Appendix A Watchdog Timer Programming 60 A 1 Watchdog Timer Init...

Page 13: ...Network Appliance FWS 2271 Chapter 1 Chapter 1 Product Specifications...

Page 14: ...Intel i211 Co lay with Intel i210 Gigabit Ethernet x 6 BOM Optional 4 Ports Bypass Supports up to 2 pairs bypass function Storage 2 5 HDD bay x 1 CFast socket x 1 Co lay for BOM Optional CompactFlash...

Page 15: ...Software Programmable button x1 HDMI x 1 Power Button x 1 RTC Internal RTC Watchdog Timer 1 255 steps by software programming Software Button GPIO Programmable push button x 1 TPM Optional TPM v1 2 96...

Page 16: ...Type A on I O side x 2 Environmental Operating Temperature 0 40 C 32 104 F Storage Temperature 20 60 C 4 104 F Operating Humidity 10 80 relative humidity non condensing Storage Humidity 10 80 40 C no...

Page 17: ...Network Appliance FWS 2271 Chapter 2 Chapter 2 Hardware Information...

Page 18: ...Chapter 2 Hardware Information 6 Network Appliance FWS 2271 2 1 Dimensions System...

Page 19: ...Chapter 2 Hardware Information 7 Network Appliance FWS 2271 Board Component Side Solder Side...

Page 20: ...Chapter 2 Hardware Information 8 Network Appliance FWS 2271 2 2 Jumpers and Connectors Component Side...

Page 21: ...Chapter 2 Hardware Information 9 Network Appliance FWS 2271 Solder Side...

Page 22: ...k Appliance FWS 2271 2 3 List of Jumpers Please refer to the table below for all of the board s jumpers that you can configure for your application Label Function JP1 CF POWER Selection JP2 Auto PWRBT...

Page 23: ...k Appliance FWS 2271 2 3 1 CF Power Selection JP1 5V 3 3V Default 2 3 2 Auto PWRBTN Selection JP2 Don t use Auto PWRBTN Default Use Auto PWRBTN 2 3 3 CMOS Setting Selection CN12 Normal Default Clear C...

Page 24: ...onnectors that you can configure for your application Label Function DIMM1 DDR3L SODIMM SOCKET CPU_FAN1 4P SMART FAN CN2 KB MS CON1 COM PORT CN9 SATA6G INTERFACE CN4 SATA POWER CN10 CN30 Mini Pci E so...

Page 25: ...ions and address is 801H The pin definitions are illustrated below Pin Signal Pin Signal 1 Digital IN OUT Port1 Bit 1 2 Digital IN OUT Port1 Bit 2 3 Digital IN OUT Port1 Bit 4 4 Digital IN OUT Port1 B...

Page 26: ...Chapter 2 Hardware Information 14 Network Appliance FWS 2271 2 6 Hard Disk Drive Installation 1 Remove the screws then the back cover 0...

Page 27: ...Chapter 2 Hardware Information 15 Network Appliance FWS 2271 2 Remove the screws on the PCB Bracket 3 Remove the screws and take off the upper casing...

Page 28: ...Chapter 2 Hardware Information 16 Network Appliance FWS 2271 4 Remove the screws for the PCB Bracket and then remove the PCB Bracket itself...

Page 29: ...Chapter 2 Hardware Information 17 Network Appliance FWS 2271 5 Remove both screws on the left hand side 6 Remove both screws on the right hand side...

Page 30: ...er 2 Hardware Information 18 Network Appliance FWS 2271 7 Remove the screws for the DC Power then take out the back cover 8 Slot the SATA Cable and the POWER cable together and secure them with a fast...

Page 31: ...Information 19 Network Appliance FWS 2271 9 After assembling the parts close the cover and secure the DC Power screws and bolts 10 Secure both screws on the left hand side 11 Secure both screws on th...

Page 32: ...2 Hardware Information 20 Network Appliance FWS 2271 12 Secure the screws on the PCB Bracket 13 Assemble the anti vibration pad and put it onto the HDD Bracket 14 Secure the screws onto the anti vibra...

Page 33: ...Chapter 2 Hardware Information 21 Network Appliance FWS 2271 15 Secure the HDD Bracket onto the HDD 16 Secure the SATA Cable and the Power Cable onto the HDD and assemble the HDD within the apparatus...

Page 34: ...Chapter 2 Hardware Information 22 Network Appliance FWS 2271 17 Assemble the lower cover and secure the screws 18 Secure the PCB Bracket screws...

Page 35: ...Chapter 2 Hardware Information 23 Network Appliance FWS 2271 19 Secure the screws...

Page 36: ...Network Appliance FWS 2271 Chapter 3 Chapter 3 AMI BIOS Setup...

Page 37: ...ion against the values stored in the CMOS memory If they do not match an error message will be outputted in which case you will need to run the BIOS setup program to set the configuration information...

Page 38: ...n the power is turned off To enter BIOS Setup press Del or F2 immediately while your computer is powering up The function for each interface can be found below Main Date and time can be set here Press...

Page 39: ...Chapter 3 AMI BIOS Setup 27 Network Appliance FWS 2271 3 3 Setup Submenu Main...

Page 40: ...Chapter 3 AMI BIOS Setup 28 Network Appliance FWS 2271 3 4 Setup Submenu Advanced...

Page 41: ...y Device Support Disabled Enabled Enables or Disables BIOS support for security device O S will not show Security Device TCG EFI protocol and INT1A interface will not be available SHA 1 PCR Bank Disab...

Page 42: ...Hierarchy Disabled Enabled Enable or Disable Storage Hierarchy Endorsement Hierarchy Disabled Enabled Enable or Disable Endorsement Hierarchy TPM2 0 UEFI Spec Version TCG_1_2 TCG_2 Select the TCG2 Sp...

Page 43: ...support both with the default set to TPM 2 0 devices if not found TPM 1 2 devices will be enumerated 3 4 2 Advanced CPU Configuration Options summary Intel Virtualization Technology Disabled Enabled...

Page 44: ...Chapter 3 AMI BIOS Setup 32 Network Appliance FWS 2271 Enabled Enable Disable Intel SpeedStep Power Limit 1 Enable Disabled Enabled Enable Disable Power Limit 1...

Page 45: ...pliance FWS 2271 3 4 3 Advanced SATA Drives Options summary Chipset SATA Disabled Enabled Enables or Disables the Chipset SATA Controller The Chipset SATA controller supports the 2 black internal SATA...

Page 46: ...3 4 4 Advanced USB Configuration Options summary Legacy USB Support Disabled Enabled Enables Legacy USB support AUTO option disables legacy support if no USB devices are connected DISABLE option will...

Page 47: ...t Control Disabled Enabled For En Disable Fan 1 Smart Control Enabled FAN is running in accordance with user settings Disabled FAN is always running with full speed Fan Control Mode Automatic Mode Man...

Page 48: ...Temperature Limit Value of Fan Off Note Some fans have the minimum speed even if the PWM value is 0 Start Control Temperature 50 0 127 Temperature Limit Value of FAN Start Control Full Speed Temperat...

Page 49: ...Chapter 3 AMI BIOS Setup 37 Network Appliance FWS 2271 3 4 6 Advanced SIO Configuration...

Page 50: ...Port Configuration Options summary Use This Device Disabled Enabled Enable or Disable this Logical Device Possible Use Automatic Settings IO 2F8h IRQ 3 IO 3F8h IRQ 4 Allows user to change Device s Re...

Page 51: ...3 AMI BIOS Setup 39 Network Appliance FWS 2271 3 4 6 1 1 Serial Port Configuration Serial Port Console Redirection Options summary Console Redirection Disabled Enabled Console Redirection Enabled or D...

Page 52: ...ettings Options summary Terminal Type VT100 VT100 VT UTF8 ANSI Emulation ANSI Extended ASCII char set VT100 ASCII char set VT100 Extends VT100 to support color function keys etc VT UTF8 Uses UTF8 enco...

Page 53: ...is always 1 Space Parity bit is always 0 Mark and Space Parity do not allow for error detection Stop Bits 1 2 Stop bits indicate the end of a serial data packet A start bit indicates the beginning Th...

Page 54: ...xtended terminal resolution Legacy OS Redirection Resolution 80x24 80x25 On Legacy OS the Number of Rows and Columns supported redirection Putty KeyPad VT100 LINUX XTERMR6 SCO ESCN VT400 Select Functi...

Page 55: ...3 AMI BIOS Setup 43 Network Appliance FWS 2271 3 4 6 1 3 Legacy Console Redirection Settings Legacy Serial Redirection Port COM0 Select a COM port to display redirection of Legacy OS and Legacy OPROM...

Page 56: ...ency Management Services EMS Options summary Terminal Type VT100 VT100 VT UTF8 ANSI VT UTF8 is the preferred terminal type for out of band management The next best choice is VT100 and then VT100 See a...

Page 57: ...o re start the flow Hardware flow control uses two wires to send start stop signals Data Bits 7 8 Data Bits Parity None Even Odd Mark Space A parity bit can be sent with the data bits to detect some t...

Page 58: ...Configuration Options summary STATUS LED CTRL LED OFF RED LED ON RED LED BLINK RED LED FAST BLINK GREEN LED ON GREEN LED BLINK GREEN LED FAST BLINK Configure LAN Bypass Status LED LAN kit Power ON By...

Page 59: ...47 Network Appliance FWS 2271 LAN kit Power Off Bypass PassTru Setting LAN kit function behavior when power off Bypass Pass Through WDT configuration Force Bypass SystemReset Configure WDT behavior S...

Page 60: ...ed Power Management Options summary Power Mode ATX Type AT Type Select Power Supply Mode Restore AC Power Loss Power Off Power On Last State Select AC power state when power is re applied after a powe...

Page 61: ...ase minute s Wake up day Fixed time option 0 Select 0 for daily system wake up 1 31 for which day of month that you would like the system to wake up Wake up hour Fixed time option 0 Select 0 23 For ex...

Page 62: ...Appliance FWS 2271 3 4 9 Advanced Digital I O Port Configuration DIO_P 1 4 Input Output Set DIO as Input or Output DIO_P 5 8 Input Output Set DIO as Input or Output DIO_P 1 4 Direction Low High Set o...

Page 63: ...Chapter 3 AMI BIOS Setup 51 Network Appliance FWS 2271 3 5 Setup submenu Chipset...

Page 64: ...Chapter 3 AMI BIOS Setup 52 Network Appliance FWS 2271 3 5 1 Chipset North Bridge Options summary Primary Display IGD PCIe Select which of IGD PCI Graphics device should be Primary Display...

Page 65: ...Chapter 3 AMI BIOS Setup 53 Network Appliance FWS 2271 3 5 1 1 North Bridge AMI Graphic Output Protocol Policy Options summary Output Select HDMI1 Output Interface...

Page 66: ...etup utility with limited access Note 2 if user presses Enter Key directly User can have full access to Setup utility if password is given If ONLY the User s password is set a password window will alw...

Page 67: ...iven Note 1 BIOS can be customized to disallow user enter setup in such situation 2 How user is limited will need to be customized according customer s actual application Removing the Password Highlig...

Page 68: ...I BIOS Setup 56 Network Appliance FWS 2271 3 7 Setup submenu Boot Options summary Quite Boot Disabled Enabled Enables or disables Quiet Boot option Network Stack Disabled Enabled Enable Disable UEFI N...

Page 69: ...Chapter 3 AMI BIOS Setup 57 Network Appliance FWS 2271 3 8 Setup submenu Exit...

Page 70: ...Network Appliance FWS 2271 Chapter 4 Chapter 4 Drivers Installation...

Page 71: ...SetupChipset exe file 2 Follow the instructions 3 Drivers will be installed automatically Step 2 Install Graphics Driver 1 Open the Step 2 Graphics folder followed by Setup exe file 2 Follow the instr...

Page 72: ...Network Appliance FWS 2271 Appendix A Appendix A Watchdog Timer Programming...

Page 73: ...P Mode Data Register 0x2F or 0x4F Table 2 Watchdog relative register table LDN Register BitNum Value Note Timer Counter 0x07 Note3 0x73 Note4 Note24 Time of watchdog timer 0 255 This register is byte...

Page 74: ...This parameter is represented from Note24 define byte UnitLDN This parameter is represented from Note5 define byte UnitReg This parameter is represented from Note6 define byte UnitBit This parameter i...

Page 75: ...work Appliance FWS 2271 VOID Main Procedure AaeonWDTConfig byte Timer Time of WDT timer 0x00 0xFF boolean Unit Select time unit 0 second 1 minute AaeonWDTConfig Procedure AaeonWDTEnable This procudure...

Page 76: ...ableReg EnableBit 0 Clear Watchdog Timeout Status WDTClearTimeoutStatus WDT relative parameter setting WDTParameterSetting VOID WDTEnableDisable byte LDN byte Register byte BitNum byte Value SIOBitSet...

Page 77: ...0x01 IOWriteByte SIOIndex 0x55 IOWriteByte SIOIndex 0x55 Break Case 0x4E IOWriteByte SIOIndex 0x87 IOWriteByte SIOIndex 0x01 IOWriteByte SIOIndex 0x55 IOWriteByte SIOIndex 0xAA Break VOID SIOExitMBPn...

Page 78: ...SIOEnterMBPnPMode SIOSelectLDN byte LDN IOWriteByte SIOIndex Register TmpValue IOReadByte SIOData TmpValue 1 BitNum TmpValue Value BitNum IOWriteByte SIOData TmpValue SIOExitMBPnPMode VOID SIOByteSet...

Page 79: ...Network Appliance FWS 2260 Appendix B Appendix B I O Information...

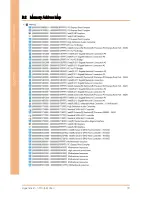
Page 80: ...Appendix B I O Information 68 Network Appliance FWS 2271 B 1 I O Address Map...

Page 81: ...Appendix B I O Information 69 Network Appliance FWS 2271...

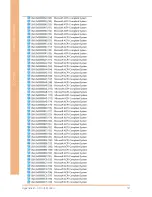
Page 82: ...Appendix B I O Information 70 Network Appliance FWS 2271 B 2 Memory Address Map...

Page 83: ...Appendix B I O Information 71 Network Appliance FWS 2271...

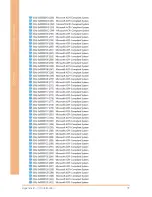
Page 84: ...Appendix B I O Information 72 Network Appliance FWS 2271 B 3 IRQ Mapping Chart...

Page 85: ...Appendix B I O Information 73 Network Appliance FWS 2271...

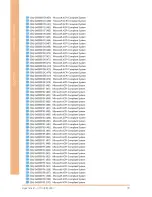
Page 86: ...Appendix B I O Information 74 Network Appliance FWS 2271...

Page 87: ...Appendix B I O Information 75 Network Appliance FWS 2271...

Page 88: ...Appendix B I O Information 76 Network Appliance FWS 2271...

Page 89: ...Appendix B I O Information 77 Network Appliance FWS 2271...

Page 90: ...Appendix B I O Information 78 Network Appliance FWS 2271...

Page 91: ...Appendix B I O Information 79 Network Appliance FWS 2271...

Page 92: ...Appendix B I O Information 80 Network Appliance FWS 2271...

Page 93: ...Network Appliance FWS 2271 Appendix C Appendix C Standard LAN Bypass Platform Setting...

Page 94: ...STA_LED2 STA_LED1 STA_LED0 LED Off 0 0 0 Red LED On 0 0 1 Red LED Blink 0 1 0 Red LED Fast Blink 0 1 1 Reserved 1 0 0 Green LED Blink 1 0 1 Green LED Fast Blink 1 1 0 Green LED On 1 1 1 Table2 Status...

Page 95: ...resented from Note2 bData aaeonSmbusReadByte CPLD_SLAVE_ADDRESS OFFSET switch LED_FLAG case 0 LED Off BIT2 0 BIT1 0 BIT0 0 bData bData 0xF8 break case 1 Red LED On BIT2 0 BIT1 0 BIT0 1 bData bData 0xF...

Page 96: ...Appliance FWS 2271 bData bData 0xF8 0x07 break case 5 Green LED Blink BIT2 1 BIT1 0 BIT0 1 bData bData 0xF8 0x05 break case 6 Green LED Fast Blink BIT2 1 BIT1 1 BIT0 0 bData bData 0xF8 0x06 break def...

Page 97: ...e of LAN kit They should be set before ACT_EN LAN_ID2 LAN_ID1 LAN_ID0 PWR_ON Use for configuring LAN Bypass function behavior to LAN kit when system power on 1 Bypass 0 Pass Through PWR_OFF Use for co...

Page 98: ...2 PWR_OFF R W 0x01 Note2 5 Table 2 WDT_EN R W 0x01 Note2 4 Table 2 ACT_EN R W 0x01 Note2 7 Table 2 Sample Code define ByteCPLD_SLAVE_ADDRESS This parameter is represented from Note1 define ByteOFFSET...

Page 99: ...ion Reg01h bit5 if SET_PASS_THROUGH Pass Through bData bData 0xDF else Bypass bData bData 0x20 WDT Action Reg01h bit4 if SET_WDT_RESET Reset bData bData 0xEF else Bypass bData bData 0x10 SmbusWriteByt...

Page 100: ...nction Description BTN_STS Reading this register returns the pin level status which is normal high active low 0 Pin Level States Low 1 Pin Level States High Sample Code define Word BTN_STS This parame...

Reviews: