19
FabriPulse
®
M
©
2015 American Air Filter Company, Inc. Any use of the text or
images this document contains, without permission of American Air
Filter Company, Inc., is prohibited. FabriPulse, AAF, REDClean,
REDFiltration, and Reliable Efficient Durable are registered
trademarks of American Air Filter Company, Inc. d/b/a AAF
International.
4.
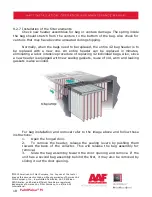
The new headers are inserted by following the reverse procedure. Be
sure the headers are located against the interior stop before securing the
sealing lever.
5.
Continue the above procedure for all bag assemblies.
6.
IMPORTANT: Pull all lever arm handles outward until the lever arm
handle stops.
7.
Close all access doors and tighten hand knobs to seal door. Lever arm
handles will be pushed in slightly by door, but will remain in “past center
locked” position.
8.
Any bag assemblies that are removed and re-installed in the collector
shall be returned to its original place and orientation to ensure sealing.
There may be occasions when one or two bags become damaged and need
to be replaced. Individual bag replacement can be done with the following
instructions:
1.
Unseat the venture/bag assembly, remove venture from expander
spring.
2.
Push new bag/expander spring assembly up through the hole in the
tubesheet.
3.
Snap the expander spring into the lower portion of the venturi
4.
Slide venture down the bag
5.
Continue sliding venturi/bag assembly down into the tubesheet hole
until the bag and grooved portion of the venturi contacts the tubesheet.
IMPORTANT: Top of the bag must be folded over the top of the tubesheet
so that the bag remains positioned between the top lip of the venture and the top
of the tubesheet. Leaks will occur if this is not accomplished.
6.
Apply force to venture/bag assembly to seat it into the tubesheet. It
may be necessary to place a block of wood over the venturi and strike with a
hammer.
9.2.8
Installation of accessories
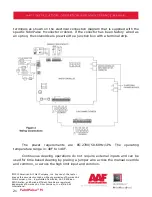
When accessories, such as sprinklers and airlocks, are ordered with the
FabriPulse M, separate installation instructions will be provided with the collector.
For complete information, see the most current installation drawing or separate
IOM.

