Aalberg Audio ROM RO-1, User Manual
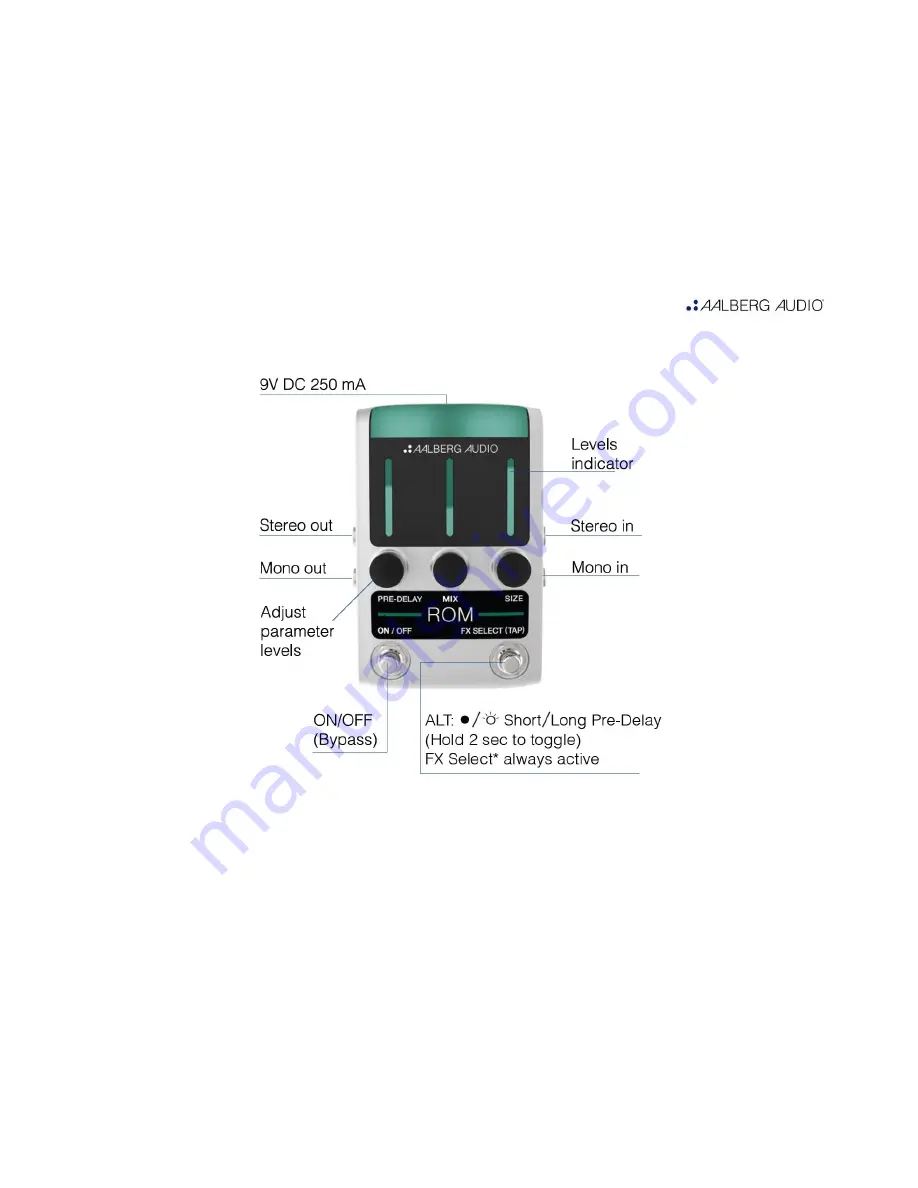
The Aalberg Audio ROM RO-1 is a robust, high-quality audio processor designed for intricate sound manipulation. Enhance your usage with the detailed User Manual, available for free download. Get the most out of your device; download the manual from 88.208.23.73:8080 to unlock all its features and capabilities.
Share
Download


Reviews:
No comments
Related manuals for ROM RO-1

S-Type
Brand: Cadac Pages: 74

FRACTAL PARAMETRIC OVERDRIVE
Brand: aion Pages: 10

Fur Coat
Brand: Orange Amps Pages: 2

INFINITE MINI SAMPLE SUSTAINER
Brand: TC Electronic Pages: 17

A2.1U
Brand: Zoom Pages: 45

MINITAUR
Brand: MMM Pages: 30

Silver Series
Brand: Taurus Pages: 2

DM 2000VCM
Brand: Yamaha Pages: 12

DCU5D
Brand: Yamaha Pages: 12

DCU5D
Brand: Yamaha Pages: 14

DSP-RX
Brand: Yamaha Pages: 24

DIO8
Brand: Yamaha Pages: 18

DM1000-v2
Brand: Yamaha Pages: 23

DM2000VCM
Brand: Yamaha Pages: 28

2FX
Brand: Yamaha Pages: 28

12/4
Brand: Yamaha Pages: 32

4FX
Brand: Yamaha Pages: 32

DCU5D
Brand: Yamaha Pages: 43


