background image


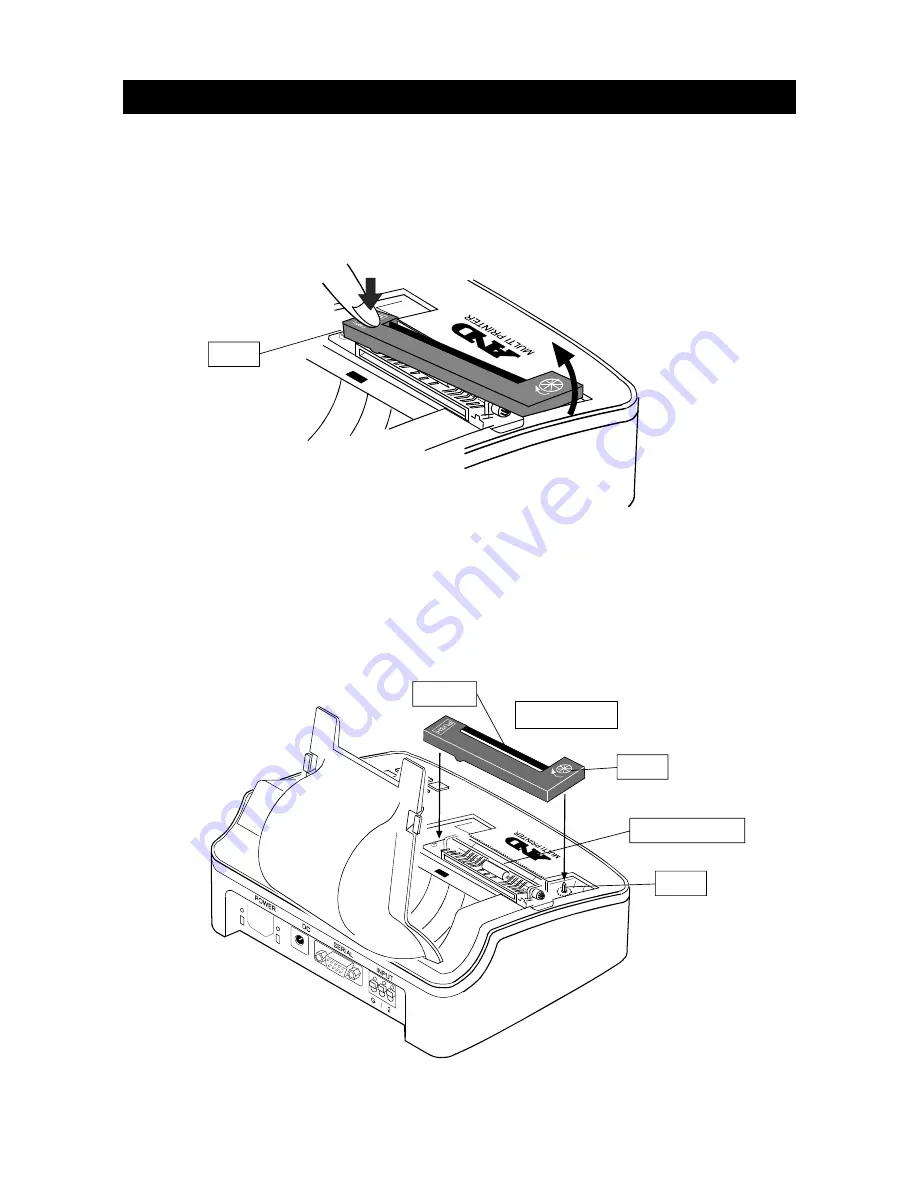
3-3. Installing and removing the ink ribbon 


Instructions 

1. Turn the power off, and then open the printer cover. 

2. When removing the ink ribbon, push the part indicated by

PUSH

on the ink ribbon 

to raise the knob side, and then lift up the ink ribbon straight. 


3. When attaching the ink ribbon, turn the ink ribbon’s knob in the direction indicated by 

the arrow until there is no slack in the ribbon. 

4. Place the hole on the ink ribbon’s knob rear side over the axis located on the main 

body. Insert the ribbon into the printing head and press the ink ribbon onto the main 
body.


* When replacing the ink ribbon with printer paper attached, insert the ribbon 

between the printing head and printer paper. 


* Sold separately: ink ribbon (5 pcs) AX-ERC-22B


Printing head 

Ink ribbon 

Ribbon 

Knob

Axis 

PUSH 

Summary of Contents for AD-8127

Page 1: ...AD 8127 Multi Printer INSTRUCTION MANUAL 1WMPD4003327A...

Page 2: ...ranslated into any language in any form by any means without the written permission of A D Company Limited The contents of this manual and the specifications of the instrument covered by this manual a...

Page 3: ...ATISTICAL CALCULATION FUNCTIONS 12 6 1 Printing example and printing contents of statistical calculation 12 7 BASIC SETTINGS 13 7 1 Time settings 13 7 2 Date settings 13 7 3 Printing mode settings 14...

Page 4: ...equipped with the RS 232C or current loop interface for data input so it allows easy connections between the printer and a weighing device such as an electronic balance Dust free paper sold separatel...

Page 5: ...ptacle type RS 232C cable RS 232C cables A B or C below will be provided by specifying at time of order D sub9 pin 9 pin AX KO2741 100 D sub25 pin 9 pin AX KO2116 090 DIN D sub9 pin AX KO1786 200 DIN...

Page 6: ...mes Printer cover Power switch Keyboard Liquid crystal display Power connector Connector for the AC adapter RS 232C connector RS 232C and current loop connector 9 pin for data transmission External in...

Page 7: ...ng the AC adapter Instructions 1 Confirm that the power switch is turned to off 2 Connect the DC plug of the AC adapter to the power connecter of the printer 3 Connect the AC plug to the outlet 1 Powe...

Page 8: ...low these operations to be performed Instructions 1 Push the knobs at both sides of the printer cover toward the inside directions indicated by arrows 2 Lift up the printer cover while keeping the kno...

Page 9: ...rn the ink ribbon s knob in the direction indicated by the arrow until there is no slack in the ribbon 4 Place the hole on the ink ribbon s knob rear side over the axis located on the main body Insert...

Page 10: ...e metal plate of the printing unit 3 Turn the power switch on 4 Press the key to feed the printer paper 5 or 6 cm out of the printing unit 5 Close the printer cover Place the paper roll in the printer...

Page 11: ...balance or scale models there are three types of pin D sub9 pin D sub25 pin or Din7 pin Use the cable that matches the specific type to connect the printer RS 232C cable D sub9 pin AD 8127 Balance re...

Page 12: ...ge to the printing head Also do not apply ink to the ink ribbon Doing so may cause bleeding Do not drop foreign matter into the printer Doing so may cause mechanical damage to the printer When operati...

Page 13: ...lts Deletes one instance of the data to be used in statistical calculation Deletes all of the data to be used in statistical calculation Feeds paper while the key is pressed Test prints when the power...

Page 14: ...press the key Date and time ID code data count N total TOTAL averaging value AVE maximum value MAX minimum value MIN maximum value minimum value R standard deviation STDEV coefficient variation CV an...

Page 15: ...1 Time settings 1 Press and hold the key 2 Enter the hour minutes and seconds by using the numerical keypad 3 The display shows when all data is entered 4 To confirm the entered data press the key To...

Page 16: ...each setting 7 4 ID code setting 1 Press and hold the key 2 Enter the ID code by using the numerical keypad 3 To move the digit to be entered press the key 4 When the digits to be changed are all ente...

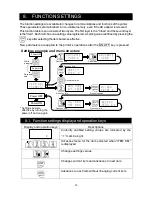
Page 17: ...s example and menu structure Settings become effective by turning the power off and on again 8 1 Function settings display and operation keys Display and operation keys Descriptions Currently enabled...

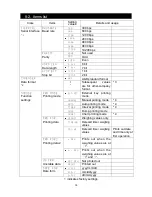
Page 18: ...inting mode MANUAL Manual printing mode 4 AUTO Auto printing mode 4 TIMER Interval printing mode 4 DUMP Dump printing mode PRN MODE Printing mode CHART Chart printing mode 4 WEGHIT Weighing values onl...

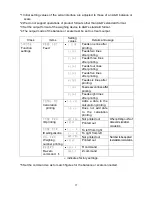
Page 19: ...LINE Feeds six lines after printing 7 LINE Feeds seven lines after printing 3 MODE Function settings FEED CNT Feed 8 LINE Feeds eight lines after printing T D YES Adds a date to the calculation print...

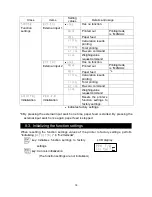
Page 20: ...ngs EXT IN2 External input 2 Q CMD Weighing value request command 4 INITAL Initialization PRN F A Initialization Resets the printer s function settings to factory settings indicates factory settings 6...

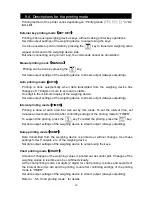
Page 21: ...weighing device to stream output Always outputting Interval printing mode TIMER Printing is done at each time that was set by this mode To set the interval time set minutes and seconds mm dd after co...

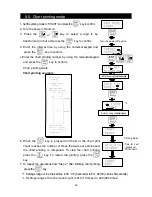
Page 22: ...pressed and held or the chart print count reaches the number of times that was set beforehand the chart printing is completed To stop the chart printing press the key To restart the printing press th...

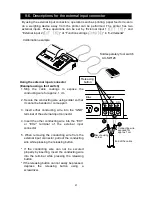
Page 23: ...m 2 Secure the conducting wire using solder so that it cannot be bended or come apart 3 Insert either conducting wire into the GND terminal of the external input connector 4 Insert the other conductin...

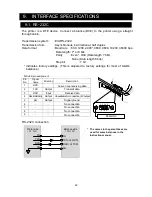
Page 24: ...it indicates factory settings This is adjusted to factory settings for most of A D s balances D Sub 9 pin assignment Pin No Signal name Direction Description 1 RXD Current loop receiving data 2 TXD Ou...

Page 25: ...rmance persists after checking contact the local A D dealer for repair Checking the power supply Is an appropriate AC adapter connected Checking the data transmission Is the printer connected to the w...

Page 26: ...rating humidity range 35 to 85 RH No condensation Storage temperature range 20 to 60 Storage humidity range 10 to 90 RH No condensation Interface RS 232C current loop Power supply AC adapter type Supp...

Page 27: ...25 12 1 External dimensions Unit mm 174 141 87 23 91 27 4 62 69 122 60 3...

Page 28: ...th Ink ribbon 5 pcs AX ERC 22B This is replacement ink ribbon RS 232C cable D sub9 pin 9 pin 1m AX KO2741 100 RS 232C cable D sub25 pin 9 pin 0 9m AX KO2116 090 RS 232C cable DIN D sub9 pin 2m AX KO17...

Page 29: ...27 MEMO...

Page 30: ...28 MEMO...

Page 31: ...1235 550485 A D AUSTRALASIA PTY LTD 32 Dew Street Thebarton South Australia 5031 AUSTRALIA Telephone 61 8 8301 8100 Fax 61 8 8352 7409 A D KOREA Limited 6 33 817 150 749 817 Manhattan Bldg 33 Gukjege...

Reviews: