Page 16
HV/HW-C/CP Series
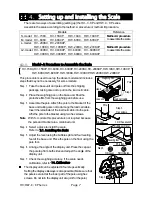
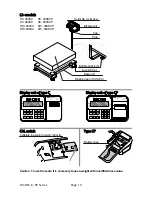
5.3.2. Method-B Procedure to Remove the Pole
HV
-
300KC, HV
-
300KCP, HV
-
600KC, HV
-
600KCP,
HW
-
300KC, HW
-
300KCP, HW
-
600KC, HW
-
600KCP
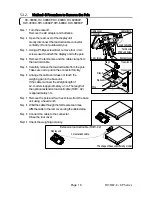
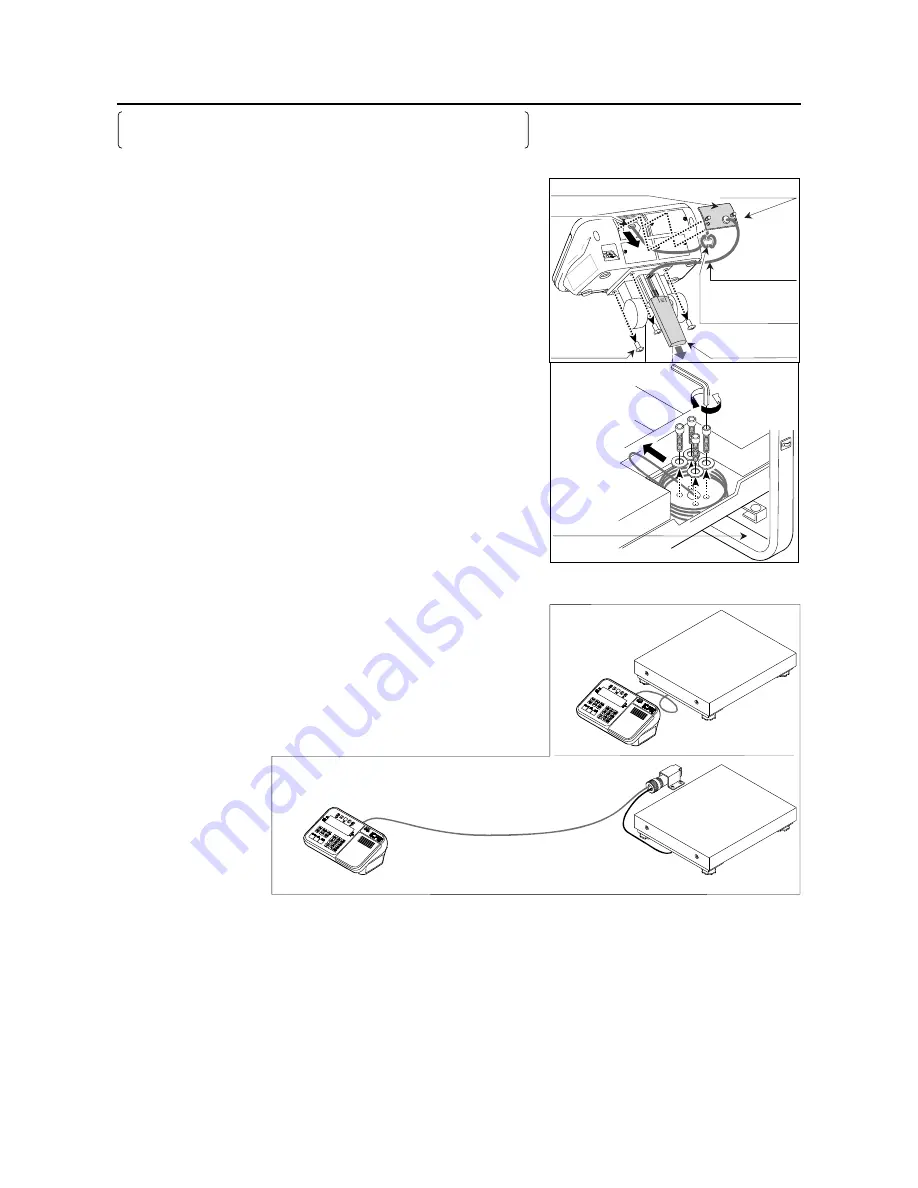
Step 1 Turn the scale off.
Remove the AC adapter and batteries. .
Step 2 Open the rear cover of the display unit.
Gently disconnect the load cell cable connector
vertically. (Do not pull toward you).
Step 3 Using a Phillips screwdriver, remove four
4
mm
screws used to attach the display unit to the pole.
Step 4 Remove the ferrite core and the cable clamp from
the load cell cable.
Step 5 Carefully remove the load cell cable from the pole.
Take care not to pull on the connector forcibly.
Step 6 Arrange the cable so it does not touch the
weighing pan in the base unit.
If the cable is untied, the straight length of
L2
-
models is approximately
4.5
m. The length of
the optional extension load cell cable (HVW
-
02)
is approximately
5
m.
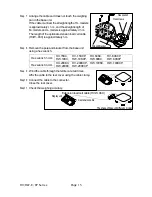
Step 7 Remove the pole and four hex screws from the base
unit using a hex wrench.
Step 8 Wind the cable through the ferrite core two times.
Affix the cable to the rear cover using the cable clamp.
Step 9 Connect the cable to the connector.
Close the rear cover.
Step 10 Check the weighing accuracy
Extension load cell cable (HVW
-
02)
Display
unit
5
m extension cable
The shape of base unit differs by model.
Cable cover Cable
clamp
Connector
Load
cell
cable
Ferrite
core
Wind up 2 times
4 mm screw
Bracket cover
Step 7
Hex wrench
Hex
screws
Step
5
Base
unit
Pole
Summary of Contents for HV-C Series
Page 89: ...HV HW C CP Series Page 87 MEMO...
Page 90: ...Page 88 HV HW C CP Series MEMO...
Page 91: ...13...


