63
removed independently from either side of
the unit.
To remove a coil, first disconnect the water
piping from the coil. Remove the coil access
panel on the side from which the coil is to be
removed. Remove the screws connecting
coil end panel to the coil. Slide the coil
straight out onto a support that is at the same
level as the coil.
To replace the coil, the above procedure
should be reversed. The coil should first be
placed on a support that is at the same level
as the coil position in the unit. The coil
should then be slid straight into the unit.
The upper coil location has angles on both
the front and back side of the coil; the lower
coil has an angle on the downstream side of
the coil and guides on the upstream side. Be
sure that the coil is all the way up against the
front (downstream) side of the coil, this
should center the coil in the opening.
Push the coil all the way in so that the
return-bend side of the coil is between 1/8”
and 1/4” from the inside wall of the unit. For
cooling coils, be sure that the vertical
headers are entirely over the drain pan.
Screw the coil end panel to the coil using
self-tapping sheet metal screws.
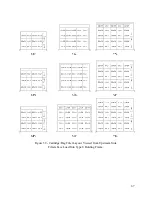
Figure 35 - Coil Removal
Doors/Panels
Removable access panels are provided
directly across from most access doors. If
regular access is required from the panel
side of the unit, the doors and panels can be
swapped or additional doors can be ordered
from
the
factory.
Contact
sales
representative to order additional parts.
Note:
For safety, inside-opening doors are
used in positive pressure sections and
outside-opening doors are used in negative
pressure sections. The opening direction of
doors cannot be changed.
Take care that the coil is not dropped
or knocked over. This could damage
the coil fins, or cause a leak in the
coil.
CAUTION
Summary of Contents for M3 Series
Page 53: ...53 Figure 28 Example Blow Through AAONEcat32 Rating Sheet ...
Page 73: ...73 ...
Page 74: ...74 ...
Page 75: ...75 ...

