background image

AAPT BizPhone Premium T48G IP Phone User Guide


P a g e

12


Customising Your Phone 


General Settings 


Backlight 


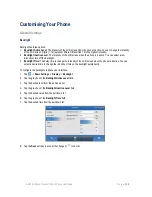
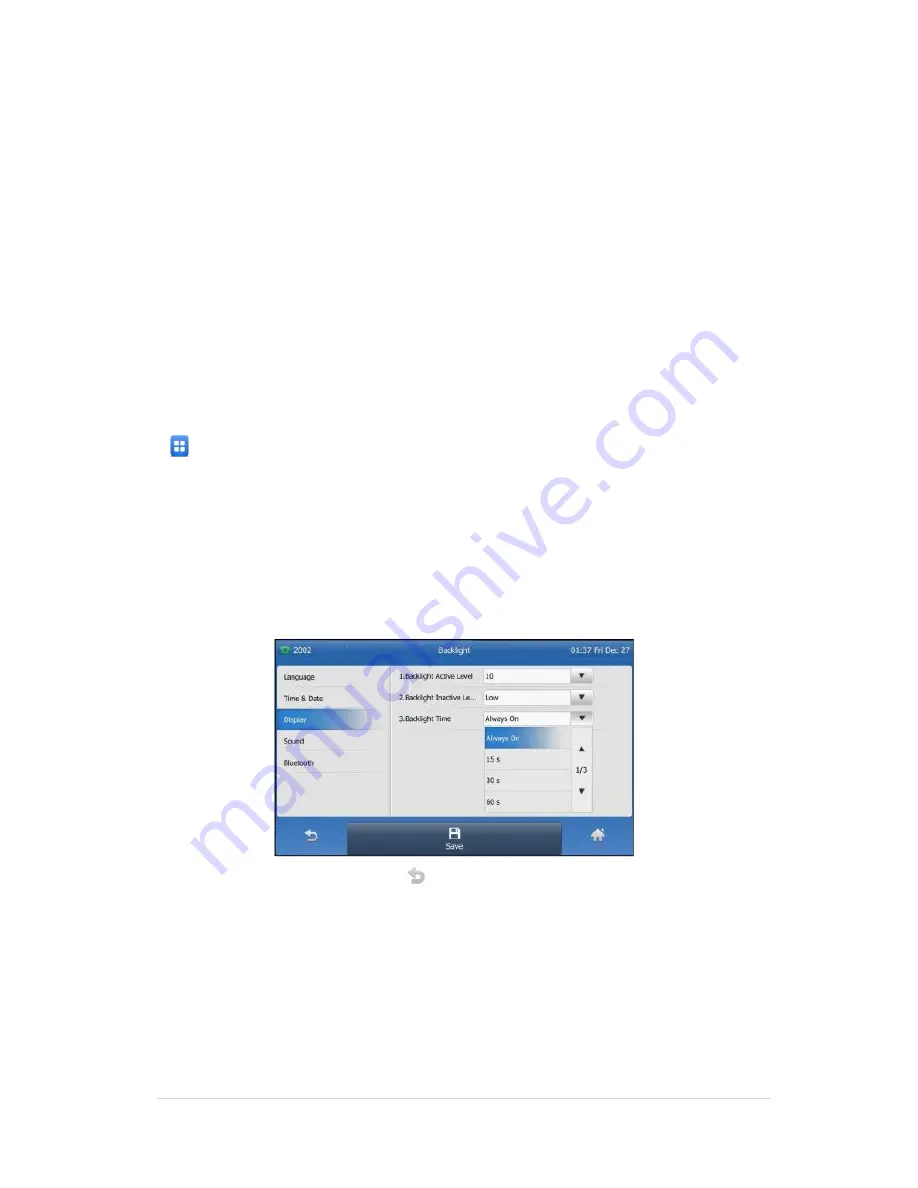
Backlight has three options: 

1.


Backlight Active Level:

 The intensity of the LCD screen when the phone is active. You can change the intensity 

of the LCD screen. Digits (1-10) represent different intensities. 10 is the highest intensity.  

2.


Backlight Inactive Level:

 The intensity of the LCD screen when the phone is inactive. You can select a low 

intensity or turn off the backlight.  

3.


Backlight Time:

 The delay time to change the intensity of the LCD screen when the phone is inactive. You can 

select a desired time to change the intensity or turn on the backlight permanently.  


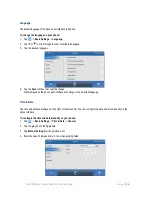
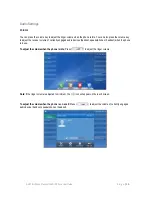
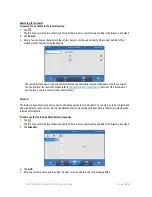
To configure the backlight via phone user interface: 

1.    Tap        -> 

Basic Settings 

-> 

Display 

-> 

Backlight

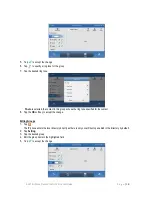
2.    Tap the gray box of the 

Backlight Active Level

 field.  

3.    Tap the desired level from the pull-down list.  

4.    Tap the gray box of the 

Backlight Inactive Level

 field.  

5.    Tap the desired value from the pull-down list.  

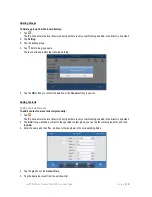
6.    Tap the gray box of the 

Backlight Time

 field.  

7.    Tap the desired time from the pull-down list. 


8.    Tap the 

Save

 soft key to accept the change or       to cancel.  


Summary of Contents for BIZPHONE T48G

Page 1: ...AAPTBizPhone Premium T48G IP Phone User Guide ...

Page 2: ...uage 13 Time Date 13 Audio Settings 15 Volume 15 Ring Tones 16 Contact Management 17 Directory 17 Local Directory 17 Call History Management 25 Basic Call Features 28 Placing Calls 28 Placing Calls from Local Directory 29 Placing Calls from Call History 30 Answering Calls 30 Answering when not in another call 30 Answering when in another call 31 Ending Calls 31 Redialling Numbers 31 Call Mute 32 C...

Page 3: ...P Phone User Guide P a g e 3 Dynamic Forwarding 36 Call Transfer 36 Call Waiting 37 Three Way Conference 38 Advanced Phone Features 39 Voice Mail 39 Greetings 39 Busy Greetings 39 No Answer Greetings 40 Extended Away Greetings 40 ...

Page 4: ...efer to the AAPT BizPhone T48G Quick Startup Guide to assemble and start up your handset The BizPhone Quick Startup Guide is available on your Online Portal https frontier aapt com au Topic includes Packaging Contents Assembling the Phone Startup the Phone Basic Handset Settings Basic Call Features If you require additional assistance to your new handset please contact your assigned System Adminis...

Page 5: ...tion about call messages soft keys time date and other relevant data Call information Caller ID Call Duration Icons for example Missed call text or second incoming caller information Prompt text for example Saving config file Time and date Headset Key Toggles and indicates the headset mode Mute Key Toggles and indicates mute feature Hold Key Places a call on hold or resumes a held call Transfer Ke...

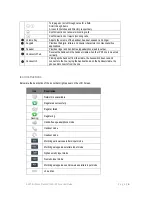
Page 6: ...cures the handset in the handset cradle when the IP Phone is mounted vertically Hookswitch Picking up the handset from the cradle the hookswitch bounces and connects to the line laying the handset down on the handset cradle the phones disconnects from the line Icon Instructions Below are the description of the icons that might appear on the LCD Screen Icon Description Network is unavailable Regist...

Page 7: ...mode is on Bluetooth headset is both paired and connected The default caller photo and contact icon LED Instructions Power Indicator LED LED Status Description Solid Red The phone is initialising Fast Flashing Red The phone is ringing Slow Flashing Red The phone receives a voicemail Off The phone is powered off The phone is idle The phone is busy The call is placed on hold or is held The call is m...

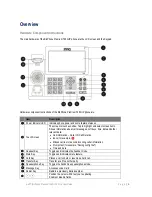
Page 8: ...ons Icons are displayed in the middle of the status bar 4 Time and Date The phone s time and date are displayed on the right of the status bar 5 Line Keys 6 Wallpaper Shows the specified wallpaper 7 Call Window Displays call information 8 Shortcut Keys tap this shortcut key to enter the History screen and view the call history tap this shortcut key to enter the Directory screen and view contacts t...

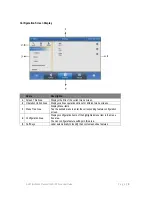
Page 9: ...plays various operation options for different menu screens 3 Menu Tree Area Display Menu items Tap the desired menu to enter the corresponding feature configuration screen 4 Configuration Area Displays configuration items of the highlighted menu item in the menu tree area You can configure feature settings in this area 5 Soft Keys Label automatically to identify their context sensitive features ...

Page 10: ...n menu Tap Return to idle screen Tap Go back to the previous menu Tap or press Select an item Tap the item Scroll to the item by pressing or Scroll through items page by page Tap or If you are in the call history local directory language configuration screen or ring tones configuration screen you can also press or Scroll through values for a field Tap the field s highlighted grey box From the pull...

Page 11: ... To enter C press three times quickly Enter special characters Press the keypad key or For key If it is the uppercase ABC soft key or lowercase abc soft key input mode it will provide the space character If it is the numeric 123 soft key or alphanumeric 2aB soft key input mode it will only provide the digit 0 For key it only provides the pound character For key If it is the uppercase ABC soft key ...

Page 12: ...n off the backlight 3 Backlight Time The delay time to change the intensity of the LCD screen when the phone is inactive You can select a desired time to change the intensity or turn on the backlight permanently To configure the backlight via phone user interface 1 Tap Basic Settings Display Backlight 2 Tap the gray box of the Backlight Active Level field 3 Tap the desired level from the pull down...

Page 13: ...ave soft key to accept the change Text displayed on the phone user interface will change to the selected language Time Date The time and date are displayed on the right of the status bar You can configure the date and time manually via the phone interface To configure the time and date manually on your phone 1 Tap Basic Settings Time Date General 2 Tap the gray box of the Type field 3 Tap Manual S...

Page 14: ... and date format manually on your phone 1 Tap Basic Settings Time Date Time Date Format 2 Tap the gray box of the Date Format field 3 Tap the desired date format from the pull down list 4 Tap the gray box of the Time Format field 5 Tap the desired time format 12 Hour or 24 Hour from the pull down list 6 Tap the Save soft key to accept the change or to cancel The time and date displayed on the touc...

Page 15: ...iver volume of currently engaged audio devices handset speakerphone or headset when the phone is in use To adjust the volume when the phone is idle Press to adjust the ringer volume Note If the ringer volume is adjusted to minimum the icon will appear on the touch screen To adjust the volume when the phone is on a call Press to adjust the volume of currently engaged audio device handset speakerpho...

Page 16: ...s are used to indicate incoming calls You can select different ring tones to distinguish your phone from your neighbour s To select a ring tone for your phone 1 Tap Basic Sound Ring Tones Common 2 Tap the desired ring tone 3 Tap the Save soft key to accept the change or to cancel ...

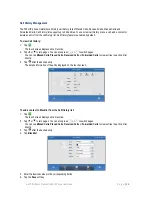
Page 17: ...iew the list directly If more than one list is enabled for the directory tap the desired list you want to view and then tap the OK soft key Local Directory Adding Groups To add a group to a Local Directory 1 Tap The IP phone enters the local directory directly as there is only Local Directory enabled in the directory by default 2 Tap Setting 3 Tap New Group 4 Enter the desired group name in the hi...

Page 18: ...cted the contact in this group will use the ring tone specified for the contact 8 Tap the OK soft key to accept the change Editing Groups 1 Tap The IP phone enters the local directory directly as there is only Local Directory enabled in the directory by default 2 Tap Setting 3 Tap the desired group 4 Edit the group name in the highlighted field 5 Tap to accept the change ...

Page 19: ...oft key to confirm the deletion or the Cancel soft key to cancel Adding Contacts Adding Contacts Manually To add a contact to a local directory manually 1 Tap The IP phone enters the local directory directly as there is only Local Directory enabled in the directory by default 2 Tap Add If you want add a contact to the specified contact group you can tap the contact group first and then tap Add 3 E...

Page 20: ...ring tone assigned to the group 8 Tap the Save soft key to accept the change or to cancel Note If the contact already exists in the directory the touch screen will prompt Contact name existed Adding Contacts from Call History To add a contact to a local directory from Call History 1 Tap 2 Tap or to turn pages You can also press or to switch pages 3 Tap after the desired entry 4 Tap Add 5 Edit the ...

Page 21: ...nly Local Directory enabled in the directory by default 2 Tap after the desired contact If the contact was added to a specified contact group you can tap the contact group first and then tap after the desired contact 3 Tap the desired field to edit the contact information 4 You can tap or to switch the contact you want to edit 5 Tap the Save soft key to accept the change or to cancel ...

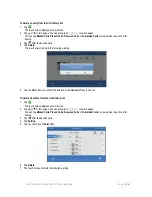
Page 22: ...ctly as there is only Local Directory enabled in the directory by default 2 Tap after the desired contact If the contact was added to a specified contact group you can tap the contact group first and then tap after the desired contact 3 Tap Delete The touch screen prompts the following warning 4 Tap the OK soft key to confirm the deletion or the Cancel soft key to cancel ...

Page 23: ...al from the result list Please refer to Placing Calls from Local Directory section of this document on how to place a call to a contact in the Local Directory Blacklist The build in phone directory can store names and phone numbers for a blacklist You can store up to 30 contacts and add edit delete or even call a contact in the blacklist directory Incoming calls from blacklist directory contacts w...

Page 24: ...key to accept the change or to cancel To add a contact to the blacklist directory from the local directory 1 Tap The IP phone enters the local directory directly as there is only Local Directory enabled in the directory by default 2 Tap after the desired contact If the contact was added to a specified contact group you can tap the contact group first and then tap after the desired contact 3 Tap Bl...

Page 25: ...r to turn pages You can also press or to switch pages You can tap Missed Calls Placed Calls Received Calls or Forwarded Calls to view entries in each call list directly 3 Tap after the desired entry The details information of the entry displayed on the touch screen To add a contact to Blacklist from the Call History list 1 Tap The touch screen displays all call records 2 Tap or to turn pages You c...

Page 26: ...try 4 Tap Delete The touch screen prompts the following warning 5 Tap the OK soft key to confirm the deletion or the Cancel soft key to cancel To delete all entries from the Call History list 1 Tap The touch screen displays all call records 2 Tap or to turn pages You can also press or to switch pages You can tap Missed Calls Placed Calls Received Calls or Forwarded Calls to view entries in each ca...

Page 27: ...AAPT BizPhone Premium T48G IP Phone User Guide P a g e 27 8 Tap the OK soft key to confirm the deletion or the Cancel soft key to cancel ...

Page 28: ...by picking up the handset or pressing the speakerphone or the headset key To place call using the handset 1 Pick up the handset 2 Enter the desired number using the keypad You can enter the number using the keypad displayed on the touch screen 3 Press or tap the Send soft key To place call using the speakerphone Do one of the following With the handset on hook press or tap the line key to obtain a...

Page 29: ... Send soft key Placing Calls from Local Directory To place a call to a contact from the local directory 1 Tap The IP Phone enters the local directory directly as there is only one Local Directory enabled in the directory by default 2 Tap the desired contact If the contact was added to specified contact group you can tap the contact group first and then tap the desired contact If only one number fo...

Page 30: ...rectly 3 Tap the desired entry Answering Calls Answering when not in another call You can answer a call in three ways when you are not in another call using your Standard T48G IP phone Using the handset Using the speakerphone Using the headset To answer call using the handset Pick up the handset To answer call using the speakerphone Do one of the following Press With the handset on hook and the he...

Page 31: ...al call is placed on hold Ending Calls To end a call Do one of the following If you are using the handset tap the End Call soft key or hang up the handset If you are using the headset tap the End Call soft key If you are using the speakerphone press or tap the End Call soft key Note When a call is placed on hold you can tap the End Call soft key to end the call directly or tap the Resume soft key ...

Page 32: ...a call Press again to un mute the call Call Hold Resume You can place an active call on hold Only one active call can be in progress at any time Other calls can be made and received while placing the original call on hold When you place a call on hold your BizPhone service may play music to the other party while waiting To place a call on Hold Press or tap the Hold soft key during a call The touch...

Page 33: ...use DND to reject incoming calls automatically on the phone All calls you receive while DND is enabled are logged to your missed calls list To activate DND on your phone Tap The icon on the status bar indicates the DND is enabled Incoming calls will be rejected automatically and n New Missed Call s n indicates the number of missed calls will appear on the touch screen Note Do Not Disturb is local ...

Page 34: ...e To enable Call Forward on your phone 1 Tap Features Call Forward or press when the phone is idle 2 Tap the desired forwarding type 3 Depending on your selection a If you tap Always Forward 1 Tap the On radio box of the Always Forward field 2 Enter the destination number you want to forward all incoming calls to in the Forward to field 3 Optional Enter the always forward on or off code respective...

Page 35: ...nal Enter the no answer forward on code or off code respectively in the On Code or Off Code field 4 Press the Save soft key to accept the change The icon on the idle screen indicates that the call forward is enabled To disable Call Forward on your phone Do one of the following Press when the phone is idle Tap Features Call Forward Tap the desired forwarding type Tap the Off radio box Tap the Save ...

Page 36: ... You can transfer a call to another party in one of three ways Blind Transfer Transfer a call directly to another party without consulting Semi Attended Transfer Transfer a call when the target phone is ringing Attended Transfer Transfer a call with prior consulting To perform a blind transfer 1 Press or tap the Transfer soft key during a call 2 Enter the number you want to transfer the call to 3 ...

Page 37: ...ired contact to dial out Directory should be configured in advance Tap the History soft key and then tap the desired list Tap the desired entry to dial out 3 After the party answers the call press or tap the Transfer soft key to complete the transfer If you are using a handset the transfer can be completed by hanging up the handset Call Waiting You can enable or disable call waiting on the phone I...

Page 38: ...press or tap the Conference soft key 4 When the second party answers the call tap the Conference soft key again to join all parties in the conference During the conference calls you can do the following actions Tap or press the Hold soft key to place the conference on hold Tap the Split soft key to split the conference call into two individual calls on hold Tap to remove the desired party Press to...

Page 39: ...o listen to your voice mails Note Your voice portal passcode is emailed to you with your BizPhone Service Completion Advice If you do not receive a voice portal passcode please contact your system administrator 3 Press 1 to enter your Voice Mail box and then press 1 again to listen to your message s Greetings You can record your greetings busy no answer or extended away for your voice mail via the...

Page 40: ...will hear if you plan to be away from your desk for an extended amount of time You are required to activate and deactivate this greetings manually To record your Extended Away Greetings 1 Press to dial the Voice Portal and enter your voice portal passcode Note Your voice portal passcode is emailed to you with your BizPhone Service Completion Advice If you do not receive a voice mail access code pl...

Reviews: