12
STEP 10
: (
Hoist
anchored)
1.
Using the base plate on the column as a guide, drill each anchor hole in the concrete
approximately
140mm
deep using a rotary hammer drill and
3
/
4
” concrete drill-bit. To assure
full
holding power, do not ream the hole or allow the drill to wobble.
2.
After drilling, remove dust thoroughly from each hole using compressed air and/or wire brush.
Make certain that the column remains aligned with the column remains aligned with the chalk line
during this process.
3.
Assemble the washers and nuts on the anchors then tap into each hole with a block of wood or
rubber hammer until the washer rests against the base plate. Be sure that if shimming is required
that enough threads are left exposed.
4.
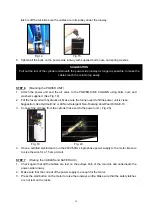
Using a level, check column plumb for every side. (Fig. 21) If shimming is required, use
3
/
4
“ washers or shim stock, placing shims as close as possible to the hole locations. This will
prevent bending the column base plates.
5.
With the shims and anchor bolts in place, tighten by securing the nut to the base then turning 2-3
full turns clockwise. DO NOT use an impact wrench for this procedure.
6.
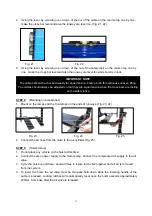
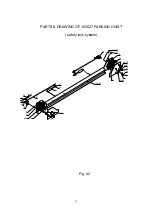
Using the lever again, check the cross bar for front and rear. ( Fig. 22) If need, loose the bottom
bolt of the safety rack. Turn the rack nut on the top of the column to raise the lower end of the
cross bar. After all tighten the bolts.
OPERATION
RAISE-
HOIST
1.
Press button on power unit
The latch mechanism will ‘trip over’ when the
hoist
raises and drop into each latch stop. But, to lock
the
hoist
you must press the lowering handle to relieve the hydraulic pressure and let the latch set
tight in a lock position.
Always lock the
hoist
before going under the vehicle. Never allow anyone to go under the
hoist
when raising or lowering. Read the safety procedures in the manual.
LOWER
HOIST
1.
Raise the
hoist
until the latch clears.
2.
Hold down the air valve while pressing the lowering handle on the power unit.
Note: It is normal for an empty
hoist
to lower slowly-it may be necessary to add weight.


