background image

14

Model 53i IP Phone User Guide

Methods for Customizing Your Phone

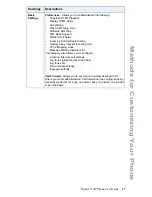
Phone Options via the Aastra Web UI

In addition to the IP Phone UI options, you can customize additional options on the 
IP Phone using the Aastra Web UI. In order to access your phone using the Aastra 
Web UI, you need to know your phone’s IP address. To find your phone’s IP address, 
see 

"Finding Your Phone’s IP Address"

 on 

page 18

.

Using the Aastra Web UI

1.

Open your web browser, enter the phone’s IP address or host name into the 

address field and press <

Enter

>.

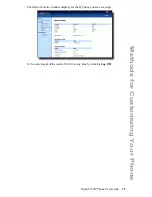
The following logon screen displays.

2.

At the prompt, enter your username and password and click 

Aastra Web UI

Note: 

For a user, the default user name is “

user

” and the password field is left 

blank.

Summary of Contents for 53i IP Phone

Page 1: ...53i IP Phone User Guide Release 2 1 41 001199 00 Rev 01...

Page 2: ...nlawful use While every effort has been made to ensure accuracy Aastra Telecom is not liable for technical or editorial errors or omissions contained within this documentation The information containe...

Page 3: ...b ute transcribe translate or reduce to electronic medium or machine readable form or language derive source code without the express written consent of the Seller and its Suppliers or disseminate or...

Page 4: ......

Page 5: ...our Phone 11 Phone Options via the IP Phone UI 11 Phone Options via the Aastra Web UI 14 Phone Status 18 Phone Status via IP Phone UI 18 Finding Your Phone s IP Address 18 Phone Status via the Aastra...

Page 6: ...Key 69 Conference Key 70 Intercom Key 71 None Key 73 Phone Lock Key 74 Deleting a Key 76 Making Calls 77 Dialing a Number 77 Using Handsfree Speakerphone 78 Using a Headset 79 Redial 80 Mute 81 Receiv...

Page 7: ...Redial Key for Last Number Redial 131 Available Features Enabled by Administrators 132 Outgoing Intercom Calls 132 Missed Call Summary Subscription 132 Customizable Callers List Key 133 Autodial Hotl...

Page 8: ......

Page 9: ...allation and set up instruc tions general features and functions and basic options list customization This Installation Guide is included in the box with your phone Aastra SIP 53i IP Phone User Guide...

Page 10: ...s The 53i IP Phone requires the following environment SIP based IP PBX system or network installed and running with a SIP account created for the 53i IP phone Access to a Trivial File Transfer Protoco...

Page 11: ...t already setup your 53i phone please refer to the Aastra 53i Installation Guide for basic installation and physical setup of the 53i For more advanced administration and configuration information Sys...

Page 12: ...ays the following startup screens The 53i phone then checks settings and looks for new configuration and firmware updates for the phone from a server If a new update is found the phone displays the me...

Page 13: ...If language packs were loaded to your phone by your System Administrator the following screen displays during startup When the configuration update is complete the phone displays the following screens...

Page 14: ...is shown whenever your phone is not in use Idle Screen 2 The second display line displays the following temporary messages if the event occurs No Service DHCP Failed Restarting New IP Obtained Networ...

Page 15: ...htly connected to the phone and to the wall jack The phone should automatically detect when the connection is reconnected and display the Network Connected prompt temporarily If changes have been made...

Page 16: ...lso exits an open list such as the Options List without saving changes Options key Accesses options to customize your phone Your System Administrator may have already customized some of your settings...

Page 17: ...ht indicator flashes when the microphone is on mute Navigation keys Pressing the UP and DOWN arrow keys lets you view different status and text messages on the LCD display if there is more than 1 line...

Page 18: ...ey to record in the Directory List 2 Del Delete Allows you to delete entries hardcoded from the Directory List and Callers List Must enter the Directory or Callers list and select an entry then press...

Page 19: ...ber Option 1 Call Forward 1 Cfwd Number 2 Cfwd Mode 3 No Rings 2 Preferences 1 Tones Ring Tone Tone Set 2 Contrast Level 3 Live Dialpad 4 Set Audio Audio Mode Headset Mic Vol 5 Time and Date Time Zone...

Page 20: ...ollowing table indicates the options that may appear on your phone if the simplified options menu is applied Option Number Option 1 Call Forward 1 Cfwd Number 2 Cfwd Mode 3 No Rings 2 Preferences 1 To...

Page 21: ...igit number of the corresponding option to select an option 4 Change a selected option if applicable 5 Press the Set or Done key to save the change 6 Press the button the 3 key or the button at any ti...

Page 22: ...he Aastra Web UI you need to know your phone s IP address To find your phone s IP address see Finding Your Phone s IP Address on page 18 Using the Aastra Web UI 1 Open your web browser enter the phone...

Page 23: ...l 53i IP Phone User Guide 15 Methods for Customizing Your Phone The Network Status window displays for the IP phone you are accessing 3 You can logout of the Aastra Web UI at any time by clicking Log...

Page 24: ...sword Programmable Keys There are 6 function keys 4 of which you can configure to perform the functions identified in the following list Expansion Module Allows you to configure an additional 36 softk...

Page 25: ...s Dialing Goodbye Key Cancels Incoming Call UPnP Mapping Lines Message Waiting Indicator Line This category also allows you to configure incoming Intercom call settings ring tones global and per line...

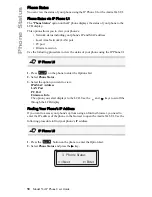
Page 26: ...hone using the IP Phone UI 1 Press on the phone to enter the Options List 2 Select Phone Status 3 Select the option you want to view IP MAC Address LAN Port PC Port Firmware Info The option you select...

Page 27: ...tatus via the Aastra Web UI After accessing your phone via the Aastra Web UI the first screen to display is the phone s Status Screen This screen is view only It displays the Network Status of your ph...

Page 28: ...here are several distinct ring tones a user can select from to set on the IP phones You can enable disable these ring tones on a global or per line basis The following table identifies the valid setti...

Page 29: ...congestion tones call waiting tone ring cadence pattern You configure global ring tones and tone sets using the Aastra Web UI and the IP Phone UI Configuring Ring Tones and Tone Sets Use the following...

Page 30: ...ustralia Europe France Germany Italy UK Mexico and US Default is US 3 Select a value from the Global Ring Tone field For per line configuration 4 In the Ring Tone section select a line for which you w...

Page 31: ...Live Dialpad The Live Dialpad option on the IP phone turns the Live Dial Pad mode ON or OFF With live dial pad ON the 53i IP phone automatically dials out and turns ON Handsfree mode as soon as a dia...

Page 32: ...s to handsfree speakerphone In Speaker audio mode lift the handset to switch to the handset Headset Choose this setting if you want to make or receive all calls using a handset or headset Calls can be...

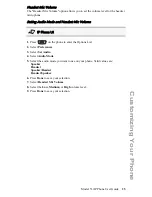
Page 33: ...t Mic Volume 1 Press on the phone to enter the Options List 2 Select Preferences 3 Select Set Audio 4 Select Audio Mode 5 Select the audio mode you want to use on your phone Valid values are Speaker H...

Page 34: ...to set either AM or PM 6 Press Set to save the time setting 7 Select Time Format 8 Using the Change softkey set the Time Format to either a 12 hour format or a 24 hour format Valid values are 12h and...

Page 35: ...Zone options A list of Time Zones display for different areas of the world 5 Select a Time Zone that applies to your area The default Time Zone is US Eastern 6 Press Set to save the Time Zone setting...

Page 36: ...format 3 In the Date Format field select the date format you want to use on your phone Default is WWW MMM DD Valid values are WWW MMM DD default DD MMM YY YYYY MM DD DD MM YYYY DD MM YY DD MM YY MM DD...

Page 37: ...ter the Options List 2 Select Language and press Enter The language setting displays a check mark indicating this is the current language on the IP Phone 3 Using the and keys scroll through the langua...

Page 38: ...The change is dynamic The Aastra Web UI displays all screens in the language you selected Aastra Web UI Note You must have the language pack s already loaded to your phone in order to use them For mor...

Page 39: ...mpt enter the current user password and press Enter 4 At the New Password prompt enter the new user password and press Enter 5 At the Enter Again promot re enter the new user password and press Enter...

Page 40: ...ent Password field enter the current user password 3 In the New Password field enter the new user password 4 In the Password Confirm field enter the new user password again 5 Click to save your change...

Page 41: ...e following procedure to reset a user password 1 Click on Operation Phone Lock 2 In the Reset User Password field click The following screen displays 3 In the Current Password field leave this blank 4...

Page 42: ...our phone if you have been asked to do so by your System Administrator or should you experience any unexpected behavior 1 Press the button on the phone to enter the Options List 2 Select Restart Phone...

Page 43: ...ord field displays a screen that allows you to enter and save a new user password Set an emergency dial plan An emergency dial plan can be 911 999 112 110 or all of the above The default emergency dia...

Page 44: ...e 2 In the Lock the Phone field click The phone locks dynamically and displays the following message Phone is locked Unlock the Phone 3 Click on Operation Phone Lock 4 In the Unlock the Phone field cl...

Page 45: ...emergency services Once you specify the emergency number s on the phone you can dial those numbers directly on the dial pad when required and the phone automatically dials to those emergency services...

Page 46: ...ation Phone Lock 2 In the Emergency Dial Plan field enter the 3 digit number used in your local area to contact emergency services For multiple numbers enter a between each emergency number For exampl...

Page 47: ...ht indicates the status of that line or call When the phone is taken off hook the phone automatically selects a line for you When you have more than one call you can use the left and right navigation...

Page 48: ...ates the key is configured for line use Speeddial Indicates the key is configured for speeddial use You can also configure a prefix for a speeddial number Do Not Disturb Indicates the key is configure...

Page 49: ...Contact your System Administrator for available services Park Indicates the key is configured to park incoming calls when pressed Pickup Indicates the key is configured to pick up parked calls when pr...

Page 50: ...Appearance Keys on page 39 You use the Aastra Web UI to set a programmable key as a line Configuring a Line Key Use the following procedure to set a programmable key to function as a line 1 Click on O...

Page 51: ...Line 2 then after you press key 1 on the phone the prefix number displays on the phone screen The phone proceeds to dial the prefix number automatically and pauses for you to enter the remaining phone...

Page 52: ...the Change softkey and select a different line or use the phone s keypad to select a number 1 9 or use the and to make your selection 4 Press Save to save the speeddial key to the line specified Creat...

Page 53: ...e dial pad keys to select the letters Continue to press the number key to access the next letter for that key i e press 2 three times to access C Press 4 to move to the next space or wait a moment and...

Page 54: ...3 In the Hard Key field select Speeddial to apply to the programmable key 4 In the Value field enter the phone number extension or speeddial prefix to apply to this hard key If you enter a speeddial p...

Page 55: ...e Directory List Callers List or Redial List key From the Directory List Callers List or Redial List scroll through the list to find the name and num ber that you wish to save to your speeddial 2 Pres...

Page 56: ...d line on the screen of the IP phone shows when DND is set If the phone shares a line with other phones only the phone that has DND configured is affected You can set DND on the programmable keys usin...

Page 57: ...icate the monitored line is off hook or unregistered The LED goes off when the line is idle You can set BLF on the programmable keys using the Aastra Web UI only BLF is not configurable from the IP ph...

Page 58: ...ate the monitored line is off hook or unregistered The LED goes off when the is idle When the monitored extension is ringing the LED flashes Example A receptionist has a 53i running Broadsoft firmware...

Page 59: ...the feature is disabled 1 Click on Operation Programmable Keys or Click on Operation Expansion Module N 2 Select a Key 3 through Key 6 3 In the Hard Key field select BLF List BroadSoft BroadWorks 4 I...

Page 60: ...do this by setting the programmable key to flash The IP phone generates flash events only when a call is connected and there is an active RTP stream for example when the call is not on hold Configuri...

Page 61: ...receive a call from the queue After creating an ACD key you are ready to receive calls from a queue on the server You must press the ACD key and then log in by entering your User ID and Password An Av...

Page 62: ...rammable Keys or Click on Operation Expansion Module N 2 Select a Key 3 through Key 6 3 In the Hard Key field select Automatic call distribution 4 In the Line field select a line to apply Automatic ca...

Page 63: ...When you set the IP phone to unavailable the server temporarily stops distributing calls to your phone The LED for the ACD Key shows the current status of your phone ACD LED Table This LED changes wh...

Page 64: ...o start receiving calls 7 To temporarily stop receiving calls press the press Unavail If you are on a call or miss a call that has been distributed to your phone your phone status automatically change...

Page 65: ...and are connected to the call When you configure a GCP softkey you specify the ring group for example extensions 2200 2210 that you want to monitor for incoming calls When an incoming call is receive...

Page 66: ...Servers Use the following procedure to configure Group Call Pickup using the Aastra Web UI 1 Click on Operation Programmable Keys or Click on Operation Expansion Module N 2 Select a key for which to c...

Page 67: ...ng Group Call Pickup GCP 1 If any of the monitored group of extensions receives a call press the GCP Key The call is answered If the monitored group of extensions receives multiple incoming calls simu...

Page 68: ...URI and a Services label using the following XML fields XML Application URI XML Application Title The XML Application URI is the URI loaded by your phone The phone performs an HTTP GET Contact your Sy...

Page 69: ...phone and after a programmable key has been configured to access the XML application s the customized service is ready for you to use 1 Press the programmable key configured for XML on the 53i phone A...

Page 70: ...r information about available services Configuring a Sprecode Key Use the following procedure to configure a sprecode programmable key on the 53i phone 1 Click on Operation Programmable Keys 2 Select...

Page 71: ...dset you can press the applica ble Park programmable key to park the call After the call is parked you can press the Pickup programmable key fol lowed by the applicable value to pickup the call You co...

Page 72: ...3 In the Hard Key field select Park for the first key For the second key select Pickup 4 In the Value fields enter the appropriate values based on the server in your net work 5 In the Line field selec...

Page 73: ...rocedure and press the Park programmable key again to retry step 2 Pickup a Parked Call 1 Pick up the handset on the phone 2 Enter the extension number where the call was parked 3 Press the Pickup pro...

Page 74: ...nfigured for lcr and the phone dials the last call you received When you configure an lcr key the label LCR displays next to that key on the IP phone When the Sylantro server detects an lcr request it...

Page 75: ...tory List which contains a customized list of names with phone numbers and labels In addition to creating a Directory key you can also download a Directory List to your PC if required using the Aastra...

Page 76: ...use the Callers List key to access a list of callers that called your phone Reference For more information about the Callers List see Callers List on page 104 Configuring a Callers List Key Use the f...

Page 77: ...alk to the recipient A consultative transfer feature transfers a call to another number but allows you to speak with the recipient before the call is actually transferred Reference For more informatio...

Page 78: ...conferences with unlimited participants on your phone if your System Administrator has enabled Centralized Conferencing on your phone Reference For more information about Local and Centralized Confere...

Page 79: ...dministrator can enable outgoing intercom calls on your phone If enabled you must configure an Icom key on your phone to use for outgoing intercom calls You must configure a programmable key with the...

Page 80: ...ou can speak through its speaker 4 To cancel intercom press or hang up the handset 5 When you are finished speaking hang up the phone by placing the handset back on hook or by pressing or the line cal...

Page 81: ...o this by setting the key to none If a particular key is not defined it is ignored Setting a None Key Use the following procedure to configure a None key on the 53i IP Phone 1 Click on Operation Progr...

Page 82: ...one Lock Key 1 Click on Operation Programmable Keys or Click on Operation Expansion Module N 2 Select from Key 3 through Key 6 3 In the Type field select Phone Lock from the list of options 4 Click to...

Page 83: ...able key The phone locks The LED for the programmable key AND the Message Waiting Lamp illuminate steady ON An Unlock label appears next to the programmable key you just pressed Unlock the Phone 1 Pre...

Page 84: ...grammable key function using the Aastra Web UI 1 Click on Operation Programmable Keys or Click on Operation Expansion Module N 2 Select from Key 3 through Key 6 3 In the Type field select none from th...

Page 85: ...or for any toll restrictions placed on your extension that may restrict your access to long distance area codes or dialing prefixes When your party picks up a timer appears on your display that record...

Page 86: ...phone see Set Audio on page 24 To dial using handsfree first press and enter a number at the dial tone To answer a call on your phone using handsfree press or the line call appearance button If you ar...

Page 87: ...st and press 4 to select your desired volume 6 Press 4 to save changes and 3 to exit 7 If you do not wish to save changes press 3 to return to the previous screen Making and Receiving Calls Using a He...

Page 88: ...the last number you called 2 If you are not on the phone press to display the most recently dialed number and use and to scroll through the list to view the other numbers 3 Press to see the second mo...

Page 89: ...y to mute the handset headset or speakerphone When you use the mute key on your phone you cannot be heard on an active call or on a conference When a call is muted the icon displays as follows For mut...

Page 90: ...ute handset headset or handsfree The speaker light flashes slowly and you can hear the caller but they cannot hear you To switch mute on or off press IP Phone UI Note If you place a muted call on hold...

Page 91: ...y press the line call appearance button for that call If you cannot answer the call the caller goes to voicemail has been configured for your extension Sending an Incoming Call to Voicemail You can se...

Page 92: ...hold 1 Connect to the call if not already connected 2 Press the Hold key The line call appearance light begins to flash slowly and after a short time the phone beeps softly to remind you that you sti...

Page 93: ...sconnect from the call Transferring Calls Blind Transfer A blind transfer is when you transfer a call directly to another extension without consulting with the person receiving the call To do this sim...

Page 94: ...Dial the extension number or the outside number to Party 2 This is the Party for which you want to transfer Party 1 4 To complete a blind transfer press the Transfer Key again before the receiving end...

Page 95: ...Conference State Screens When you use the Conference key to initiate a conference call the following screen displays In a conference call the call timer moves to the left You use the up and down arro...

Page 96: ...sult with them before adding them to the conference 4 Press the Conf Key A new line opens 5 Enter the phone number of Party 3 6 Wait for Party 3 to answer When Party 3 answers you can consult with the...

Page 97: ...conference the two calls together for example Line 1 3 Press the Conf key 4 Press the Line key that has the second active call for example Line 2 5 Press the Conf key The two active calls link into a...

Page 98: ...etting to work you must configure the lines with the applicable phone number Reference For more information on Centralized Conferencing see Centralized Conferencing on page 133 or contact your System...

Page 99: ...y 2 and Party 3 are all connected to Conference 1 8 Press an available Line Key or answer an incoming call on an available line If calling out call Party 4 9 Wait for Party 4 to answer When Party 4 an...

Page 100: ...conferencing you can join multiple incoming or outgoing calls to active conferences Before following this procedure at least one active conference must exist on your phone 1 As Party 1 pickup the han...

Page 101: ...need to connect or reconnect to the call if not already connected for example if your caller is on hold Press or the line call appearance button of the active call to end the call If connected through...

Page 102: ...anually or by saving the number and name from other lists stored on your phone You can also dial directly from a directory entry Each entry can contain a maximum of 16 letters and numbers On the 53i y...

Page 103: ...the handset or press any Line Key 5 Press the Directory Key to cancel Sorting Entries and Quick Search Feature You can also sort multiple numbers according to preference and perform a quick search fea...

Page 104: ...press the number key to access the next letter for that key for example press 2 three times to access C Press 4 to move to the next space or wait a moment and the cursor automatically advances To ins...

Page 105: ...s Continue to press the number key to access the next letter for that key for example press 2 three times to access C Press 4 to move to the next space or wait a moment and the cursor automatically ad...

Page 106: ...by pressing the first letter of the name on the dial pad or use and to scroll through the list to find the name 3 To begin editing press 3 Press 3 again to erase the numbers or letters to the left or...

Page 107: ...he following illustration as a reference Delete a Single Entry 1 Press the Directory Key 2 Press and to find the entry you want to delete 3 Press the Delete Key The DELETE again to erase this item pro...

Page 108: ...You can save the name and or number displayed on your screen during a call to the Directory List or to one of your programmable keys using the following procedure Use the following illustration as a...

Page 109: ...lers List Key Key 4 2 From the Callers List scroll through the list to find the name and number that you want to save to your Directory 3 Press the Save Key 4 Press the Directory Key to save the numbe...

Page 110: ...Redial List Key 2 From the Redial List scroll through the list to find the name and number that you want to save to your directory 3 Press the Save Key 4 Press the Directory Key to save the number yo...

Page 111: ...ber for each Directory entry Download the Directory List Use the following procedure to download the Directory List to your PC using the Aastra Web UI 1 Click on Operation Directory 2 In the Directory...

Page 112: ...leted to accommodate the information of new callers If the phone number of an incoming or outgoing call matches a number that you have programmed with a name in a programmable key or in the Directory...

Page 113: ...4 3 30pm 2x N indicates a new call XX New Callers When you re not on the telephone and not in the Callers list the display shows you how many callers have been added to the list since you last checked...

Page 114: ...ng illustration as a reference 1 Press the Callers List Key Press and to move through the Callers list Press to see the most recent call or to see the oldest call on your list 2 To dial the displayed...

Page 115: ...ble the entry of the prefix Use the following procedure to edit the Callers List Use the following illustration as a reference 1 Press the Callers List Key 2 Press and to find the entry you want to ed...

Page 116: ...Callers List Use the following illustration as a reference 1 Press the Callers List Key 2 Press and to find the item you want to delete 3 Press the Delete Key 4 Press the Delete Key again at the promp...

Page 117: ...ample of a Callers List in a spreadsheet application This file displays the name phone number and the line that the call came in on Download the Callers List Use the following procedure to download th...

Page 118: ...n up to 9 individual lines For global and local call forwarding you can set the following Call forward mode Destination number Number of rings before forwarding the call from 1 to 9 rings The followin...

Page 119: ...to scroll to Cfwd Mode and press 4 6 Use the and to select a value and press 4 Valid values are Off All Busy NoAns No Answer BusyNoAns Busy No Answer 7 Press to scroll to No Rings and press 4 8 Use t...

Page 120: ...s field enter the number of rings you want to set before the call is forwarded Valid values are 1 to 9 5 Click to save the Call Forward settings The changes are dynamic and are immediately applied to...

Page 121: ...u want your calls on this line to be call forwarded 5 In the Number of Rings field select the number of rings on the line before the call is forwarded Valid values are 1 to 9 6 Click to save the Call...

Page 122: ...the user accesses the Callers List the number New Calls on the idle screen is cleared Accessing and Clearing Missed Calls Use the following procedure to access and clear missed calls from the Callers...

Page 123: ...pse character at the end of the number URI string The end of the Voicemail list displays the number of new voicemail messages if any exist Contact your System Administrator for lines configured for Vo...

Page 124: ...ession of DTMF playback is disabled and you press a programmable key the IP phone dials the stored number and displays each digit as dialed in the LCD window When the suppression of DTMF playback is e...

Page 125: ...y group of tones and the other from a low frequency group If you enable the Display DTMF Digits parameter the digits you are dialing from the keypad or from a programmable key display to the IP phone...

Page 126: ...orwards the call according to the rule configured The phone can only transfer the currently active call or accept transferred calls if there is no active calls If call waiting is disabled intercom cal...

Page 127: ...ng procedure to enable or disable Call Waiting on the IP phone 1 Click on Basic Settings Preferences General 2 Call Waiting is enabled by default If required disable the Call Waiting field by unchecki...

Page 128: ...igure this feature using the Aastra Web UI Configuring Call Waiting Tone Use the following procedures to configure a call waiting tone on the IP phone 1 Click on Basic Settings Preferences General 2 A...

Page 129: ...his feature using the Aastra Web UI Configuring Stuttered Dial Tone Use the following procedures to configure stuttered dial tone on the IP phone 1 Click on Basic Settings Preferences General 2 Stutte...

Page 130: ...et a value for this feature in a custom XML application or in the configuration files the value you set in the Aastra Web UI overrides the Administrator s setting Setting and saving the value in the A...

Page 131: ...ences General The default time is 5 seconds for each message to display before scrolling to the next message You can increase or decrease this time as required Setting and saving the value in the Aast...

Page 132: ...You have a choice to ignore the incoming call or answer the incoming call on another line If you choose to answer the incoming call you can answer the call finish the call and then hang up You can st...

Page 133: ...Goodbye key hangs up the active call If you disable this feature and the phone receives another call when an active call is already present the 53i displays 3 Ignore Answer 4 on the LCD For the 53i yo...

Page 134: ...incoming call Goodbye Key Cancels Incoming Call is disabled AND a second call comes in while you are on an active call press the Goodbye key to hang up on the active call so you can answer the second...

Page 135: ...ontrols the opening closing and polling of ports on the IGD HTTP and SIP use a single port each RTP RTCP uses a range of ports You can enable the UPnP mappings to specific lines on your phone You set...

Page 136: ...hone lines 1 through 9 You configure the MWI indicator using the Aastra Web UI Configuring Message Waiting Indicator Use the following procedure to configure the message waiting indicator on a specifi...

Page 137: ...re If you want to unmute or hear the intercom call you disable this feature Microphone Mute is enabled by default Incoming Intercom Features in Aastra Web UI Description Microphone Mute Allows you to...

Page 138: ...re When you enable the this parameter which is the default value an incoming intercom call takes precedence over any active call by placing the active call on hold and automatically answering the inte...

Page 139: ...ll on hold and answers the incoming Intercom call To disable this field uncheck the box 6 Click to save your settings Using Redial Key for Last Number Redial The IP phone has an enhanced redial user i...

Page 140: ...rver to be incremented in the missed calls indicator on the phone it was initially directed to This feature is called the Missed Call Summary Subscription and can be configured by your System Administ...

Page 141: ...o and Broadsoft servers This feature provides centralized conferencing on the SIP server versus localized on the phone Your System Administrator must enable this feature on your phone before you can u...

Page 142: ...or for more information XML Softkey for Special Characters in XML Applications When using XML applications that require you to enter information such as email addresses that require special symbols fo...

Page 143: ...ach column totaling 36 keys on the keypad Each key provides an LED for indicating call status The 536M provides a paper label for convenient key labeling The softkeys support the following features Bu...

Page 144: ...rd the name of the softkey on the paper labels provided with the Expansion Module Press the softkey you want to use when applicable References For more information about configuring softkeys see Progr...

Page 145: ...keypad The following example illustrates the screen display After entering the number the prompt Use Save to end displays on the screen 3 Press Save to save the number as a speeddial key By default th...

Page 146: ...Audio option Why can t I get a dial tone Check for any loose connections and that the phone has been installed properly For installation instructions please refer to the Installation and Setup section...

Page 147: ...the current user password 3 In the New Password field enter the new user password 4 In the Password Confirm field enter the new user password again 5 Click to save your changes For information on how...

Page 148: ...hone Status and press the 4 key to select 3 Press the key to scroll to the Restart Phone option Press the 4 key to confirm and restart the phone If you do not wish to restart your phone press the 3 ke...

Page 149: ...Use the following procedure to lock an IP phone using the IP Phone UI Lock the Phone 1 Press on the phone to enter the Options List 2 Select Phone Lock and press 4 3 Press 4 to set the phone to lock 4...

Page 150: ...P Phone User Guide Troubleshooting Solutions Unlock the Phone 3 Click on Operation Phone Lock 4 In the Unlock the Phone field click The phone unlocks dynamically and displays the following message Pho...

Page 151: ...or consequential damages including but not limited to loss damage or expense directly or indirectly arising from the customers use of or inability to use this telephone either separately or in combina...

Page 152: ......

Page 153: ...AU Lord Howe AU Tasmania AU Melbourne AU Sydney AU Broken Hill AU Brisbane AU Lindeman AU Adelaide AU Darwin AU Perth AW Aruba CET AST AST CET AST ART BST CET LHS EST EST EST CST EST EST CST CST WST...

Page 154: ...CST EES CET DE Berlin DK Copenhagen DM Dominica DO Santo Domingo CET CET AST AST EE Tallinn ES Madrid ES Canary EET CET WET FI Helsinki FJ Fiji FK Stanley FO Faeroe FR Paris EET NZT FKS WET CET GB Lo...

Page 155: ...S Montserrat MT Malta MX Mexico City MX Cancun MX Merida MX Monterrey MX Mazatlan MX Chihuahua MX Hermosillo MX Tijuana CET EET CET AST AST CET CST CST CST CST MST MST MST PST NI Managua NL Amsterdam...

Page 156: ...Anadyr EET EET MSK SAM YEK OMS NOV KRA IRK YAK VLA SAK MAG PET ANA SE Stockholm SG Singapore SI Ljubljana SK Bratislava SM San Marino SR Paramaribo SV El Salvador CET SGT CET CET CET SRT CST TR Istan...

Page 157: ...ized 133 contrast level 23 D delete key 10 dial plan emergency 37 dial tones stuttered 121 dialing a number 77 dialpad live 23 directory key softkey for 67 Directory List downloading to phone 103 dire...

Page 158: ...e IP phone 65 password resetting user s 33 phone status 31 plugging in the phone 4 programmable key deleting 76 description 40 R redial 80 requirements 53i 2 restarting the phone 34 ring tone sets 21...

Page 159: ...3 Model 55i IP Phone User Guide V voicemail 83 115 W warning tone for Intercom 130 warranty limited 143 X XML application title 60 XML application URI 60 XML beep support 122 XML key setting 60 XML se...

Page 160: ......

Page 161: ......

Page 162: ...s owner s manual and consulted the Troubleshooting section and still have problems please visit our website at www aastra com or call 1 800 574 1611 for technical assistance Aastra Telecom Inc 2007 41...

Reviews: