background image

14   MBU 400 Installation Guide

Connecting the MBU 400

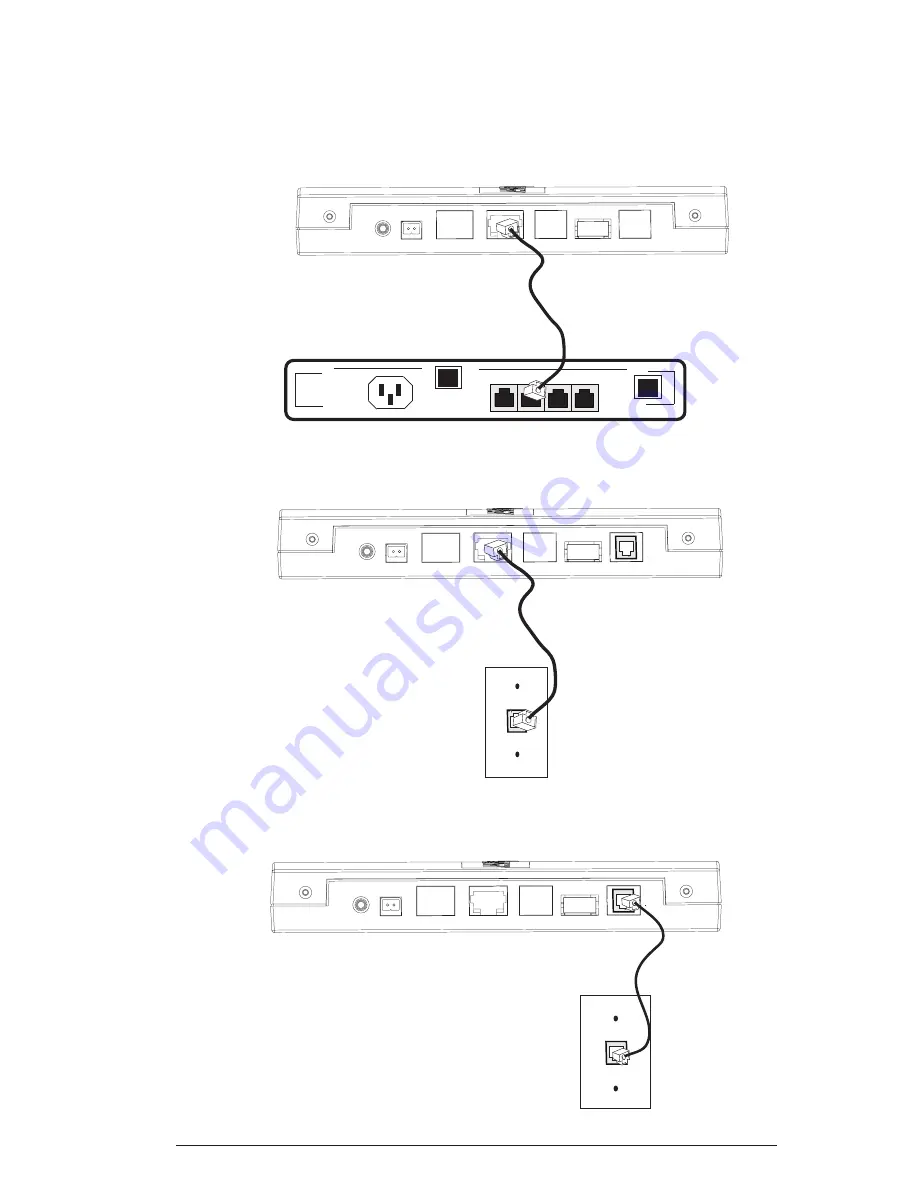
1.  To prepare the MBU for Internet telephony, connect the Ethernet cable 

from the LAN port on the MBU to the LAN port on your broadband 

modem or router.


or


Connect the Ethernet cable from the 

LAN

 port on the MBU to the


Ethernet connection on your network as shown below. 

2.

  To prepare the MBU for analog telephone line calls, connect the 

telephone cord from the 

LINE

 port on the MBU to the telephone wall 

outlet.

MBU

Router / LAN

Line

LAN

Reset DC9-20V

MBU

LAN Network 

Connection

Line

LAN

Reset DC9-20V

MBU

Telephone Wall Outlet

Line

LAN

Reset

DC9-20V

Installing the MBU 400

Summary of Contents for MBU 400

Page 1: ...MBU 400TM 41 001271 00 Rev 01 Installation Guide...

Page 2: ...l use While every effort has been made to ensure accuracy Aastra Telecom will not be liable for technical or editorial errors or omissions contained within this documentation The information contained...

Page 3: ...prises pendant l utilisation de mat rial t l phonique afin de r duire les risques d incendie de choc lectrique et de bles sures En voici quelquesunes 1 Ne pas utiliser l appareil pr s de l eau p ex p...

Page 4: ......

Page 5: ...or reduce to electronic medium or machine readable form or language derive source code without the express written consent of the Seller and its Suppliers or disseminate or otherwise disclose the Sof...

Page 6: ...nts ACTA Located on the equipment is a label that contains among other information the FCC registration number and the ringer equivalence number REN If requested this information must be provided to t...

Page 7: ...com US Service Center 900 Technology Park Drive Billerica MA 01821 USA Phone 978 262 3200 For Industry Canada This product meets the applicable Industry Canada technical specifications Before installi...

Page 8: ...tifier in the format US T7HIP06B8015 If requested this number must be provided to the telephone company b An applicable certification jacks Universal Service Order Codes USOC for the equipment is prov...

Page 9: ...h Please follow instructions for repairing if any e g battery replacement section otherwise do not alternate or repair any parts of device except specified i Connection to party line service is subje...

Page 10: ...ion For battery replacement or removal please remove the battery cover of the handset Never disassemble customize or short circuit batteries Do not place battery in fire or heat the battery Charge the...

Page 11: ...ing the cables plugs and acces sories should be disposed of separately in order to allow proper treatment recovery and recycling These products should be taken to a designated fa cility where the best...

Page 12: ...line with the local regulations If no arrangement has been made with Aastra or your supplier please contact the local authorities for further information Battery Disposal Information Defect or exhaus...

Page 13: ...nergy and if not installed and used in accordance with the instructions may cause harmful interference to radio communica tions However there is no guarantee that interference will not occur in a part...

Page 14: ...ption rate SAR for uncontrolled environment general population exposure limits specified in ANSI IEEE Std C95 1 1992 and had been tested in accordance with the measurement procedures specified in FCC...

Page 15: ...tenna or transmitter This device has been shown to be capable of compliance for localized specific absorption rate SAR for uncontrolled environment general public exposure limits specific in ANSI IEEE...

Page 16: ......

Page 17: ...on xiii Europe xiii United States xiii Canada xiv Congratulations 1 About This Guide 2 Documentation 2 MBU 400 Features 3 MBU Features 3 Aastra 420d Handset Features 4 Requirements 5 What s in the MBU...

Page 18: ...dsets with the MBU 20 Factory Defaulting the MBU 20 Viewing the MBU 400 IP Address and Status Information 21 Accessing the MBU 400 Web UI 22 Using the MBU 400 24 Handset Idle Screen 24 Idle Mode Optio...
Page 19: ...y You can setup your MBU 400 in your business or home environment to act as a small hub with group calling voicemail individual SIP accounts or SIP lines shared across a group Once installed the hands...

Page 20: ...com website at www aastratelecom com MBU 400 Installation Guide Contains installation and set up instruc tions general features and functions of the MBU and Handset This Installation Guide is included...

Page 21: ...Quality of Service Type of Service ToS CODECs Pulse Code Modulation A law PCMA G 711 64 kbps Pulse Code Modulation u law PCMU G 711 64 kbps iLBC 20 ms G 729 Maintenance administration and provisioning...

Page 22: ...umbers per entry Voicemail message support Speed dial support Three way conferencing 2 handsets Call hang up upon return to charging cradle On hook dialing pre dial numbers before pressing off hook bu...

Page 23: ...ke voice calls over your Internet connection Analog telephone line subscription to make ordinary phone calls and emergency calls over the LINE port on the MBU optional In addition before you start the...

Page 24: ...our System Administrator Note In addition to the parts below the MBU 400 includes a wall mounting template wall mounting screws and wall anchors 420d Handset 420d Fixed Belt Clip and Insert Tool MBU S...
Page 25: ...R DISPLAY EARPIECE SOFTKEYS used for various functions Navigational keys used to navigate through menus and services MICROPHONE STAR KEY used in the name editor to capitalize letters type num bers or...

Page 26: ...tion Guide Aastra 420d Handset Side View HEADSET JACK CONNECTOR 2 5mm VOLUME UP KEY VOLUME DOWN KEY Speakerphone activation and deactivation key Aastra 420d Handset Side View REAR SPEAKER GRILL on the...

Page 27: ...MBU 400 Installation Guide 9 Aastra 420d Handset Charger Aastra 420d Handset Charger Front View Aastra 420d Handset Charger Rear View HANDSET CHARGER POWER SUPPLY CONNECTOR ON HANDSET CHARGER...

Page 28: ...T for Ethernet cable MBU Top and Rear Views POWER INDICATOR Illuminates when power is on I NET Indicator I net indicator flashes during boot It indicates that the MBU has received an IP address VoIP I...

Page 29: ...n a Desktop You can install the MBU on any flat desktop using the MBU stand included with your unit To install the MBU 400 on a desktop 1 Place the MBU stand on a flat surface 2 Hold the top of the MB...
Page 30: ...anchors Both the wall mounting screws and wall anchors are included with your MBU 2 If required insert the wall anchors into the wall 3 Insert the screws either into the wall anchors or into the wall...

Page 31: ...iser les chevilles murales Les vis de montage et les chevilles murales sont fournies avec le MBU 2 Si n cessaire introduisez les chevilles murales dans le mur 3 Introduisez les vis soit dans les chevi...

Page 32: ...nect the Ethernet cable from the LAN port on the MBU to the Ethernet connection on your network as shown below 2 To prepare the MBU for analog telephone line calls connect the telephone cord from the...

Page 33: ...nd the I NET LED flashes as the MBU proceeds to power up When the power cycle is complete the I NET LED goes out the POWER LED lights up steady and then the I NET LED lights up steady indicating the M...

Page 34: ...the battery connect to the contacts in the body of the phone as shown in the illustration and then replace the battery cover to the back of the phone 3 Connect the Handset Charger Base Power Adapter...

Page 35: ...ers with the MBU provided you have just reset the MBU Place the handset near the MBU during the registration process Note After registration of the first handset there is a 5 minute period during whic...

Page 36: ......

Page 37: ...elease the Reset button once do not hold down on the rear of the MBU The POWER LED lights up steady and the I NET LED flashes When the reset is complete the I NET LED lights up steady indicat ing the...

Page 38: ...er the handset being added to initiate the auto registration process 3 Place the handset in the charger When the new handsets have successfully registered the status indicator in the upper left corner...

Page 39: ...the IP address and other status information about the MBU UP DOWN Viewing the MBU 400 IP Address IP Address Network MAC Address 00 08 7g 98 45 cf IP address 192 345 43 54 D Boot Status Failed Gateway...
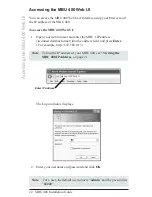
Page 40: ...Web UI 1 Open your web browser and enter the MBU s IP address in dotted decimal format into the address field and press Enter For example http 192 168 0 13 Note To find the IP address of your MBU 400...

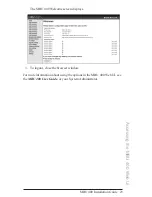
Page 41: ...23 The MBU 400 Welcome screen displays 3 To logout close the browser window For more information about using the options in the MBU 400 Web UI see the MBU 400 User Guide or your System Administrator A...
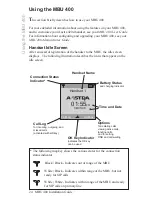
Page 42: ...llowing illustration describes the icons that appear on the idle screen Using the MBU 400 The following map key shows the various states for the connection status indicator Black Black Indicates out o...

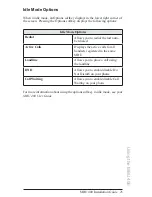
Page 43: ...Options Redial Allows you to redial the last num ber dialed Active Calls Displays the active calls for all handsets registered to the same MBU Landline Allows you to place a call using the landline DN...

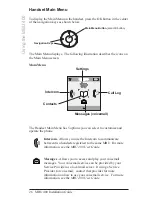
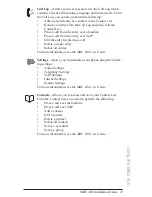
Page 44: ...00 Main Menu Button also OK button Navigation Keys Intercom Allows you use the Intercom to communicate between two handsets registered to the same MBU For more information see the MBU 400 User Guide M...

Page 45: ...try for placing a call Delete a single entry Delete all entries For more information see the MBU 400 User Guide Settings Allows you to customize your phone using the follow ing settings Audio Settings...

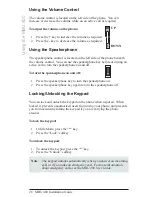
Page 46: ...n and off To turn the speakerphone on and off 1 Press the speakerphone key to turn the speakerphone on 2 Press the speakerphone key again to turn the speakerphone off Locking Unlocking the Keypad You...

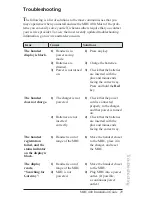
Page 47: ...et is in power saving mode 2 Batteries are drained 3 Power is not turned on 1 The charger is not powered 2 Batteries are not inserted correctly 1 Handset is out of range of the MBU 1 Handset is out of...

Page 48: ...MBU power cord is connected properly and that the adapter is plugged into a power outlet If possible a continuous power outlet 1 Check that the Ethernet cable between the WAN port on the MBU and the...

Page 49: ...he System settings menu choose Country selection and then choose the country that you are in 1 Check that you have configured your phone properly Go to www aastratelecom com and then click Configurati...

Page 50: ...tion b Sign up for a Quality of Service agreement with your broadband provider c Order a connection with higher speed from your broadband provider 2 Contact your Internet Telephony Service Provider re...

Page 51: ...d on and then reset the MBU 2 Turn on the router 3 Contact your Internet Telephony Service Provider 4 Contact your broadband provider 1 a Press the UP button on the side of the handset to connect to t...

Page 52: ......

Page 53: ...ad locking and unlocking 28 Index M main menu handset 26 MBU 400 about the hardware 7 connecting 14 features 3 hardware included 6 installing on a desktop 11 installing on a wall 12 IP address for 21...

Page 54: ...Index 2 MBU 400 Installation Guide T troubleshooting 29 V volume control 28 W Web UI accessing 22 Index...

Page 55: ......

Page 56: ...ner s manual and consulted the Troubleshooting section and still have problems please visit our Web site at www aastratelecom com or call 1 800 574 1611 for technical assistance Aastra Telecom Inc 200...

Reviews: