Installing MX-ONE
Warning!
Before working on any equipment, be aware of the hazards involved with the
electrical circuits and be familiar with the standard practices for preventing
accidents.
4.6.1
Installing the AC/DC Unit Shelves 115-230 V
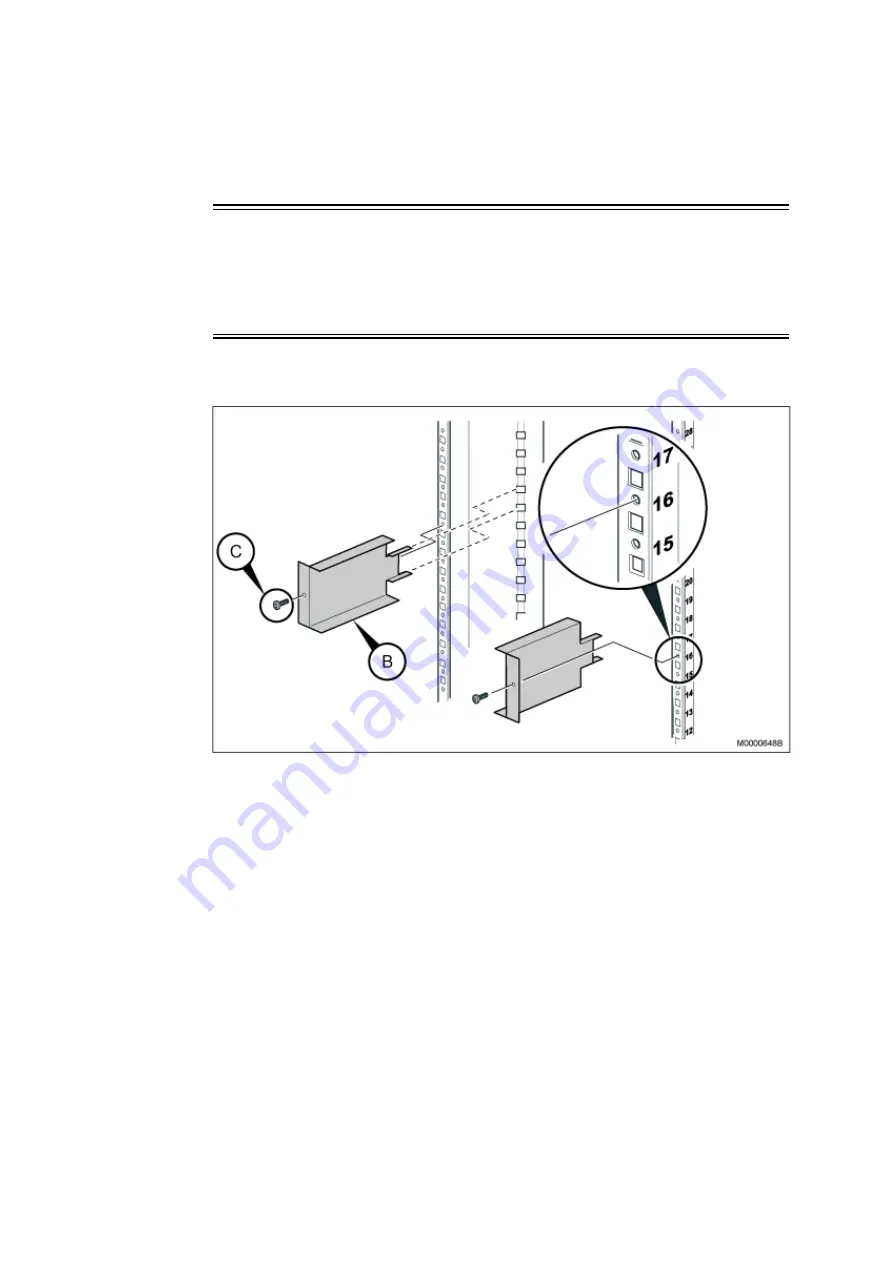
Figure 33
Installing AC/DC Unit Shelves 115-230 V
First, install shelves for the AC/DC unit. (The shelves come with the 115 - 230
V AC/DC unit.) Perform the following steps:
1.
Mount four captive nuts (A) (see Section 4.4 on page 41 ) according to the
number positions shown, see Figure 37. It will be difficult to mount these
if the shelves have been installed.
2.
Use the screws (C) supplied with the AC/DC unit to fasten the shelves (B)
to the captive nuts in the cabinet, see Figure 36.
4.6.2
Installing the AC/DC Unit 115-230 V
This unit delivers 4 x 850 W at 230 V and 4 x 600 W at 115 V.
48
6/1531-ASP 113 01 Uen J2 2008-07-17
Summary of Contents for MX-ONE
Page 1: ...Installing MX ONE INSTALLATION INSTRUCTIONS...
Page 6: ...Installing MX ONE 6 1531 ASP 113 01 Uen J2 2008 07 17...
Page 10: ...Installing MX ONE Figure 1 MX ONE Cabinets 4 6 1531 ASP 113 01 Uen J2 2008 07 17...
Page 26: ...Installing MX ONE 20 6 1531 ASP 113 01 Uen J2 2008 07 17...
Page 72: ...Installing MX ONE Figure 49 Installing Slides 66 6 1531 ASP 113 01 Uen J2 2008 07 17...
Page 107: ...Cabling Figure 79 Cable Connections Configure Example 101 6 1531 ASP 113 01 Uen J2 2008 07 17...
Page 111: ...Cabling Figure 81 ESU Front Connectors and LEDs 105 6 1531 ASP 113 01 Uen J2 2008 07 17...
Page 122: ...Installing MX ONE 116 6 1531 ASP 113 01 Uen J2 2008 07 17...
Page 134: ...Installing MX ONE 128 6 1531 ASP 113 01 Uen J2 2008 07 17...
Page 146: ...Installing MX ONE 140 6 1531 ASP 113 01 Uen J2 2008 07 17...
Page 148: ...Installing MX ONE 142 6 1531 ASP 113 01 Uen J2 2008 07 17...
Page 156: ...Installing MX ONE 150 6 1531 ASP 113 01 Uen J2 2008 07 17...


