7
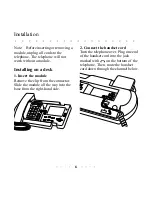
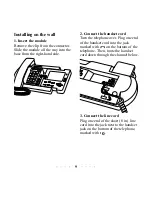
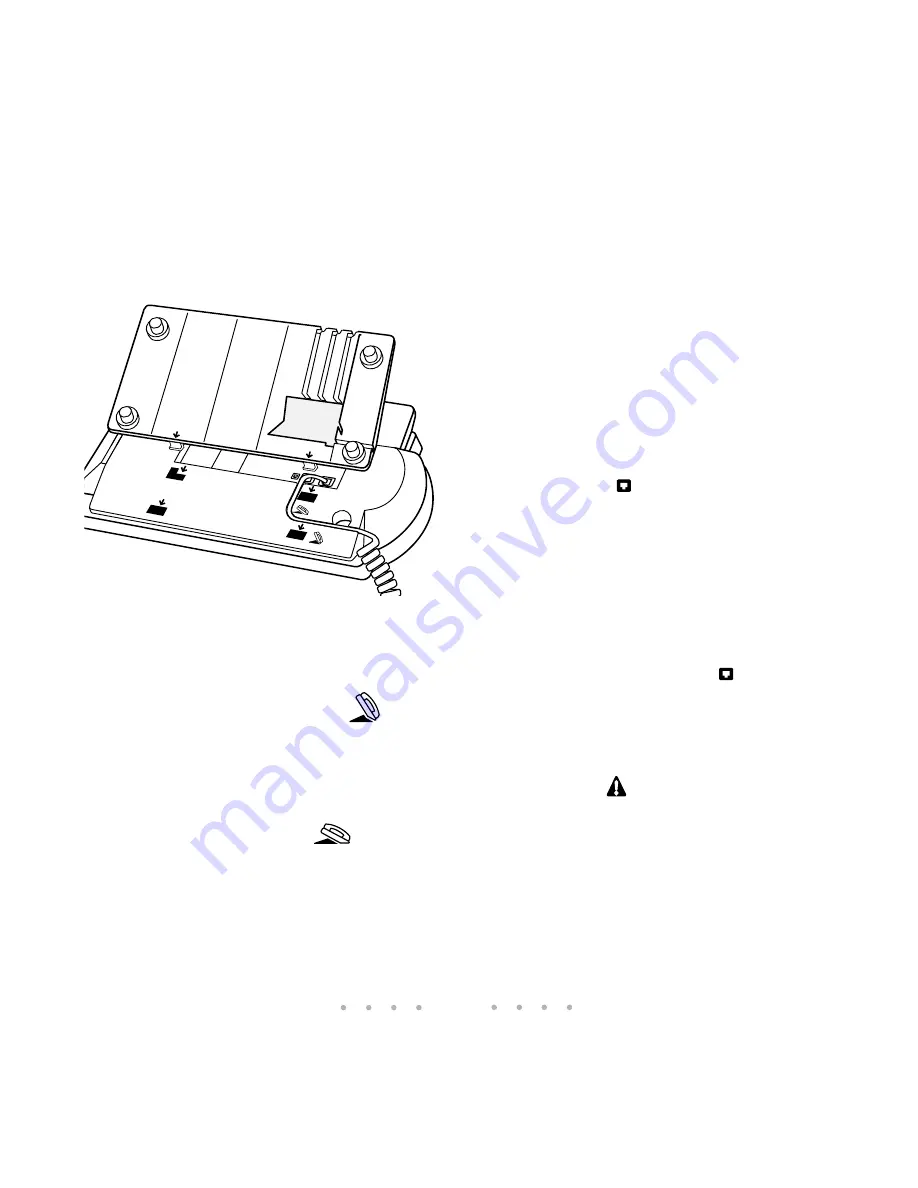
3. Lower the stand into the
slots
Hold the stand so that the square
opening is on the lower right.
For a high viewing angle:
Lower the stand so that the two tabs fit
into the lower slots on the bottom of
the telephone (marked with
).
For a low viewing angle:
Lower
the stand so that the two tabs fit into
the upper slots on the bottom of the
telephone (marked with
).
4. Lock the stand into place
Press down hard on the top edge of the
stand until the locking tabs click.
Note: To remove the stand:
Reverse the process in steps 3 and 4.
With one hand holding the phone and
the other hand holding the stand, pull
them apart, increasing pressure
steadily until the stand pops off.
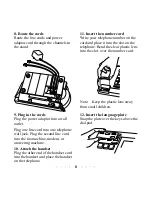
5. Connect the line cord
Plug one end of the long (6 ft) line cord
into the jack next to the handset jack
on the bottom of the telephone,
marked with
1
.
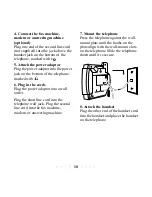
6. Connect the fax machine,
modem or answering machine
(optional)
Plug one end of the second line cord
(not supplied) into the jack above the
handset jack on the bottom of the
telephone, marked with
2
.
7. Attach the power adaptor
Plug the power adaptor into the power
jack on the bottom of the telephone,
marked with
.
Summary of Contents for PowerTouch 350
Page 1: ...PowerTouch 350 User Guide...


