+33 4 7642 9550
www.aaton.com
User manual for Cantar-X1 & X2 v2.15 2008 March 28
p.18
p.18
M/S monitoring
The ‘M/S Declaration’ of a track pair (see IN-GRIDS p.28)
allows them to be monitored as M+S and M-S, i.e. L/R
stereo.
If you pan the M track to one side or the other, it goes
100% to the right or left, and the S signal disappears
from the mix. That is the way to mono monitor an M/S
pair.
Track (dis)arming
One of the advantages of the Monophonic multi-track file
recording is to not waste disk space by recording empty
tracks as is the case with polyphonic files. It is wise to mo-
mentarily disarm a track when there is no use for it. In TEST,
press [shift] [track-solo] of the unwanted track. Its monitor
is muted, and to remind you it is disarmed, its square track
number icon is blinking and its modulometer is dashed to
make it less visible. Disarmed tracks are not rearmed by
passing through STOP, you must pass over IN-GRIDS, or
turn ‘OFF’ the power.
Headphone level
The headphone level is protected by [shift] and is displayed
on the rectangular screen. Rotating the fader makes ‘
<
’
and
‘
>
’ appear. There is no level change if [shift] re-activation is
done when the fader is put back in its ‘pipe’ ( | ) position.
The headphone amplifier can drive 8-ohm loudspeakers: a
helpful feature to send playback tracks to the stage.
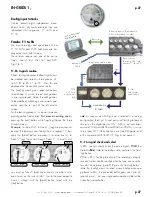
To facilitate extraction of a right angle 1/4” jack plug,
the headphone socket is slant-
ed toward the bottom of the
machine. This makes a long
straight plug hit the table on
which you put Cantar.
Line-out and Foldback levels
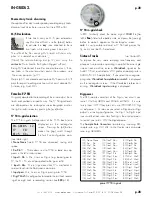
In TEST, [shift] [silver] opens LVL&DELAY.01. The line-out
level is [jog] adjustable from 0 to -94dB
and Mute. A -18dBFS tone delivers a
-10dBu line-output compatible with HD
cameras' line-inputs.
LVL&DELAY.02 gives access to the Foldback level, [jog]
adjustable from 0 to -94dB and Mute.
CantaRem sliders (p.48) can be assigned to this level adjust-
ment too.
A +12dBu gain two channel accessory is available (p.52).
These new 'operating' entries replace the former AUDIO/
TC.05 & 06 'operand' entries.
Rec&Play rehearsal
read p.45 & p.46
In BLUE-TEST, the playback tracks (Tp1-8) are sent internal-
ly to the Digi1–8 inputs, then routed in the standard way.
Select the
In-grids
(see below) & the
Out-maps
tailored for
the job. Rehearse the BLUE-REC navigation and adjust
the levels between the digi-inputs (play-cards being called)
and the analog inputs.
The last played card will be the first to be called when
going to BLUE-REC.
Examples of cloning in-grids
They are made of T1-T6* & T7T8** in-grids
•
for 'Remix':
RPM
= B2 & 02.
•
for 'Archive file update':
RPA
= B2 & 44.
•
for 'Eight track Re-recording':
RR1
= A1 & 01,
RR2
= A2
& 01,
RR3
= A3 & 01,
RR4
= A4 & 01,
RR5
= A5 & 01,
RR6
= B1 & 01,
RR7
= B2 & 07,
RR8
= B2 & 45.
*
T1–T6 operator created ingrids
A1
(Mic5/T1),
A2
(Mic5/T2, Digi1/T1),
A3
(Mic5/
T3, Digi1/T1, Digi2/T2),
A4
(Mic5/T4, Digi1/T1,
Digi2/T2, Digi3/T3),
A5
(Mic5/T5, Digi1/T1, Digi2/
T2, Digi3/T3, Digi4/T4),
B1
(Mic5/T6, Digi1/T1,
Digi2/T2, Digi3/T3, Digi4/T4, Digi5/T5),
B2
(Digi1/T1
Digi2/T2, Digi3/T3, Digi4/T4, Digi5/T5, Digi6/T6)
.
With 'TECHSET.03 (p.34), save this A1–B2 in-grid setup,
and rename it 'Clone1'. Loading it for your next cloning
session will be a great time saver.
** T7T8 ready-made in-grids
(p.28)
01
None None
02
Xa Xb
11
Mic5 Xb
44
Digi7 Digi8
45
Digi7 Mic5
TEST
[BLUE-TEST]
3.
LVL&DELAY 01
LineOut lvl
-20 dB

