+33 4 7642 9550
www.aaton.com
User manual for Cantar-X1 & X2 v2.15 2008 March 28
p.27
p.27
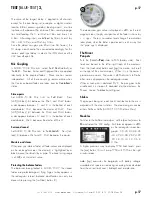
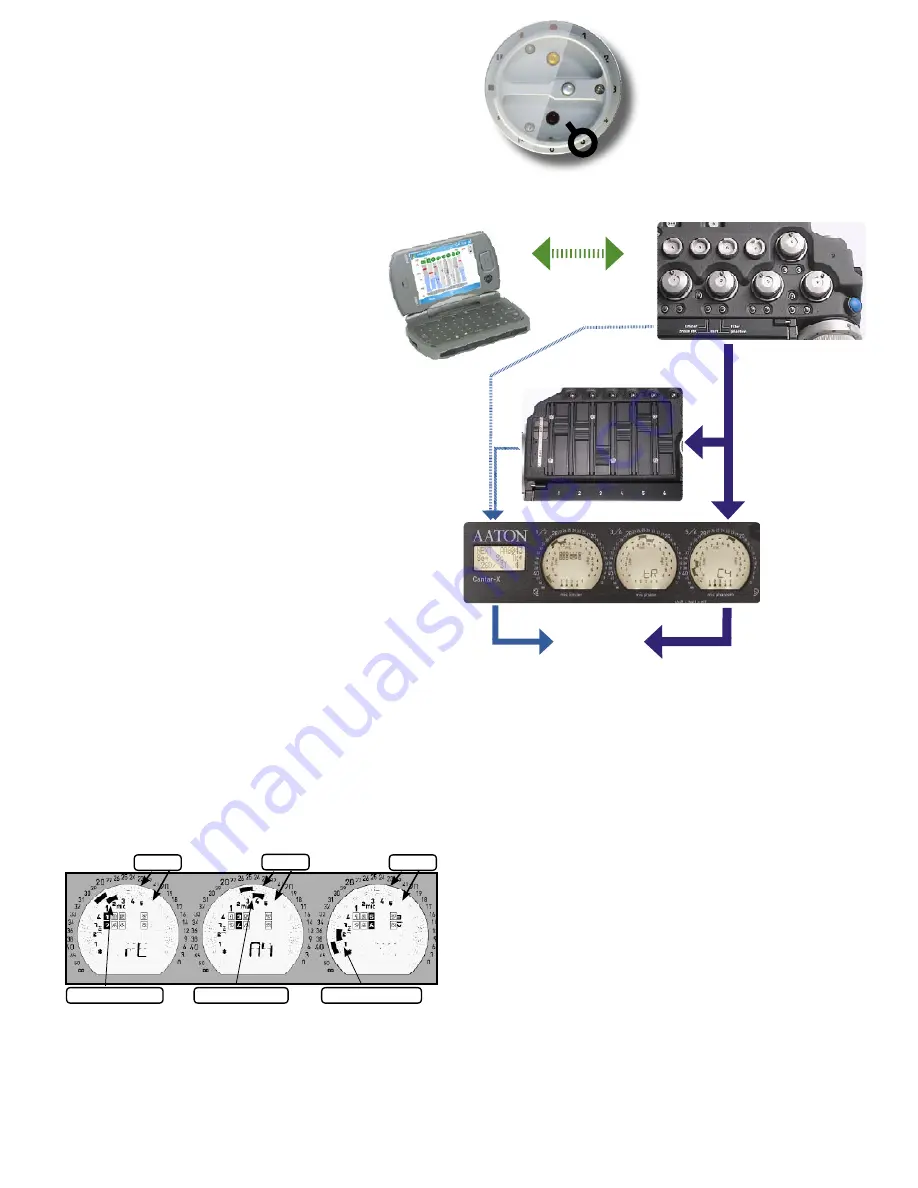
IN-GRIDS 1,
Routing inputs to tracks
Cantar records eight independent mono-
phonic tracks; physically identical, they are
separated into two groups: T1 to T6 and
T7 T8.
Tracks T1 to T6
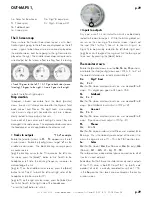
The
In-grids
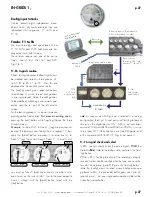
routings and signal levels of the
T1 T2, T3 T4 and T5 T6 track pairs are dis-
played on the circular screens.
These tracks receive any one of the active
inputs: Line-in 1 to 4, Mic 1 to 5 and 'AES'
Digi 1 to 6.
T1–T6 In-grid creation
Fifteen routing templates (called
In-grids)
can
be created and stored in three groups: A1
to A5, B1 to B5, C1 to C5. Their IDs are
displayed on the central circular screen.
The [config] crown gives sequential access
to all of them in a wink; the last configuration
in use is displayed. Select the configuration
to be modified, a blinking cursor awaits your
orders near the ‘
*
’ icon of the left circular
screen.
For the learning process, it is easier to create
a configuration from scratch:
first erase an existing one
by
pressing the [red] button while [jog]-ing through the three
circular screens.
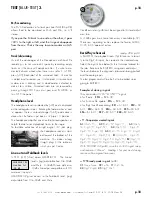
Example
: to route Mic 1 to Track 1, [jog] five positions up
and put the blinking cursor facing the mic segment ‘1’ then
press the [black] button to accept it; to route Line-in 1 to
Track 5, [jog] the cursor through Tracks 2, 3, and 4 until
you land on Track 5 (odd tracks are on the outer circle,
even tracks on the inner circle). Go to the pixel opposite
Line-in 1, accept with the [black] button; reject with the
[red] button.
note:
As soon as an AES Digi-input is selected in a routing
configuration, the Digi 1-6 input icons start flashing to remind
you to turn the digital power ‘ON’. AES in/out converters
consume110mA at 48kHz and 200mA at 96kHz, it is wise
to turn them ‘OFF’ if they are not in use (see AES power end
of this chapter and TECKSET.02 ‘Digi in/out power’).
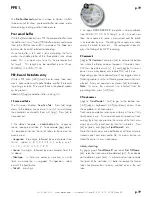
T1–T6 in-grid check and select
In REC, you can silently check the active
In-grid
:
PUSH
the
[Solo Mix
Pan
] slider to the battery side, and press the [rout-
ing] button.
While in REC, for the protection of the recording’s integrity,
you can’t select another configuration but you can neverthe-
less do it on purpose: go to PPR, press the [routing] button,
rotate the [config] crown to select a new configuration and
go back to REC, the pre-record buffer gives you up to 35
seconds to act... not one single audio sample will be lost be-
tween the two audio files.
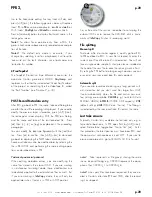
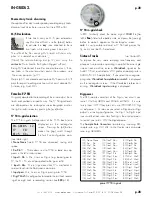
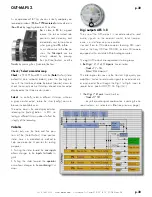
6 pan-pots and 6 mix faders
9 analog inputs to 9 permanently
active rotary faders (no trims)
fifteen channels
(9 analog, AES 1 to 6
routed to T1–T6 (p.27).
T7 T8
on 2 linear
modulometers
(p.8)
Bluetooth
mixer
Input pairs
(p.28)
T1–T6
on 6 circular
modulometers
Xa
Xb
monophonic
8 tracks
remote touch-screen
and keyboard
T1 T2
T5 T6
Mic 1 Mic 2
Mic 3 Mic 4
Line-in 1 Line-in 2
T3 T4

