The trampoline's user manual is also available at www.abarqs.pl.
6
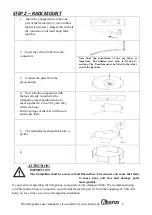
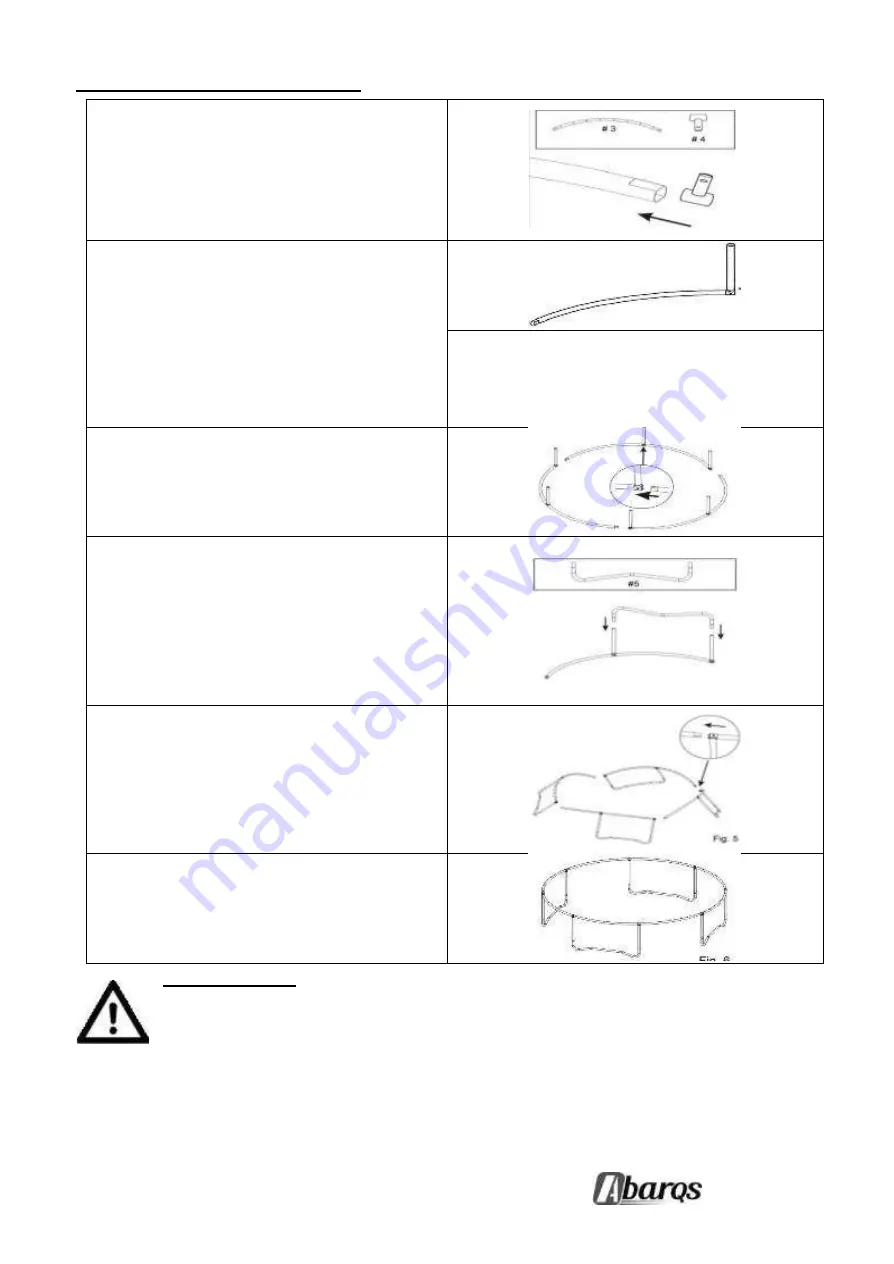
STEP 2 – RACK MOUNT
1.
Insert the t-shaped switch into one
part of the frame rim (3), use a rubber
mallet if necessary. Repeat this with all
the connectors, but don't hoop them
together.
2.
Insert the vertical tubes into the
connectors
Note that the orientation of the leg tubes is
important .The dilation part need to fit the T-
sections. The T-sections must be fitted to the wider
end of the leg tubes.
3.
Connect the parts from the
previous step.
4.
Now turn the components with
the legs already mounted to the
trampoline target position and join
them together in a rim. The parts may
still seem loose,
but the springs of the mat will tension
and secure them.
5.
The folded frame should look like a
picture
6.
ATTENTION
!
IMPORTANT!
The trampoline must be on a level and flat surface. Unevenness can cause the frame
to move wear and tear and damage parts
more quickly.
If you want to reassemble the trampoline, some parts can be clamped firmly. We recommend using
a rubber mallet. There is no need to re-extend the frame rim part (3) from the coupling (4). This will
help you save time on your next trampoline installation.


