2600T Series Pressure transmitters |
OI/266/HART-EN Rev. D 65
Pressure transducer replacement
If the pressure transducer needs to be replaced proceed as
follows:
– Insulate the transmitter from the process by acting on the
manifolds or on the insulation valves
– Open the vent valves to allow sensor depressurization
– Disconnect the power supply and disconnect the wiring to
the transmitter
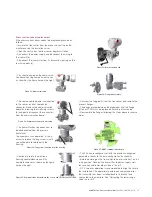
– Disconnect the transmitter from its bracket by loosing on the
four fixing bolts (a).
a
– You should now open the communica-
tion board housing compartment cover
as shown by the figure here on the right.
– The communication board is connected
to the sensor via a flat cable and a
connector. Remove the communication
board by releasing the two fixing screws
(b) and gently disconnect the connector
from the communication board.
b
– The transmitter housing needs now to
be disconnected from the pressure
transducer.
To accomplish such operation, it is nec-
essary to release the tang screw (c) until
you will be able to rotate easily the
housing.
c
– Continue to rotate the electronic
housing counterclockwise until its
complete removal, as shown by the figure
here on the right.
– Unscrew the fixing bolts from the transducer and remove the
process flanges.
– The orings placed between the diaphragm and the flange
(Viton or PTFE) must be replaced after every disassembly.
– Reassemble the flanges following the steps above in reverse
order.
– The 266 can reconfigure itself with the previous configured
parameters thanks to the auto-configuration functionality.
– Before powering on the transmitter raise dip-switches 1 and 2
in up position. Connect the transmitter to power supply, wait
ten seconds and lower dip-switched 1 and 2 .
– A PV zero bias operation is recommended to align the zero to
the installation. This operation should be accomplished after
the transmitter has been installed back to its bracket and
connected to the manifold. See “Correcting the lower range
value / zero shift”.
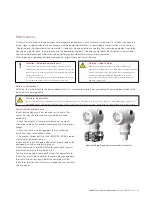
Figure 51: Bracket fixing bolts
Figure 52: Display removing
Figure 53: Communication board removing
Figure 54: Tang screw removing from the housing
Figure 55: Communication flat between the sensor and the electronic module
Figure 56: Flange disassembly
Figure 57: HART communication board
Summary of Contents for 266 HART Series
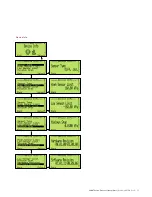
Page 40: ...40 OI 266 HART EN Rev D 2600T Series Pressure transmitters 266 Models HART Device Set up ...
Page 41: ...2600T Series Pressure transmitters OI 266 HART EN Rev D 41 ...
Page 42: ...42 OI 266 HART EN Rev D 2600T Series Pressure transmitters 266 Models HART ...
Page 43: ...2600T Series Pressure transmitters OI 266 HART EN Rev D 43 ...
Page 44: ...44 OI 266 HART EN Rev D 2600T Series Pressure transmitters 266 Models HART Display ...
Page 45: ...2600T Series Pressure transmitters OI 266 HART EN Rev D 45 ...
Page 46: ...46 OI 266 HART EN Rev D 2600T Series Pressure transmitters 266 Models HART ...
Page 48: ...48 OI 266 HART EN Rev D 2600T Series Pressure transmitters 266 Models HART Calibrate ...
Page 49: ...2600T Series Pressure transmitters OI 266 HART EN Rev D 49 Totalizer ...
Page 50: ...50 OI 266 HART EN Rev D 2600T Series Pressure transmitters 266 Models HART ...
Page 51: ...2600T Series Pressure transmitters OI 266 HART EN Rev D 51 ...
Page 52: ...52 OI 266 HART EN Rev D 2600T Series Pressure transmitters 266 Models HART Diagnostics ...
Page 53: ...2600T Series Pressure transmitters OI 266 HART EN Rev D 53 Device Info ...
Page 54: ...54 OI 266 HART EN Rev D 2600T Series Pressure transmitters 266 Models HART Communication ...
Page 77: ...2600T Series Pressure transmitters OI 266 HART EN Rev D 77 ...
Page 78: ...78 OI 266 HART EN Rev D 2600T Series Pressure transmitters 266 Models HART ...
Page 79: ...2600T Series Pressure transmitters OI 266 HART EN Rev D 79 ...


