364Ax-Gx Instruction Manual
44
Removing PV scaling by HHT
PV scaling removing by Hand Held Terminal is available. Please refer to the device manual fo r the
appropriate operations.
Removing PV scaling by PC
PV scaling removing by PC is available using dedicated Software. ABB can provide the references and the
Software. Please refer to the Software instructions for the appropriate operations.
Zero suppression
Two different methods can be used for Zero suppression:
Method 1
: after completion of the zero and span trim procedures, apply to the High Side connection (P2 as
default) a pressure equal to the pressure to be supp ressed. Allow time for pre ssure stabilization and then
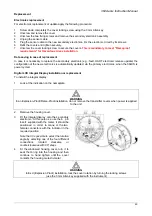
press the Zero local adjustment key (Z) located behind the terminal block for at least 2 second and release.
After this operatio n the digital milliammeter reading should be 4mA and the Upp
er Range Value
automatically moved to a value equal to the sum of the pressure to be suppressed and the previous
calibrated span.
Method 2
: use the zero and span procedure above but apply pressures equal to the Lo wer Range Value
(LRV) and th en to Upp er Range Value (URV), pre ss for at lea st 2 second a nd release, the Zero loca l
adjustment key (Z) and Span local adjustment key (S) respectively.
Zero elevation
Two different methods can be used for Zero elevation:
Method 1
: after completion of the zero and span procedure above apply to the Low Side connection (P1 as
default) a pressure equal to the pressure to be elevated. Allow time for pressure stabilization and then the
Zero local adjustment key (Z) located behind the cover for at least 2 second and release After this operation
the digital milliammeter reading should be 4mA and the Upper Range Value (URV) is automatically moved to
a value equal to the sum of the pressure to be elevated and the previous calibrated span.
Method 2
: use the zero and span procedure above but apply pressures equal to the Lo wer Range Value
(LRV) and then equal to the Up per Range Value (URV) press for at least 2 seco nd and release the Zero
local adjustment key (Z) and Span local adjustment key (S) respectively.
The LRV pressure will be applied to the L ow Side connection (P1 as defa ult) whereas the URV will be
applied to the Low Side (P1 as default) or to the High Side (P2 as default) connection depending upon the
whether the range is all negative or crosses zero.
Reset to Factory trim
The transmitter has in the memory the Sensor Low trim, the Se nsor High trim and th e Output trimming
(Digital to analog trim) defined or calculated during the transmitter assembly. These data have been defined
as Factory trim. The Reset to Fa ctory trim allow the restoration of the a s-shipped factory settings of t he
sensor trim and analog output trim.
The Reset to Factory trim is suggested in case wrong trim operations are performed and the transmitter is in
an undefined condition (i.e.: inadvertent zero trim of an ab solute pressure unit or i naccurate pressure
source).
Reset to Factory Trim by Digital LCD Integral Display
Navigate the Digital LCD Integral Display menu, select
Calibrate
>
Reset to Factory Trim.
To modify select
Edit
then scroll the desired Factory Trim (see the following table) with the up and down keys and confirm with
OK
.
Sensor Trim
Provides the Sensor Low Trim and Sensor High Trim as defined
during the factory transmitter assembly
DAC Trim
Provides the Output Current Trimming as during the factory
electronics characterization
Full Trim
Provides the Sensor Low Trim and the Sensor High Trim as during
the factory transmitter assembly and the Output Current Trimming as
during the factory electronics characterization
)
Digital LCD Integral Display Keys sequence to Reset to Factory Trim: 6 – 3 – Edit


