364Ax-Gx Instruction Manual
74
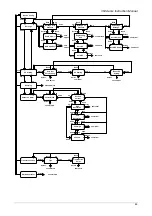
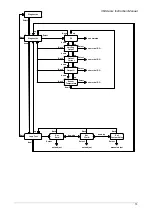
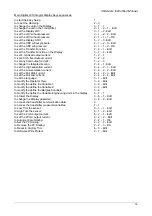
Main Digital LCD Integral Display Keys sequences:
to start the Easy Setup:
1
to to set the Damping:
2 – 3
to change the unit on the Display:
3 – 7 – 1
to change the unit in the Transmitter:
2 – 1 – 2 – 1 – Edit
to set the Display LRV :
3 – 7 – 2 - Edit
to set the LRV wihout pressure:
2 – 1 – 2 – 2 – Edit
to set the LRV wihout pressure:
2 – 1 – 1 – 1 – OK
to set the Display URV:
3 – 7 – 3 - Edit
to set the URV wihout pressure:
2 – 1 – 2 – 3 – Edit
to set the URV wih pressure:
2 – 1 – 1 – 2 – OK
to set the Transfer Function:
2 – 6 – 1 – Edit
to set the Transfer Function on the Display:
3 – 7 – 4 – Edit
to set 4 mA fixed output current:
7 – 2 – 1
to set 20 mA fixed output current:
7 – 2 – 2
to set any fixed output current::
7 – 2 – 3
to change the failsafe direction:
2 – 4 – 1 - Edit
to set the High saturation current:
2 – 4 – 2 – 1 – Edit
to set the Low saturation current::
2 – 4 – 2 – 2 – Edit
to set the Fail High current:
2 – 4 – 2 – 3 - Edit
to set the Fail Low current::
2 – 4 – 2 – 4 - Edit
to set the language:
3 – 1 – Edit
to modify the Operator View:
3 – 2 – Edit
to modify the define the Variable 1:
3 – 3 – Edit
to modify the define the Variable 2:
3 – 4 – Edit
to modify the define the Bargraph variable:
3 – 6
to modify the define the Variable Engineering Units in the display:
3 – 7 - 1
to protect the Display:
3 – 8 – 1 – Edit
to change the Display password:
3 – 8 – 2 – Edit
to access the transmitter communication data:
5
to access the transmitter measured variables:
7 – 1
to Low Trim the sensor:
6 – 1 – 1 – Edit
to High Trim the sensor:
6 – 1 – 2 – Edit
to set the 4 mA output current:
6 – 2 – 1 – Edit
to set the 20 mA output current:
6 – 2 – 2 – Edit
to Auto-Set Zero Scaling:
2 – 2 – 1 – OK
to Set the PV Scaling:
2 – 2 – 2 – Edit
to Remove the PV Scaling:
2 – 2 – 3 – OK
to Reset to Factory Trim:
6 – 3 – Edit
to Software Write Protect:
2 – 7 – Edit


