- 18 -
CALIBRATION
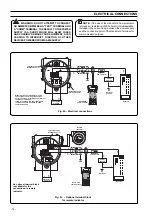
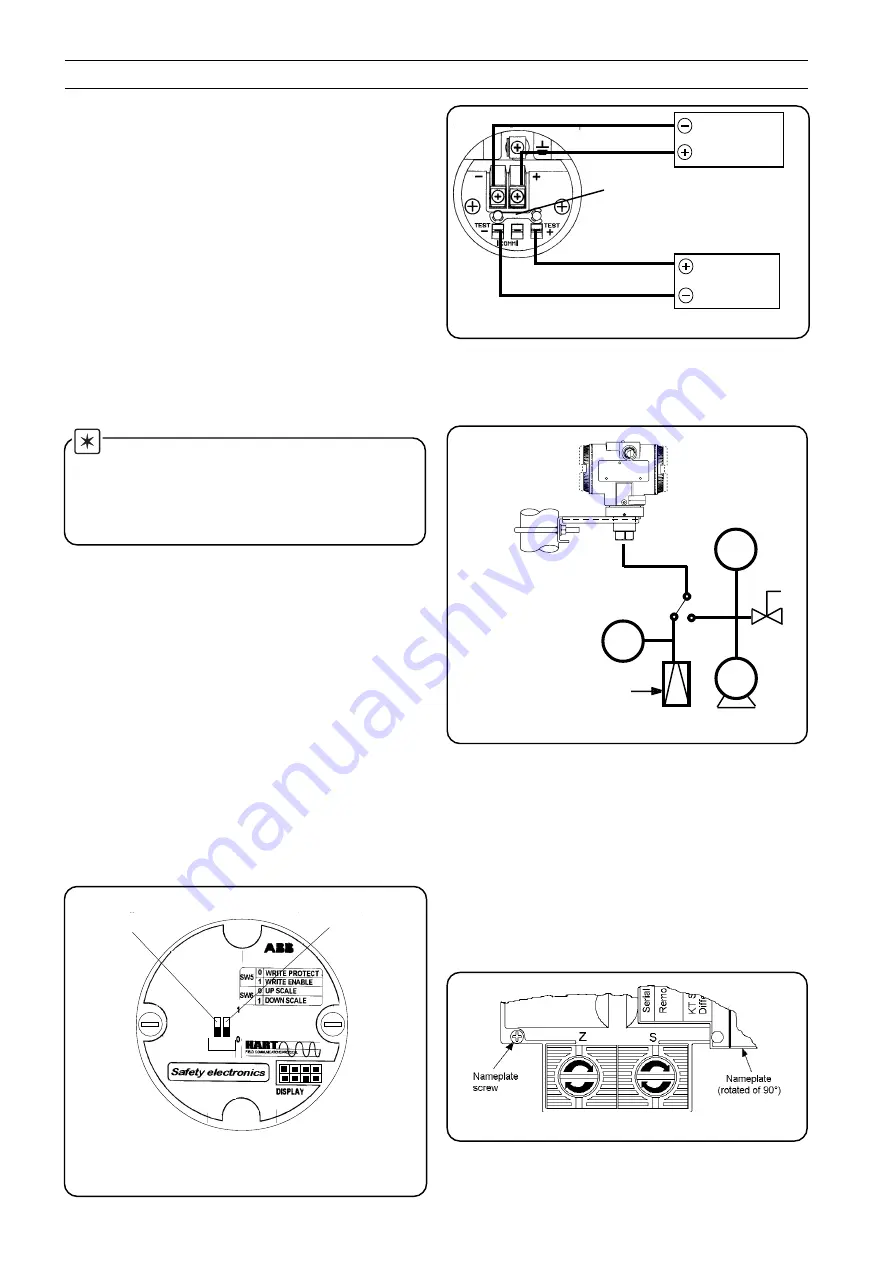
Precision
Milliameter
Power Supply
10.5 to 42 V. d.c.
55
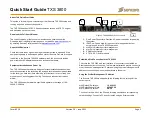
Short circuit link
Fig. 10 - Calibration electrical connections
Set up an appropriate test rig in accordance with the required
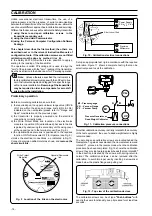
calibration. Figure 11 shows a complete test rig that can be
selectively used to suit the calibration.
Note that calibration accuracy is strictly related to the accuracy
of the test equipment: the use of a dead weight tester is highly
recommended.
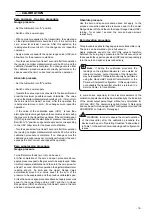
The zero and span calibration screws are located behind the
Nameplate. To gain access slacken the nameplate screw and
rotate 90
°
; proceed in the reverse mode when the calibration
procedure has been completed. Fig. 12 shows the calibration
screws: they provide two large plastic heads that can rotate 90
°
in the direction indicated by the arrows, with spring-return to
normal. The calibration screws can be removed after the
calibration, to avoid improper use by inserting a screwdriver
blade below the plastic flange and pulling out.
Fig. 12 - Top view of the calibration devices
M1 - Pressure gauge
Fig. 11 - Calibration pressure connections
M1
A
Pressure Generator or
Dead Weight Calibrator
V.G.
V.P.
B
V.G. - Vacuum Gauge
V.P. - Vacuum Pump
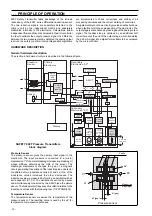
Fig. 9 Location of the links on the electronics
Unlike conventional electronic transmitters, the use of a
microprocessor and the presence of serial communications
between the transmitter and the configuration device, allows the
use of several different approaches in calibration and servicing.
Different methods can be used to calibrate the Safety transmitter:
i) using the zero and span calibration screws in the
transmitter secondary unit.
ii) using the Hand Held Communicator.
iii) using the Personal Computer Configuration Software
Package.
This chapter describes the first method; the others are
described next or in the relevant Instruction Manuals of
configuration tools. If the calibration screws are not fitted
calibration must be done by method ii) or iii).
In the Safety 600T EN Series it is also possible to apply a
scaling to the reading of the transmitter.
The operation is called PV-scaling and is used to align the
"zero" of the process with the "zero" reading of the transmitter.
See the description in the Addendum for PV scaling operation.
Note: Unless otherwise specified the instrument is
factory calibrated at maximum span with the LRV set to true
zero. Instruments adjusted and tagged for a specific range
will not require recalibration. Rezeroing of the transmitter
may be required in order to compensate for zero shift
arising from the installation.
Preliminary operation
Before commencing calibration ensure that:
i) the required span, the upper and lower range value (URV &
LRV) are within the span and range limits (URL & LRL)
indicated on the nameplate (please refer to "Range and
Span" consideration on the previous page).
ii) the transmitter is properly powered and the electrical
connections correctly made.
iii) the Write Protect Mode link, located on the electronics
module is in position ON (write allowed). Access to the link
is gained by unscrewing the secondary unit housing cover
at the opposite end to the terminal cover (See Fig. 9).
iv) the Upscale/Downscale link is positioned to the required
function: ON for Downscale OFF for Upscale (see Fig. 9).
v) make the electrical connections, as indicated in Fig. 10.
Connect a precision milliammeter as shown and remove the
short circuit link.
Upscale/Downscale
link
5 6
Write Protect
Mode link
The calibration screws can be of type "Push buttons" with
exactly the same functionality; keep it pressed for at least two
seconds.


