background image

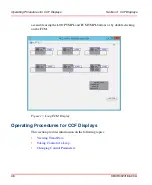
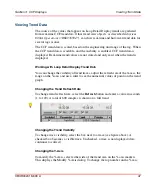
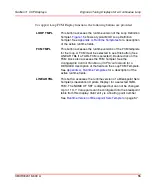
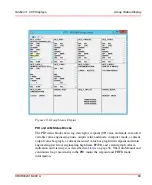
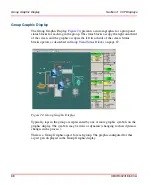
Figure 15. Loop Templet Display

Engineer Tuning Displays for a Continuous Loop

Section 3  CCF Displays

56

3BUR002418-600 A


Runtime Versions of Loop Definition and FCM Templets

The runtime versions of the templets are used to make the actual tuning changes. 
The templets are accessed via the Loop FCM Display as described above. Their 
format is similar to the configurator templets in AdvaBuild with the following 
exceptions:

The information is current since it comes directly from the active database.

Black values are tunable while the grayed values are not.

The AdvaBuild versions of the templets have different buttons.

No FCM list is on the runtime version of the Loop Definition Templet.

Summary of Contents for Ability 800xA Series

Page 1: ...Power and productivity for a better worldTM 800xA for MOD 300 Operation System Version 6 0 ...

Page 2: ......

Page 3: ...800xA for MOD 300 Operation System Version 6 0 ...

Page 4: ...installa tion of antivirus programs and so on to protect the system its products and networks against security breaches unauthorized access interference intrusion leakage and or theft of data or information ABB verifies the function of released products and updates However system product owners are ulti mately responsible to ensure that any system update including but not limited to code changes c...

Page 5: ...1 Introduction Document Overview 19 Product Overview 21 Section 2 Getting Started General 23 Operating Overview 25 Accessing Displays 25 Printing Displays 30 Alarm Event Handling 30 Section 3 CCF Displays Loop Detail Displays 32 Control and PID Loops 32 Device Loops 36 Continuous Loops 38 Loop Faceplates 39 Tag Identification and Indicators 39 Process Bar Graphs and Values 40 Operator Controls 42 ...

Page 6: ... 57 Alarms 58 Alarm Post and Alarm Check 58 Alarm Detection 59 Alarm Indication and Viewing 59 Alarm Priority 60 Alarm Limits and Limiting 60 Alarm Acknowledgement 61 MOD Group Displays 62 Group Status Display 62 Group Trend Display 66 Group Graphic Display 68 Group Alarm Display 69 MOD Area Displays 69 Area Status Display 69 Area Alarm Display 71 Area Graphic Display 72 Section 4 TCL Displays Dis...

Page 7: ...quence Steps 85 SFC Sequential Function Chart Display 86 SFC Display Format 87 SFC Display Operation 88 Sequence Debug Display 91 Sequence Debug Display Format 91 Choosing a Sequence for Debug Display 92 Sequence Source 92 Changing Sequence State Mode and Status 92 Sequence Debug Program Functions 92 Recipe Detail 97 Recipe Detail Display Format 97 Changing Recipe Values 98 TCL Array Plot Display ...

Page 8: ... 122 Subsystem Status Displays 124 AC460 Subsystem Status Display 125 AC410 Subsystem Status Display 130 Controller Node Subsystem Status Display 131 Turbo Console Node Subsystem Status Display 137 Diagnostic Message Display 140 System Performance Display 145 Section 7 I O Displays S800 I O Displays 148 S800 LAN Display 148 S800 Station Display 152 S800 Device Display 156 S800 Warmstart 159 S100 I...

Page 9: ...g a Control Loop 194 Single Loop Operation in Automatic Mode 196 Single Loop Automatic Operation with Local Setpoint 196 Single Loop Automatic Operation with Remote Setpoint 197 Single Loop Automatic Operation with Ratio and Bias 198 Single Loop Automatic Operation with Feedforward 199 Single Loop Auto Manual Transfer 201 Transfer from Manual to Automatic 201 Transfer from Automatic to Manual 203 ...

Page 10: ...rivative FCM 252 Output FCMs 253 Common Fields 253 Analog Output FCM 254 Digital Output FCM 255 Pulse Duration Output FCM 255 Pulse Train Output FCM 255 Common Calculator FCM Fields 256 Math Related Calculator FCMs 256 Sum of 4 Inputs FCM 257 Polynomial FCM 257 Average FCM 257 Subtraction FCM 258 Division FCM 258 Natural Logarithm FCM 258 Exponentiation FCM 258 Multiplication FCM 258 Absolute Valu...

Page 11: ... FCM 265 Totalizer FCM 265 Lead Lag Filter FCM 266 Dead Time FCM 266 Dead Time Compensation FCM 267 Timer FCM 267 Counter FCM 267 Delay Timer FCM 268 Logic Calculator FCMs 269 Logical AND 269 Logical OR 270 Logical NOT 271 Exclusive OR 271 Set Reset Flip Flop 271 Real Compare FCM 272 Miscellaneous Calculator FCMs 273 Selector FCM 273 Put Generic Value FCM 274 Get Generic Value FCM 274 Select Next ...

Page 12: ... 282 Non Rate Periodic Total FCM 282 Periodic Average FCM 282 Periodic Maximum FCM 282 Periodic Minimum FCM 282 Periodic Rate Total FCM 283 S800 I O Runtime Templets 283 AI810 AI890 283 AI820 286 AI830 289 AI835 292 AO810 AO890 295 AO820 298 DI810 301 DI814 304 DI820 305 DI821 307 DO810 309 DO814 313 DO820 315 Special Applications Runtime Templets 318 SP_ALGO1_FCM 318 SP_ALGO2_FCM 318 SP_ALGO3_FCM...

Page 13: ...Table of Contents 3BUR002418 600 A 13 SP_ALGO5_FCM 318 BRKPTS 319 Revision History Updates in Revision Index A 321 Index ...

Page 14: ...Table of Contents 14 3BUR002418 600 A ...

Page 15: ...n entering text key sequences prompts messages menu items screen elements etc Any security measures described in this user manual for example for user access password security network security firewalls virus protection etc represent possible steps that a user of an 800xA System may want to consider based on a risk assessment for a particular application and installation This risk assessment as we...

Page 16: ...equipment could under certain operational conditions result in degraded process performance leading to personal injury or death Therefore fully comply with all Warning and Caution notices Electrical warning icon indicates the presence of a hazard that could result in electrical shock Warning icon indicates the presence of a hazard that could result in personal injury Caution icon indicates importa...

Page 17: ...ter Terms Terms that uniquely apply to this User Manual are listed in the following table Term Description AC410 AC460 Advant Controller 410 and 460 AdvaBuild Configuration package for Advant OCS running on an Engineering Station HP UX or Windows Advant OCS Advant Open Control System or MOD control system CCF Configurable Control Functions DCN Distributed Communication Network Connects MOD control...

Page 18: ...s updated or a new document is released It is in pdf format and is provided in the following ways Included on the documentation media provided with the system and published to ABB SolutionsBank when released as part of a major or minor release Service Pack Feature Pack or System Revision Published to ABB SolutionsBank when a User Manual or Release Note is updated in between any of the release cycl...

Page 19: ...quisite you should already be familiar with the MOD 300 control system you will be working with In addition you must have operator privileges on the computer where the software runs This user manual is not intended to be the sole source of instruction for the software It is highly recommended that those people who will be involved in system operation attend the applicable training courses offered ...

Page 20: ...gnostic Displays Section 6 Status Displays contains information associated with using the diagnostic and status displays I O Displays Section 7 I O Displays contains information associated with using the I O displays Operation Examples Section 8 Operation Examples contains information intended to help the user better understand how to use the displays Online Help Comprehensive online help is avail...

Page 21: ...ased Advant OCS system Customized user accounts allow operators to deal with operating conditions in a productive manner The interface used allows multiple aspects of objects to be viewed in a format that is familiar to users Operation of the control system works within this interface to give you the ability to easily explore Aspect Objects control loops acknowledge abnormal conditions and perform...

Page 22: ...view MOD 300 TCL Unit Detail MOD 300 TCL Recipe Detail MOD 300 TCL Sequence Debug MOD 300 TCL Sequence Detail MOD 300 TCL SFC MOD 300 TCL Unit Array Plot TLL MOD 300 TLL Counter MOD 300 TLL Counter Faceplate MOD 300 TLL File MOD 300 TLL I O Point MOD 300 TLL I O Point Faceplate MOD 300 TLL Register MOD 300 TLL Register Faceplate MOD 300 TLL Segment MOD 300 TLL Sequencer MOD 300 TLL Timer MOD 300 T...

Page 23: ...llows 1 Turn on your computer and wait for the logon screen 2 Select your operator user name type the password and then select the blue arrow Your status changes to the User Rights as defined in the User Manager and you are now logged into the computer 3 From the ABB Start Menu select ABB Industrial IT 800xA System and then select Workplace The desktop will be shown and the Workplace Login is laun...

Page 24: ...een users in a running workplace The log over changes the permissions and user roles but keeps all open windows with their present contents The permitted actions in the open windows are controlled by the permissions of the logged over user The log over only affects the 800xA System permission Windows security is still the same as the user logged in To log over into the 800xA System as a new user 1...

Page 25: ...umerical and graphic form Operator can change certain parameter values such as setpoints outputs setpoint modes output modes and device commands from the console Display and acknowledgment of alarm conditions Operator can change tune some aspects of the configuration while the system is operating Accessing Displays Use the aspect browser display associations and links to access displays described ...

Page 26: ...rms for different areas and groups from one display or have target blocks that can initiate a TCL program sequence state or status transition Accessing Displays Using Context Menus Context menus Figure 1 provide display access based upon the object type or upon the selection in the current display for example access to the Lan Display or Station Display when working with S800 I O Use the right mou...

Page 27: ...m Status MOD_AC460MOD MOD300 AC460 PS Status MOD300 Message MOD300 System Performance MOD 300 System Status MOD_AC410 MOD300 AC410 PS Status MOD300 Message MOD300 System Performance MOD 300 System Status MOD_CCF MOD_CTRL_BLOCK MOD 300 System Status MOD_CCF_CONTIN_LOOP MOD300 Alarm Summary MOD300 Loop Detail MOD300 Loop FCM Faceplate Alarm List Measure_DVAlue MOD_CCF_CNTRL_LOOP MOD300 Alarm Summary...

Page 28: ...300 Segment MOD300 Sequencer MOD300 Timer MOD_LL_CNTR_GRP MOD_LLIO_GRP MOD_LL_REG_GRP MOD_LL_TIMER_GRP MOD 300 System Status MOD_LL_CNTR MOD300 TLL Counter Faceplate MOD_LL_I_O MOD300 TLL IO Point Faceplate MOD_LL_REG MOD300 TLL Register Faceplate MOD_LL_TIMER MOD300 TLL Timer Faceplate MOD_D2F MOD_ADVANT_STATION MOD300 Message MOD300 System Performance MOD 300 System Status MOD_CONT_SS MOD300 Con...

Page 29: ...D_GENERICD MOD300 Multibus MOD300 Message MOD300 System Performance MOD 300 System Status MOD_ENV_AREA MOD300 Area Status MOD300 Area Graphic MOD300 Area Alarm MOD_ENV_GROUP MOD300 Group Status MOD300 Group Graphic MOD300 Group Alarm MOD300 Group Trend Table 2 Server Status Indicators Condition Indication Description OK Green Connection between client server is good Failed Red A connection was mad...

Page 30: ...ivity Server node is fully booted and active before rebooting the standby Connectivity Server node to prevent an alarm mismatch MOD 300 has multiple alarm conditions per object Measure Setpoint Output Deviation and so forth To handle these properties a MOD Alarm Event List is provided as an aspect Alarm Events are handled as follows Alarm Event types with user action acknowledgement CCF Measure Se...

Page 31: ...p Detail Loop Faceplate Loop FCM Loop Templets Appendix A Runtime Templates Area Displays Alarm Status and Graphic Group Displays Trend Alarm Status and Graphic These basic operational displays are supported by runtime versions of the Loop Definition and FCM Templets through the Loop FCM display Continuous loops perform indication and calculation functions Control loops provide output control and ...

Page 32: ...trend graph is updated Select Refresh to get the Change Refresh Rate dialog where you can change this rate to any integer number from 1 to 120 seconds the default value is 1 After changing the Refresh value the plot restarts and the trend is refreshed at the new rate The Loop Detail Display also provides the means to set the following loop parameters Loop setup values including Phase Scan Rate Loo...

Page 33: ...bles you to change the setpoint and output values displayed for the loop in the Loop Detail Display as well as other values and modes Reduced size faceplates Figure 3 provide the basic operator control actions without the process bar graphs of the standard size faceplate Figure 4 The reduced size faceplates for PID loops show measure setpoint output and other parameters as determined by configurat...

Page 34: ...Figure 3 MOD CCF PID Loop Reduced Faceplate Figure 4 MOD CCF PID Loop Standard Faceplate Control and PID Loops Section 3 CCF Displays 34 3BUR002418 600 A ...

Page 35: ...ank and the labels for these fields are dimmed For Auto Manual Controller loops Figure 5 the following fields are blank setpoint setpoint and deviation alarms deviation deadband and tuning values See Section 8 Operation Examples for explanations on the use of the various loop faceplate types Figure 5 A M Ratio Bias Controller Faceplates ...

Page 36: ... Displays for device loops Select the command mode and state process values box to access the device loop faceplate This display also provides the means to set the following device loop parameters Loop setup values including Phase Scan Rate Loop Mode Simulation Mode Override Mode and Lock State Field State is a read only field and cannot be changed Alarm configuration conditions including Alarm Po...

Page 37: ...ss Restriction configuration is set to Yes then device commands are not allowed while in auto shaded buttons If the Manual Enable configuration is set to Disallowed then the Manual button is shaded to prevent changes back to manual may already be in manual before the configuration change Allow the Manual Enable configuration change to process before making mode changes Figure 7 MOD CCF Device Loop...

Page 38: ... The device loop reduced faceplate Figure 8 is also used to modify command mode and state Continuous Loops Indicator loops measure the values of process variables The types of information that are included on a Loop Detail Display or a faceplate for indicator loops are tag descriptor measured variable engineering units and alarm indications Figure 9 is an example of the types of information that a...

Page 39: ...lates are described below The extended size is discussed in Loop Detail Displays on page 32 Tag Identification and Indicators Contains the tag name tag descriptor and abnormal state indication Figure 10 A tag name can be up to 12 characters and is defined during tag configuration This identifies the tag for monitoring and control of the process point A tag descriptor can be up to 24 characters and...

Page 40: ...ontrols to change setpoint and output and alarm markers The number area includes measured value Pv setpoint Sp control output Out setpoint high and low limits and ratio Ra and bias Bi values You can use the number area to enter a value for operator controllable values configured limits are enforced Alarms are indicated using colored backgrounds for priority flashing for unacknowledged and the char...

Page 41: ...Figure 11 Faceplate Process Bar Graph and Values Features CCF Section 3 CCF Displays Process Bar Graphs and Values 3BUR002418 600 A 41 ...

Page 42: ...et point mode a shaded button does not allow change If the Confirm button is enabled all commands in the operator area must be confirmed by clicking the confirm button when it is active If Confirm is not clicked in a configured amount of time the value will not change and the button will return to its normal color If the hide Confirm button option is enabled the behavior of the faceplates change a...

Page 43: ...ODE In Computer Mode you have two options LOCAL where the operator is able to access the restricted parameters but the computer cannot and COMPUTER where the computer program is allowed access to the restricted parameters but the operator is not When the COMPUTER option is selected the operator can still change control to LOCAL Local Mode In Local Mode the operator is able to access the restricted...

Page 44: ...Forward This control loop has a feed forward input that is added or multiplied to the denormalized AUTO output of the PID algorithm FeedForward FeedBack Both FeedForward and FeedBack are used Control Output Tracking Tag is in control output tracking mode If the station goes into output tracking mode the output percentage adjusts to changes in its reference signal Control output changes cannot be i...

Page 45: ...sic control fields become available on the lower part of the display Use these fields to make mode changes and tune setpoint and output Runtime versions of the Loop Definition and FCM templets are Ramp Setpoint is being ramped by a TCL source Abnormal State An abnormal condition for a CCF loop is checked when the ABNORMAL STATE Field on page 219 is set to yes Alarm Active Unacknowledged Alarm acti...

Page 46: ...A accessible using the LOOP TMPL and FCM TMPL buttons or by double clicking on the FCM Operating Procedures for CCF Displays This section provides information on the following topics Viewing Trend Data Taking Control of a Loop Changing Control Parameters Figure 13 Loop FCM Display ...

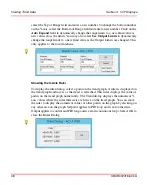
Page 47: ...layed Working with Loop Detail Display Trend Data You can change the visibility of trend traces adjust the refresh rate of the X axis the range on the Y axis and use a ruler to see the numerical values of points on the trend graph Changing the Trend Refresh Rate To change trend refresh rate select the Refresh button and enter a value in seconds 1 to 120 A total of 600 samples is shown on a full tr...

Page 48: ...This only applies to the local machine Showing the X Axis Ruler To display the ruler dialog select a point on the trend graph A ruler is displayed on the trend graph and moves as the trend is refreshed This ruler displays the value of points on the trend graph numerically The Trend dialog displays the numerical Y axis values where the ruler intersects each trace on the trend graph You can move the...

Page 49: ...meter for a PID Control or Device loop is similar in all cases They may be changed from any operational display where the loop tag target is displayed Using the Faceplate A general procedure for changing control parameters from a faceplate is provided below 1 Select the tag target on a graphic or the process values box on a Loop Detail display This displays the applicable faceplate based on the ki...

Page 50: ...put value up or down 4 Select the Confirm button or press Enter if enabled while it is active to accept the new slider value 5 Repeat the steps above to make changes to the values in any other fields 6 Click on the X button to close the window Using the Loop FCM Display A general procedure for changing control parameters from the Loop FCM display is provided below Figure 14 Changing Setpoint on MO...

Page 51: ...versions of the Loop Definition and FCM templets These displays provide the means for more comprehensive tuning and for changing loop configurations during runtime while the system is online Refer to Engineer Tuning Displays for a Continuous Loop on page 53 for details Tuning Via the Loop Detail Display You can change tuning alarm limits and loop parameters via the Loop Detail Display More advance...

Page 52: ... to Standard High or Medium Quality parameters include InputBad SetpointBad DeviationBad and OutputBad Changing a Loop Parameter Loop parameters include phase scan rate loop mode trend rate alarm posting and alarm checking Phase scan rate and trend rate parameters require value entries the loop mode can be switched between scan ON and scan OFF and alarm posting and alarm checking can be switched b...

Page 53: ...is display is dynamically updated with runtime data The display also provides access to the runtime version of the Loop Definition and FCM templets where actual tuning engineering changes are entered A runtime version of the Loop Definition Templet provides the means to modify some fields that were originally configured via the Loop Definition Templet during control database configuration Runtime ...

Page 54: ...o the database after the selection is made or when you press Enter The change is only made to the runtime database in the subsystem containing the loop It is not made to the installed database in the node where the configuration software is resident The following read only information for the current loop is provided in the lower right corner of the display Tag Name Loop State as specified on the ...

Page 55: ... see this button See LINEAR TBL if a TABL FCM is selected Double click on the FCM block also accesses the FCM Templet See the Configurable Control Functions CCF User s Guide for a DETAILED description of the fields on the Loop FCM Templets See Appendix A Runtime Templates for a description of the active runtime fields LINEAR TBL This button accesses the runtime version of a Breakpoint Sets Templet...

Page 56: ...ning changes The templets are accessed via the Loop FCM Display as described above Their format is similar to the configurator templets in AdvaBuild with the following exceptions The information is current since it comes directly from the active database Black values are tunable while the grayed values are not The AdvaBuild versions of the templets have different buttons No FCM list is on the runt...

Page 57: ...essful a message describing the problem is displayed SAVE changes both the active database in the subsystem containing the loop and the installed database on the disk in the node where the configuration software resides However the Breakpoint Sets Templets originally used to configure the database is not immediately modified It retains the old values until the database is decompiled Instructions f...

Page 58: ...ture during startup or shutdown conditions when nuisance alarms can be generated by equipment that is not in service ALARM CHECK can be turned off Disabled during periods when the alarm conditions should not be tested ALARM POST provides the capability to prevent Disabled alarms from printing and or generating audible indication on operator consoles With ALARM CHECK Enabled and ALARM POST Disabled...

Page 59: ...k from the device but no state is defined for the feedback bit combination or Systems recognize the command from the operator or the TCL program but it is an invalid command as defined by the Device Descriptor Templet ABNORMAL Abnormal State Change The device changed state but no command to do so was issued Abnormal State Change alarms will not occur if the state changes to match DEV_CMND TRANSITI...

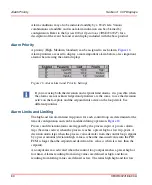
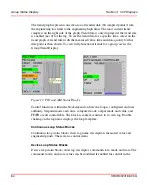
Page 60: ...larm before a less important alarm when viewing the alarm displays Alarm Limits and Limiting The high and low alarm limit trip points for each control loop are determined at the time of configuration and can be modified during operation Figure 16 Process and deviation alarms are triggered by the process input A process alarm trips becomes active when the process reaches a preset high or low trip p...

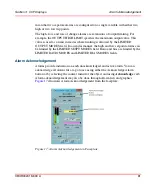
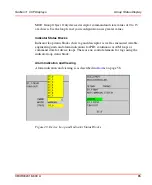
Page 61: ...In a similar manner the high and low setpoint alarms can be limited by the LIMITED SETPT MODES field Ratio and bias are limited by the LIMITED RATIO MODES and LIMITED BIAS MODES fields Alarm Acknowledgement Alarms provide indication on each unacknowledged and active alarm You can acknowledge all alarms for a tag at once using either the Acknowledge Alarm button or by selecting the context menu for...

Page 62: ...up Status and Group Trend displays A custom graphic can be configured for the Group Graphic display The Group Alarm display is a filtered list of a selected event group page Group Status Display The Group Status Display Figure 18 shows the current status of all tags within the group by organizing the tags into status blocks one per control loop and up to three indicator loops Trend data is shown f...

Page 63: ...ariable value engineering units output value and mode computer mode a current output value bar graph a current measured value bar graph with setpoint and limits engineering low limit engineering high limit FF FB and a trend graph Alarm indication and viewing is as described in Alarms on page 58 The Auto Manual and continuous loops are similar to the PID minus the setpoint and FF FB mode informatio...

Page 64: ... functional trends for a group access the Group Trend Display Control functions within the block depend on how the loop is configured and user authority Setpoint mode and value computer mode output mode and value and FF FB are all controllable The block is context sensitive to its own tag Double clicking on the tag name displays the loop faceplate Continuous Loop Status Blocks Continuous loop stat...

Page 65: ...tatus Blocks Indicator loop status blocks show tag and descriptor as well as measured variable engineering units and alarm indications for PID continuous or A M loops or command state for device loops There are no control elements for tags using the indicator loop status block Alarm Indication and Viewing Alarm indication and viewing is as described in Alarms on page 58 Figure 20 Device Loop and I...

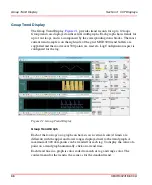
Page 66: ... are supported and the most recent 300 points are read if a Log Configuration aspect is configured for the tag Group Trend Graph Each of the four tags on a graph can have its own vertical scale if limits are different with the upper and lower ranges displayed next to the trend graph A maximum of 300 data points can be trended for each tag To display the value of a point on a trend graph numericall...

Page 67: ...l functions within the block depend on how the loop is configured and user authority Setpoint mode and value computer mode FF FB output mode and value are all controllable The block is context sensitive to its own tag Double clicking on the tag name displays the loop faceplate Alarm Indication and Viewing Alarm indication and viewing is as described in Alarms on page 58 Figure 22 Changing Values i...

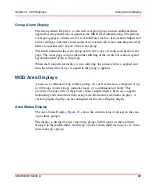
Page 68: ...e graphic occupies the left two thirds of the screen Status blocks operate as described in Group Trend Status Blocks on page 67 Typically tags in the group are represented by one or more graphic symbols on the graphic display The symbols may be static or dynamic changing to show dynamic changes in the process There is a Group Graphic aspect for each group The graphic configured for that aspect get...

Page 69: ...nt group When the Group Alarm display is first called up the primary filter is applied and then the filtered list of tags assigned to the group is applied MOD Area Displays An area is a collection of up to three groups As such each area is composed of up to 108 loops control loops indicator loops or a combination of both This provides a broader view of the process from a single display Each area s...

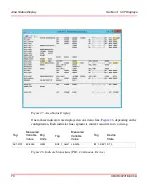
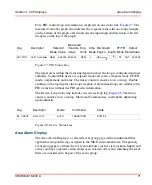
Page 70: ...isplayed on one status line Figure 26 depending on the configuration Each indicator line segment is context sensitive to its own tag Figure 26 Indicate Status Line PID Continuous Device Tag AC1 PID1 Measured Variable Value 50 5000 Eng Units GPM Tag SC5_1_ALG1 Measured Variable Value L5 0000 Tag B1_1 DEV1 Device State ST_0 ...

Page 71: ...c information The Device Loop status line includes one device loop tag Figure 28 The line is context sensitive to its own tag Mode and Command are controllable depending upon authority Area Alarm Display The Area Alarm Display is a selected event group page with an additional filter applied based upon the tags assigned to the MOD environment area The primary event group page is a filtered set of e...

Page 72: ... area is applied Area Graphic Display The Area Graphic Display Figure 29 provides a custom graphical depiction of a given area Any tag in the area may be represented by one or more graphic symbols on the graphic display The symbols may be static or dynamic changing to show dynamic changes in the process The graphic symbols and their dynamics are defined during display building The Area Graphic Dis...

Page 73: ...Section 3 CCF Displays Area Graphic Display 3BUR002418 600 A 73 There is an Area Graphic aspect for each area The graphic configured for that aspect gets displayed in the Area Graphic display ...

Page 74: ...Area Graphic Display Section 3 CCF Displays 74 3BUR002418 600 A ...

Page 75: ...m state status and mode Manipulating steps Changing recipe values Changing tag parameters Recovery from TCL Abnormal conditions for invalid S88 state changes see Batch Connectivity to M0D 300 on page 101 Users with the proper access authority can also troubleshoot and debug programs under runtime conditions from a Sequence Debug Display as well as receive and respond to unit messages Users who are...

Page 76: ... available with AdvaBuild TCL Version Mismatch Warning If the source code of a TCL sequence is re compiled or modified after that sequence has been loaded a warning message Figure 30 is displayed on the Unit Detail SFC Sequence Detail or Sequence Debug display as follows WARNING SEQUENCE SOURCE MISMATCH On the Unit Detail page the affected sequences are also indicated by the Sequence ID having yel...

Page 77: ...tus colored priority alarm indication High Medium Standard event type arrival date and time the unit from which the message was sent and the message itself Acknowledge and Respond to a Message Acknowledge individual events by selecting the Ack box or a group of events by selecting a group of boxes Acknowledge a page of messages by using Acknowledge on the menu line To respond to a TCL message sele...

Page 78: ...ir associated tanks reactors and so on which are treated as entities when being controlled by TCL programs The Unit Overview Display provides the following information for each unit Unit ID name and description Batch ID if any Recipe ID currently associated with the unit if any The TCL Unit Overview displays only units associated with a given OPC Service Group If the system configuration has multi...

Page 79: ...Section 4 TCL Displays Unit Overview Display 3BUR002418 600 A 79 Click on the Unit ID field to access the Unit Detail display for the selected unit Figure 32 Unit Overview Display ...

Page 80: ... state mode and status changes Remove a sequence from the unit when it is no longer needed Select a specific Sequence Detail Debug Recipe Detail or SFC display Figure 33 Unit Detail Display Unit Detail Display Format The top of the display contains the unit ID and description the ID of the recipe associated with the unit and the batch ID There is a field for entering a sequence load request a fiel...

Page 81: ...oad Request field 2 Enter the ID for the desired sequence optionally you may load the sequence to a slave unit by entering SLAVE after the Sequence ID 3 Press ENTER Wait while the system downloads the sequence to the unit The message Loading Sequence sequence name is displayed while the system downloads the sequence When downloading is complete the sequence and its related data are shown in the li...

Page 82: ... system is downloading the recipe When downloading is complete the new Recipe ID is displayed in the Recipe ID field You can load one recipe per unit Changing Sequence State Mode and Status The sequence state mode and status can be changed by selecting one of the sequences listed on the Unit Detail Display Use the pull down boxes to make your selection Functions for sequence state are For example ...

Page 83: ...for SFC Sequence Detail or Debug display select the Sequence ID right click for the context menu and select the SFC Sequence Detail Display or Sequence Debug Display AUTO Programs execute steps in order without requiring operator intervention SEMI_AUTO Programs execute steps automatically but pause at configured breakpoints The operator can then resume or abort MANUAL Programs execute manually NOR...

Page 84: ...ual sequence Most of the runtime changes made to a sequence are done from this display The changes you can make include Step manipulation up to 255 steps supported Sequence state mode or status Figure 34 Sequence Detail Page A limit of 255 steps can be displayed Additional steps are indicated by the text TEXT NOT AVAILABLE These steps can be expanded on the SFC display to get their data ...

Page 85: ... Sequence Detail Direct access of a sequence detail is possible from the MOD_SEQUENCE object which specifies a valid sequence as defined during configuration Otherwise a listing of TCL sequences is provided when you first enter a MOD Sequence Detail display from a MOD_UNIT object Choose the sequence to be loaded from the list on the Sequence List display Figure 35 Changing Sequence State Mode and ...

Page 86: ...ntial Function Chart Display Figure 36 supports runtime monitoring and manipulation of an individual sequence by presenting information similar to that found in the Sequence Detail Display but with a graphical flow chart format This chart presents TCL steps and activities actions a sequence will execute along with the transition conditions which determine the flow of the sequence execution Activit...

Page 87: ...s on page 85 State Mode and Status are changed using a pull down list to make your selection For information on using this dialog refer to Changing Sequence State Mode and Status on page 85 The Follow Current Active Step check box when selected automatically follows the current active step as the sequence progresses The step that is currently active is shown expanded in the center of the display Y...

Page 88: ...he step number is displayed on a button following the transition tic mark Use the horizontal scroll bar to see additional transitions if necessary Activities and conditions can have both load text and runtime text The load text is displayed when the sequence is first loaded It is replaced by runtime text as that part of the sequence is executed Load text describes what should happen during executi...

Page 89: ...atement following the condition To gain control access right click on a transition button then select either the Loop FCM Display or the faceplate for the loop associated with the transition You can change loop values from either the Loop FCM Display or faceplate Transitions Step transitions contain tag references for operator control There are three highlight states for transition statements Base...

Page 90: ... the referenced database point to satisfy the transition expression To gain control access right click on a transition button then select either the Loop FCM Display or the control dialog for the loop associated with the transition You can change loop values from either the Loop FCM Display or control dialog Operator access to the database reference is only available after the statement has been e...

Page 91: ...roubleshooting and debug functions on this display are trace and breakpoint Control functions supported by the sequence debug display are sequence state mode and status changes Sequence Debug Display Format The Unit ID Sequence Time Stamp Current Statement number Follow current St and the sequence State Mode Priority level and Status are shown at the top of Figure 38 Sequence Debug Display ...

Page 92: ...nce to be loaded from the list on the Sequence List display Figure 35 typical Sequence Source The message Unable to read sequence source is displayed when opening the Sequence Debug display if the source is down such as when AdvaBuild is not on line or when batch uses an alias for the sequence If an alias is being used type the sequence name in the Sequence Source box Figure 38 and press Enter to ...

Page 93: ... be applied to up to four variables To enable or disable the trace list select the Trace Enabled check box To view the Trace Window Figure 39 select the Trace Window check box The window shows a Trace Steps list of the last 12 executable statements You can add up to four trace local or database variables which are of type integer or real in the Trace Window To add a trace variable enter the variab...

Page 94: ... the Close button to close the Trace Variable Window Trace variables can be created or modified while a sequence is in AUTO mode This creates a trace variable record in the controller however the trace variable record is not applied to the sequence at this time Trace variable changes are applied to a sequence only when the sequence is in MANUAL mode and tracing is enabled Any latent not yet applie...

Page 95: ...uence reaches a line at which a breakpoint has been set The sequence then enters the paused state where it remains until either resumed or aborted While the sequence is in the paused state tests can be performed and commands can be given to check the sequence logic The breakpoint function is enabled and disabled without disturbing breakpoints that have been set Breakpoints are indicated on the Seq...

Page 96: ...dow Figure 40 or click in the Brk column this sets a breakpoint as indicated by a red then green dot To set the first breakpoint in the Breakpoint Window enter the line number of the line where the first breakpoint is to occur in the Statement field There can be up to five breakpoints To delete a breakpoint either select a breakpoint on the Breakpoints list in the Breakpoint Window and then click ...

Page 97: ...ipe parameters are made via this display Recipe Detail Display Format The unit ID unit description recipe ID and batch ID are shown at the top of the display The main portion of the display shows the values for each recipe parameter referred to as recipe item The display provides the following for each recipe item ID description current value high and low limits and engineering units Figure 41 Rec...

Page 98: ... can have vertical blue lines drawn at user specified locations Plots of this type are called Hybrid Plots Hybrid plot displays are useful for flat sheet applications A TCL hybrid line array is required for the hybrid plot display The hybrid line array is a TCL real number array that is 260 elements long Using TCL Array Plot When using the In Plot Array option the first 10 elements of the array ar...

Page 99: ...Using TCL Array Plot 3BUR002418 600 A 99 Context Menu Use the context menu to perform the following activities Trace 1 and Trace 2 Configure This menu is active when using the In Plot Array option during configuration The fields can be set as follows ...

Page 100: ...ifying more points than available will cause a diagnostic error message and will not display any points Specifying less than 25 points will produce a low resolution plot the ruler will offset to the nearest point during selection Y Axis Top and Y Axis Top Bottom This field is used to specify the top and bottom values of the y axis X Axis Width This field is used to specify the width of the x axis ...

Page 101: ...Phase to go to the S88 Abort State with an Error in this case TCL Paused by User Let the Batch Manager software manage the State Status of the Sequence being used as a MOD_PHASE When there is not a valid S88 State change that can be used for recovery then the TCL displays can be used to recover the process Additional notes Within batch the MOD Phase Sequence is a TCL Sequence adapted to provide IS...

Page 102: ...Batch Connectivity to M0D 300 Section 4 TCL Displays 102 3BUR002418 600 A ...

Page 103: ...en blue on Segment display Segment Display The Segment Display Figure 43 is used to monitor and control the execution of Taylor Ladder Logic see the TLL User s Guide This display is accessed by selecting a Ladder Logic object and then selecting MOD300 TLL Segment from the context menu The Segment Display can be used to Load and remove segments Turn TLL scanning on and off Debug segments by forcing...

Page 104: ...e displayed on their own rung A closed segment also closes its data access subscription does not collect data in background when closed File instructions Figure 44 allow the ladder logic to transfer data from registers to files files to registers and from one file to another Each instruction has a counter associated with it to provide an index into a file for a particular element counter faceplate...

Page 105: ...er any I O point in the segments is being forced by operator command as read from the database Load Segment This field is used to add segments to the node or controller The segments must already exist in a loadable form for the node or controller To add a segment select the Load Segment field and enter the number of the segment Press Return The information on the screen does not change after the l...

Page 106: ... search forward or on the left arrow button to search backward The item you put into the Search field stays there until you replace it with a new item Changing the search item causes the search to start at the beginning of the segment if open If an item is found in a closed segment you are asked if you want to search in that segment Selecting No ends the search The search does not wrap back to the...

Page 107: ...so supported via the I O Point Display For more information refer to I O Point Display on page 115 TLL Timer Faceplate You can change the Preset Value and Enable in the TLL Timer faceplate The format for Preset and Value time entries is described in Timer Display on page 112 TLL Counter Faceplate You can change the Preset Value and Enable in the TLL Counter faceplate For more information on the TL...

Page 108: ... is accessed by selecting a Ladder Logic object and then selecting MOD300 TLL Register from the context menu The following fields can be edited on this display Figure 46 TLL Register Display Value You can change the value of a register by selecting the Value field for the register entering the new value then pressing ENTER This change is then applied Description Use this field to modify the associ...

Page 109: ...rows will find the previous or next match Register Faceplate Each register can have a faceplate Select the register left click to get the faceplate or use the context menu to get the faceplate of an imported register as shown in Figure 47 You can change the Description and value from the faceplate Figure 47 TLL Register Faceplate Use context menu to select faceplate for a register ...

Page 110: ...TLL counters can count by increments of one Instructions in the programs can cause them to count up or down reset or go to their configured preset values Counters can count as high as 2 147 483 647 Counters are required by a number of instructions such as file instructions and sequencer instructions Down counting starts at the Preset and is finished when the count Value 0 Up counting starts at the...

Page 111: ... disabled NO from the faceplate You can also change the Description Preset and Value Value You can change the value of a counter by selecting the Value field for the counter entering the new value then pressing ENTER This change is logged Preset You can change the preset of a counter the value counted up to or down from by selecting the Preset field for the counter entering the new value then pres...

Page 112: ...ic object and then selecting MOD300 TLL Timer from the context menu TLL timers can time with a configurable time base that can be either 1 0 0 1 or 0 01 seconds displayed on faceplate The timers are under program control and can be started stopped and reset by program instructions They can time to values as large as 999 hours A timer is configured to time up or down Figure 50 TLL Timer Display ...

Page 113: ... displayed to the hundredth place For example 001 20 15 25 is one hour twenty minutes fifteen and twenty five hundredths seconds Your entry should be within the resolution of the time base If it is not the system automatically rounds it to the nearest multiple of the time base You can change the preset or value of a timer by selecting the Preset or Value field for the timer entering the new value ...

Page 114: ...les 6 6 seconds 5 5 seconds Timer Faceplate Each timer can have a faceplate Figure 51 Select the timer left click to get the faceplate or use the context menu to get the faceplate of an imported timer The timer can be enabled YES or disabled NO from the faceplate Figure 51 TLL Timer Faceplate ...

Page 115: ...ntext menu TLL uses digital input contact and output coil points that are local to the controller or node For ladder logic I O points that use PLC functionality only inputs are supported I O Point Faceplate Each I O point can have a faceplate Figure 53 Select the I O point left click to get the faceplate or use the context menu to get the faceplate of an imported I O point For S100 I O points the ...

Page 116: ...us field for the point then selecting the appropriate status from the pull down list Status changes are logged Forced When the Forced field is YES you can determine how the value of a points status affects the segment since the change is not sent to the actual I O point When the Forced field is NO status field changes affects the actual I O point You can change between YES and NO by selecting the ...

Page 117: ...p down file list to switch to a display for another file in the device Select the Value field to change the values of the items in the file All changes are logged When changing a value type in the new value and press ENTER The maximum value allowed is an eight digit integer For control purposes 16777215 FFFFFF hex is the full access upper value During TLL execution the sequencer instructions trans...

Page 118: ...g a Ladder Logic Device object and then selecting MOD300 TLL Sequencer from the context menu and then a specific sequence from the Sequence List A sequencer is a series of up to 128 steps Each step is a list of as many as 32 I O points The I O points listed in a sequencer step are manipulated in one way or another by sequencer program instructions One type of sequencer instruction causes the value...

Page 119: ... point no spaces and then press ENTER To delete a value clear the field and then press ENTER TLL Device Logged Changes There are several changes that can be made to items on the Database Summary Displays Almost all of these changes are logged For example if your system is configured with a logging printer a typical message would be REG1 SEQ1 MASK REGISTERAC CHANGED FROM 115 TO 315 TLL Messages TLL...

Page 120: ...TLL Messages Section 5 TLL Displays 120 3BUR002418 600 A ...

Page 121: ... For additional information on diagnostic displays for the Advant Controller subsystems refer to the Advant Controller 410 User s Guide and or the Advant Controller 460 User s Guide For all other subsystems refer to the appropriate hardware user s guide user manual You are alerted to the presence of a diagnostic message by the Diagnostic Message List of the base product as described in System 800x...

Page 122: ... the subsystem name device address device type media state device state and controller status Controller types only The display has a large icon small icon and a report view available through the context menu shown The Address and Type columns may be sorted by clicking on the column heading Module message and performance displays can be viewed right clicking in the Status column shown Figure 56 Sy...

Page 123: ...ssor Subsystem DCN DCN Interface or Gateway Interface is determined by configuration Subdevice numbers for the Controller Subsystem only are determined by the module position in the controller card file and are shown in the Subsystem Status Display Subsystem Name The subsystem name shown for each icon of the System Status Display is the 21 character name entered in the TEMPLET NAME field when that...

Page 124: ... following state definitions Subsystem Status Displays The Subsystem Status Displays provide information on the node s condition Table 6 State Definitions STATE COLOR DEFINITION Blank No Control Module configured ACTIVE Green Device or subdevice is running AVAILABLE Cyan Program has downloaded and database is downloading DOWN Red Fatal failure that is communications has failed or device subdevice ...

Page 125: ...nd whether a card is currently a primary or backup status and address for DCN TRIO MVI AF 100 S800 I O and S100 I O submodules TRIO S100 S800 and PROFIBUS logical LAN numbers MVI Port type and status A B Select a controller to perform Switchover Hard Reset or Reset for Upgrade activities Use the context menu to select the Diagnostic Message and System Performance displays for a specific subdevice ...

Page 126: ...y the controlling application client program Redundant ports may reside on the same or on a different MVI submodule Therefore no MVI submodule is considered to be a backup for another The status of the MVI submodule will show if it is active failed or missing DCN Interface The DCN interface is similar to the TRIO interface in that both are considered to be active simultaneously with no preference ...

Page 127: ... target The S100 I O LAN status show the condition of the CI540 and the LAN communications ACTIVE Primary Redundant LAN is OK READY Back up Redundant LAN is OK BC DN Communication to DSBC 175 Bus Extender has a problem DOWN CI540 Bus Extender Master has failed Push buttons on AC460 Subsystem Status Display See the Advant Controller 460 User s Guide for a detailed description on how to perform an o...

Page 128: ... to clear the RESET for UPGRADE SWITCHOVER The SWITCHOVER push button is used to force the switchover of a primary controller to a backup controller that is loaded with a different version of software The following restrictions apply for this command If the backup controller is not in the UPGRDE state SWITCHOVER cannot be selected This prevents switchover from being attempted for backup controller...

Page 129: ...t actually sent until the CONFIRM push button is selected The CANCEL push button can be used to clear the fact that this push button was selected CONFIRM Because there is a need to prevent inadvertent selection of a push button from causing unintended controller resets and switchovers the CONFIRM push button is used to provide a confirmation process for the RESET for UPGRADE HARD RESET and SWITCHO...

Page 130: ...isplay Figure 59 provides node address and name DCN status PM150 Controller address name and status and TRIO and S100 submodule status and logical LAN numbers See the AC460 for a description of the TRIO Interface S100 I O Interface S800 I O Interface MVI interface and DCN interface Figure 59 AC410 Subsystem Status Display Compact Station ...

Page 131: ...activities are described below Controller Subsystem Status Display CCR Requests The Redundancy Request button is used to make Control Card Redundancy CCR requests for the selected Control Module When one of the associated commands is selected the request and the currently selected subdevice number are shown and a prompt is displayed requesting confirmation of the selected action If the action and ...

Page 132: ... Module to the Backup Control Module If the fail over is unsuccessful the Primary Control Module continues to function as if no request to fail over occurred Switch Back Requests switch back from the Backup Control Module to the Primary Control Module Confirm Confirms and sends request to the subdevice Cancel Cancels any request not yet confirmed When one of the above commands is selected except C...

Page 133: ...ers A blank status block indicates that there is no Control Module configured for that slot in the Controller Card File If a status block contains only the status data in the Control Module itself could not be accessed Each field in a status block is a target When selected it is highlighted and that Control Module becomes the object of subsequent redundancy and display requests If a target in the ...

Page 134: ...agnostic is generated The redundancy state remains LOST for five unsuccessful attempts After the fifth unsuccessful attempt to re establish redundancy the redundancy status becomes TERMINATED If redundancy is re established before the fifth attempt the REDUNDANCY AUTO ESTABLISH AFTER x TRIES diagnostic message is generated Once the auto establish mode is entered it remains active even if a manual ...

Page 135: ...up memory module Backup Memory Modules are assigned pseudo subdevice numbers of 13 OD 14 OE and 15 OF since they are not actually on the DCN or F Bus The only meaningful displays for use with Backup Memory Modules are the Diagnostic Message Displays The backup memory status is shown in the status block as STATUS Unknown Red UNKNOWN Red NOT AVAIL Red ACTIVE Green BACKUP STATUS No status received Re...

Page 136: ...al error PROM Checksum Error fatal error Timer Error timer is not within a set tolerance during a 10 ms delay Watchdog Timer Error on board watchdog timer times out in under 350 ms or takes longer than 410 ms Bus Error Handling Error system getting bus errors on valid addresses or not getting errors on invalid addresses Parity Handling Error system is not correcting a one bit error or not detectin...

Page 137: ...sets the outputs approximately 200 milliseconds after the card available signal is turned off If in the HOLD position the last outputs are maintained Otherwise the output values go to zero If a failure is the result of a shorted transistor on the digital output transfer to the Backup Control Module whose I O is paralleled with the Primary results in the Backup failing also This causes the Backup t...

Page 138: ...ble for controlling the Annunciator the Contact output and erasing the SIM SIM ERROR LOG The current error log as reported by the System Integrity Module for the specified subsystem is shown in this field Note that only fatal errors are shown The hexadecimal number to the left of the colon is a unique hardware software and SIM status code identifier The set of four hexadecimal numbers to the right...

Page 139: ...le I 0 module base addresses When the System Integrity Module SIM is missing or not active the message NOT AVAILABLE is displayed in the SIM and SIM ERROR LOG areas When the subsystem includes remote I O Figure 62 then Remote I O rows show the LAN number This number is the one configured in the node not in the database Subsystem Status Display Operation Buttons available and the actions performed ...

Page 140: ...c Messages Display Figure 63 shows all messages reported and filed as a diagnostic failure by a device subdevice of the MOD control system both system software and system hardware along with an indication of the time frequency and type A font selection allows you to display large medium or small fonts and consequently fewer or more lines in the main portion of the display Colors are assigned to ea...

Page 141: ... Diagnostic Messages Archive Display Description The main fields on the Diagnostic Messages Archive Display are TIME Shows the date and time of the most recent occurrence Shows the number of occurrences within an interval of up to 10 minutes DEVSUB Shows the device subdevice ID from which the message originated DESCRIPTION Shows the message text and severity The first time a message occurs it is a...

Page 142: ...e In the ALL MSGS CODE format all codes are given numerically If you need to contact Technical Service for help it is important to provide them with as much information as possible concerning the observed problem and actions attempted The ALL MSGS CODE for example identifies the AP code that can be found in the Diagnostic Error Messages user manual to determine the cause and effect of a problem as...

Page 143: ...ssages on this system and previously archived messages from this or another system The EMPHASIS MODE and EMPHASIS SOURCE fields together select six possible ways to view messages The effects are summarized below MODE SOURCE EFFECT SHOWING ONLY SUB DEVICE Displays current if the disk is WC00 and archived messages from the selected device subdevice The messages shown are the same as those shown in t...

Page 144: ... function to select a printer After selecting the print view icon the print display Figure 64 is shown Select Screen Dump to print a picture of the current view Use the Operator or Custom selection to print All Messages or a Range of messages where the range numbers are row numbers Custom mode is selectable when the message format is not OPERATOR With Custom Code and Alt cannot both be selected Th...

Page 145: ...isplay It provides information on the performance of a specified device subdevice node in terms of CPU loading Configurable Control Functions CCF software loading and memory pool usage The display provides information on the performance of a specified device subdevice node in terms of CPU loading CCF software loading and memory pool usage There are three performance monitors on this display each c...

Page 146: ...ausing large peaks and low current usage Continuous or device loops driven by digital inputs causing high current and average usage Alarm frequency due to narrow deadbands causes high peak usage Reset ALL Resets the samples since time year and month YYYYMM 0 for Reset CPU Reset CCF and Reset Memory utilization Reset CPU The Reset CPU button resets DATA1 of a SYS Data Entry FCM to zero which resets...

Page 147: ... like the diagnostic displays Hardware factors to consider are No more than 30 TRIO blocks can be attached to a Field Bus Controller A SC Controller I O Module has either all TRIO or all Direct I O A SC Controller can have two Field Buses at most Each can be either non redundant or redundant All SC Controllers backed up by one specific backup controller must have the same type of I O either TRIO o...

Page 148: ...s the CI520 CI522 submodule status and information about each S800 I O Station configured under a particular LAN Select a display target to call up the S800 Station display The heading fields on the S800 LAN display are described below Figure 66 S800 LAN Overview Display Devsub The controller DCN address where the S800 I O is located State This field shows the status of the controller as ACTIVE DO...

Page 149: ...ogical device name created during database configuration is given in this field Label Descriptive label associated with templet RPT Faults Indicates the reporting method for fault condition FLASH NOTIFY SILENT NOTIFY or NO NOTIFY Mod Sub This field represents the slot number of the of the controller carrier MODule and the SUBmodule location of the CI520 CI522 Bus Address This is the AF 100 field b...

Page 150: ...terface status area contains an AF 100 INTERFACE X menu button When the AF100 INTERFACE x button is selected a menu is displayed with the items shown in Figure 67 and as explained below S800 Station Detail In the main section of the display a detail window shows specific information about each I O Station The right scroll bar is used to view other stations on the LAN The display is arranged in a 1...

Page 151: ...unknown N not ready R ready A active and B backup Station Border Border color is based on the letter shown in the status box M F and U red N orange B and R yellow and A green Border will flash when diagnostic messages are present Templet Name and Label Displayed as a single line tool tip when the cursor is over the station target The templet name is first and label is second Section 7 I O Displays...

Page 152: ...ation display Figure 69 shows information about the FCI Module each S800 I O Module and the I O Clusters that are configured for the I O Station Select an I O Device display target to get a S800 Device Display Use the context menu to move up to the LAN display Select the CI810 FCI box to get the CI810 Diagnostics Display similar to Figure 68 Figure 69 S800 Station Display S800 I O Display Target ...

Page 153: ...hown For the AC 460 this is LAN 1 4 and for the AC 410 this is LAN 1 or 2 Go back to the controller display to select a different LAN Station This field represents the number of the station Go back to the LAN display to select a different station Templet The logical device name created during database configuration is given in this field Label Descriptive label associated with templet RPT Faults I...

Page 154: ...VE indicates the FCI is in use BACKUP indicates the station is running redundantly and the backup is available READY indicates a transient state on the way to becoming ACTIVE or BACKUP FAILED means the FCI has stopped MISSING means there is not an FCI connected UNKNOWN is an indeterminate state sometimes seen as a transient state as the station changes state State User can change state to RESTART ...

Page 155: ...e I O Device Display I O modules not configured are not shown and blank space is left Module Type The component type is shown under the position number FCI CI810A CI820 module DI810 DO810 AI810 and etc for I O devices Status Boxes This shows a letter for the module status M missing F failed U unknown N not ready R ready A active B backup for redundant FCIs and O OSP state for output module types d...

Page 156: ...Figure 70 shows information for the device and each channel configured for the S800 I O module device diagnostics are not displayed Use the context menu to move up to the station and LAN displays From this display you can Change channel output value Select loop CCF tag and start loop faceplate Select TLL point tag and start TLL faceplate Select device configuration display Figure 70 S800 Device St...

Page 157: ...s the I O modules connected directly to the FCI Clusters 1 7 are for remote optical ModuleBus connections to the FCI Device This field represents the device number of the I O module of the cluster selected on this station Command Menu Set a device condition by pointing to the COMMAND drop down menu and selecting the desired action RESTART re initializes the device DEACTIVATE forces all data qualit...

Page 158: ...type that is inserted in this device number location Dev State This field shows the status of the I O module ACTIVE indicates the I O module is OK FAILED means the I O module has stopped MISSING means there is not an I O module installed Channel The input IN or output OUT and channel number of the device The text color for each channel is based upon the reporting of faults and the data quality Dar...

Page 159: ...ally the automatic transfer of outputs to the S800 module is enabled Actions On Module Communication As a module logs out a diagnostic message Block nnnn has logged out is sent and the associated data quality goes BAD As a result FCMs may take their configured action on output error and the automatic transfer of outputs to the module is disabled As a module logs in output values are read from the ...

Page 160: ...loops configured for warmstart that were warm started are shown with a white background Note that the loop warm started for a given channel is the loop whose tag is shown in the S800 I O Display If two or more loops reference the same channel only the last loop downloaded participates in warmstart and is listed on the S800 I O Display Operation Actions With warmstart configured for output FCMs and...

Page 161: ...loops reference the same channel only the last loop downloaded participates in warmstart and is listed on the S800 I O Display Section 7 I O Displays S100 I O Displays 3BUR002418 600 A 161 S100 I O Displays These S100 runtime displays relate to the Series 100 process interface as described in the S100 I O User s Guide where you can find additional information about S100 I O S100 LAN Display The S1...

Page 162: ...is given in this field Lan This field represents the number 1 to 4 of the local area network for all the primary I O boards listed below Mod For the AC 460 controller this field represents the position of the SC510 in the Futurebus backplane 3 4 7 8 11 12 For the AC 410 controller it represents the position of PM150 in the 410 controller This is always 1 Sub For the AC 460 controller this field co...

Page 163: ...he runtime status of the I O board ACTIVE indicates the primary I O board is in use processing I O signals FAILED means the primary I O board has stopped handling I O signals and the redundant I O board may be ACTIVE if configured UNKNOWN indicates not installed Red Dev If the I O board has a redundant partner configured the address of the redundant board is given The format LL DD indicates the la...

Page 164: ...t Dev Type Comm Addr and Dev State Channel The input IN or output OUT and channel number of the device If the value is green the Data Quality is good If the value is red the Data Quality is bad CCF Tag and TLL Tag The TAG is the name of the CCF loop or the TLL device that uses the channel If no loop or device is assigned to the channel then the field is blank Select the CCF or TLL Tag target area ...

Page 165: ...e corresponding MOD Faceplate or Loop FCM Display to find out what loops are affected 3 Make any necessary modifications to synchronize the control system with the current outputs 4 Commission any affected CCF output FCMs by setting their output modes to AUTO 5 Commission any affected CCF Device loops by issuing device commands as required S100 Warmstart Actions Upon Node Startup Upon node startup...

Page 166: ...d As a board logs in output values are read from the board If configured for warmstart the corresponding CCF output FCM or device loop for each channel on the board is warm started That is the output FCM is placed in the MANUAL mode and the output value from the board is written to its result attribute For the warm started device loop its DEV_CMND attribute is set to NO COMMAND Finally the automat...

Page 167: ...suing device commands if desired For continuous loops with Analog and Digital Output FCMs or device loops configured for warmstart that have been warm started the tag is shown with a white background When CCF loops with output FCMs configured for warmstart are placed in the MANUAL mode by either a warmstart or user action their tags are shown with a white background When device loops configured fo...

Page 168: ...EV to call up the PROFIBUS Device display Scroll display as necessary to view all devices up to 126 View the CI541 CTL status and its Diagnostic Display Switch the display to another LAN by returning to the AC460 display Figure 73 PROFIBUS LAN Overview Display PROFIBUS LAN Header Area The heading fields on the PROFIBUS LAN display are described below Devsub The controller DCN address where the PRO...

Page 169: ...fferent LAN Templet The logical device name created during database configuration is given in this field Label Descriptive label associated with templet Mod Sub This field represents the slot number of the of the controller carrier MODule and the SUBmodule location of the CI541 Bus Address This is the field bus address assigned to the CI541 State This field shows the status of the CI541 submodule ...

Page 170: ...yed as described below Station Item Description Device Number This is the number of the PROFIBUS Device as specified during database configuration 0 125 It is also a screen target to the device display Type The type can be DEV PROFIBUS Device and CTL Controller CI541 Status Box This shows a letter for the status M missing F failed U unknown R ready and A active Station Border Border color is based...

Page 171: ...gure 75 shows information about the modules for the selected device on the current LAN Select a display target to get a Module Channel Display The right scroll bar is used to view other modules Use the context menu to move up to the LAN display From this display you can Select a module display target MOD to call up the Module Channel display Scroll display as necessary to view all modules up to 64...

Page 172: ... A PROFIBUS Device Header Area The top of the PROFIBUS Device display identifies the device the associated AC460 controller and has other information as described below Devsub The controller DCN address where the device is located State This field shows the status of the controller as ACTIVE or DOWN ...

Page 173: ... the LAN display to select a different device Templet The logical device name created during database configuration is given in this field Label Descriptive label associated with templet State This field shows the status of the device ACTIVE indicates the device is in use READY indicates a transient state on the way to becoming ACTIVE FAILED means the device has stopped MISSING means there is not ...

Page 174: ... Displays 174 3BUR002418 600 A Device Detail In the main part of the display Figure 75 a detail window shows specific information about the devices and each associated I O module The right scroll bar is used to view other modules The information is displayed as described below see Figure 75for device graphic ...

Page 175: ...ROFIBUS Device MOD I O Module Status Box This shows a letter for the module status M missing F failed U unknown R ready and A active Device Border Border color is based on the letter shown in the status box M F and U red R yellow A green Border will flash when diagnostic messages are present Templet Name and Label Displayed as a single line tool tip when the cursor is over the station target The t...

Page 176: ...L tag association channel value data quality and diagnostics A module may have a mixture of data and I O types Use the context menu to move up to the device or LAN displays From this display you can Change channel output value Select loop CCF tag and start loop faceplate Select TLL point tag and start TLL faceplate View the module channel diagnostics Switch the display to another LAN by returning ...

Page 177: ...t LAN Device This field represents the device number Go back to the LAN display to select a different device Module This field represents the module number Go back to the device display to select a different module Templet The logical device name created during database configuration is given in this field Label Descriptive label associated with templet State Module This field shows the status of ...

Page 178: ...the data quality Dark Green data quality is good Red data quality is bad CCF Tag and TLL Tag The TAG is the name of the CCF loop or the TLL device that uses the channel If no loop or device is assigned to the channel then the field is blank Select the CCF or TLL Tag target area to get the appropriate MOD Faceplate Select the context menu for CCF or TLL tag to navigate to the Loop FCM or Loop Detai...

Page 179: ...ssing the Remote I O Displays for a SC Controller To access the Remote I O Displays for a SC Controller 1 Select the desired SC Controller Subsystem and access the Controller Subsystem Status Display 2 To use the Display Request button select the desired SC Controller select the Display Request button and then select the desired TRIO LAN to access the TRIO LAN Display 3 Alternately you can select ...

Page 180: ...r and Figure 79 for SC Controller show the status of the TRIO Field Bus and its attached blocks From this display you can Activate Deactivate Restart or Switch Bus Redundancy AC Controller Establish Terminate or Switch Bus SC Controller Enable Disable or Clear All Diagnostics Activate all blocks Figure 78 TRIO LAN Display AC ...

Page 181: ... TRIO is located State This field shows the status of the controller as ACTIVE or DOWN Name The controller subsystem part of the logical name created during database configuration Lan This field represents the number of the Local Area Network LAN for all the stations shown For the AC 460 this is LAN 1 4 For the SC Controller this is LAN 1 2 Go back to the controller subsystem status display to sel...

Page 182: ...all blocks on the Field Bus Bus A or Bus B Use the context menu associated with the Bus A or Bus B status and select the appropriate command to do the following Select Diagnostics and from the submenu select Enable Disable or Clear All to clear all diagnostics for every block on the bus Select Activate All to activate all inactive blocks on the bus either bus for the AC 460 This is equivalent to a...

Page 183: ...s on a bus with redundancy NOT AVAILABLE and bus state READY to change the bus state to ACTIVE and redundancy to AVAILABLE Mod Sub This field represents the slot number of the of the controller carrier Module and the Submodule location of the CI560 TRIO MIB submodule AC This field is N A on the SC controller State This field shows the status of the CI560 submodule AC ACTIVE indicates the submodule...

Page 184: ...ollowing information is displayed for each block Block The first cell in a row contains the block number 1 to 30 for the block on the bus This number is displayed as follows for the indicated conditions Red diagnostic s active Black no diagnostics active On the AC Controller if this cell has a black background you can use the context menu to get the Switch Bus command background is red if diagnost...

Page 185: ...turn to the subsystem status display to access other TRIO LAN Displays or use the context menu to select LAN Display Read or Clear Block Diagnostics Activate or Deactivate Block Status Open associated CCF or TLL faceplate for a channel click on CCF Tag or TLL Tag for desired channel The TRIO block display does not show the TLL tag if both CCF and TLL are configured Block Type The type is displayed...

Page 186: ...Figure 80 TRIO Block Display Analog Figure 81 TRIO Block Display Counter TRIO Block Display Section 7 I O Displays 186 3BUR002418 600 A ...

Page 187: ...60 this is LAN 1 4 For the SC Controller this is LAN 1 2 Go back to the controller display to select a different LAN Block This field identifies the block by its number 1 to 30 Return to the TRIO LAN Display to select another block Templet This field contains the name assigned to the block templet for this block Block Status There are four possible block states ACTIVE INACTIVE FAILED INIT FAIL fai...

Page 188: ...w diagnostic cleared system is checking to see if problem is corrected flashing color value forced with HHM yellow for good data quality red for bad CCF Tag Tag of the loop sending or receiving information from the channel If multiple tags access the same channel only one tag is displayed for it Note that for continuous loops with Analog and Digital Output FCMs or device loops configured for warms...

Page 189: ...I O display shows all configured direct I O for the selected SC or Model B Controller Value Current value of the channel expressed as one of the following 0 or 1 for digital counts or engineering value for analog degrees for thermocouples degrees or ohms for RTDs A or B for BSM Bus Switch Module status Normally writing an output causes the value to show red until the value is actually updated Howe...

Page 190: ... direct I O device in the Diagnostics window of the Controller Subsystem Status display From this display you can Return to the subsystem status display using the controller context menu right click anywhere except in a valid CCF or TLL tag field Open associated CCF or TLL faceplate for a channel click on CCF Tag or TLL Tag for desired channel CCF can use any I O type Analog Input Analog Output Pu...

Page 191: ...s described below Devsub The controller DCN address where the direct I O is located State This field shows the status of the controller as ACTIVE or DOWN If the controller goes down existing data is cleared Name The controller subsystem part of the logical name created during database configuration Channel Channel number The type of channel is indicated as IN Input OUT Output The colors used to di...

Page 192: ...value of the channel expressed as one of the following 0 or 1 for digital A real number for analog inputs and outputs If the channel type is input the Value field is not editable If the channel type is output the Value field is editable TRIOCONTROL is used for special access rights as described in 800xA for MOD 300 Configuration 3BUR002417 Normally writing an output causes the value to show red un...

Page 193: ...user This section describes basic operator activities to illustrate use of the MOD CCF displays in the 800xA System environment These activities include Selecting and viewing a control loop Monitoring process variable input and setpoint Monitoring output to the control device Monitoring alarm status Acknowledging alarms Changing the local setpoint Changing operating mode between manual and automat...

Page 194: ...select either the Loop Detail Display or the Loop FCM Display The same approach is also used for Diagnostic TCL and TLL displays Each object is identified by a user configured tag name Loop Detail Display Use the Loop Detail Display to enable disable and change limit parameters to change loop and tune parameters and to access the associated Loop FCM and Loop Faceplate Loop FCM Display Use the Loop...

Page 195: ...ut value The current output high limit and low limit values are shown on the Out bar graph scale PID loop is operating in automatic with local setpoint LOC To adjust local setpoint from the faceplate use the setpoint slider or the Sp entry field Loop Faceplate Manual Local Tag name could indicate that this faceplate applies to a PID control loop Current process temperature Pv is 31 72 C Current va...

Page 196: ...displays and control button operations resemble the example below indicates that the controller is in automatic mode Current output value cannot be changed in automatic indicates local setpoint is active Shaded setpoint value field and slide bar on setpoint graphic indicates that the local setpoint can be changed in automatic Use the slider or the entry value box Sp to change the value with confir...

Page 197: ...sembles the example shown in Figure 83 Control loop is in automatic mode Remote setpoint is being used Sp indicates the current setpoint value Remote setpoint cannot be changed locally Out indicates the current output value Output value cannot be changed in automatic Use the local button to switch back to Local from remote REM Setpoint can be changed when in local Use the manual button to switch f...

Page 198: ... remote setpoint is 200 00 with a ratio of 2 00 then the auto bias value will be 230 00 170 200 2 Using auto ratio a switch from local to remote setpoint will cause the ratio value to automatically adjust to the ratio between the active setpoint minus bias and the remote setpoint For example if the active setpoint is 170 00 and the remote setpoint is 200 00 with a bias of 230 00 then the auto rati...

Page 199: ...stem is shown in Figure 84 Feedforward control system provides a combination of feedforward and feedback control Feedback provides its normal function of holding the process at the setpoint Feedforward helps the feedback function by modifying the control output as required to cancel the effect of variations in the disturbance variable The feedforward input set up as a percent of output is multipli...

Page 200: ...r feedforward control resembles the example shown in Figure 85 indicates that the controller is in automatic with feedforward input indicates local setpoint indicates that the loop is in the Feedback mode Use the FF or FF FB buttons to switch to the Feedforward or Feedforward Feedback modes Figure 85 Faceplate and Control Buttons for feedforward control ...

Page 201: ...n Figure 86 Indicates that the controller is in manual Use Out field to adjust output in manual indicates local setpoint is active The local setpoint can be changed in automatic Use the setpoint slider or the value box SP to change the value with confirmation Press Auto button to transfer from manual to automatic control When the controller is in automatic the output value field is no longer highl...

Page 202: ... control in response to the active setpoint either local or remote If the control loop is configured for local setpoint tracking the local setpoint tracks the process value when the loop is in manual The process is always at the local setpoint when a transfer to automatic is made regardless of setpoint limits If the control loop does not have local setpoint tracking the local setpoint and the proc...

Page 203: ...ly tracks the Auto output value when the FCM is in Auto The output value can then be manipulated in the manual Indicates controller in automatic Indicates local setpoint is active Press Manual button to transfer from manual to automatic control When the controller is in manual the current output value can be adjusted Press Remote button to switch the setpoint from local to remote When the controll...

Page 204: ...wn in Figure 88 indicates that the controller is in manual Current output value display OP is in percent and can be adjusted using the output slider the OP entry menu indicates local setpoint is active and can be changed Use the slider or the value box SP to change the value with confirmation Since the controller is in manual the process is following the manual controller output and not the contro...

Page 205: ...o portions whereby a secondary control loop is formed around a major disturbance thus leaving only minor disturbances to be controlled by the primary controller Cascade Operation in Manual While in manual the slave setpoint tracks automatically remains equal to the slave process variable This characteristic is optional by enabling setpoint tracking on the slave It will eliminate the need for the c...

Page 206: ... bias The requirement for balancing the local and remote setpoint signals prior to placing the slave controller in cascade mode is eliminated It may also be desirable for the setpoint of the master to track the master process variable This depends on the desirability of permitting the setpoint of the master to vary indirectly in response to changes at the slave controller Cascade Operation in Auto...

Page 207: ... slave output at the reset rate The output of the master tracks the setpoint of the slave while the slave is in manual This ensures that the local slave setpoint and remote setpoint master output are in balance prior to placing the slave loop in cascade auto mode The setpoint of the master tracks the master process variable while the slave is in manual This causes the setpoint of the master to var...

Page 208: ...slave Viewing Alarms on MOD Loop Displays Alarms can be configured for each control loop to respond to an alarm condition on the process variable the control output and the deviation between the setpoint and process value as a normalized measured value into the PID FCM Alarm types can be high high high low low low or limit alarms The parameters of these alarms can be adjusted during operation on t...

Page 209: ...es that this display applies to the control output An output alarm is activated by reaching the output limit Flashing background indicates that the alarm is active and has not been acknowledged Acknowledge all alarms for a tag at once using either the active Alarm Acknowledge button or by using Acknowledge in the context menu Indicates an active acknowledged alarm current value is outside the trip...

Page 210: ...ndicates that the alarm is activated by increasing deviation Flashing background indicates that the alarm is active and has not been acknowledged Acknowledge all alarms for a tag at once using either the active Alarm Acknowledge button or by using Acknowledge in the context menu Steady colored background indicates an active acknowledged alarm current value is outside the trip point Background retu...

Page 211: ...ontinuous loop is caused by any one of the following conditions Loop is off An FCM is off Output of an FCM which is not a PID or AM Controller FCM is in MANUAL Output mode of a PID Controller FCM or an AM Controller FCM is not in its design state as defined on its templet Setpoint mode of a PID Controller FCM is not in its design state as defined on its templet When set to YES the system checks fo...

Page 212: ...Viewing Abnormal State on MOD Loop Displays Section 8 Operation Examples 212 3BUR002418 600 A ...

Page 213: ...ss is not successful a message describing the problem is displayed After corrective action is taken you can re try the save process Saving changes both the active database in the subsystem containing the loop and the installed database However the original configuration templets are not modified until the database is decompiled Loop Definition Templet This section describes the active runtime fiel...

Page 214: ...alue entered on this field is automatically rounded up to the next higher multiple of the base rate Loop Definition Template entry examples PROCESSING PHASE Field Use this field to distribute processing for the loops about the processing interval This field the PROCESSING RATE and BASERATE fields interact to determine the loop processing rate Valid entry is any integer from 0 to PROCESSING RATE BA...

Page 215: ...ntry is any string of up to 6 alphanumeric characters for example GPM PSIG LOOP STATE Field This field determines whether the loop is processed When LOOP STATE is OFF the loop processor ignores the loop Valid entries are ON process the loop OFF do not process the loop SUPPRESS ALARMS Field This field determines if the loop processor checks that alarms defined by this loop are active Valid entries ...

Page 216: ...eater than the high limit and clears when the measured variable decreases to the value of the high limit minus the alarm deadband Valid entry is a decimal number HIGH ALARM PRIORITY Field This field sets the alarm priority which determines how the alarm is displayed You can specify different colors to distinguish high medium and standard priority alarm indicators Valid entries are STD standard pri...

Page 217: ... ALARMS Field This field specifies whether the rate alarm for the measured variable is enabled The rate alarm becomes active when the measured variable changes by an amount greater than the specified rate limit from one loop processing scan to the next Valid entries are YES enable the alarm NO disable the alarm RATE LIMIT Field This field defines the rate alarm limit for the measured variable The ...

Page 218: ...e YES enable the alarm NO disable the alarm HIHI LIMIT Field This field defines the high high alarm limit for the measured variable The alarm becomes active when the measured variable becomes equal to or greater than the high high limit and clears when the variable decreases to the value of the high high limit minus the alarm deadband Valid entry is a decimal number HIHI ALARM PRIORITY Field This ...

Page 219: ...re stores alarm event history messages for the loop in a default unit file Valid entry is the name of a unit as defined in the TEMPLET NAME field on the Unit Master Templet for the unit COMP MODE RESTRICT Field COMP MODE computer mode is used to specify how certain PID or an AM controller loop parameters are handled During configuration of the Loop Definition Templet you can set loop control to ei...

Page 220: ...fies whether the specified loop s are processed when the loop is processed normally or when it is demand scanned or both Valid entries are NONE no extra processing NORMAL process loops in the LOOPS TO PROCESS edit window when this loop is normally scanned DEMAND process loops in LOOPS TO PROCESS edit window when this loop is demand scanned BOTH process loops in LOOPS TO PROCESS edit window when th...

Page 221: ...p appears on the Alarm Event Log but only the first 12 characters are shown when the descriptor appears on a display PROCESSING RATE Field This field specifies the loop processing rate This field and the CCF BASE RATE field interact to determine the loop processing rate Scan Rate Loop Detail display equals the Processing Rate divided by the Base Rate If the Base Rate is 0 5 and the Processing Rate...

Page 222: ... when the data base is compiled and the phase is set to 0 INVERTED INPUTS Field The INVERTED INPUTS field is used to make modifications to the device handling algorithm by changing the bit patterns of the feedback input signals Valid entry is a decimal number identifying which bits are inverted Example If a device type supports the following 3 feedback states 1 0 1 0 1 0 0 1 0 1 0 1 entering a 4 t...

Page 223: ...timeout occurs Valid entries are NONE no change STATE set to entry in the DEVICE STATE field DEV_STAT If STATE is specified but the current state does not correspond to a valid command the action taken is the entry in the SAFE COMMAND field if a command is specified in that field SAFE CMD action taken is the entry in the SAFE COMMAND field PREVIOUS CMD set to the last successful previous command S...

Page 224: ... at the Operator Stations or Multibus based consoles and on the Alarm Event Log Valid entries are YES enable posting NO disable posting SUPPRESS ALARMS Field This field specifies whether the loop processor checks to see if the alarms defined by this loop are active Valid entries are YES suppress alarms do not check NO do not suppress alarms DEVICE OVERRIDE Field This field overrides the feedback t...

Page 225: ...run on a host computer The effect of the Simulation Mode on device processing depends on the state of the DEVICE OVERRIDE field on the Device Loops Templet Valid entries are ON device simulation mode is on OFF device simulation mode is off INITIAL MODE Field This field determines the output mode for the loop at the start up Valid entries are AUTO loop is under the control of TCL or a supervisory p...

Page 226: ...and parameter DEV_CMND Valid entries are NONE no change to device command but abnormal state change alarm is generated STATE device command DEV_CMND is set to value of Device State DEV_STAT abnormal state change alarm is generated SAFE COMMAND device command DEV_CMND is set to entry in the SAFE COMMAND field abnormal state change alarm is generated NONE NA no change no abnormal state change alarm ...

Page 227: ...ield This field sets the time for the device loop s feedback timer When the loop sends a command to the device the feedback timer starts counting down The loop starts checking its input to see if the device has gone to the desired state A timeout alarm is generated if the device has not entered the desired state by the time the timer expires Valid entry is an amount of time in whole seconds DEV IN...

Page 228: ...or explanations of these features Valid entry is a command from the descriptor set defined for the device on its Device Descriptor Templet PERMITTED COMMAND Field This field specifies the only possible command sent to the device as part of device interlock See the description of the DEV INTERLOCK ENABLE field for an explanation of this feature Valid entry is a command from the descriptor set defin...

Page 229: ...is field specifies whether cutout is enabled for the loop Cutout allows an FCM of this or another loop to control the posting of the alarms Valid entry is YES enable the cutout feature NO disable the cutout feature OUTPUT ERROR ACTION Field This field specifies the actions taken when the output driver fails Valid entries are NOTHING continue normal processing GOTO BACKUP processing goes to the Bac...

Page 230: ...hanges for this device DMND PROCESSING MODE Field LOOPS TO PRESCAN Field and LOOPS TO PROCESS Field The DMND PROCESSING MODE field LOOPS TO PRESCAN field and LOOPS TO PROCESS fields allow you to specify up to 5 loops to process along with this loop The DMND PROCESSING MODE field is used to specify whether the loops are processed when this loop is normally processed or when it is demand scanned or ...

Page 231: ...e Templets are needed PROCESSING RATE Field The field indicates the multiple of the loop processing rate at which the controller algorithm is executed If the default 1 is used the FCM is processed each time the loop is processed If the field is changed to 2 the FCM is processed every second time the loop is processed Valid entry is an integer multiple of the loop processing rate specified on the L...

Page 232: ...ff STD reset response is turned on and is operating with the standard algorithm It is used with either adaptive gain or adaptive reset and or external feedback Manual reset must be turned off MICROSCAN reset response is turned on and is operating with the Microscan algorithm It is used with either adaptive gain or adaptive reset but not with external feedback Manual reset must be turned off LIMITE...

Page 233: ... are MAN start in the Manual mode AUTO start in the Auto mode INITIAL OUTPUT Field This field specifies the value of the output at startup time Valid entry is a value in percent INITIAL SETPOINT Field This field indicates the value of the setpoint at start up time Valid entry is a value scaled in engineering units INITIAL SETPT MODE Field This field specifies the setpoint mode at start up time Val...

Page 234: ... BALANCE manual reset response is enabled and used to provide bumpless transfers to Auto mode NO BALANCE manual reset response is enabled but not used to provide bumpless transfers MANUAL RESET VALUE Field This field specifies the initial value of the manual reset Valid entry is a value between 127 and 127 MAN RESET HIGH LIMIT Field This field specifies the high limit for the manual reset value Va...

Page 235: ... signal or square of the error signal Valid entries are NO integral calculation uses the error signal YES integral calculation uses the square of the error signal GAIN LIMIT Field This field defines a limit for the gain of the controller above which a low pass filter is activated Valid entry is a value set between 0 0 and 125 0 FF FB MODE Field The feedforward and feedback options are specified in...

Page 236: ...d off MAN OUT controller FCM goes to the Manual output mode NONE FCM continues processing according to its configuration ACTION ON BAD SETPT Field This field specifies the action to take if the setpoint signal goes to a BAD data quality Valid entries are NONE no special action is taken MAN OUT output mode is switched to Manual LOC SPT setpoint mode goes to Local FCM OFF FCM is turned off SETPOINT ...

Page 237: ...utput mode to enter when the mode returns from Track Valid entries are PREVIOUS go to the mode active before the output began tracking MANUAL go to the Manual mode AUTO go to the Auto mode OUTPUT MODE ON FAIL Field This field specifies the output mode to enter upon a remote link failure Valid entries are PREVIOUS go to the mode active before the remote link failure MANUAL go to the Manual mode AUT...

Page 238: ...emote setpoint bias to prevent process bumps when the setpoint state is switched to remote Valid entries are RATIO FCM automatically manipulates ratio value of remote setpoint to balance transitions to Remote BIAS controller automatically manipulates bias value of remote setpoint to balance transitions to Remote BOTH the system can manipulate both bias and ratio OFF the balance feature is not used...

Page 239: ...es the high limit for the bias values This limit only applies to the bias modes specified in the LIMITED BIAS MODES field Valid entry is a percentage value BIAS LOW LIMIT Field This field specifies the low limit for the bias values This limit only applies to the bias modes specified in the LIMITED BIAS MODES field Valid entry is a percentage value RATIO MODE Field This field specifies which remote...

Page 240: ...fied in the LIMITED RATIO MODES field Valid entry is a value in engineering units RATIO LOW LIMIT Field This field specifies the low limit for the ratio values This limit only applies to the ratio modes specified in the LIMITED RATIO MODES field Valid entry is a value in engineering units INC MINIMUM OUTPUT Field This field specifies the critical value for the incremental PID algorithm The critica...

Page 241: ...ng units which must be less than or equal to 0 zero INC UPPER DEADBAND Field This field specifies the upper boundary of the deadband for the incremental PID algorithm Valid entries are a value in engineering units which must be greater than or equal to 0 zero OUTPUT HIGH LIMIT Field This field specifies the high limit for the output signal It is used to limit the output when the FCM is in the mode...

Page 242: ...ot applicable for manual mode It is also the alarm limit if the entry in the OUTPUT RATE ALARMS field is YES Valid entry is a number between 0 0 and 128 0 SETPOINT HIGH LIMIT Field This field specifies the high limit for the setpoint values This limit only applies to the setpoint modes specified in the LIMITED SETPT MODES field It is also used as an alarm limit when the entry in the SETPOINT HIGH ...

Page 243: ...qual to or greater than the value entered in the OUTPUT HIGH LIMIT field The alarm clears when the output decreases to a value equal to or less than the value of the high limit minus the alarm deadband Valid entries are YES enable the alarm NO disable the alarm OUTPUT LOW ALARMS Field This field specifies whether the low alarm on the output signal is enabled If this field is YES an alarm occurs wh...

Page 244: ... to or less than the value entered in the SETPOINT LOW LIMIT field Valid entries are YES enable the alarm NO disable the alarm BAD SETPOINT ALARMS Field This field specifies whether the bad data quality alarm for the setpoint signal is enabled If this field is YES an alarm occurs when the data quality of the setpoint goes to BAD Valid entries are YES enable the alarm NO disable the alarm DEVIATION...

Page 245: ...ITY Valid entries are STD standard priority MED medium priority HIGH high priority Adaptive Gain The PID Controller FCM uses adaptive gain and or adaptive reset to adapt to changing process conditions This templet is a child of the PID Controller FCM Templet HIGH LIMIT Field The field specifies the overall high limit for gain or reset when any adaptive function is used Valid entry is a decimal val...

Page 246: ... function is applied Valid entry is a decimal value REMOTE HIGH LIMIT Field This field specifies the maximum allowed value for the remote variable adaptive contribution to the overall gain or reset Valid entry is a decimal number REMOTE LOW LIMIT Field This field specifies the minimum allowed value for the remote variable adaptive contribution to the overall gain or reset Valid entry is a decimal ...

Page 247: ...ier of the base gain or reset associated with the lower breakpoint BP1 of the remote variable adaptive function Valid entry is a decimal value OUTPUT UPPER BRKPT Field This field specifies the upper breakpoint BP2 for the output adaptive function The gain or reset starts to change when the size of the output becomes greater than the upper breakpoint Valid entry is a decimal value in percent OUTPUT...

Page 248: ... the upper breakpoint BP2 for the process adaptive function The gain or reset starts to change when the size of the process variable becomes greater than the upper breakpoint Valid entry is a decimal value in percent PROCESS LOWER BRKPT Field This field specifies the lower breakpoint BP1 for the process adaptive function The gain or reset changes when the process variable becomes less than the low...

Page 249: ...ERROR LOWER BRKPT Field This field specifies the lower breakpoint BP1 for the error adaptive function The gain or reset changes when the error becomes less than the lower breakpoint Valid entry is a decimal value in percent ERROR UPPER FACTOR Field This field specifies the multiplier of the base gain or reset associated with the upper breakpoint BP2 of the error adaptive function Valid entry is a ...

Page 250: ...VALUE ON FAIL Field CHANGE OUTPUT ON FAIL Field BALANCE MODE Field BIAS MODE Field LOCAL BIAS Field LIMITED BIAS MODES Field BIAS HIGH LIMIT Field BIAS LOW LIMIT Field RATIO MODE Field LOCAL RATIO Field LIMITED RATIO MODES Field RATIO HIGH LIMIT Field RATIO LOW LIMIT Field LIMITED OUTPUT MODES Field OUTPUT HIGH LIMIT Field OUTPUT LOW LIMIT Field OUTPUT ALARM DB Field OUTPUT RATE LIMIT Field OUTPUT...

Page 251: ...output value of the FCM in effect upon startup of the FCM Valid entry is a decimal number Analog Input FCM COUNTS LOWER BOUND Field This field specifies the lower limit for the range of counts It corresponds to the engineering units lower bound Valid entry is an integer between 0 and 32767 COUNTS UPPER BOUND Field This field specifies the upper limit for the range of raw counts It corresponds to t...

Page 252: ...cifying which bits are inverted Pulsed Input FCM ENGU LOWER BOUND Field This field specifies the lower limit of the engineering units range Valid entry is a decimal number ENGU UPPER BOUND Field This field specifies the upper limit of the engineering units range Valid entry is a decimal number Pulsed Input Time Derivative FCM CONSTANT Field This field specifies the scaling constant You can choose ...

Page 253: ...f the FCM Valid entry is a decimal number BAD INPUTS ACCEPTED Field This field specifies the data qualities acceptable for the input signal to the FCM and the action to take if the data quality becomes unacceptable Valid entries are YES GOOD and BAD are acceptable data qualities NO GOOD is the only acceptable data quality for the input ACTION ON ERROR Field This field defines the action taken if t...

Page 254: ...he signal NO do not invert the signal ENGU OR PERCENT Field This field specifies whether the FCM input is converted from engineering units or percent This determines which scaling equation is used to change input to counts Valid entries are ENGU convert input from engineering units PERCENT convert input from percent COUNTS LOWER BOUND Field This field specifies the raw counts lower limit correspon...

Page 255: ...cations to the bit patterns output by the Digital Output FCM Valid entry is a decimal number translated into binary bit positions specifying which bits are inverted Pulse Duration Output FCM COUNTS UPPER BOUND Field This field defines the length for the pulse duration Pulse Duration Output or the number of pulses Pulse Train Output to treat as 100 of range Valid entry is an integer for the pulse d...

Page 256: ...r state mnemonics available for TCL for this parameter BAD INPUTS ACCEPTED Field This field specifies the data qualities acceptable for the input signal to the FCM and the action to take if the data quality becomes unacceptable Valid entries are YES GOOD and BAD are acceptable data qualities NO GOOD is the only acceptable data quality for the input Math Related Calculator FCMs This section describ...

Page 257: ...r polynomial curve fitting linearization for up to a third order fit Constant 1 through Constant 4 Fields These fields specify the values of the constants Valid entry is any number Average FCM The Average FCM finds the arithmetic average of up to 4 inputs You can use constant factors to scale the inputs Constant 1 through Constant 4 Fields These fields specify the values of the constants Valid ent...

Page 258: ...alid entry is any number Natural Logarithm FCM The Natural Logarithm FCM calculates a scaled natural logarithm for an optionally scaled input signal You can use the constant factors for scaling Constant 1 and Constant 2 Fields These fields specify the values of the constants Valid entry is any number Exponentiation FCM The Exponentiation FCM raises one input signal to a power determined by another...

Page 259: ...fields Modified Square Root Linearization Normalize Inverse Normalize Scale Input Flow Calculation Temperature Compensation Ratio Bias Modified Square Root FCM The Modified Square Root FCM calculates the square root of its input for input values greater than 2 47 of range For input values less than 2 47 including negative input values the result is modified to be linear near zero and to handle neg...

Page 260: ...in degrees C Celsius F Fahrenheit K Kelvin or R Rankine INVERSE AXIS Field This field specifies either normal or inverted axis Valid entries are NO do not invert axis input value is the x value in the linearization table corresponding y value becomes the result YES invert axis input value is the y value in the linearization table corresponding x value becomes the result Normalize FCM The Normalize...

Page 261: ...GE Field This field specifies the top of range value for engineering units range of the result Valid entry is any number SCALING Field This field specifies the scaling factor Valid entry is any number Scale Input FCM The Scale FCM converts a value from one engineering unit scale to its corresponding value in another engineering unit scale OLD LOW RANGE Field This field specifies low range value of...

Page 262: ...es the flow temperature It is used when TEMP LOC REM is LOCAL The temperature must be absolute deg Rankine where deg Rankine deg Fahrenheit 459 69 Valid entry is any number greater than 0 FLOWING PRESSURE Field This field specifies the flow pressure It is used when PRES LOC REM is LOCAL Valid entry is any number greater than 0 The entry must be in PSIA FLOWING DENSITY Field This field specifies th...

Page 263: ...TEMP CONSTANT Field This field specifies the design temperature constant Valid entry is any number FLOW CONSTANT Field This field specifies the value of the flow constant Valid entry is any number DEN VS TEMP CONSTANT Field This field specifies the value of the density versus temperature constant Valid entry is any number VOLUME OR MASS FLOW Field This field specifies whether the FCM uses volumetr...

Page 264: ...r Time Related Calculator FCMs This section describes the active runtime fields on the following time related calculator FCM templets See Common Calculator FCM Fields on page 256 for common fields Time Derivative Time Integration First Order Filter Totalizer Lead Lag Filter Dead Time Dead Time Compensation Timer Counter Delay Timer Time Derivative FCM The Time Derivative FCM performs a first order...

Page 265: ...ue of the lag time Valid entry is an amount of time in minutes Totalizer FCM The Totalizer FCM calculates a total by adding or subtracting its current input from the total of the previous input values You can also compare the total to two user defined values SCALE FACTOR Field This field specifies the value of the scaling constant Valid entry is any number TRIP POINT 1 Field This field specifies t...

Page 266: ... input is discarded without being applied to the total Valid entry is a number greater than or equal to 0 Lead Lag Filter FCM The Lead Lag Filter FCM provides the capability for combined lead lag filter conditioning LAG TIME Field This field specifies the value of the lag time Valid entry is an amount of time in minutes PREACT TIME Field This field specifies the value of Pre act time Valid entry i...

Page 267: ...his field specifies the value of Pre act time Valid entry is a number in minutes PREACT GAIN Field This field specifies the value of Pre act gain Valid entry is any number Timer FCM The Timer FCM provides for triggering an action after a specified elapsed time or at a specified time of day Both single shot and periodic timing are supported PERIODIC TIME Field This field specifies period length It ...

Page 268: ...that the count is compared to When the count is less than the value in this field the data base flag TIM_EXP1 is 0 When the count is greater than or equal to the value in this field TIM_EXP1 is set to 1 Valid entry is a decimal number greater than or equal to 0 HIGHER TIME LIMIT Field This field specifies a reference value that the count is compared to When the count is less than the value in this...

Page 269: ...the defined inputs is 0 Result 0 BIT Bits 1 of all inputs are ANDed together to get Bit 1 of the result Bits 2 are ANDed together and so on The result is a decimal number equivalent to the bit pattern resulting from the ANDing Bits in the inputs are shifted to the right or left prior to ANDing The inputs for bitwise type of FCM are decimal numbers translated into bit patterns by the FCM For exampl...

Page 270: ...t is a decimal number equivalent to the bit pattern resulting from the ORing Bits in the inputs are shifted to the right or left prior to ORing The inputs for bitwise type of FCM are decimal numbers translated into bit patterns by the FCM For example an input of 9 means that bits 0 and 4 are 1 and the rest of the bits are 0 SHIFT COUNT 1 through 4 Fields These fields specify how many places the in...

Page 271: ... an input of 9 means that bits 0 and 4 are 1 and the rest of the bits are 0 Exclusive OR The Exclusive OR FCM performs the exclusive OR function on two inputs LOGICAL BITWISE Field Logical In logical mode all non zero inputs 1 The result is determined by the following truth table Inp1Inp2 Result 0 0 0 0 1 1 1 0 1 1 1 0 BIT Bits 1 of the inputs are exclusively ORed together to get Bit 1 of the resu...

Page 272: ...ns there as long as inp2 is 1 Real Compare FCM This FCM compares two analog signals and provides a logical output if a specified condition is met COMPENSATION CONSTANT Field This field specifies the comparison constant when INPUT SOURCE 2 is not specified Valid entry is any number COMPARE OPERATOR Field This field specifies the operator for the comparison constant Valid entries are EQ equal to NE ...

Page 273: ... runtime fields Selector Put Generic Value Get Generic Value Select Next Redundant Signal Selector Input Limiter User Calculations Data Entry String User Math Block MOD30_MOD300_MAP Selector FCM The Selector FCM can compare up to four input signals and choose one of them for the output SELECTOR MODE Field This field configures the selector for serial parallel or delta selection Valid entries are S...

Page 274: ...ed destination parameter in the Controller Multibus I O Data Processor or Interface Subsystem containing the FCM The result may come from either the INPUT SOURCE field or the CONSTANT TO PUT field There are two ways to specify location of the destination parameter OUTPUT DESTINATION or RELATION name In most cases OUTPUT DESTINATION is recommended CONSTANT TO PUT Field This field specifies a consta...

Page 275: ... the ATTRIBUTE NAME field This field specifies the type of alarm to check It must be appropriate for the entry in the ATTRIBUTE NAME field For example the SETPT HI entry for this field should only be used when the entry in the ATTRIBUTE NAME field is a setpoint You can check only one alarm for a variable The alarm status becomes the result of the Get FCM Valid entries are NONE do not obtain an ala...

Page 276: ...Field This field specifies the value for the comparison constant Input 1 is compared to the comparison constant if no entry is made to the INPUT SOURCE 2 field Valid entry is any number COMPARE OPERATOR Field This field specifies the value for the comparison constant Valid entries are EQ equal to NE not equal to GT greater than GE greater than or equal to LT less than LE less than or equal to Redu...

Page 277: ...nts the flag from being continuously set and reset if the input oscillates around one of the limits HI LIMIT Field This field specifies the value of the high limit Valid entry is any number greater than the value of the low limit LO LIMIT Field This field specifies the value of the low limit Valid entry is any number less than the value of the high limit ENABLE HIGH LIMIT Field This field specifie...

Page 278: ...string is set during configuration not tuneable from the templet The string can be accessed by TCL programs via tag FCM access that is tag STR SVALUE You can also use it on custom displays The string can be accessed even if the loop with the FCM is turned off The result of the String FCM is a numerical value not directly related to the string User Math Block FCM The User Math Block FCM is used to ...

Page 279: ...ry is a real number LOW LIMIT Field This field specifies a low limit for the result of the FCM if the entry in the ENABLE LOW LIMIT field is YES The limit applies to the final result only not intermediate calculations When the result is limited the LO_FLAG attribute is set to 1 TCL can set events to watch this flag or you can acquire its value using Get FCMs Valid entry is a real number ENABLE HIG...

Page 280: ...ndard Deviation FCM Non Rate Periodic Total FCM Periodic Average FCM Periodic Maximum FCM Periodic Minimum FCM Periodic Rate Total FCM Common Fields INITIAL MODE Field This parameter specifies if the output mode of the FCM is set at MAN manual or AUTO INITIAL OUTPUT Field This parameter specifies the result of the FCM calculations and can be changed if the output mode is manual There are no state ...

Page 281: ...FCMs Valid entries are MONTHLY LAST DAY WEEKLY DAILY HOURLY MINUTES PERIOD SIZE Field This field specifies the size of the period It is used with the PERIOD UNIT field to specify the period of the FCM Section 10 4 7 Discussion describes how the period is used by periodic Extended Processing FCMs Valid entry is an integer from 1 to 99 NUM OF INVALID SAMPLES Field This field specifies the maximum nu...

Page 282: ...n Non Rate Periodic Total FCM The Non Rate Periodic Total FCM determines the total value of the input over a specified time period The time period is synchronized with the real time clock minutes hours and so on Periodic Average FCM The Periodic Average FCM determines the arithmetic average of an input signal over a selected time period The time period is synchronized with the real time clock minu...

Page 283: ...odule AI835 on page 292 Analog Output Module AO810 AO890 on page 295 Bipolar Analog Output Module AO820 on page 298 Digital Input Modules DI810 and DI890 DI810 on page 301 Digital Input Module for AC 400 DI814 on page 304 Digital Input Module DI820 on page 305 Digital Input Module DI821 on page 307 Digital Output Module DO810 on page 309 Digital Output Module DO814 on page 313 Digital Output Modul...

Page 284: ...the station where this module is located The cluster connected directly to the FCI is number zero 0 The number in this field is 0 7 Default value is 0 DEAD BAND 01 through 08 Enter the difference in successive signal count values before a new value will be sent The valid values are NONE 0 1 3 7 15 31 63 127 255 511 1023 2047 4095 8191 and 16383 The default value is NONE FILTER TIME 01 through 08 E...

Page 285: ... I O module directly next to the FCI is number 1 Default value is 1 POWER LINE FREQUENCY Enter the power line frequency to filter out notch the signal The valid values are 16 50 and 60 The default value is 60 RANGE 01 through 08 The valid values are 0 10V not valid for AI890 0 20mA For the AI890 module enter a description that includes the module type for future reference to help alleviate confusi...

Page 286: ...the AI890 Module The default value is 0 zero VALUE CYCLE TIME Enter the channel value update period msec over the fieldbus Refer to the S800 I O User s Guide for details of AF 100 loading in relation to cycle time The valid values are 1 2 4 8 16 32 64 128 256 512 1024 2048 and 4096 The default value is 128 AI820 S800 I O AI820 Differential Analog Input Module Templet ACTIVE 01 through 04 If the ch...

Page 287: ...ue is 0 DEAD BAND 01 through 04 Enter the difference in successive signal count values before a new value will be sent The valid values are NONE 0 1 3 7 15 31 63 127 255 511 1023 2047 4095 8191 and 16383 The default value is NONE FILTER TIME 01 through 04 Enter the lowpass filter time constant msec for each channel The possible range is 20 to 65535 The default value is 20 20msec LABEL Enter a char...

Page 288: ...es are 16 50 and 60 The default value is 60 RANGE 01 through 04 The valid values are 10 10V 20 20mA 5 5V The default range is 20 20mA REPORT FAULTS 01 through 04 If channel faults are to be reported enter a YES if not enter a NO The default value is YES RESERVED OPTIONS This field reserved for future use A zero 0 should be entered as a default value If positions are to be used for spare MTUs the s...

Page 289: ... will not be used enter a NO The default value is YES AUTO DOWNLOAD To automatically download the configuration to the I O module enter a YES In the future if the configuration is to be loaded locally enter a NO Default value is YES CLUSTER Enter the I O device cluster of the station where this module is located The cluster connected directly to the FCI is number zero 0 The number in this field is...

Page 290: ...ify the AI830 Module of the station The name may contain up to 20 characters POSITION Enter a number from 1 to 12 representing the position of the I O module relative to the FCI The I O module directly next to the FCI is number 1 Default value is 1 POWER LINE FREQUENCY Enter the power line frequency to filter out notch the signal The valid values are 16 50 and 60 The default value is 60 RANGE 01 t...

Page 291: ...s and defaults for each sensor type Pt100 80 80 C 112 176 F 200 250 C 328 482 F 200 850 C 328 1562 F corrected default Ni100 60 180 C 76 356 F corrected default Ni120 80 260 C 112 500 F corrected default Cu10 100 260 C 148 500 F corrected default Resistor 0 400 OHMS corrected default REPORT FAULTS 01 through 08 If channel faults are to be reported enter a YES if not enter a NO The default value is...

Page 292: ...ES If the channel will not be used enter a NO The default value is YES AUTO DOWNLOAD To automatically download the configuration to the I O module enter a YES In the future if the configuration is to be loaded locally enter a NO Default value is YES CLUSTER Enter the I O device cluster of the station where this module is located The cluster connected directly to the FCI is number zero 0 The number...

Page 293: ...annel 08 will be used as the Cold Junction Compensation value enter COLD for channels 01 through 07 and for channel 08 also enter COLD If the junction compensation will use the value entered in the JUNCTION TEMP field enter FIXED The valid values are COLD or FIXED The default entry is COLD JUNCTION TEMPERATURE Enter the fixed temperature at the junction of the thermocouple wire and the terminals o...

Page 294: ...gnal The valid values are 16 50 and 60 The default value is 60 REPORT FAULTS 01 through 08 If channel faults are to be reported enter a YES if not enter a NO The default value is YES RESERVED OPTIONS This field reserved for future use A zero 0 should be entered as a default value TC TYPE 01 through 08 Enter the type of sensor that will be connected to each channel When channel 08 serves as the Col...

Page 295: ...riod msec over the fieldbus Refer to the S800 I O User s Guide for details of AF 100 loading in relation to cycle time The valid values are 1 2 4 8 16 32 64 128 256 512 1024 2048 and 4096 The default value is 128 AO810 AO890 The S800 I O AO810 Analog Output Module templet is also used for the AO890 except as noted in the field entry descriptions ACTIVE 01 through 08 If the channel is to be active ...

Page 296: ...8 16 32 64 128 256 512 1024 2048 and 4096 The default value is 128 LABEL Enter a characteristic name to identify the AO810 or AO890 Module of the station The name may contain up to 20 characters OSP HOLD 01 through 08 If an OSP TIMEOUT has occurred will the AO810 hold the last value during OSP Enter a YES if it will or enter a NO if an OSP VALUE will be used The Default is NO OSP TIMEOUT Enter the...

Page 297: ... 12 representing the position of the I O module relative to the FCI The I O module directly next to the FCI is number 1 Default value is 1 REPORT FAULTS 01 through 08 If channel faults are to be reported enter a YES if not enter a NO The default value is YES RESERVED OPTIONS Used to select I O module type Enter 0 zero for the AO810 Module 274333696 for the AO890 Module The default value is 0 zero ...

Page 298: ... will not be used enter a NO The default value is YES AUTO DOWNLOAD To automatically download the configuration to the I O module enter a YES In the future if the configuration is to be loaded locally enter a NO Default value is YES CLUSTER Enter the I O device cluster of the station where this module is located The cluster connected directly to the FCI is number zero 0 The number in this field is...

Page 299: ... will be used The Default is NO OSP TIMEOUT Enter the time msec after communications is lost that outputs go to OSP value The valid values are OFF 256 512 and 1024 The default value is 1024 OSP VALUE 01 through 04 Enter the channel value in counts to output after an OSP TIMEOUT If the OSP HOLD has been selected as the OSP value then this field entry is ignored The default is 0 The valid values are...

Page 300: ... reported enter a YES if not enter a NO The default value is YES RESERVED OPTIONS This field reserved for future use A zero 0 should be entered as a default value VALUE CYCLE TIME Enter the channel value update period msec over the fieldbus Refer to the S800 I O User s Guide for details of AF 100 loading in relation to cycle time The valid values are 1 2 4 8 16 32 64 128 256 512 1024 2048 and 4096...

Page 301: ...a NO The default value is YES AUTO DOWNLOAD To automatically download the configuration to the I O module enter a YES In the future if the configuration is to be loaded locally enter a NO Default value is YES CLUSTER Enter the I O device cluster of the station where this module is located The cluster connected directly to the FCI is number zero 0 The number in this field is 0 7 Default value is 0 ...

Page 302: ...of the I O module relative to the FCI The I O module directly next to the FCI is number 1 Default value is 1 REPORT FAULTS 01 through 16 If channel faults are to be reported enter a YES if not enter a NO The default value is YES RESERVED OPTIONS Used to select I O module type Enter 0 zero for the DI810 Module 542769152 for the DI890 Module decimal value for all channels without supervision see tab...

Page 303: ...th Supervision hex number 205A000F converted to decimal 542769167 Channels 8 through 5 with Supervision hex number 205A00F0 converted to decimal 542769392 Channels 7 2 and 1 with Supervision hex number 205A0043 converted to decimal 542769219 VALUE CYCLE TIME Enter the channel value update period msec over the fieldbus Refer to S800 I O User s Guide for details of AF 100 loading in relation to cycl...

Page 304: ...o the I O module enter a YES In the future if the configuration is to be loaded locally enter a NO Default value is YES CLUSTER Enter the I O device cluster of the station where this module is located The cluster connected directly to the FCI is number zero 0 The number in this field is 0 7 Default value is 0 FILTER Enter the input filter time in msec The valid values are 2 4 8 and 16 The default ...

Page 305: ...If channel faults are to be reported enter a YES if not enter a NO The default value is YES RESERVED OPTIONS This field reserved for future use A zero 0 should be entered as a default value VALUE CYCLE TIME Enter the channel value update period msec over the fieldbus Refer to S800 I O User s Guide for details of AF 100 loading in relation to cycle time The valid values are 1 2 4 8 16 32 64 128 256...

Page 306: ... directly to the FCI is number zero 0 The number in this field is 0 7 Default value is 0 FILTER Enter the input filter time in msec The valid values are 2 4 8 and 16 The default value is 2 LABEL Enter a characteristic name to identify the DI820 Module of the station The name may contain up to 20 characters MONITOR POWER To monitor process power source enter a YES if not needed enter a NO Default V...

Page 307: ... update period msec over the fieldbus Refer to S800 I O User s Guide for details of AF 100 loading in relation to cycle time The valid values are 1 2 4 8 16 32 64 128 256 512 1024 2048 and 4096 The default value is 128 DI821 ACTIVE 01 through 08 If the channel is to be active enter a YES If the channel will not be used enter a NO The default value is YES AUTO DOWNLOAD To automatically download the...

Page 308: ...efault value is 2 LABEL Enter a characteristic name to identify the DI821 Module of the station The name may contain up to 20 characters MONITOR POWER To monitor process power source enter a YES if not needed enter a NO Default Value is NO POSITION Enter a number from 1 to 12 representing the position of the I O module relative to the FCI The I O module directly next to the FCI is number 1 Default...

Page 309: ...10 templet is also used for the DO890 except as noted in the field entry descriptions The DO890 also supports only 4 channels ACTIVE 01 through 16 If the channel is to be active enter a YES If the channel will not be used enter a NO The default value is YES AUTO DOWNLOAD To automatically download the configuration to the I O module enter a YES In the future if the configuration is to be loaded loc...

Page 310: ...R To monitor process power source enter a YES if not needed enter a NO DO890 with any channel supervision requires that MONITOR POWER YES Default Value is NO OSP HOLD 01 through 16 If an OSP TIMEOUT has occurred will the DO810 hold the last value during OSP Enter a YES if it will or enter a NO if an OSP VALUE will be used The Default is NO OSP TIMEOUT Enter the time msec after communications is lo...

Page 311: ...ter a number from 1 to 12 representing the position of the I O module relative to the FCI The I O module directly next to the FCI is number 1 Default value is 1 REPORT FAULTS 01 through 16 If channel faults are to be reported enter a YES if not enter a NO The default value is YES RESERVED OPTIONS Used to select I O module type Enter 0 zero for the DO810 Module 542769152 for the DO890 Module decima...

Page 312: ...ith Supervision hex number 205A0009 converted to decimal 542769161 Channels 3 and 2 with Supervision hex number 205A0006 converted to decimal 542769158 Channels 2 and 1 with Supervision hex number 205A0003 converted to decimal 542769155 VALUE CYCLE TIME Enter the channel value update period msec over the fieldbus Refer to S800 I O User s Guide for details of AF 100 loading in relation to cycle tim...

Page 313: ...alue is YES CLUSTER Enter the I O device cluster of the station where this module is located The cluster connected directly to the FCI is number zero 0 The number in this field is 0 7 Default value is 0 DQ CYCLE TIME Enter the channel data quality update period msec over the fieldbus Refer to the S800 I O User s Guide for details of AF 100 loading in relation to cycle time The valid values are 1 2...

Page 314: ...T Enter the time msec after communications is lost that outputs go to OSP value The valid values are OFF 256 512 and 1024 The default value is 1024 OSP VALUE 01 through 16 Enter the channel value 0 or 1 to output after an OSP TIMEOUT If the OSP HOLD has been selected as the OSP value then this field entry is ignored The valid values are 0 or 1 Where 0 off and 1 on The default is 0 POSITION Enter a...

Page 315: ...ng in relation to cycle time The valid values are 1 2 4 8 16 32 64 128 256 512 1024 2048 and 4096 The default value is 128 DO820 ACTIVE 01 through 08 If the channel is to be active enter a YES If the channel will not be used enter a NO The default value is YES AUTO DOWNLOAD To automatically download the configuration to the I O module enter a YES In the future if the configuration is to be loaded ...

Page 316: ...r a characteristic name to identify the DO820 Module of the station The name may contain up to 20 characters MONITOR POWER To monitor process power source enter a YES if not needed enter a NO Default Value is NO OSP HOLD 01 through 08 If an OSP TIMEOUT has occurred will the DO820 hold the last value during OSP Enter a YES if it will or enter a NO if an OSP VALUE will be used The Default is NO OSP ...

Page 317: ...ule relative to the FCI The I O module directly next to the FCI is number 1 Default value is 1 REPORT FAULTS 01 through 08 If channel faults are to be reported enter a YES if not enter a NO The default value is YES RESERVED OPTIONS This field reserved for future use A zero 0 should be entered as a default value VALUE CYCLE TIME Enter the channel value update period msec over the fieldbus Refer to ...

Page 318: ...ecial application software installed SP_ALGO2_FCM The runtime templet for this FCM is implemented only in systems having special application software installed SP_ALGO3_FCM The runtime templet for this FCM is implemented only in systems having special application software installed SP_ALGO4_FCM The runtime templet for this FCM is implemented only in systems having special application software inst...

Page 319: ... SET The NAME OF SET field specifies the name of the linearization table used when referencing the breakpoint set Valid entry is a string of up to 4 ASCII characters Default is blank spaces X VALUE The X VALUE field specifies the x value for one of up to 11 x y pairs for the breakpoint table Valid entry is a floating point number Y VALUE The Y VALUE field specifies the y value for one of up to 11 ...

Page 320: ...BRKPTS Appendix A Runtime Templates 320 3BUR002418 600 A ...

Page 321: ...llowing table shows the updates made in this User Manual for 800xA 6 0 3 Revision Index Description Date First version published for 800xA 6 0 August 2014 A Updated for 800xA 6 0 3 September 2016 Updated Section Sub section Description of Update Section 4 TCL Displays TCL Unit Message Display subsection updated with Acknowledge and Message ...

Page 322: ...Updates in Revision Index A 322 3BUR002418 600 A ...

Page 323: ...Buttons 45 Alarm Check 32 36 Alarm Configuration 32 36 Alarm Post 36 Analog Input 286 Analog Output 298 Analog output 295 AO810 templet 295 AO820 298 AO890 295 to 296 Archive Messages 141 Area Alarm Display CCF 71 Area Graphic Display CCF 72 Area Status Display CCF 69 Aspect Browser 25 Auto Expand Trend Y Axis 48 Auto Manual Transfer Transfer Auto Manual 201 Automatic Mode 43 Automatic Reset Balan...

Page 324: ...dband 32 53 Device Alarms 59 Loop Faceplate 37 to 38 Loops 36 Number Address 123 Parameter 53 Device Descriptor State 37 Device Loop Templet 221 DI810 301 DI814 templet 304 DI890 301 Diagnostic Status Displays 121 Diagnostic Message List 121 Differential Analog Input 286 Direct I O Display 190 Display Access 25 Display Request 179 Display Request Button 132 Displays CCF 31 Area Alarm 71 Area Graph...

Page 325: ...F Faceplate A M Ratio Bias Loop 35 Alarm Indications 40 Continuous Loop 39 Device Loop 37 to 38 Operator Controls 42 PID Loop 34 Process Bargraphs and Values 40 Reduced Size 33 Tag Identification 39 TLL Counter 111 TLL I O Point 116 TLL Program Elements 106 TLL Register 109 TLL Timer 114 Tool Tips 45 FCI Module 152 FCI Status 154 FCM 17 Loop Display 45 Mode Status 54 Output Mode Status 54 Setpoint...

Page 326: ...17 Bad Measure Alarms 217 Comp Mode Restrict 219 Cutout State 216 Dmnd Processing Mode 220 Enable Hi Alarms 216 Enable Hihi Alarms 218 Enable Lo Alarms 216 Enable Lolo Alarms 218 Enable Posting 215 Enable Rate Alarms 217 Engu Alarm Deadband 218 Hi Eng Unit Limit 215 Hi Limit 216 High Alarm Priority 216 Hihi Alarm Priority 218 Hihi Limit 218 Lo Alarm Priority 217 Lo Eng Unit Limit 215 Lo Limit 216 ...

Page 327: ...erator Workplace 23 Output 64 67 Bad Quality 52 Control Limit 52 Deadband 32 53 Mode 54 Rate of Change Alarm Limit 52 Tracking 44 Value 33 45 Output Tracking 202 Override Mode 36 53 Overview Type Displays 26 P Page Selector Alarm Panel 26 Phase 32 36 52 Plant Explorer 23 Plot Display TCL Array 98 Plot Filled 98 Preact 32 51 Preact Time 232 Print Active Window 30 Print Diagnostic Messages 144 Print...

Page 328: ...144 Security Level 24 Segment Display TLL 103 Sequence Debug 91 Loading onto a Unit 81 Mode 83 Removing 83 State 82 Status 83 Steps 85 Sequence Debug Display Breakpoint 95 Trace 93 Sequence Debug Display TCL 91 Sequence Detail Display TCL 84 Sequence List 85 92 118 Sequence Source 92 Sequencer Display TLL 118 Server Status 29 Setpoint 64 67 Bad Quality 52 Hi Control Limit 52 Lo Control Limit 52 Mo...

Page 329: ...ta Source 47 Modifying Y axis 47 Refresh Rate 32 47 Ruler Dialog 48 Trace Visibility 47 Use Output Limits for Y Axis 48 Trend Rate 32 52 64 214 TRIO Block Display 185 TRIO LAN Display 180 Tuning Breakpoint Sets Templet 57 Changing Parameter 51 FCM Templet 53 56 Loop Definition Templet 53 56 Loop Detail Display 51 Loop FCM Display 51 53 Parameters 32 Turbo Node Subsystem Status Display 137 Turbo Co...

Page 330: ...Index 330 3BUR002418 600 A ...

Page 331: ......

Page 332: ...Power and productivity for a better worldTM Contact us Copyright 2016 ABB All rights reserved 3BUR002418 600 A www abb com 800xA www abb com controlsystems ...

Reviews: