background image

ABB DRIVES

ACS580-01…, ACH580-01… and
ACQ580-01… +C135 drives with flange
mounting kit

Supplement

Summary of Contents for ACH580-01 +C135 Series

Page 1: ... ABB DRIVES ACS580 01 ACH580 01 and ACQ580 01 C135 drives with flange mounting kit Supplement ...

Page 2: ......

Page 3: ...ACS580 01 ACH580 01 and ACQ580 01 C135driveswith flange mounting kit Supplement 3 Mechanical installation General 3AXD50000349821 Rev B EN Original instructions EFFECTIVE 2022 06 17 Table of contents ...

Page 4: ......

Page 5: ...g codes 3 Mechanical installation General 13 Contents of this chapter 13 Safety instructions 13 Examining the installation site 15 Free space requirements 16 Additional requirements for cabinet installations 16 Necessary tools 16 Moving the drive 4 Mechanical installation Frames R1 to R3 17 Contents of this chapter 17 Unpacking and examining the delivery 17 Transport package contents 18 Flange mou...

Page 6: ...48 Mounting template 49 Installation procedure 51 Installing the drive on the mounting plate 7 Dimension drawings 55 Contents of this chapter 56 Frame R1 58 Attaching points and hole dimensions 59 Frame R2 61 Attaching points and hole dimensions 62 Frame R3 64 Attaching points and hole dimensions 65 Frame R4 67 Attaching points and hole dimensions 68 Frame R5 70 Attaching points and hole dimension...

Page 7: ...llation and install the drive with the flange mounting kit Read the supplement before you work on the drive You are expected to know the fundamentals of electricity wiring electrical components and electrical schematic symbols The supplement is written for readers worldwide Both SI and imperial units are shown Purpose of the supplement This supplement tells you how to install the drive mechanicall...

Page 8: ...w abb com drives documents for all manuals on the Internet The code below opens an online listing of the manuals applicable to the product ACQ580 01 manuals ACH580 01 manuals ACS580 01 manuals 8 Introduction to the supplement ...

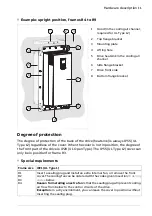
Page 9: ...brackets for attaching the drive onto a mounting plate The heatsink of the drive can be located in the cooling air channel and the front part of the drive on the other side of the mounting plate Layout and mounting position The flange mounted drive is installed in a tilted or an upright position depending on the drive type Hardware description 9 ...

Page 10: ...ample tilted position frames R1 to R3 Side flange bracket 4 Mounting plate 1 Bottom flange bracket 5 Top flange bracket 2 Drive heatsink in the cooling air channel 6 Lifting hole 3 10 Hardware description ...

Page 11: ...sition the degree of the front part of the drive is IP20 UL Open Type The IP55 UL Type 12 cover can only be in position for frame R3 Special requirements IP21 UL Type 1 Frame size Insert a sealing plug and install an extra internal fan or remove the front cover The cooling fan can be ordered with the codes given in section Ordering codes below R1 R2 R3 Reason for installing an extra fan is that th...

Page 12: ...000105335 IP21 and IP55 UL Type 1 and UL Type 12 R3 3AXD50000031460 IP21 UL Type 1 R4 3AXD50000031461 IP21 UL Type 1 R5 3AXD50000018852 IP21 UL Type 1 R6 3AXD50000018853 IP21 UL Type 1 R7 3AXD50000018854 IP21 UL Type 1 R8 3AXD50000018855 IP21 UL Type 1 R9 Ordering code of IP55 UL Type 12 internal cooling fan for IP21 UL Type 1 drives Frame size 3AXD50000050128 R1 3AXD50000050128 R2 3AUA0000088115 ...

Page 13: ...t the installation site complies with these requirements The installation site has sufficient ventilation to prevent overheating of the drive See section Losses cooling data and noise in the hardware manual for the required air flow in the cooling air channel and in the front part of the drive The operation conditions of the drive agree with the specifications in section Ambient conditions in the ...

Page 14: ... and maintenance See section Free space requirements page 15 When you install drives above one another make sure that the outlet cooling air flows away from the drive above in the cooling air channel B C A C B A Frame in mm in mm in mm 7 87 200 9 84 250 3 94 100 R1 R2 7 87 200 9 84 250 4 53 115 R3 R5 11 81 300 9 84 250 7 87 200 R6 R9 14 Mechanical installation General ...

Page 15: ...and Additional requirements for cabinet installations page 16 Note The free space requirements below are for the heat sink side of the mounting plate There is no free space requirement for the front side of the mounting plate That area can be occupied by other equipment e g contactors relays wires ducts etc B A Frame in mm in mm 7 87 200 3 94 100 R1 R2 7 87 200 4 53 115 R3 R5 11 81 300 7 87 200 R6...

Page 16: ...ding radius of input power and motor cables according to UL rules Necessary tools To move a heavy drive you need crane fork lift or pallet truck check load capacity To lift a heavy drive you need a hoist To install the drive mechanically you need the following tools drill with suitable bits screwdriver set Torx flat and or Phillips as appropriate socket set metric Moving the drive Move the drive i...

Page 17: ...package or sent separately Examine that all items are present and there are no signs of damage Read the data on the type designation label of the drive to make sure that the drive is of the correct type To unpack Cut the straps Remove the flange mounting kit package For the contents of the kit package see Flange mounting kit package contents page 18 Open the drive cardboard box For the contents of...

Page 18: ...uired for UL Type 12 14 Bottom bracket 3 Screw package 15 Top bracket In frame R3 different 4 M4 nut 4 pcs M5x20 screw 4 pcs M6x25 screw R1 10 pcs R2 12 pcs R3 14 pcs M6 nut R1 R2 18 pcs R3 19 pcs M4x8 screw R1 R2 2 pcs Tightening brackets 5 Bottom U bracket 6 Top U bracket 7 Cardboard tray 8 Top cardboard cover 9 Sealing plug 10 Mounting template 11 The delivery does not include the Rivet or Kale...

Page 19: ...The flange mounting kit package includes a template in actual size for drilling the attaching holes and cutting the hole in the mounting plate An example template is shown below Mechanical installation Frames R1 to R3 19 ...

Page 20: ...tion procedure 1 For IP21 UL Type 1 To remove the fan assembly push the retaining clips Lift the assembly up 2 For IP21 UL Type 1 Insert the sealing plug a to the hole 20 Mechanical installation Frames R1 to R3 ...

Page 21: ...L Type 12 frame R3 5 For IP 55 UL Type 12 The cover can only be in position for frame R3 but must be removed from frames R1 R2 To remove the cover remove the tightening screws with a T20 Torx screwdriver a Lift the cover up b and lift it off c Recycle the cover according to ACS580 01 ACQ580 01 and ACH580 01 drives recycling instructions and environmental information 3AXD50000040612 English b a c M...

Page 22: ...6 Attach the U brackets b and c to the back of the drive î 0 QXW 1āP 4 4 lbf ft E F 22 Mechanical installation Frames R1 to R3 ...

Page 23: ...ed in step 5 using M6 nuts finger tight Then use the tightening brackets e M5 20 screws to press the side brackets against the module Tighten the side bracket nuts H G G H 4 M5 20 screw 3 N m 2 2 lbf ft 4 M6 nut 6 N m 4 4 lbf ft Mechanical installation Frames R1 to R3 23 ...

Page 24: ...brackets first the inner sides 1 the sides that touch the drive then the outer sides 2 Remove the tightening bracket e from the top to enable replacement of the cooling fan J I J I I J H 8 M6 nut 6 N m 4 4 lbf ft 24 Mechanical installation Frames R1 to R3 ...

Page 25: ...ng plate For R1 and R2 If you wish to install the grounding plate push it onto the alignment pins of the bottom bracket and attach it 0 QXW 1āP 1 1 lbf ft 0 RPEL VFUHZ 1āP 1 1 lbf ft Mechanical installation Frames R1 to R3 25 ...

Page 26: ...For R3 To attach the grounding plate to the bottom plate use the cable entry plate screw h 0 QXW 1āP 1 1 lbf ft K 26 Mechanical installation Frames R1 to R3 ...

Page 27: ...ower cable grounding shelf 1 If you wish to install the power cable grounding shelf lower on the bottom bracket first remove the cover and the cable entry plate Mechanical installation Frames R1 to R3 27 ...

Page 28: ... ft to avoid moisture exchange through the empty holes Attach the cable shelf to the bottom bracket with M4 nuts Frame R3 is shown as an example The cable shelf varies in different frame sizes î 0 QXW 1āP 1 1 lbf ft 1āP 1 1 lbf ft L L 28 Mechanical installation Frames R1 to R3 ...

Page 29: ...d opening in the mounting plate Attach the mounting template from the flange mounting kit package onto the mounting plate Make the opening and drill the holes for the mounting screws Consider the hole size for the Rivet or Kalei nuts not included in the delivery Remove the mounting template Mechanical installation Frames R1 to R3 29 ...

Page 30: ...e backside of the drive attach the hood to the cooling channel This is not required for IP55 R1 R2 2 M6 nuts R3 3 M6 nuts 6 N m 4 4 lbf ft Back Back Front Front Back View from top Back View from bottom 30 Mechanical installation Frames R1 to R3 ...

Page 31: ...4 Attach the bottom bracket with one screw 5 Attach the top bracket with one screw 6 Attach the rest of the mounting screws Remove the chains 3 5 4 6 1 M6 25 screw 6 N m 4 4 lbf ft 1 M6 25 screw 6 N m 4 4 lbf ft R1 8 M6 25 screw R2 10 M6 25 screw R3 12 M6 25 screw 6 N m 4 4 lbf ft Mechanical installation Frames R1 to R3 31 ...

Page 32: ...32 Mechanical installation Frames R1 to R3 ...

Page 33: ...ly Examine that all items are present and there are no signs of damage Read the data on the type designation label of the drive to make sure that the drive is of the correct type To unpack Cut the straps Remove the flange mounting kit package For the contents of the kit package see Flange mounting kit package contents page 34 Remove the drive cardboard box and option box Remove the cover protectin...

Page 34: ...ening brackets 1 Side brackets 10 Top and bottom U brackets 2 Quick guide 11 Top cardboard cover 3 Hood required for UL Type 12 12 Cardboard tray 4 Screw package 13 Sealing plug R4 5 M5x20 screw 4 pcs M6x25 screw 16 pcs M6 nut 23 pcs Clamp plate R5 6 Mounting template 7 Top bracket 8 The delivery does not include the Rivet or Kalei nuts for the M6 screws 34 Mechanical installation Frames R4 and R5...

Page 35: ...he flange mounting kit package includes a template in actual size for drilling the attaching holes and cutting the hole in the mounting plate An example template is shown below Mechanical installation Frames R4 and R5 35 ...

Page 36: ... For R4 IP21 UL Type 1 To remove the fan assembly push the retaining clip with a flat screwdriver Lift the assembly up 2 For R4 IP21 UL Type 1 Insert the sealing plug a to the hole D 36 Mechanical installation Frames R4 and R5 ...

Page 37: ...n for IP21 drives first remove the covers R4 IP21 UL Type 1 R5 IP21 UL Type 1 R5 IP21 UL Type 1 To install the fan see section Replacing the auxiliary cooling fan IP55 UL Type 12 frame R4 IP21 and IP55 UL Type 1 and UL Type 12 frame R5 in the Hardware manual Mechanical installation Frames R4 and R5 37 ...

Page 38: ... up b and lift it off c Recycle the cover according to ACS580 01 ACQ580 01 and ACH580 01 drives recycling instructions and environmental information 3AXD50000040612 English b a c 6 For R4 R5 Attach the U brackets b and c to the back of the drive î 0 QXW 1āP 4 4 lbf ft E F 38 Mechanical installation Frames R4 and R5 ...

Page 39: ...ts using M6 nuts finger tight Then use the tightening brackets e 4 M5 20 screws to press the side brackets against the module Tighten the side bracket nuts G G H H î 0 î VFUHZ 1āP 2 2 lbf ft 0 QXW 1āP 4 4 lbf ft Mechanical installation Frames R4 and R5 39 ...

Page 40: ...h the top f and bottom g brackets to the side brackets first the inner sides 1 the sides that touch the drive then the outer sides 2 I I I 8 M6 nut 6 N m 4 4 lbf ft 2 x M6 nut 40 Mechanical installation Frames R4 and R5 ...

Page 41: ...9 For R4 R5 Remove the tightening bracket e from the front of the fan 10 For R5 Attach the clamp plate 0 QXW 1āP 4 4 lbf ft Mechanical installation Frames R4 and R5 41 ...

Page 42: ...d opening in the mounting plate Attach the mounting template from the flange mounting kit package onto the mounting plate Make the opening and drill the holes for the mounting screws Consider the hole size for the Rivet or Kalei nuts not included in the delivery Remove the mounting template 42 Mechanical installation Frames R4 and R5 ...

Page 43: ...irements at the backside of the drive attach the hood to the cooling channel This is not required for IP55 DFN 9LHZ IURP ERWWRP URQW DFN URQW DFN î 0 QXW 1āP 4 4 lbf ft DFN 9LHZ IURP WRS Mechanical installation Frames R4 and R5 43 ...

Page 44: ...e onto the opening in the mounting plate 4 Attach the bottom bracket with one screw 5 Attach the top bracket with one screw 6 Attach the rest of the mounting screws Remove the chains 0 VFUHZ 1āP 4 4 lbf ft 0 VFUHZ 1āP 4 4 lbf ft 0 VFUHZ 1āP 4 4 lbf ft 44 Mechanical installation Frames R4 and R5 ...

Page 45: ...sizes R6 to R9 with the flange mounting kit mechanically Safety WARNING For frame sizes R6 to R9 Use the lifting eyes of the drive when you lift the drive Do not tilt the drive The drive is heavy and its center of gravity is high An overturning drive can cause physical injury Mechanical installation Frames R6 to R9 45 ...

Page 46: ...e is of the correct type Drive with factory installed options 5 Straps 1 Pallet stopper 6 Cardboard cover 2 Pallet tray 7 Flange mounting kit 3 Printed manuals and quick guides manuals CD and multilingual residual voltage warning stickers 8 Cardboard sleeve 4 To unpack Cut the straps 1 Remove the cardboard cover 2 Lift the flange mounting kit 3 Remove the cardboard sleeve 4 Attach lifting hooks to...

Page 47: ...8 16 pcs R9 18 pcs Mounting template 2 Top bracket 3 Bottom bracket 4 Side brackets 5 Hood required for UL type 12 9 Top cardboard cover 6 Cardboard tray 10 Option kit package label 7 The delivery does not include the Rivet or Kalei nuts for the M6 screws Mechanical installation Frames R6 to R9 47 ...

Page 48: ...The flange mounting kit package includes a template in actual size for drilling the attaching holes and cutting the hole in the mounting plate An example template is shown below 48 Mechanical installation Frames R6 to R9 ...

Page 49: ...iver a Lift the cover up b and lift it off c Recycle the cover according to ACS580 01 ACQ580 01 and ACH580 01 drives recycling instructions and environmental information 3AXD50000040612 English b a c 2 Attach the side brackets to the drive H IW 5 LJ K W î 0 î 7 1āP 4 4 lbf ft Mechanical installation Frames R6 to R9 49 ...

Page 50: ...3 Attach the top and bottom brackets î 0 QXW 1āP 4 4 lbf ft 50 Mechanical installation Frames R6 to R9 ...

Page 51: ...d opening in the mounting plate Attach the mounting template from the flange mounting kit package onto the mounting plate Make the opening and drill the holes for the mounting screws Consider the hole size for the Rivet or Kalei nuts not included in the delivery Remove the mounting template Mechanical installation Frames R6 to R9 51 ...

Page 52: ...irements at the backside of the drive attach the hood to the cooling channel This is not required for IP55 î 0 QXW 1āP 4 4 lbf ft DFN 9LHZ IURP ERWWRP DFN URQW DFN 9LHZ IURP WRS DFN URQW 52 Mechanical installation Frames R6 to R9 ...

Page 53: ... opening in the mounting plate 4 Attach the bottom bracket with one screw 5 Attach the top bracket with one screw 6 Attach the rest of the mounting screws Remove the chains 5 5 î 0 î 1āP 4 4 lbf ft 5 î 0 î 1āP 4 4 lbf ft î 0 î 1āP 4 4 lbf ft î 0 î 1āP 4 4 lbf ft Mechanical installation Frames R6 to R9 53 ...

Page 54: ...54 ...

Page 55: ...7 Dimension drawings Contents of this chapter This chapter contains the dimension drawings of the flange mounting kits and required openings in the mounting plate Dimension drawings 55 ...

Page 56: ...Frame R1 56 Dimension drawings ...

Page 57: ...Hood is needed for UL Type 12 installation only Dimension drawings 57 ...

Page 58: ... Attaching points and hole dimensions 58 Dimension drawings ...

Page 59: ...Frame R2 Dimension drawings 59 ...

Page 60: ...Hood is needed for UL Type 12 installation only 60 Dimension drawings ...

Page 61: ... Attaching points and hole dimensions Dimension drawings 61 ...

Page 62: ...Frame R3 62 Dimension drawings ...

Page 63: ...Hood is needed for UL Type 12 installation only Dimension drawings 63 ...

Page 64: ... Attaching points and hole dimensions 64 Dimension drawings ...

Page 65: ...Frame R4 Dimension drawings 65 ...

Page 66: ...Hood is needed for UL Type 12 installation only 66 Dimension drawings ...

Page 67: ... Attaching points and hole dimensions Dimension drawings 67 ...

Page 68: ...Frame R5 68 Dimension drawings ...

Page 69: ...Hood is needed for UL Type 12 installation only Dimension drawings 69 ...

Page 70: ... Attaching points and hole dimensions 70 Dimension drawings ...

Page 71: ...Frame R6 Dimension drawings 71 ...

Page 72: ...Hood is needed for UL Type 12 installation only 72 Dimension drawings ...

Page 73: ... Attaching points and hole dimensions Dimension drawings 73 ...

Page 74: ...Frame R7 74 Dimension drawings ...

Page 75: ...Hood is needed for UL Type 12 installation only Dimension drawings 75 ...

Page 76: ... Attaching points and hole dimensions 76 Dimension drawings ...

Page 77: ...Frame R8 Dimension drawings 77 ...

Page 78: ...Hood is needed for UL Type 12 installation only 78 Dimension drawings ...

Page 79: ... Attaching points and hole dimensions Dimension drawings 79 ...

Page 80: ...Frame R9 80 Dimension drawings ...

Page 81: ...Hood is needed for UL Type 12 installation only Dimension drawings 81 ...

Page 82: ... Attaching points and hole dimensions 82 Dimension drawings ...

Page 83: ...by navigating to www abb com searchchannels Product training For information on ABB product training navigate to new abb com service training Providing feedback on ABB manuals Your comments on our manuals are welcome Navigate to new abb com drives manuals feedback form Document library on the Internet You can find manuals and other product documents in PDF format on the Internet at www abb com dri...

Page 84: ...www abb com drives 3AXD50000349821 B Copyright 2022 ABB All rights reserved Specifications subject to change without notice 3AXD50000349821 Rev B EN 2022 06 17 ...

Reviews: