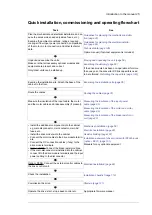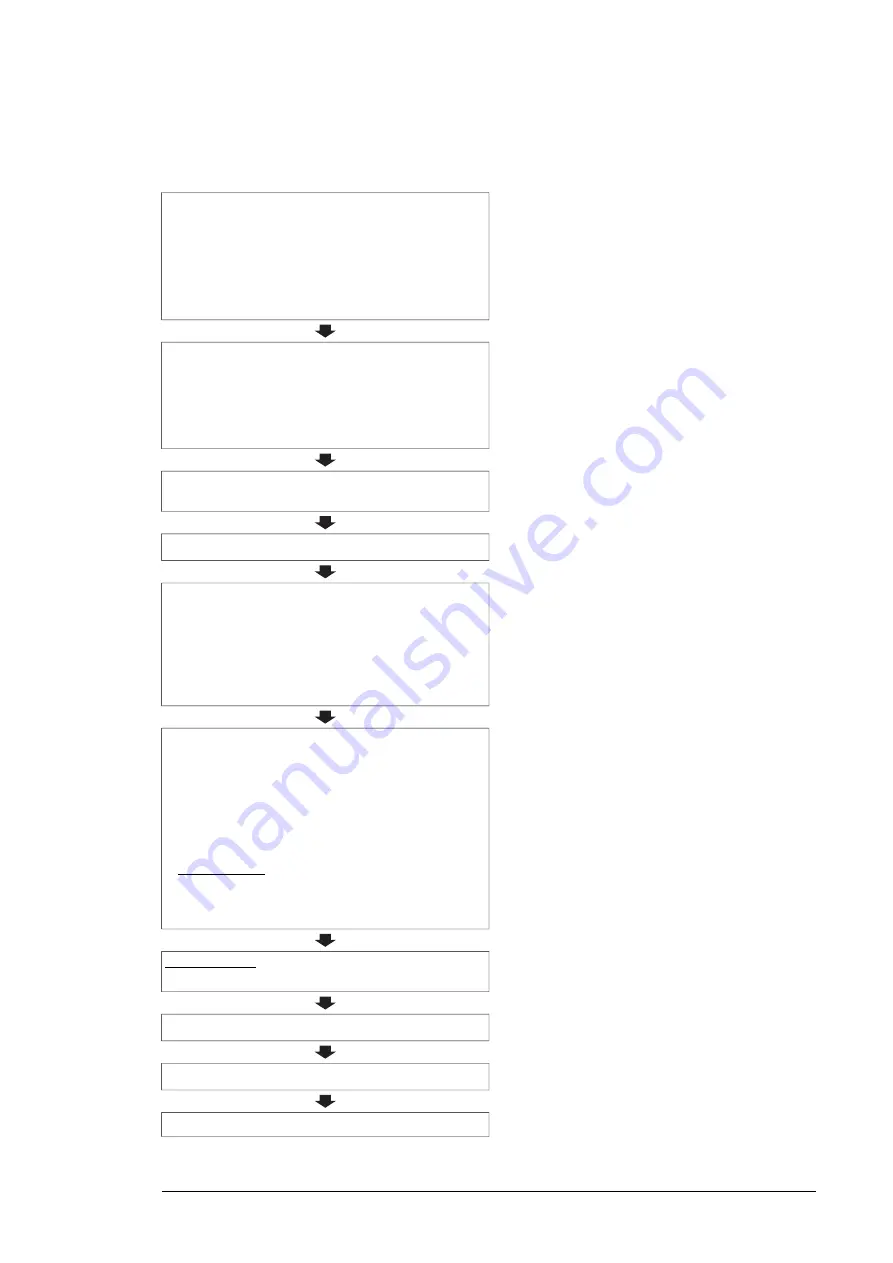
Quick installation, commissioning and operating flowchart
See
Task
Guidelines for planning the mechanical installa-
tion (page 45)
Plan the mechanical and electrical installation and ac-
quire the accessories needed (cables, fuses, etc.).
Examine the ambient conditions, ratings, required
cooling air flow, input power connection, compatibility
of the motor, motor connection, and other technical
data.
Guidelines for planning the electrical installa-
tion (page 65)
Option manual (if optional equipment is included)
Moving and unpacking the unit (page 56)
Unpack and examine the units.
Make sure that all necessary optional modules and
equipment are present and correct.
Examining the delivery (page 60)
If the drive module has been non-operational for more
than one year, the converter DC link capacitors need
to be reformed.
Reforming the capacitors (page 133)
)
Only intact units can be started up.
Examining the installation site (page 55)
Examine the installation site. Attach the base of the
cabinet to the floor.
Route the cables.
Measuring the insulation of the input power
cable (page 90)
Measure the insulation of the input cable, the motor
and the motor cable and brake assembly (if present).
Measuring the insulation of the motor and motor
cable (page 90)
Measuring the insulation of the brake resistor cir-
cuit (page 90)
Mechanical installation (page 55)
• Install the additional components into the cabinet:
eg, main disconnector, main contactor, main AC
fuses, etc.
• Install the drive module into the cabinet.
• Connect the motor cables to the drive module termin-
als.
• Connect the DC connection cables (if any) to the
drive module terminals.
• D150: Connect the brake resistor cables.
• If the main disconnector is installed into the cabinet,
connect it to the drive module terminals and the input
power cabling to the disconnector.
Electrical installation (page 89)
Installation example of drive module with IP20 shrouds
(B051) (page 101)
Manuals for any optional equipment
Electrical installation (page 89)
P906): Connect the external control cables to
the drive control unit.
Installation checklist (page 119)
Check the installation.
Commission the drive.
Appropriate firmware manual
Operate the drive: start, stop, speed control etc.
Introduction to the manual 25
Summary of Contents for ACH580-04
Page 1: ... ABB DRIVES FOR HVAC ACH580 04 drive modules Hardware manual ...
Page 2: ......
Page 4: ......
Page 54: ...54 ...
Page 88: ...88 ...
Page 100: ...100 ...
Page 118: ...118 ...
Page 122: ...122 ...
Page 124: ...124 ...
Page 128: ...3 6 5 5 128 Maintenance ...
Page 134: ...134 ...
Page 156: ...R10 standard configuration 156 Dimension drawings ...
Page 157: ...R10 with E208 0H354 H356 H370 0H371 Dimension drawings 157 ...
Page 158: ...R10 with option B051 158 Dimension drawings ...
Page 159: ...R10 with option E208 H356 P906 192 Tools R10 3 1 Dimension drawings 159 ...
Page 160: ...R10 with option E208 0H371 H356 0H354 H370 P906 Tools 191 R10 2 1 160 Dimension drawings ...
Page 161: ...R10 with option B051 P906 190 Tools R10 1 1 Dimension drawings 161 ...
Page 162: ...R11 standard configuration 162 Dimension drawings ...
Page 163: ...R11 with option E208 0H371 H356 0H354 H370 Dimension drawings 163 ...
Page 164: ...R11 with option B051 164 Dimension drawings ...
Page 165: ...R11 with option E208 H356 P906 Dimension drawings 165 ...
Page 166: ...R11 with option E208 0H371 H356 0H354 H370 P906 166 Dimension drawings ...
Page 167: ...R11 with option B051 P906 Dimension drawings 167 ...
Page 186: ... Declaration of conformity 186 The Safe torque off function ...
Page 206: ...Dimension drawing 206 External control unit option P906 ...
Page 212: ...212 ...
Page 224: ...224 ...
Page 226: ...226 ...
Page 234: ...234 ...


