EN
13
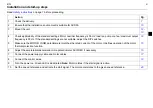
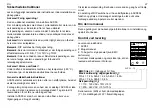
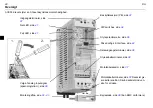
Attaching and detaching the wall mounting clip
The unit can be mounted either with the wide or the narrow side against the wall. Install the mounting clip on the desired side. See
instructions below for frames A and B. Detach the mounting clip of frames C and D by pulling downward and attach it by pushing
upward.
Detaching the mounting clip, Frames A
and B:
Press the two plastic buttons to
detach the upper and lower part of the clip
from each other.
Attaching the mounting clip, Frame A:
Place the two parts as shown and click
them together.
Attaching the mounting clip, Frame B:
Push the two parts between the cooling
fins and click them together.
Summary of Contents for ACS55
Page 2: ......
Page 4: ...4 ...
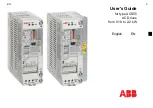
Page 5: ...EN 5 User s Guide for type ACS55 AC Drives from 0 18 to 2 2 kW English EN ...
Page 25: ...DA 25 Brugermanual for type ACS55 AC drev fra 0 18 til 2 2 kW Dansk DA ...
Page 45: ...DE 45 Deutsch DE Betriebsanleitung für ACS55 Frequenzumrichter von 0 18 bis 2 2 kW ...
Page 65: ...ES 65 Español ES Guía del usuario para Accionamientos de CA de tipo ACS55 de 0 18 a 2 2 kW ...
Page 85: ...FI 85 Käyttäjän opas ACS55 taajuusmuuttajat 0 18 2 2 kW Suomi FI ...
Page 125: ...IT 125 Italiano IT Manuale utente per convertitori di frequenza in c a ACS55 da 0 18 a 2 2 kW ...
Page 146: ...146 IT ...
Page 147: ...NL 147 Nederlands NL Gebruikershandleiding voor type ACS55 AC omvormers van 0 18 tot 2 2 kW ...
Page 188: ...188 PT ...
Page 209: ...SV 209 Användarhandledning för frekvensomriktare ACS55 från 0 18 till 2 2 kW Svenska SV ...
Page 229: ...CN 229 用户手册 ACS55 交流传动 0 18 至 2 2 kW 中文 CN ...
Page 249: ...KR 249 사용자 메뉴얼 ACS55 AC 드라이브 0 18 2 2 kW 한국어 KR ...
Page 269: ......


