48 Electrical installation
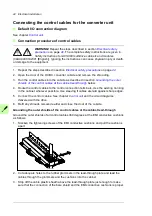
Connection procedure of the energy storage cables
For the cable types, see
Selecting and routing the energy storage cables
on page
WARNING!
Repeat the steps described in section
. The complete safety instructions are given in
Safety instructions for ACS880 multidrive cabinets and modules
(3AUA0000102301 [English]). Ignoring the instructions can cause
physical injury or death, or damage to the equipment.
WARNING!
With aluminum cables, apply grease to stripped conductors before
attaching them to non-coated aluminum cable lugs. Obey the grease
manufacturer’s instructions. Aluminum-aluminum contact can cause oxidation in
the contact surfaces.
1. Repeat the steps described in section
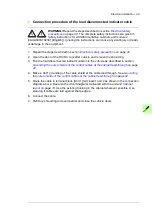
2. Open the door of the DC/DC converter cubicle and remove the shrouding.
3. Lead the cables into the cubicle.
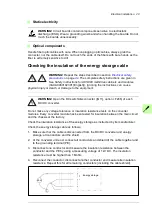
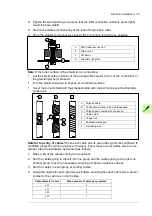
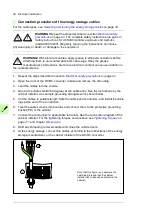
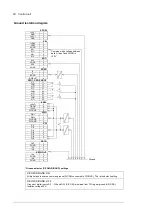
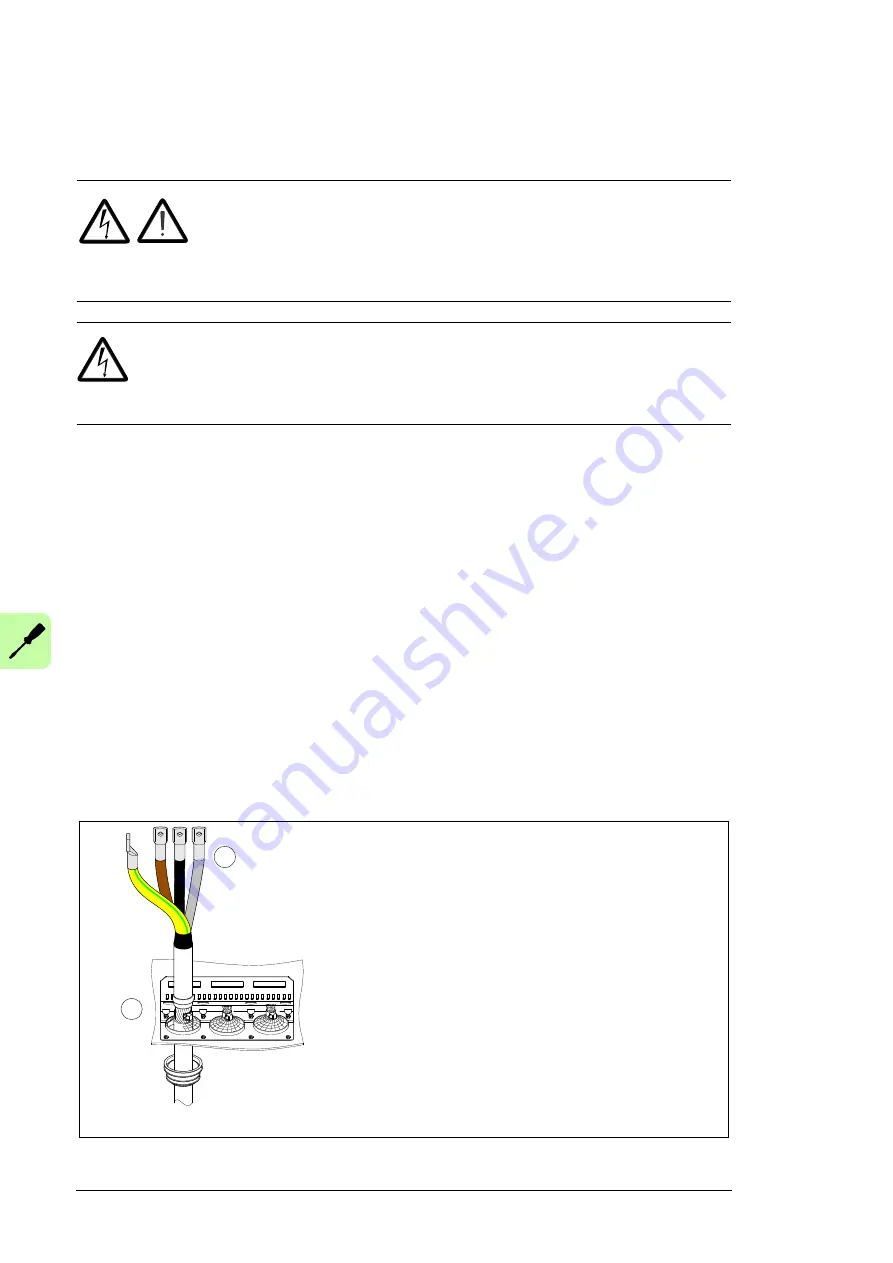
4. Ground the cable shield 360 degrees at the cable entry. See the instructions by the
cabinet installer. An example grounding arrangement is shown below.
5. Cut the cables to suitable length. Strip the cables and conductors, and install the cable
lugs at the end of the conductors.
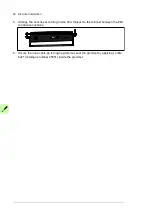
6. Twist the cable screens into bundles and connect them to the protective grounding
busbar (PE) of the cabinet.
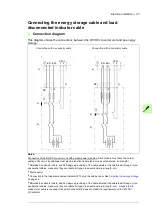
7. Connect the conductors to appropriate terminals. See the connection diagram of the
cabinet installer. For the tightening torques and busbars, see
on
page
and chapter
8. Refit any shrouding removed earlier and close the cubicle doors.
9. At the energy storage, connect the cables according to the instructions of the energy
storage manufacturer, or the cabinet installer of the DC/DC converter.
Note that this figure is an example of a
cable lead-through that the cabinet
installer has to acquire and install in the
cabinet.
4
5
Summary of Contents for ACS880-1607
Page 1: ...ABB industrial drives Hardware manual ACS880 1607 DC DC converter units ...
Page 4: ......
Page 12: ...12 Introduction to the manual ...
Page 34: ...34 Mechanical installation ...
Page 40: ...40 Guidelines for planning electrical installation ...
Page 52: ...52 Electrical installation ...
Page 68: ...68 Start up ...
Page 80: ...80 Maintenance 7 3 4 5 6 ...
Page 82: ...82 Maintenance 3 4 5 6 7 8 9 9 ...
Page 85: ...Maintenance 85 12 Install and tighten the two screws 10 11 12 ...
Page 92: ...92 Maintenance 3 6 4 5 4 7a 7b 7b ...
Page 93: ...Maintenance 93 9 8 8 10 11 ...
Page 96: ...96 Maintenance 4 8 6 7 5 3 ...
Page 97: ...Maintenance 97 9 ...
Page 118: ...118 Dimensions Dimension drawings Frame 1 R8i bottom cable entry ...
Page 119: ...Dimensions 119 Frame 1 R8i top cable entry ...
Page 122: ...www abb com drives www abb com drivespartners 3AXD50000023644 Rev B EN 2017 01 30 Contact us ...

