AMS 500
ABSOLUTE MARKING SYSTEM
26
Prepare for marking
The following possibilities are available:
a) Double click on the leader marker and the labeling editor opens.
b) Click on Menu bar
“Edit”
“Labeling”
c)
Push the right mouse button
“Labeling”
d) Press any key.
Note: If you use a key to open the labeling editor the text or number or space will be
shown in the data entry field; to disable the marking function of this feature, go in
“Option” and uncheck “Accept keyboard entry as the first character marked”.
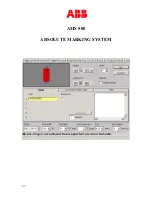
The exact description of the selected marker card and the number of markers available both
appear in the top line of the dialog box.
An outline of the selected marking element is shown in the top third of the box. Angle and
text alignment options are found next to this diagram. The number of lines per tag can also be
specified here.
Note that the program will only allow options that are appropriate for the
selected element (marker cards).
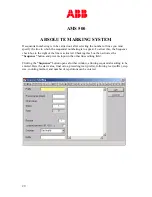
The various tabs for different methods of data input and import appear in the middle of the
box. This is where you can enter all the data and text for single, sequence, and row marking.
The font, font width, font size, line spacing, tip width of the plotter pen, and plotting speed
settings can be adjusted in the lower part of the window. The values match the chosen
marking element, but can be altered within reasonable limits. A visual warning and text is
displayed if text length exceeds the size of the tag (see picture below). This enables you to
adjust the font, font size or font width so that the text fits onto the tag or element. From a
certain font height upward, only capital letters and certain special characters are allowed in
order to make best use of the available labeling area. In such cases the following warning is
displayed:
“Only capital letters are allowed”


