88
EL3000
CONTINUOUS GAS ANALYZERS | OI/EL3000-EN REV. D
… 5 Installation
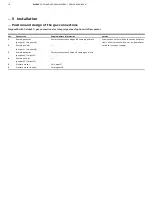
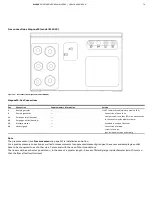
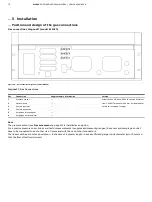
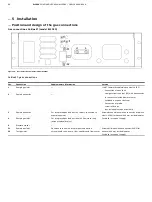
… Fidas24 – Connect gas lines
Test gas connection
The test gas outlet is connected to the sample gas connection at
the factory.
If the test gases are to be fed directly at the gas sampling point,
the connection between the test gas outlet and the test gas inlet
at the sample gas connection should be removed, and the
corresponding opening at the sample gas connection is to be
sealed gas-tight with an M6 screw.
Connecting the exhaust air line
Observe the following points when connecting the exhaust air
pipe:
• Conduct exhaust gases from the gas analyzer directly
into the atmosphere or through a de-pressurized pipe
with a large inside diameter which is as short as possible,
or into an exhaust pipe.
• Use PTFE or stainless steel as the material for the exhaust
air line!
The temperature of the exhaust air can be up to 200 °C!
• Install the exhaust air line at a gradient, leading away
from the gas analyzer.
• At a maximum of 30 cm after the exhaust air outlet, the
exhaust air pipe must have an inside diameter of
≥
10 mm!
If the exhaust air pipe is very long, its inside diameter
must be much larger than 10 mm, otherwise you might
have problems with pressure control in the gas analyzer.
• Do not install any throttle sections or shut-off valves in
the exhaust air line!
Note
Dispose of corrosive, toxic or combustion exhaust gases
according to the regulations!
Fidas24 – Connecting the combustion gas
line
Clean combustion gas line.
1. Pump a cleaning agent (alkaline cleaner, stainless steel
pickling solution) through the stainless steel pipe.
2. Rinse the pipe thoroughly with distilled water.
3. Purge the pipe with synthetic air or nitrogen, at a > 100 °C,
for several hours (10 bis 20 l/h).
4. Seal the ends of the pipe.
Connect
combustion gas pipe
See also
Connection of process gases and test gases
page 87.
1. Connect a two-stage cylinder pressure reducer (a model
suitable for high purity gases) to the combustion gas
cylinder.
2. Connect the combustion gas pipe to the cylinder pressure
reducer.
3. Install a flow restrictor in the combustion gas supply line
which limits the combustion gas flow to 10 l/h H
2
or 25 l/h
H
2
/He mixture, see
Flow restrictor in the combustion gas
on page 34. This means that the operation of the
gas analyzer is safe even in the event of a fault in the
combustion gas path (such as leakage).
4. Install a shut-off valve in the combustion gas supply line.
– It is recommended that a pneumatic shut-off valve be
installed.
– The pneumatic shut-off valve must be controlled by the
instrument air supply, so that the combustion gas supply
is interrupted in the event of a failure of the instrument
air supply.
– See also
Shut-off valve in the combustion gas supply line
on page 34.
5. Connect the combustion gas line to the combustion gas
inlet
36
of the analyzer module , via a pressure regulator
(0 to 1.6 bar) refer to
Position and design of the gas
on page 45.
Check the tightness of the combustion gas line
Check the combustion gas line for tightness , refer to
tightness of the combustion gas line

