Combustion Oxygen Monitor
Endura AZ20 Series Probe
5 Dismantling and Reassembly – Probe
IM/AZ20M–EN
Rev. B
15
5.6 Replacing the End Cap and Seal
Before replacing the end cap:
1. If fitting new end cap, ensure the correct kit is available
(and the correct version of the wiring label [AZ20 or ZFG2]
is used) – refer to Section 7.5, page 43.
2. If necessary, remove the probe from its mounting as
detailed in Section 5.4, page 14 (integral probe) or Section
5.5, page 14 (remote probe).
5.6.1 Removing the End Cap
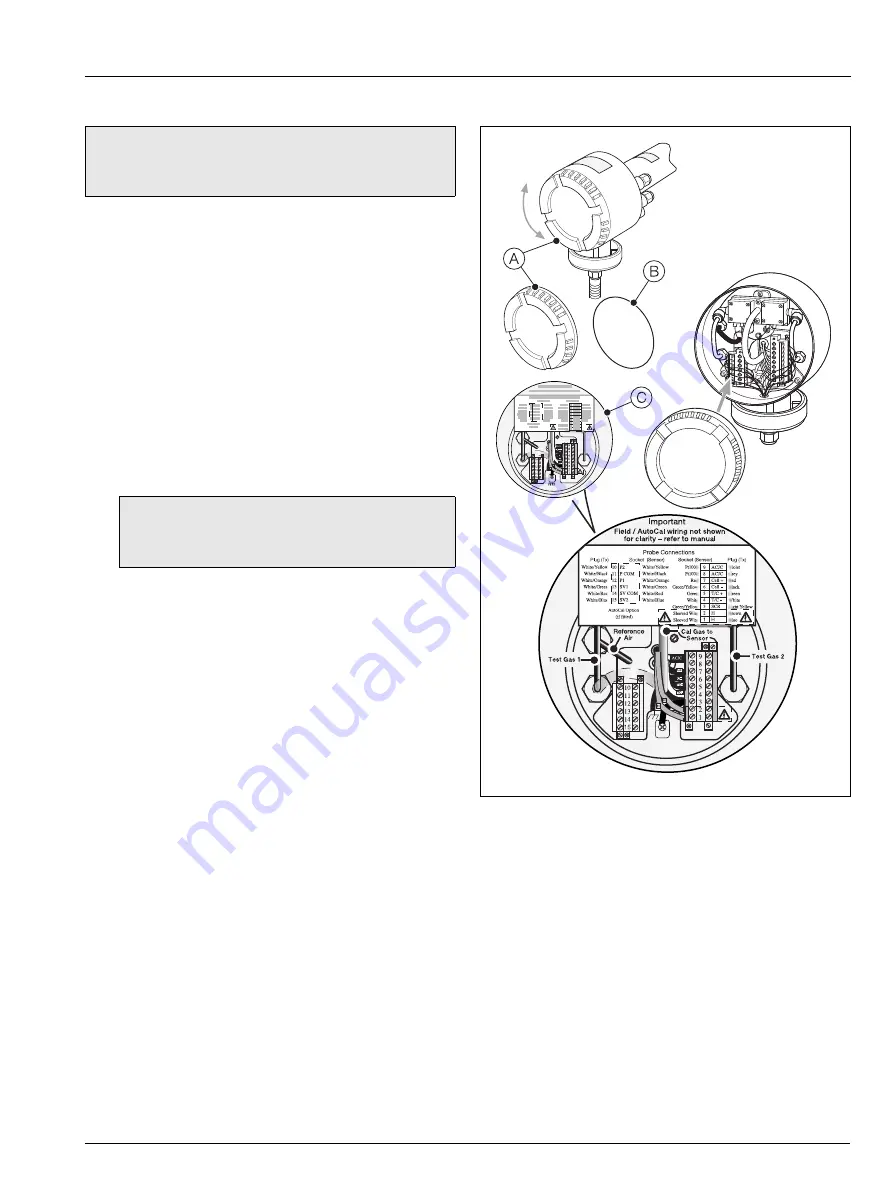
Referring to Fig. 5.3:
1. Unscrew and remove probe end cap
A
.
2. Remove seal and discard O-ring
B
.
5.6.2 Fitting a New End Cap
Referring to Fig. 5.3:
1. Fix the new wiring label
C
to the inside of the end cap.
2. Fit the new O-ring onto the end cap ensuring it is seated
correctly.
3. Screw the new end cap onto the probe body until
hand-tight.
Warning.
If the end cap is replaced with the probe in situ,
ensure the system it is used in has been shut down and
isolated to prevent the risk of electrical shocks.
Caution.
Ensure the correct wiring label is fixed in the
end cap – AZ20 and AZ20/ZFG2 replacement probe
connections are different – refer to Fig. 5.3.
Fig. 5.3 Replacing the End Cap and Seal
Wiring Label


