
Quick-start Guide SOI/NHU200-EN
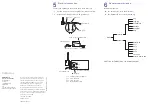
FieldKey NHU200
Wireless adapter
1
Health and safety
To ensure that our products are safe and without risk to health,
the following points must be noted:
1. The relevant sections of these instructions must be read
carefully before proceeding.
2. Warning labels on containers and packages must be
observed.
3. Installation, operation, maintenance and servicing must only
be carried out by suitably trained personnel and in
accordance with the information given and site procedures.
Product disposal
Refer to the User Guide (OI/NHU200–EN) for disposal
information.
2
Installation overview
Ensure the intended field instrument has a tag and message
configured – see section 6:
1. Remove the FieldKey from the box.
2. Attach the antenna.
3. Attach the FieldKey to the field instrument (remove the
antenna to help rotate the housing).
4. Rotate housing for best antenna direction (normally vertical).
5. Lock the FieldKey via the locking nut and set or grub screw.
6. Make electrical connection to the FieldKey (see Section 5)
and then wait at least 3 minutes.
7. Connect HART configuration tool and set
Network ID
,
Join
Key
and
FieldKey Tag
.
8. Set the join mode to
Join Now
.
9. Monitor the join status.
3
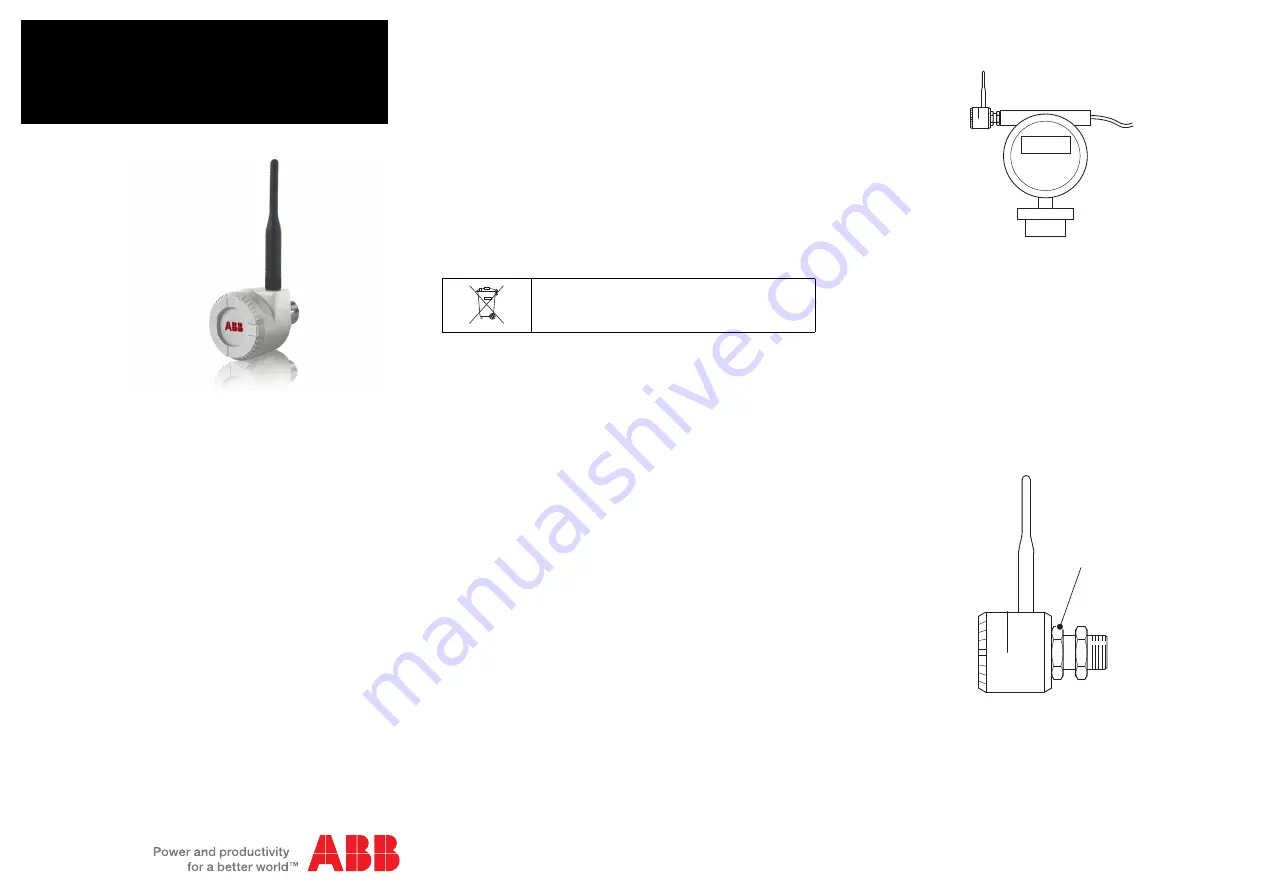
Mechanical installation
The WirelessHART adapter can be fitted in the following ways:
Via a spare instrument cable gland.
If no cable gland is available use the T-Piece (option).
Connect the adapter at a junction box located in the 4 to
20 mA signal loop.
4
Antenna direction and locking
The antenna can be rotated through almost 360° and fixed in
place by rotating the locking nut and tightening the set or grub
screw with the Allen key.
The best position for the antenna is often in a vertical direction.
European countries only.
Locking Nut


