background image


Operating Instruction 

D184B097U02 


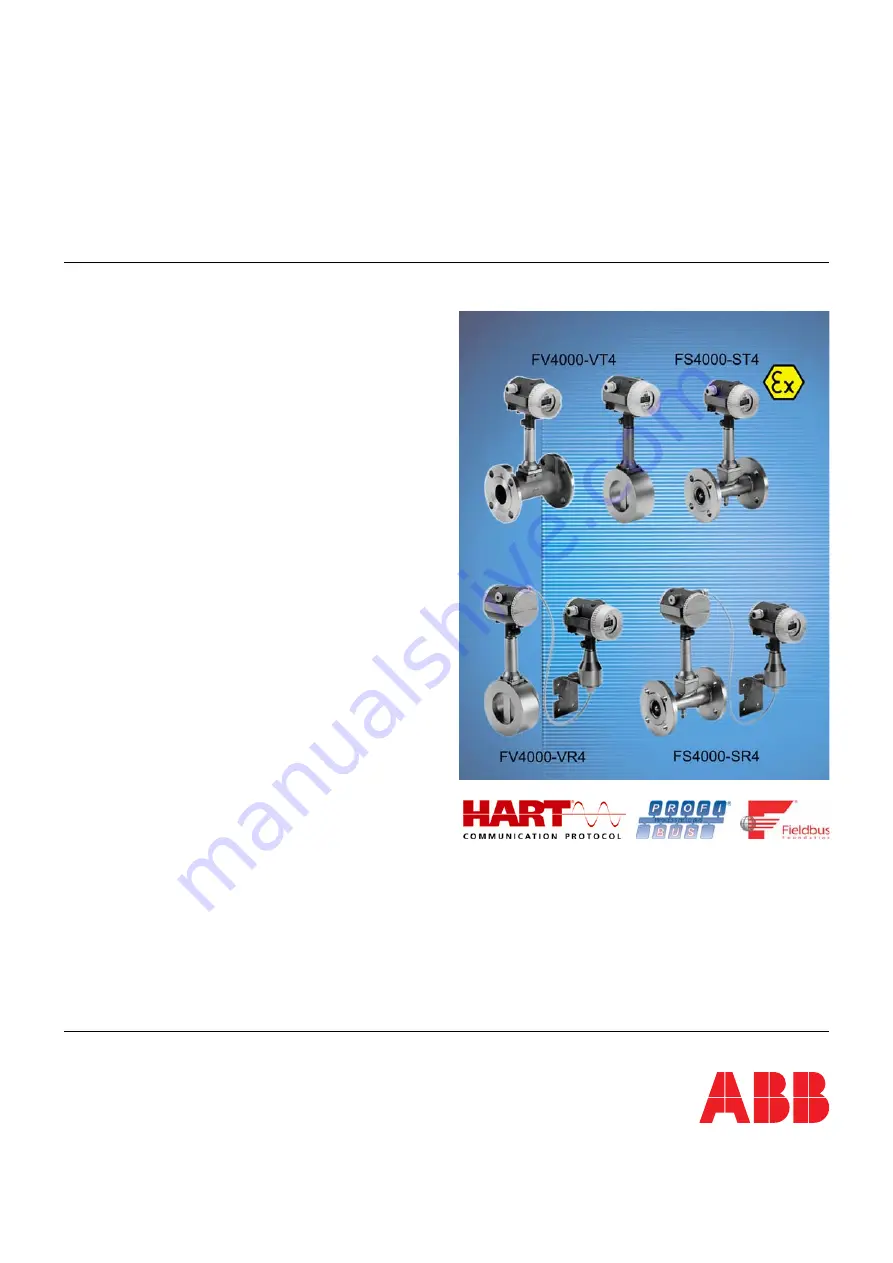
Vortex Flowmeter / Swirl Flowmeter

FV4000-VT4/VR4 / FS4000-ST4/SR4


Summary of Contents for FS4000-SR4

Page 1: ...Operating Instruction D184B097U02 Vortex Flowmeter Swirl Flowmeter FV4000 VT4 VR4 FS4000 ST4 SR4 ...

Page 2: ...aße 2 D 37079 Göttingen Germany Tel 49 551 905 534 Fax 49 551 905 555 CCC support deapr de abb com Copyright 2009 by ABB Automation Products GmbH Subject to changes without notice This document is protected by copyright It assists the user in safe and efficient operation of the device The contents of this document whether whole or in part may not be copied or reproduced without prior approval by t...

Page 3: ...7 1 12 Installation safety information 17 1 13 Safety information for electrical installation 18 1 14 Safety information for operation 18 1 15 Safety instructions for operation in hazardous areas 18 1 16 Safety information for maintenance and inspection 19 2 Design and function 20 2 1 Principles of measurement 20 2 1 1 Vortex flowmeter 20 2 1 2 Swirl flowmeter 22 2 2 Design 23 2 3 Device designs 2...

Page 4: ...dbus design 41 5 2 Cable connection 42 5 2 1 Standard design HART 42 5 2 2 Connection via flameproof cable gland Ex d design 42 5 2 3 Standard design PROFIBUS PA FOUNDATION Fieldbus 45 5 2 4 Separate design 47 5 3 M12 plug in connector PROFIBUS PA 50 5 4 Switching output 51 5 5 Configuration of the switching output 52 5 6 Functional ground Equipotential bonding 54 6 Commissioning 55 6 1 Preliminar...

Page 5: ...rotection 74 8 6 Menu structure 75 8 6 1 Menu structure Enhancement for HART 83 8 6 2 Menu structure Enhancement for PROFIBUS PA 85 8 6 3 Menu structure Enhancement for FOUNDATION Fieldbus 88 8 7 Description of parameters 90 8 7 1 Nominal size 90 8 7 2 Mean k factor 90 8 7 3 Hardware config 91 8 7 4 Error 3 9 92 8 7 5 Standard factor 93 8 7 6 Operating density 93 8 8 Parameterization of gases stea...

Page 6: ...pply power or supply current 112 11 4 2 Medium temperatures Temperature classes 112 11 4 3 Approval data for hazardous areas 112 11 4 4 Trio Wirl control drawing 113 11 5 EEX ia design for VT4A ST4A and VR4A SR4A fieldbus 114 11 5 1 PROFIBUS PA electrical connection 114 11 5 2 FOUNDATION Fieldbus electrical connection 114 11 5 3 Approval data for hazardous areas 115 11 5 4 Medium temperatures Temp...

Page 7: ...R4 FS4000 ST4 SR4 7 12 11 Transmitter 122 12 11 1 General specifications 122 13 Appendix 124 13 1 Additional documents 124 13 2 Approvals and certifications 124 13 3 Overview of technical design and setting parameters 130 14 Index 132 ...

Page 8: ...maintain this state throughout the period of operation Modifications and repairs to the product may only be performed if expressly permitted by these instructions Only by observing all of the safety information and all safety warning symbols in these instructions can optimum protection of both personnel and the environment as well as safe and fault free operation of the device be ensured Informati...

Page 9: ...missible insofar as these are described in the manual Approval by ABB Automation Products GmbH must be sought for any activities beyond this scope Repairs performed by ABB authorized specialist shops are excluded from this 1 4 Technical limit values The meter has been designed for use exclusively within the values stated on the name plate and within the technical limit values specified on the data...

Page 10: ...he operator to examine Media fluids with unknown properties or abrasive media may only be used if the operator can perform regular and suitable tests to ensure the safe condition of the meter Observe the information on the name plate The meter tube solid bodies FV4000 VR4 FV4000 VT4 Vortex flowmeters only inlet and outlet pipes FS4000 SR4 FS4000 ST4 Swirl flowmeters only sensor and gasket come int...

Page 11: ...rmation may result in death or severe injury WARNING Bodily injury This symbol in conjunction with the signal word Warning indicates a potential electrical hazard Failure to observe this safety information may result in death or severe injury CAUTION Minor injury This symbol in conjunction with the signal word Caution indicates a possibly dangerous situation Failure to observe this safety informat...

Page 12: ...e model The model number of the meter see no 1 in the description of the name plates can be found on the name plate The connection diagram appears in the section titled Electrical connection Technical data material load curves etc appear sorted by model in the section titled Technical data 2 Identifying the transmitter design The transmitter design can be identified from the name plate 3 Identifyi...

Page 13: ...Safety D184B097U02 FV4000 VT4 VR4 FS4000 ST4 SR4 13 1 7 2 2 Name plates G00723 Fig 2 Name plate G00722 Fig 3 Name plate hazardous area ...

Page 14: ...luid group as per the pressure equipment directive PED Fluid group 1 hazardous liquids gaseous 6 Manufacturer of the pressure equipment Pressure equipment outside the applicable range of the PED S Nr 0012345 DN 50 PN 40 Material 1 4571 PTFE Manufactured 2002 PED SEP ABB Automation Products GmbH 37070 Göttingen Germany Hast C 4 G00003 Fig 5 The factory tag contains most of the specifications includ...

Page 15: ...y in doing so The operators must strictly observe the applicable national regulations with regards to installation function tests repairs and maintenance of electrical products 1 9 Returning devices Use the original packaging or a suitably secure packaging for returning the device for repair or for recalibration Include the properly filled out return form see attachment with the device According t...

Page 16: ...used in private applications may be disposed of at municipal garbage facilities Proper disposal prevents negative effects on people and the environment and supports the reuse of valuable raw materials If it is not possible to dispose of old equipment properly ABB Service can accept and dispose of returns for a fee 1 10 2 RoHS directive 2002 95 EC With the Electrical and Electronic Equipment Act El...

Page 17: ... The flow direction must correspond to the direction indicated on the meter if labeled The maximum torque must not be exceeded for all flange connections The meters must be installed without mechanical tension torsion bending Wafer units must be installed with coplanar counter flanges Equipment must only be installed for the intended operating conditions and with suitable gaskets Flange bolts and ...

Page 18: ...Operation with abrasive fluids and or cavitation can damage pressurized components During operation with hot fluids contact with the surface may result in burns Aggressive fluids may result in corrosion and abrasion of the parts that come into contact with the medium As a result pressurized fluids may escape prematurely Due to wear on the flange gasket a pressurized medium may escape Important As ...

Page 19: ...ective maintenance work may only be performed by trained personnel Depressurize the device and adjoining lines or containers before removing the device Check whether hazardous materials are used as materials to be measured before opening the device Residual amounts of hazardous material may still be present in the device and could escape when the device is opened As far as provided in the scope of...

Page 20: ...ex trail Karman street G00680 1 2 Fig 6 Principle of measurement FV4000 1 Solid body 2 Piezo sensor The frequency f of vortex shedding is proportional to the flow velocity v and inversely proportional to the width of the solid body d d v St f St known as the Strouhal number is a dimensionless number which has a decisive impact on the quality of vortex flow measurement If the solid body is dimensio...

Page 21: ...l changes in pressure induced by vortex shedding are detected by a piezo sensor and converted into electrical pulses corresponding to the vortex frequency The frequency signal from the flowmeter sensor which is proportional to the flow undergoes downstream processing in the transmitter G00602 L St Re Fig 7 How the Strouhal number is dependent upon the Reynolds number St Strouhal number ReReynolds ...

Page 22: ...onal to the flow and if the internal geometry of the meter exhibits an optimum design will be linear over a wide flow range This frequency is measured by a piezo sensor The frequency signal from the flowmeter sensor which is proportional to the flow undergoes downstream processing in the transmitter G00702 p1 VT2 VT1 V 0 A V 0 A p2 1 2 3 4 5 6 Fig 8 Principle of measurement of the Swirl flowmeter ...

Page 23: ... output 1 FIR Finite Impulse Response The flow and vibration piezo elements from the sensor deliver signals which are forwarded to the analog to digital converter via an amplifier A gain control mechanism in the DSP controls gain via the D A converter Gain control is used to adapt the necessary signal gain dynamically The filter algorithm in the DSP evaluates the signals picks up the flow signal a...

Page 24: ...4 Wafer flange design Vortex flowmeter FV4000 VT4 Flange design Swirl flowmeter FS4000 ST4 Flange design Fig 11 2 3 2 Remote mount design The transmitter can be installed up to 10 m 33 ft away from the flowmeter sensor The cable is permanently connected to the transmitter It can be made shorter if required G00700 Vortex flowmeter FV4000 VR4 Wafer flange design Vortex flowmeter FV4000 VR4 Flange de...

Page 25: ...e or slip unintentionally during transport Support the meter laterally Warning Potential damage to parts A lifting strap must be used to transport flanged units smaller than DN 350 Wrap the straps around both process connections when lifting the meter Chains should not be used since these may damage the housing 3 3 Transport of flanged units larger than DN 300 Caution Potential damage to parts Usi...

Page 26: ...e media and its temperature may be used Gaskets must not extend into the flow area since possible turbulence could affect the accuracy of the meters The pipelines must not exert any impermissible forces or torques on the meter Do not remove the plugs in the connectors until you are ready to install the electrical cable Make sure the gaskets for the housing cover are seated properly Carefully gaske...

Page 27: ...ate damping devices The residual pulse must not exceed 10 The frequency of the conveying equipment must not be within the range of the measuring frequency of the flowmeter Valves gates should normally be arranged in the flow direction downstream of the flowmeter typically 3 x DN If the medium is conveyed through piston plunger pumps or compressors pressures for fluids 10 bar 145 psi it may be subj...

Page 28: ...ameter is required at the outflow end G00703 15xD 5xD 15xD 5xD 18xD 5xD 25xD 5xD 20xD 5xD 50xD 5xD 40xD 5xD Fig 13 Recommended inflow and outflow sections 4 3 2 Swirl flowmeter On account of its operating principle the Swirl flowmeter functions virtually without inflow and outflow sections The figure below shows the recommended inflow and outflow sections for various installations Inflow and outfl...

Page 29: ...tallation for pressure and temperature measurement As an option the flowmeter can be fitted with a PT100 for direct temperature measurement This temperature measurement supports for example the monitoring of the media temperature or the direct measurement of saturated steam in mass flow units If pressure and temperature are to be compensated externally e g with the Sensycal the measuring points mu...

Page 30: ...of final controlling equipment 4 6 2 Vortex and Swirl flowmeters If the medium is conveyed through piston plunger pumps or compressors pressures for fluids 10 bar 145 psi it may be subject to hydraulic vibration in the pipeline when the valve is closed If this does occur the valve absolutely has to be installed in the flow direction upstream of the flowmeter Suitable dampers e g air vessels in the...

Page 31: ...rofile will be distorted 3 Use the appropriate screws for the holes 4 Slightly grease the threaded nuts 5 Tighten the nuts in a crosswise manner as shown in the figure Observe the selected tightening torque Important Torques for screws depend on temperature pressure screw and gasket materials The relevant applicable regulations must be taken into consideration First tighten the nuts to approx 50 o...

Page 32: ...via the outer diameter of the sensor body with the corresponding bolts Depending on the nominal pressure rating sleeves for the bolts a centering ring up to DN 80 or segments can be ordered as additional accessories see Fig 20 G00618 1 2 3 Fig 19 Centering the wafer unit with ring or segment 1 Centering 2 Bolts 3 Centering segment ...

Page 33: ...sting pipeline insulation it is installed inside the insulation the maximum height of 100 mm 3 94 inch must not be exceeded If the maximum temperature the trace heating is able to produce is less than or equal to the maximum temperature of the fluid The requirements to be met by integrators set out in EN 60079 14 must be complied with Please note that the use of trace heaters will not impair EMC p...

Page 34: ...0 This stop protects the cable running from the flowmeter sensor G00705 1 2 Fig 21 Rotating the transmitter housing 1 Bolt 2 Stop screw 1 Unscrew the stop screw on the transmitter housing with a 4 mm Allen key 2 Push the bolts out 3 Turn the transmitter housing in the required direction Warning Potential damage to parts The transmitter housing must not be lifted up since this could tear away the c...

Page 35: ...e cover is open the inside of the meter must be protected against the ingress of dust and moisture G00706 1 1 Fig 22 Rotating the display 1 Phillips head screws 1 Unscrew the front housing cover The lock on the cover needs to be undone first on meters for hazardous areas Important After switching off the supply power wait t 2 minutes before opening the flameproof housing 2 Remove the white clip on...

Page 36: ...1 Std 280 C 536 F version HT High temperature version fmax 400 C 752 F The flowrates apply for fluids at 20 C 68 F 1 013 mbar 14 69 psi ρ 998 kg m3 62 30 lb ft3 4 12 1 2 Gas Steam flowrates DIN pipe ANSI pipe Qvmin 1 m3 h Qvmin 1 m3 h Qvmin 1 ft3 min DN std HT QvmaxDN m3 h Frequency Hz at Qvmax std HT QvmaxDN m3 h std HT QvmaxD N ft3 min Frequency Hz at Qvmax 15 1 2 4 24 1520 5 22 2 94 12 95 1980 ...

Page 37: ... 2201 43 30 44000 300 12 100 1000 440 29 4402 87 16 115000 400 16 180 1800 792 52 7925 16 13 160000 The flowrates apply for fluids at 20 C 68 F 1013 mbar 14 69 psi ν 1 cSt ρ 998 kg m3 62 30 lb ft3 4 12 2 2 Gas Steam flowrates DN QVmin m3 h QVmaxDN m3 h QVmin ft3 min QVmaxDN ft3 min Frequency Hz at QVmaxDN 15 1 2 2 5 16 1 47 9 42 1900 20 3 4 5 25 2 94 14 71 1200 25 1 5 50 2 94 29 43 1200 32 1 1 4 8...

Page 38: ...d at the plant overvoltage lightning protection is optional Check that the existing operating voltage corresponds to the voltage indicated on the name plate The same lines are used for both the power supply and output signal Important Please ensure compliance with applicable requirements when making electrical connections for meters approved for use in the USA and Canada USA Meters approved for us...

Page 39: ...ng output is also available G00711 31 1 2 3 32 41 42 Fig 23 Cable connection area 1 Current output terminals 2 Switching output terminals 3 Functional ground Pin configuration Connection Description 31 Supply power 32 Supply power 41 Switching output 42 Switching output Functional ground Supply power terminals 31 32 Standard 14 46 V DC Hazardous area design See Technical data for hazardous areas s...

Page 40: ...SR4 D184B097U02 Connection examples G00640 UB US RB 31 32 41 42 1 Fig 24 Supply power from central voltage supply 1 Functional ground G00641 R US UB RB 31 32 1 2 Fig 25 Supply power DC or AC from power supply unit 1 Functional ground 2 Power supply unit ...

Page 41: ...for bus cable shield 2 Bus terminals 3 Switching output terminals 4 Functional ground Pin configuration Description Connection PROFIBUS PA FOUNDATION Fieldbus 31 PA 1 FF 2 32 PA 1 FF 2 41 C9 Switching output 42 E9 Switching output Terminal for cable shield functional ground 1 Connection for PROFIBUS PA to IEC 1158 2 2 Connection for FOUNDATION Fieldbus H1 ...

Page 42: ...n fall below the required level thereby interrupting the electrical connection The sheathing of the supply voltage cable must not be damaged Otherwise protection class IP 67 for the flowmeter cannot be ensured 5 Remove the insulation from the cable sheath and the wires and connect these to the corresponding terminals see the section titled Cable connection area 6 Screw on the cover for the cable c...

Page 43: ... 2 Remove the cable gland 3 Install the conduit gland 4 Route the connecting cable through Important The outer diameter of the unshielded connecting cable must be between 8 0 mm 0 31 inch and 11 7 mm 0 46 inch 5 Tighten the lock nut on the gland to a torque of 32 5 Nm 23 97 lbf ft 6 Fasten the connecting cable inside the housing with the additional cable grip 7 Connect the bare wires to the corres...

Page 44: ...0 0 U V DC k Ω R Fig 28 Load diagram for current output load via supply power In HART communication the smallest load is 250 Ω The load RE is calculated on the basis of the available supply voltage US and the selected signal current as follows B S E I U R G00648 20 mA 4 mA 0 Qmax Q Fig 29 Current output 1 Low flow The measurement value output at the current output is as shown in the figure Above t...

Page 45: ...switching off the supply power wait t 2 minutes before opening the flameproof housing 3 Remove the insulation from the cable sheath the shield and the wires as specified see the section titled Cable connection area 4 Insert the bus cable into the cable connection area through the cable gland and fasten to the cable grip level with the shield to prevent accidental disconnection 5 Tighten the cable ...

Page 46: ...tput terminals 41 42 available Electrical variable Value Supply voltage U 14 32 V DC Current normal operation I 10 mA Current in the event of an error FDE I 13 mA VT4A ST4A models G00728 PA F T 42 41 32 31 NAMUR II 2G EEx ia IIC T4 EEx ia PA E9 C9 FF FF E9 C9 PA PA b a 1 2 3 4 Hazardous area Non hazardous area Fig 30 FV4000 VT4A FS4000 ST4A connection diagram 1 Flowmeter sensor and transmitter 2 O...

Page 47: ... cable gland and fasten to the cable grip on level with the shield to prevent accidental disconnection 5 Tighten the cable gland Warning Potential damage to parts If the bus cable is not fastened to the cable grip the shield will not have a functional ground Furthermore there is a risk of the cable being pulled completely out of the transmitter housing should the strain fall below the required lev...

Page 48: ...The signal cable carries a voltage signal of only a few millivolts and must therefore be routed along the shortest distance possible The maximum permissible signal cable length is 10 m All leads must be shielded and connected to operational ground For this purpose the cable shield must be connected underneath the cable clamp Avoid routing the signal cable in the vicinity of electrical equipment or...

Page 49: ...eter sensor cable connection area 2 Close up of signal cable fastening 3 To transmitter 4 Terminals for Pt100 5 Functional ground G00709 31 32 41 42 87 86 86 85 84 82 83 81 3 2 4 1 Fig 33 Connection between transmitter and flowmeter sensor 1 Voltage supply connection 2 Converter 3 Flowmeter sensor 4 Functional ground Wire colors signal cable Wire color White Brown Green Yellow Gray Pink Blue Red C...

Page 50: ...rmation The device can be shipped completely prewired The M12 plug in connector is installed in the terminal box instead of the cable gland Important Matching sockets type EPG300 can be found in data sheet 10 63 6 44 xx along with other accessories G00653 4 1 3 2 Fig 34 Assignment for connection using optional M12 plug in connector view from the front looking at pin insert and pins Pin Assignment ...

Page 51: ... as a passive optocoupler G00646 41 RE US 42 Switching output Input from e g PLC etc with US 16 30 V Fig 35 Electrical connection Function Technical data Pulse output fmax 100 Hz 1 256 ms NAMUR contact Closed 1 KΩ open 10 KΩ Passive optocoupler 0 UCEL 2 V 16 V UCEH 30 V 0 ICEH 0 2 mA 2 mA ICEL 15 mA G00647 e 0 1 B e 8 9 2 10 I in mA U in V S R min 2 KΩ R m a x 8 0 K Ω 3 11 16 4 12 5 13 6 14 7 15 3...

Page 52: ...0 VR40 ST40 SR40 None optocoupler VT41 VR41 ST41 SR41 Ex ib Ex nA nL NAMUR contact VT42 VR42 ST42 SR42 Ex d Ex ib Ex nA nL Optocoupler VT43 VR43 ST43 SR43 CFMUS Optocoupler VT4A VR4A ST4A VR4A II 2G EEx ia IIC T4 NAMUR contact If necessary the switching output can be modified subsequently should prevailing site conditions change 1 Disconnect the flowmeter from the line supply 2 Unscrew the front h...

Page 53: ...ed correctly Warning Potential damage to parts If the transmitter is not placed into the housing correctly the electrical plug in connectors at the rear can twist or break off Position the transmitter so that the three screw holes on the base plate are located exactly in front of the threaded bolts 6 Then tighten the three screws again 7 Finally tighten the housing cover hand tight The lock on the...

Page 54: ...xternally using the designated terminal on the transmitter housing G00713 31 1 32 41 42 Fig 39 1 Functional ground equipotential bonding terminal Functional ground connection 1 Unscrew the screw type terminal on the transmitter housing 2 Insert the fork type cable lug for functional ground into the terminal between the two metal tabs 3 Tighten the screw type terminal ...

Page 55: ...pply power the display if in use shows the current flow after a few seconds 6 2 2 Device configuration The device can be factory calibrated to customer specifications upon request If no customer information is available the device is delivered with factory settings see Standard display format on page 68 6 3 Information on voltage current consumption The switch on response meets the requirements se...

Page 56: ...e set either locally on the unit via the miniature switch 8 on the digital board using system tools or via a PROFIBUS DP master class 2 such as SMART VISION Switch 8 is factory set to Off in other words addressing is via the fieldbus G00733 C CE Step Step C CE Data Data Enter Enter On 1 2 3 4 5 6 7 8 Fig 40 Position of the miniature switch Setting the bus address 1 Unscrew the front cover from the...

Page 57: ...f On On The bus address is set by adding together the corresponding address values of switches 1 to 7 To set bus address 81 switches 1 5 and 7 have to be set to On since the corresponding address values 1 16 and 64 add together to make 81 Switch 8 must be set to On in order that the bus address can be set with the miniature switch 6 5 Setting the bus address FOUNDATION Fieldbus On the FOUNDATION F...

Page 58: ...uired operating mode Which flow unit is the meter to display the flow in is the flowmeter to add values Selection between units of volume and units of mass flow depending upon the selected operating mode Enter the required measuring range in the unit selected above with the Qmax operating mode parameter Range 0 15 1 15 x QmaxDN operation Qmin operation Check the low flow value Range 0 05 0 1 x Qma...

Page 59: ...ter Digital communication utilizes an alternating current superimposed on the analog output 4 20 mA that does not affect any meters connected to the output Transmission method FSK modulation of the current output 4 20 mA is implemented in accordance with the Bell 202 standard The maximum signal amplitude is 1 2 mA SS Logic 1 representation 1200 Hz Logic 0 representation 2200 Hz The SMART VISION WI...

Page 60: ... programmable and corresponds to NAMUR NE43 Operation using the HART protocol is described in operating instructions D184B108Uxx G00790 1 4 20 mA HART R 250 Ω B min RS232C Fig 41 HART communication 1 FSK modem Important Up to date DD EDD data can also be downloaded from the ABB homepage at http www abb com flow ...

Page 61: ...itters are suitable for connection to DP PA segment couplers and the ABB MB204 multibarrier The meter s PROFIBUS PA interface conforms with Profile B V 3 0 fieldbus standard PROFIBUS EN 50170 DIN 19245 PRO91 The transmitter transmission signal is designed according to IEC 61158 2 Certification has been obtained to verify conformity with the standard The meter s PROFIBUS PA ID no is 05DC hex The me...

Page 62: ...ected to one and the same bus and communicate on it they are also interchangeable in other words devices from different manufacturers can be interchanged without having to modify the configuration in the process control system To support interchangeability ABB provides three different GSD generic station description files for system integration During system integration users decide whether to ins...

Page 63: ...wmeter data such as nominal size k factor measuring ranges etc along with all manufacturer specific parameters not contained in the function blocks Analog input block output of measured value and status Users can select the measured values which are relevant for their applications Qv volume flow Qn volume flow under standard conditions Qm mass flow or temperature option via the channel selector To...

Page 64: ... registered by the Fieldbus Foundation and meets all current requirements successful completion of the FF Conformance Test compliance with FF spec 1 4 and successful completion of the test with the ITK 4 0 The reg no is IT013600 The device is registered with the Fieldbus Foundation under manufacturer ID 0x000320 and device ID 0x0015 The device supports LAS functionality The device s intrinsically ...

Page 65: ...ed for segment engineering Engineering can be performed online or offline The function blocks are described in the separate FOUNDTAION Fieldbus interface description for the meter part no D184B093U23 You can find both files as well as the interface description on the CD included in the scope of supply part no D699D002U01 The CD can be ordered separately from ABB at any time free of charge if requi...

Page 66: ...e flow totalizer parameters The transducer block also contains a totalizer Analog input block Users can select the measured values which are relevant for their applications Qv volume flow Qn volume flow under standard conditions Qm mass flow totalizer or temperature option via the channel selector Important Detailed descriptions of the blocks parameters appear in the separate PROFIBUS PA interface...

Page 67: ...vent of error 3 error 9 B 1X 11 2008 Market entry Software for transmitter D674A659U10 and U12 launch 12 2008 onwards same functionality at A 42 7 4 2 TRIO WIRL FV4000 Profibus PA Software D200SF003U01 Software version Revision date Type of changes Documentation Supplements A 1X 12 1999 Market entry A 2X 09 2006 Function enhancement Totalizer arithmetic modified higher internal readings possible 7...

Page 68: ...flowmeter runs various self tests automatically The standard display then appears process information The configuration of the display can be defined by the user The following display formats can be selected Display format Display Qv 13 56 m3 h Operating flow with physical display Qv 409 8 m3 Totalized operating flow T 185 6 C Media temperature ...

Page 69: ...utton is one of two arrow buttons Press Data to move backward through the menu All required parameters can be called up Enter The Enter function requires that both arrow buttons Step and Data be pressed simultaneously The Enter function activates and deactivates programming protection It can also be used to call up further parameters for modification and apply new selected or set parameters The En...

Page 70: ...E Step Data These magnet sensors function in the same way as the buttons of the same name Enter The Enter function is activated by pressing and holding down the Data magnet sensor for more than 3 s The display flashes to indicate that this function is active As soon as the magnet stick is taken away from the magnet sensor the Enter function is executed Important The flow continues to be measured d...

Page 71: ...er value Where there are multiple parameters a numerical value has to be entered The Data and Step buttons are also used to enter numbers If a parameter requiring a numerical entry is selected a 0 will appear in the top left hand line and the corresponding unit will be shown in the line below 1 Press Data to enter the numerical value Pressing this button repeatedly will show the numbers 1 to 0 con...

Page 72: ...customer relevant menu parameters Service level 3 The Service menu is accessed exclusively for after sales service of ABB Automation Products 8 4 2 Menu level parameters Standard Specialist Service Progr level P protect code Language QmaxDN operation Qmax Totalizer Damping Hardware config Display Error register Progr level P protect code Language Flowmeter sensor Nominal size Mean k factor Operati...

Page 73: ...r Display format Comments Qv 10 5 Standard display Sprache 1 Activate parameterization mode C CE Step or Data A parameter appears Progr Ebene 2 Find the Progr level menu item Step or Data Gesperrt 3 Show the current programming level Enter Gesperrt_ Enter Standard_ 4 Select the required programming level Step or Data or Spezialist_ Step or Data or Service_ Step or Data Progr Ebene 5 Return to the ...

Page 74: ...utton Magnet sensor Display format Comments Progr Ebene 1 Find the Progr level menu item Step or Data Spezialist 2 Show the current programming level Enter Spezialist_ Enter Service_ 3 Select the Blocked parameter Step or Data or Standard_ Step or Data or Gesperrt_ Step or Data Progr Ebene 4 Reactivate programming protection Enter Qv 10 5 5 Go back to standard display C CE Standard display ...

Page 75: ...chutz Kode Enter Alter Kode 0 Enter Enter Neuer Kode 9999 If a number other than 0 factory setting has been selected for the P protect code it will only be possible to deactivate programming protection by entering a number from 1 to 9999 as the P protect code Enter Data Data Step Sprache Enter Englisch_ Step Deutsch_ Languages German English Enter Data Data Step Messaufnehmer Enter VORTEX VT VR_ S...

Page 76: ... T Medium Fluid Operating mode Mass with correction Pt100 required Selection Mass flow Step Flüssig Qm V T Medium Fluid Operating mode Mass with correction Pt100 required Selection Mass flow Step Gas Qv Medium Gas Steam Operating mode Operating volume Selection Operating flow Step Gas Norm Qn pT Medium Gas Operating mode Standard volume with correction Pt100 required Selection Standard flow Step G...

Page 77: ...uid Qm V T gas mass Qm pT gas mass Qm D Enter Enter Data Step Bezugs dichte Enter 1 000 kg l 0 kg l Selection 0 001 1000000 The menu appears when the following operating modes are selected Fluid Qm D T fluid Qm V T gas mass Qm D Enter Enter Data Step Norm dichte Enter 0 001 kg l kg l 0 kg l Selection 0 000 0 100 The menu appears when the following operating mode is selected Gas mass Qm pT Enter En...

Page 78: ...ted Fluid Qm V T Enter Data Step D Ausg koeffi Enter 1 00 K The menu appears when the following operating mode is selected Fluid Qm D T Enter Step Data Step Einheit Qvol Enter l s _ l m _ Selection l s l m l h m3 s m3 m m3 h m3 d ft3 s ft3 m ft3 h ft3 d usgps usgpm usgph usmgd igps igpm igph igpd bbl s bbl m bbl h bbl d The menu appears when the following operating modes are selected Fluid Qm D T ...

Page 79: ...ieb 1 000 m3 h 0 m3 h 0 10 of the QmaxDN volume Enter Enter Data Step Zähler Zähler Wert 0 0000 m3 Sets the totalizer to a defined starting value Enter Über lauf 10 Displays the totalizer overflow max 65 535 1 overflow 10 000 000 Enter Einheit Zähler m3 ft3 Selection m3 ft3 usgal igal igl bbl l g kg t lb Selects the totalizer unit as a function of the selected operating mode volume or mass flow En...

Page 80: ...Step I HART S_Alarm_ Current HART protocol Switching output System alarm with alarm closed Enter Enter Data Step Min Q_Alarm Enter 10 000 _ 0 _ Selection 0 100 of Qmax 0 off Min flow alarm Enter Enter Data Step Max Q_Alarm Enter 80 000 _ 0 _ Selection 0 100 of Qmax 100 off Max flow alarm Important The Min Q_Alarm and Max Q_Alarm menu items are only displayed if the I HART Q_Alarm parameter is sele...

Page 81: ... alarm programmable Enter Enter Data Step Impuls Faktor 100 000 1 m3 5 1 m3 Selection 0 001 1000 pulses unit Selected unit for the output for the internal and external flow totalizer Important The Pulse width menu is only displayed if the I HART Pulse_Bin parameter is selected Enter Enter Data Step Impuls breite 10 ms 0 ms Selection 1 256 ms Maximum 50 on off If this value is overshot a warning wi...

Page 82: ... sensor frequency Simulation current and pulse output Switch on by entering the starting value in Hz Switch off by entering 0 Hz On changing to the process display the frequency can be modified with the Data and Step buttons 5 Hz Data Step Main FRAM To be completed Data Step Backup FRAM To be completed Enter Data Step Schalt ausgang Kontakt aus The contact is switched on or off as required with th...

Page 83: ...e parameters Comments Enter Enter Data Step Anzeige Haupt Anzeige Enter Q Betr art_ HART device Step Qv Betrieb_ Step Prozent_ _ Step Zähler_ _ Step Temperatur_ _ Step Frequenz_ _ Selects the main display Enter Enter Multipl Anzeige Enter Q Betr art_ Step Qv Betrieb_ Step Prozent_ _ Step Zähler_ _ Step Temperatur_ _ Step Frequenz_ _ Selects the multiplex display ...

Page 84: ...line on off in multiplex operation Data Enter Data Step Funktions test Step HART Transmit HART Tra 0 2200H Selection 0 2200H 1 1200H Enter Data Step HART Command HART Com Tests the HART receiver Data Step Geräte adresse Enter Data Step 50VT4000 06 2000 D699C00x U01 A 16 1 15 multidrop operation Displays the current software version along with the revision date Entry Displays the current revision n...

Page 85: ...n the AI block only in the case of the FOUNDATION Fieldbus design Step Temperatur_ _ This parameter will only be displayed if the flowmeter sensor is fitted with a temperature measurement device Displays the process temperature Step Frequenz_ _ Displays the sensor frequency Step AI1 Out_ _ Selects the values to be displayed Displays the OUT value of AI1 decimal places resulting from the decimal po...

Page 86: ...mode is dependent upon the flow display in operating volume or standard volume mass units Enter Kontast The Data and Step buttons are used to set the display contrast Enter Enter Data Step Fehler register Netzausfall 14 Totalizer for the number of power failures since first use Data Step Displays any errors that have occurred Press the Enter button to reset Data Enter Data Step Funktions test Step...

Page 87: ...nt Zähler Displays the communication software version Sets the ID no for the selector Note Modes can only be changed when in STOP and not during cyclic communication Channel setting of the first AI block When setting the channel the unit for the channel is also copied to the AI block to OUT_SCALE UNIT_INDEX Enter Data Step AI2 Channel Qv AI2 Channel Q Betriebsart Enter Data Step TOT Channel Qv TOT...

Page 88: ...er in the AI block only in the case of the FOUNDATION Fieldbus design Step Temperatur_ _ This parameter will only be displayed if the flowmeter sensor is fitted with a temperature measurement device Displays the process temperature Step Frequenz_ _ Displays the sensor frequency Step AI1 Out_ _ Selects the values to be displayed Displays the OUT value of AI1 decimal places resulting from the decima...

Page 89: ...setting of the DIP switches on the digital panel Switch 1 Releases the simulation of the Al function blocks Switch 2 Hardware write protection for write access via bus locks all blocks Switch 3 Write protection for local operation of device button and magnet stick Data Step FF Enter Software Rev Communication 0 Data Step TRIO WIRL FF 50VT4 FF 11 2001 D200F002U01 A 1_ Displays the communication sof...

Page 90: ...ration factor is calculated and engraved on the flowmeter sensor The following tables show the typical k factors for corresponding nominal sizes along with the frequencies generated in the flowmeter when measuring fluids and gases Important The values indicated are typical k factors and frequencies for the associated device models Precise data can be found in the test logs included in the respecti...

Page 91: ...00 78 690 100 4 1620 77 700 150 6 460 40 470 200 8 194 23 270 300 12 54 16 92 400 16 27 13 80 The transmitter calculates the operating flow using the following formula k f Q Q Operating flow m3 s F Frequency 1 s K Calibration k factor 1 m3 8 7 3 Hardware config This submenu allows users to specify the response of the switching output terminals 41 42 Depending upon the selection Pulse Flow alarm Te...

Page 92: ... factory setting 22 4 mA If QmaxDN is overshot by more than 20 error 9 will also be output as a warning before the device is overloaded Error 3 off If the set measuring range is overshot by more than 3 125 the current output will maintain the 20 5 mA it will have reached by this point If QmaxDN is overshot by more than 20 error 9 will also be output and the current output will switch to the set fa...

Page 93: ... the ratio between standard flow and operating flow Standard factor T 273 273 bar 013 1 p bar 013 1 Qv Qn Qn Standard flow Qv Operating flow P Operating pressure bar ü T Temperature C ρV Operating density ρN Standard density Since the mass flow is constant the following formula applies N V Qv Qn ρ ρ 8 7 6 Operating density Please refer to the AP Calc product selection and dimensioning program whic...

Page 94: ...nce density Unit Qm Fluid 1 Qm D T b T Qv Qm ρ 2 T T 1 T 0 b b β ρ ρ Reference density ρb Reference temperature T0 Temperature measured Tb Density compensating coefficient ß2 Unit of density Reference density Reference temperature Unit Qm D comp coeffi Fluid 1 Qm V T Fluid Mass flow b Qn Qm ρ 1 T T 1 Qv Qn 0 b β Vol expansion coefficient K ß1 Reference temperature T0 Temperature measured Tb Refere...

Page 95: ...tandard factor Gas mass 1 Qm pT Gas Mass flow standard condition at 1 013 bar 0 C or 1 013 bar 20 C Qn Qm 0 ρ b T K 273 K 273 bar 013 1 Pbtr Qv Qn Reference pressure Pbtr abs Standard density p0 Temperature measured Tb Unit of density Standard density Standard condition Reference temperature Pressure_Pbtr_abs Unit Qm Gas Qv Operating flow Gas mass Qm D Gas Steam Mass flow b Qv Qm ρ Reference densi...

Page 96: ...ery digit or letter on the error register display represents an error 9 1 1 Error register display when no errors are pending 9 1 2 Error register display when errors are pending 3 6 4 9 9 1 3 Power failure totalizer The transmitter counts the number of power failures This information can be read from the error register Important Only ABB Service personnel are able to clear the power failure total...

Page 97: ...signed 5 M database 0 Main database damaged beyond repair loss of transmitter s internal database Reduce flow Replace meter and switch back on replace transmitter plug in module if necessary contact ABB Service 6 Meter damaged beyond repair 1 Flowmeter damaged beyond repair values displayed are invalid Reprogram the meter PT100 faulty Replace sensor 7 Temperature 7 Problem affecting temperature me...

Page 98: ...the housing is open EMC protection is limited 10 1 Returning devices Use the original packaging or a suitably secure packaging for returning the device for repair or for recalibration Include the properly filled out return form see attachment with the device According to EC guidelines for hazardous materials the owner of hazardous waste is responsible for its disposal or must observe the following...

Page 99: ... flowmeters sent to the repairs department must wherever possible be accompanied by your own description of the fault and its underlying cause Important Please use the form for returned products provided in the Appendix This helps us to perform repairs quickly and without the need to contact you for further details Before you return the device please clean it and pack it safely and securely When o...

Page 100: ...al integrity of the process connections Cable entry points and cover screws Operational reliability of the supply power feed the lightning protection and the grounds Important When sending the flowmeter to the head office of ABB Automation Products GmbH complete the return form in the appendix and include with device 10 3 Cleaning When cleaning the exterior of meters make sure that the cleaning ag...

Page 101: ... EMC protection is limited 1 Disconnect the flowmeter from the line supply 2 Unscrew the front housing cover The lock on the cover needs to be undone first on meters for hazardous areas Important Observe the waiting times for meters for hazardous areas see the section titled Technical data for hazardous areas 3 Remove the transmitter from the housing To do this unscrew the three Phillips head scre...

Page 102: ...mitter is not placed into the housing correctly the electrical plug in connectors at the rear can twist or break off Position the transmitter so that the three screw holes on the base plate are located exactly in front of the threaded bolts 6 Then tighten the three screws again 7 Finally tighten the housing cover hand tight The lock on the cover needs to be re attached on meters for hazardous area...

Page 103: ...used as flow media Residual amounts of hazardous material may still be present in the device and could escape when it is opened The pipeline must be depressurized prior to opening the device Warning Potential damage to parts Never unscrew the fixing screws from the base or the transmitter from the base Doing so can damage the meter beyond repair In the event of problems please contact ABB Service ...

Page 104: ...ls VT42 ST42 VR42 SR42 Operation in Zone 1 Ex d ib IIC non intrinsically safe supply Operation in Zone 1 Ex ib IIC intrinsically safe supply Operation in Zone 2 Ex nA nL IIC non intrinsically safe supply Operation in Zone 21 22 Ex tD A21 Ex tD A22 non intrinsically safe supply or intrinsically safe supply Important All types of protection are noted on the name plate In the case of operation in Zon...

Page 105: ... the device is based on the PTB s FISCO model FISCO fieldbus intrinsically safe concept Proof of intrinsic safety for interconnection with other intrinsically safe equipment is not required under the boundary conditions specified All nodes must have FISCO approval e g from the PTB TÜV BVS KEMA The maximum cable length in a segment is restricted to 1 000 m for EEx ia and 1 900 m for EX ib The bus c...

Page 106: ...category 1 2G 1 2G 2 3G 21 2D Class I DIV 1 Class I II III DIV 1 Housing components in addition to the housing with particular relevance for explosion protection Flameproof cable gland safety catch None None Safety catch NPT thread prepared for conduit fitting safety catch Waiting time on opening the transmitter 2 min 2 min 2 min 2 min 2 min No Temperature class T6 sensor T4 T4 T4 T85 C Tmed T4 T4...

Page 107: ...Red 82 Blue 83 Pink 84 Gray 85 Yellow 86 Green 86 Brown 87 White 1 Supply power terminals 31 32 a Ex ib Ui 28 V DC b Ex nA nL UB 14 46 V DC 2 Switching output terminals 41 42 The switching output passive optocoupler is designed as a NAMUR contact to DIN 19234 When the contact is closed the internal resistance is approx 1 000 Ω When the contact is open it is 10 KΩ The switching output can be change...

Page 108: ... to the line supply the electrical circuits must not exceed overvoltage category III II 11 2 3 Medium temperatures Temperature classes For the supply circuit Terminals 31 32 and the switching outputs Terminals 41 42 cables suitable for temperatures up to T 110 C T 230 F can be used without restriction Category 2 3G For cables suitable only for temperatures up to T 80 C T 176 F the interconnection ...

Page 109: ...U U m m 81 82 83 84 85 86 86 87 42 42 41 41 32 32 31 31 VR42 SR42 VT42 ST42 Ex d ib Ex ib Ex nA nL Ex ib Ex nA nL PA 1 1 60 V 60 V 2 2 PA PA Ex d ib Ex ib Ex nA nL Fig 52 Connection diagram for VT42 ST42 and VR42 SR42 1 Flowmeter sensor 2 Transmitter 3 Flowmeter Flowmeter sensor wire colors Terminal Wire color 81 Red 82 Blue 83 Pink 84 Gray 85 Yellow 86 Green 86 Brown 87 White 1 Supply power termi...

Page 110: ...g 11 3 2 Approval data for hazardous areas Power supply circuit Terminals 31 32 Zone 1 Ex d ib IIC Zone 2 Ex nA nL IIC UB 14 46 V Zone 1 Ex ib IIC Tamb 55 C 20 70 C Ui 28 V Ii 110 mA Pi 770 mW Effective internal capacitance 14 6 nF Effective internal capacitance to ground 24 4 nF Effective internal inductance 0 27 mH Type of protection Um 60 V Zone 21 22 Ex td A21 Ex tD A22 Tamb 20 C 60 C Power su...

Page 111: ...l design for the USA and Canada for VT43 ST43 and VR43 SR43 4 20 mA HART Important The devices may only be operated in explosive areas if the housing covers have been fully closed Designation Explosion proof XP Class I Div 1 BCD T4 Ta 70 C Type 4X Dust ignition proof DIP Class II III Div 1 EFG T4 Ta 70 C Type 4X Intrinsic safety IS Class I II III Div 1 ABCDEFG T4 Ta 70 C Entity Type 4X Non incendi...

Page 112: ...31 F 280 C 536 F 20 50 C 4 122 F 320 C 608 F 1 20 40 C 4 104 F 400 C 752 F 1 1 Medium temperatures 280 C 536 F with VT43 VR43 Vortex flowmeter only Change from one to two columns 11 4 3 Approval data for hazardous areas Supply circuit terminals 31 32 Explosion proof XP Class I Div 1 BCD T4 Ta 70 C Type 4X Dust ignition proof DIP Class II III Div 1 EFG T4 Ta 70 C Type 4X DIP Class II III Div 2 EFG ...

Page 113: ...Ex relevant specifications D184B097U02 FV4000 VT4 VR4 FS4000 ST4 SR4 113 11 4 4 Trio Wirl control drawing Fig 56 Connection diagram and data VT43 VR43 and ST43 SR43 ...

Page 114: ... V I 10 mA normal operation 13 mA in the event of an error FDE 2 Terminals 41 42 Function C9 E9 Switching output Function can be selected via software as a pulse output fmax 100 Hz 1 256 ms min max alarm or system alarm Configured as NAMUR contact to DIN 19234 Closed 1 KΩ Open 10 KΩ M12 plug in connector G00653 4 1 3 2 Fig 58 Assignment for connection using optional M12 plug in connector view from...

Page 115: ... be used without restriction Category 2 3G For cables suitable only for temperatures up to T 80 C T 176 F the interconnection of both circuits needs to be taken into account in the event of a fault Otherwise the restricted temperature ranges listed in the following table shall apply Category 2D For cables suitable only for temperatures up to T 80 C T 176 F the restricted temperature ranges listed ...

Page 116: ... 0 08 0 01 Conversion of standard density ρn operating density ρ T n ρ ρ ρ 273 273 013 1 013 1 12 3 Overload capability Gases 15 above maximum flow Fluids 15 above maximum flow no cavitation permitted 12 4 Measured value deviation for flow measurement Measured value deviation as a percentage of the measured value under reference conditions including transmitter linear measuring range upwards of Re...

Page 117: ...nt output load 250 Ω 4 20 mA only Fluid for calibration Air 20 C 68 F ambient pressure Water approx 20 C 68 F 2 bar 29 psi Calibration loop internal diameter internal diameter of meter Unobstructed straight upstream section 15 x DN 3 x DN Downstream section 5 x DN 1 x DN Pressure measurement 3 5 x DN downstream of meter Temperature measurement 2 3 x DN downstream after pressure measurement 12 8 Pr...

Page 118: ...pes Material no 1 4571 option Hastelloy C Sensor Material no 1 4571 option Hastelloy C 55 C 400 C 67 752 F 55 C 280 C 67 536 F Kalrez 3018 O ring 0 280 C 32 536 F 0 280 C 32 536 F Kalrez 6375 O ring 20 275 C 4 527 F 20 275 C 68 527 F Viton O ring 55 230 C 67 446 F 55 230 C 67 446 F PTFE O ring 55 200 C 67 392 F 55 200 C 67 392 F Graphite 55 280 C 67 536 F 55 280 C 67 536 F Sensor gasket 1 Graphite...

Page 119: ...t 55 50 0 50 100 150 160 250 280 200 FV4000 VT4 VR4 FS4000 ST4 SR4 Fig 59 Relationship between the temperature of the fluid and the ambient temperature 1 Ambient temperature 2 Fluid temperature 3 Permissible temperature range for standard design 280 C 536 F 4 Side elevation of pipeline 5 Installation for fluid temperature 150 C 302 F 6 HT design 400 C 752 F 1 For the supply circuit terminals 31 32...

Page 120: ...h temperature version Fig 61 High temperature design only version FV4000 TRIO WIRL VT VR PS Pressure bar TS Temperature C Aseptic flange to DIN 11864 2 DN 25 to DN 40 PS 25 bar to TS 140 C if suitable gasket materials are selected DN 50 and DN 80 PS 16 bar to TS 140 C if suitable gasket materials are selected Process connection DIN wafer 0 10 20 30 40 50 60 70 80 90 100 110 60 30 0 30 60 90 120 15...

Page 121: ... G00624 PN40 PN25 PN16 PN10 0 5 10 15 20 25 30 35 40 60 30 0 30 60 90 120 150 180 210 240 270 PS bar TS C Fig 64 PS Pressure bar TS Temperature C Process connection ASME flange G00625 0 10 20 30 40 50 60 30 0 30 60 90 120 150 180 210 240 270 150 lb 300 lb PS bar TS C Fig 65 PS Pressure bar TS Temperature C Change from one to two columns ...

Page 122: ...equipment for process and lab control technology 5 93 and EMC Directive 89 336 EEC EN 50081 1 EN 50082 2 Note EMC protection and protection against accidental contact are limited when the housing cover is open Damping Configurable from 1 100 s corresponds to 5 τ Qv min low flow Configurable between 0 10 of QmaxDN max operating flow per nominal size The actual low flow is determined by application ...

Page 123: ...tics in plain text on the display and an error message G00634 D u r c h f l 1 1 5 Fig 67 Examples The illustration shows the display on the 4 20 mA design G00635 Q v m 3 h 1 3 5 6 Fig 68 Operating flow G00636 Q v m 3 h 4 0 9 8 Fig 69 Totalized operating flow G00637 T C 1 8 5 6 Fig 70 Temperature of medium Change from one to two columns ...

Page 124: ...ing European directives ATEX directive 94 9 EC EMC directive 89 336 EEC Pressure equipment directive PED 97 23 EC Pressure equipment does not receive a CE mark indicating PED compliance on the factory tag in the event of the following conditions prevailing The maximum permissible pressure PS is less than 0 5 bar Due to low pressure risks meter size DN 25 1 no approval procedures are required Explo...

Page 125: ...Appendix D184B097U02 FV4000 VT4 VR4 FS4000 ST4 SR4 125 ...

Page 126: ...Appendix 126 FV4000 VT4 VR4 FS4000 ST4 SR4 D184B097U02 ...

Page 127: ...Appendix D184B097U02 FV4000 VT4 VR4 FS4000 ST4 SR4 127 ...

Page 128: ...Appendix 128 FV4000 VT4 VR4 FS4000 ST4 SR4 D184B097U02 ...

Page 129: ...Appendix D184B097U02 FV4000 VT4 VR4 FS4000 ST4 SR4 129 ...

Page 130: ...kg l kg m3 lb ft3 lb ugl Unit Qvol l s l min l h l d m s m min m h m d ft3 s ft3 m ft3 h ft3 d bbl s bbl min bbl h bls d Usgps USgpm USgph Usmgd igps igpm igph igpd Unit Qm kg s kg min kg h kg d t min t h t d g s g min g h lb s lb min lb h lb d Unit totalizer l m igal USgal ft3 bbl kg t g lb Max alarm Min alarm Pulse factor 0 001 to 1 000 pulse phys unit Pulse width 0 100 2 000 ms Low flow Qmin 2 ...

Page 131: ...person Telephone Fax E mail Device details Type Serial no Reason for the return description of the defect Was this device used in conjunction with substances which pose a threat or risk to health F Yes F No If yes which type of contamination please place an X next to the applicable items Biological F Corrosive irritating F Combustible highly extremely combustible F Toxic F Explosive F Other toxic ...

Page 132: ...2 Error description 97 Error messages 96 Error register 96 Error register display when errors are pending 96 Error register display when no errors are pending 96 Ex 107 Ex relevant specifications 104 F Factory Tag 12 Factory Tag 14 Fieldbus devices 105 Flow ranges FV4000 vortex flowmeter 36 Flow ranges swirl flowmeter FS4000 37 Flowmeter insulation 33 Flowmeter sizes flow range 36 Fluid flowrates ...

Page 133: ...and symbols 11 Power failure totalizer 96 Principles of measurement 20 Process connections 117 PROFIBUS PA communication 61 PROFIBUS PA electrical connection 114 Programming protection 73 R Recommended inflow and outflow sections 28 Reference conditions for flow measurement 117 Repairs alterations and enhancements 9 Replacing the transmitter 101 Returning devices 15 98 Rotating the display 35 S Sa...

Page 134: ...Index 134 FV4000 VT4 VR4 FS4000 ST4 SR4 D184B097U02 Transport safety information 17 W Warranty 10 Warranty provisions 10 WEEE Directive 16 Change from one to two columns A ...

Page 135: ......

Page 136: ...without notice Printed in the Fed Rep of Germany 02 2009 ABB 2009 D184B097U02 Rev 08 ABB Limited Oldends Lane Stonehouse Gloucestershire GL10 3TA UK Tel 44 0 1453 826661 Fax 44 0 1453 829671 ABB Inc 125 E County Line Road Warminster PA 18974 USA Tel 1 215 674 6000 Fax 1 215 674 7183 ABB Automation Products GmbH Dransfelder Str 2 37079 Goettingen Germany Tel 49 551 905 534 Fax 49 551 905 555 CCC su...

Reviews: