background image

Operation Manual / TPL65-A32 / -A33 / -A36 + TPL69-A32 / -A33

7  Removal and installation / 7.2  Removing the turbocharger

© Copyright 2020 . All rights reserved.

HZTL2498_EN

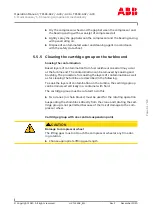
Rev.F

December 2020

u

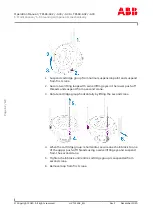
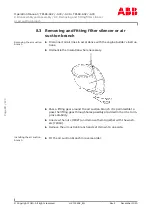
Fasten separate lifting gear to each of the two ribs on the bearing
casing provided for this purpose.

w

Ribs (01) not in the middle at the top:

u

Completely remove the bearing casing insulation (02) and place a
sling around the bearing casing.

u

Loosen the fixing screws at the foot.

u

Lift the turbocharger off the engine and set it down to one side.

Page 

75

 / 

123

Summary of Contents for HT613682

Page 1: ... ABB Turbocharging Type TPL65 A32 HT613682 nMmax 509 t Mmax 600 nBmax 467 t Bmax 600 1 s C 01230 36 50 50 Year 2022 Application according to the Operation Manual kg HZTL2498 English TPL65 A32 Original Operation Manual ...

Page 2: ...Replacement intervals of components depends on the load profile turbine inlet temperature suction air temperature and turbocharger speed In case the operation conditions differs significantly from what is considered to be normal for the cur rent application it is recommended to contact ABB for a re calculation of replacement intervals Frequent load alterations high temperatures and high speed lowe...

Page 3: ...ition of Safety instructions 15 2 5 Warning plates on the turbocharger 16 2 6 Safe operation and maintenance 17 2 7 Hazards during operation and maintenance 20 2 8 Periodic checking of the pressure vessel 25 2 9 Lifting loads 26 3 Commissioning 27 3 1 Oil supply 27 3 2 Inspection work 30 3 3 Commissioning after taking out of operation 32 4 Operation 33 4 1 Noise emissions 33 4 2 Servicing work 35 ...

Page 4: ...ng the turbine diffuser and nozzle ring 87 8 7 Installing cartridge group 90 8 8 Dismantling and fitting nozzle ring at turbine end 93 8 9 Table of tightening torques 96 9 Taking out of operation at short notice 98 9 1 Possibilities for emergency repair 98 9 2 Locking the rotor 99 9 3 Fit cover plate 104 9 4 Blocking the inlets and outlets 108 9 5 Bypass the turbocharger 108 10 Mothballing the tur...

Page 5: ...ing and how to use it as intended It provides important information in order that the turbocharger can be operated safely correctly and efficiently This Operation Manual complements and expands existing national reg ulations concerning work safety and accident prevention Target group This Operation Manual is intended for engineers and qualified mechan ics who are responsible for operating the engi...

Page 6: ... rights reserved HZTL2498_EN Rev F December 2020 1 2 Layout and function 01Filter silencer 08Nozzle ring 02Radial plain bearing 09Turbine wheel 03Thrust bearing 10Bearing casing 04Bearing bush 11Diffuser 05Radial plain bearing 12Compressor wheel 06Gas outlet casing 13Compressor casing 07Gas inlet casing Page 4 123 ...

Page 7: ...is air then passes through the diffuser 11 and leaves the turbocharger through the com pressor casing 13 The rotor runs in two radial plain bearings 02 05 One plain bearing is in the bearing bush 04 and the second one is in the axial thrust bearing 03 at the compressor end The plain bearings are connected to a central lubricating oil duct which is fed with oil from the engine s lubricating oil cir...

Page 8: ... all warranty claims State of the art This turbocharger was built according to state of the art technology and is operationally safe according to recognised safety regulations WARNING Improper operation and maintenance of the turbocharger can result in danger to life and limb of the user or third parties In addition im proper use may cause damage to the machine u The machine may be operated only b...

Page 9: ... WARNING Protection of health when handling VCIs VCI products are not hazardous in the sense of the Hazardous Sub stances Ordinance Nevertheless the following points are to be ob served when handling VCIs u Ensure good room ventilation u Do not eat drink or keep food at the workplace while working with VCIs u Wear safety gloves u Clean hands and face after working with VCIs u For further informati...

Page 10: ...en exceeded In this case the turbochar ger must be inspected by an ABB Turbocharging Service Station and repacked u Inspect the package for damage If the package is damaged the tur bocharger must be inspected by an ABB Turbocharging Service Sta tion and repacked After every 3 years the following work steps must be performed by an ABB Turbocharging Service Station Inspect the component Replace the ...

Page 11: ...d wearing of personal protective equipment NOTICE The manner in which personnel work on and with the turbocharger with regard to safety and risks is to be checked on a regular basis in accord ance with the Operation Manual u If the turbocharger shows modifications affecting safety or any cor responding operating behaviour it must be shut down immediately by stopping the engine The malfunction must...

Page 12: ...Competence of personnel The turbocharger must only be operated and serviced by trained and au thorised personnel Basic mechanical training is a prerequisite Design variants This document is valid for different design variants of turbochargers There may be sections and descriptions of components that are not rel evant for a specific turbocharger variant ABB Turbocharging Service Stations will be ha...

Page 13: ...s which facilitate the work on the product Definition of mandatory signs Mandatory signs show the protective equipment to be worn for a task The mandatory signs are described in chapter Safety and must be com plied with Definition of caution warning The caution and warning signs are described in the chapter Safety ABB Turbocharging ABB Switzerland Ltd Turbocharging is identified as ABB Turbochargi...

Page 14: ...erwise agreed with the enginebuilder 02 Turbocharger operating limits during operation Recommended replace ment intervals for tur bocharger components 03 Replacement interval for plain bearings in 1000 h 04 Replacement interval for compressor in 1000 h 05 Replacement interval for turbine in 1000 h Further information 06 Part number for customer 07 Designation of special design 08 Turbocharger weig...

Page 15: ...d tMmax normally apply only when running at overload 110 during trials on the engine test bed Operation above nMmax and tMmax is not permit ted Non observance of the recommended replacement intervals increases the risk of unpredictable component failures 1 7 2 Positions of the rating plates A rating plate is attached to the turbocharger foot one on the left and one on the right On turbochargers wi...

Page 16: ...nsequence of insufficient observance of the safety instruc tions are the consequence of unsatisfactory and improper execution of maintenance and inspection work The operating company is responsible for access to the turbocharger as well as the organisational measures that regulate the safe handling of the turbocharger by its personnel All instructions contained in this chapter must be observed for...

Page 17: ...lmet Ear protection 2 4 Definition of Safety instructions The following symbols and terms used in this manual concern safety or refer to possible hazards WARNING Definition of warning Serious personal injuries and even accidents with fatal consequences may occur if work and operating instructions marked with this symbol and the word WARNING are either not followed or not followed pre cisely u Warn...

Page 18: ... plates that must be observed are attached to the turbocharger The warning plates must always be present in the intended locations and must be legible Fig 1 Warning plate Part number Size mm Product 81080 105 x 74 TPL When uninsulated turbochargers are delivered to the engine builder the warning plates must be subsequently attached to the insulation This is the responsibility of the engine builder...

Page 19: ...t work on the turbocharger if you are under physical or mental stress u Work only with suitable tools as well as equipment and working ma terials that are in perfect condition u Electric tools must be solidly earthed and connecting cables may not be damaged u Keep the workplace clean clear away loose objects and remove obstacles on the floor u Keep the floor equipment and the turbocharger clean u ...

Page 20: ... any damage or changes in operational perform ance to person responsible u If damage is discovered immediately shut down turbocharger and se cure it against inadvertent or unauthorized use u When switching on auxiliary power sources hydraulics pneumatics electricity water keep an eye open for any hazards resulting from supplying these power sources Safety during cleaning If cleaning agents or solv...

Page 21: ...ure that the supply of oil is interrupted especially with an external oil supply u Put the engine into operation only after all parts have been refitted properly CAUTION Mechanical work on the turbocharger Possible damage to or destruction of components on the turbocharger u Perform only those tasks that are described in this manual u Perform work only for which training has been carried out Safet...

Page 22: ...he turbocharger in accordance with instructions u During maintenance work secure the rotor against unintentional ro tation Mechanical hazards when working on the turbocharger During maintenance work various risks can occur through the improper handling of components through the non observance of work instruc tions due to inadequate care or as a consequence of insufficient train ing WARNING Mechani...

Page 23: ...s above 85 dB A always wear ear protection Wear ear protection Hazards due to hot surfaces and substances During operation turbocharger surfaces and attached parts as well as operating materials lubricating oil become hot The surface temperat ure is dependent on the effectiveness of the insulation being used The temperature can become high enough so that it falls into ranges where burns are possib...

Page 24: ... turbocharger surfaces is compuls ory Wear safety gloves to protect against thermal hazards Hazards due to operating and auxiliary materials Operating and auxiliary materials are substances used for operation or the execution of maintenance work Oils greases coolants cleaning agents and solvents acids etc can be regarded as hazardous materials Operating and auxiliary materials can be combustible a...

Page 25: ... or contamination of the ground and water due to improper disposal can lead to environmental damage u Handle operating and auxiliary materials carefully u Heed the instructions for use safety data sheets and hazard notices on the containers of the operating and auxiliary materials u Wear appropriate protective clothing u Avoid inhalation and contact with the skin u Ensure that the work space is ad...

Page 26: ...e work area u Take particular care when removing old insulating materials u Dispose of insulating materials properly and in an environmentally compatible way in accordance with applicable local regulations Wear safety goggles Wear a respiratory mask to protect against dusts Wear safety gloves to protect against chemical hazards u Use only suitable non combustible insulating materials u Ensure that...

Page 27: ...c checking of the pressure vessel The pressure vessels used by ABB such as those for wet or dry cleaning are so called simple pressure vessels The locally applicable legal regulations regarding periodic checks of the pressure vessels must be observed The operating company is responsible for the safe operation of the pressure vessel WARNING Danger due to pressure vessels The operating company must ...

Page 28: ...h a suspended load Wear safety gloves to protect against mechanical hazards Wear safety helmet In the case of two or more suspension points the slinging angle must not exceed 45 This avoids excessive loading due to inclined tensile loading u Fasten turbocharger assemblies components as described in re spective handling steps u Before attaching slings allow turbocharger components to cool down maxi...

Page 29: ...nditions is an important prerequisite for trouble free turbocharger operation The turbocharger is normally lubricated with oil from the engine oil cir cuit NOTICE With regard to the oil supply please observe the engine builder s spe cifications for lubricating oil selection oil change intervals oil filtration oil pressure and oil temperature Oil filtration A lubricating oil filter system with a fi...

Page 30: ...n the turbocharger are listed below Status for operation Oil pressure at measuring point M poil in bar Permissible for normal operation 1 3 2 5 Permissible during engine warm up 1 3 5 0 Temporarily admissible 1 h alarm 1 1 1 3 Not permissible emergency stop 0 0 1 1 Permissible during pre and post lubrication engine stopped 0 2 2 5 Oil orifice A metering orifice is installed in the oil inlet of the...

Page 31: ...0 Lubricating oil temperature at the outlet The oil temperature at the outlet is mainly dependant on Lubricating oil temperature and pressure at the oil inlet Engine load and turbocharger speed Exhaust gas temperature The maximum admissible oil temperature at the outlet is listed in the fol lowing table The specified oil outlet temperature is to be considered as alarm value for the turbocharger op...

Page 32: ... oil can cause serious damage to the machine or property u During initial commissioning and after all service work the complete lubricating system must be flushed thoroughly with warm oil u When running in the engine and after all service work on the lubricat ing system special running in filters must be used u Check oil pressure in oil supply lines CAUTION Prelubrication Serious machine or proper...

Page 33: ...e u Measure speed oil pressure and charging pressure at various engine performance levels u Measure exhaust gas temperature in front of and behind turbine u Measure air temperature in front of and behind compressor The measured values must be compared with the values in the accept ance test report while taking different operating conditions into ac count NOTICE Lubricants and pastes used during as...

Page 34: ...haust gas duct line in front of and after turbine for any combustion deposits foreign matter or residual water Clean and re move u Inspect air supply line or filter silencer for any foreign matter Clean and remove u Start up turbocharger oil circulation system at engine end u Prepare turbocharger for operation as instructed in section Inspec tion work before start up commissioning of chapter heade...

Page 35: ...the turbocharger The highest sound pressure level of emissions1 reaches a maximum of 105 dB A near the filter silencer and over the entire speed range The following prerequisites must be fulfilled on the turbocharger in or der to observe this limit value Fitted air inlet system All standard noise reducing measures have been taken2 The bellows at the air outlet have been perfectly insulated acousti...

Page 36: ...ssions Copyright 2020 All rights reserved HZTL2498_EN Rev F December 2020 Suggestion for noise insulation of the bellows 01 Compressor casing 04 Insulation pads 02 Bellows 05 Insulation mat at least 15 mm 03 Charge air duct scavenging air line 06 Sheet metal cover Page 34 123 ...

Page 37: ...ION Shortened service intervals Despite observance of the service intervals unusual loads such as sev eral start stops a day harsh environmental factors poor fuel quality or heavy installation vibration can lead to premature machine damage u A shortened service interval must be arranged with ABB Turbochar ging NOTICE Service inspection after 5 years To prevent age and stoppage related machine dama...

Page 38: ... manufacturer s engine logbook Engine performance and speed Air intake temperature Exhaust gas temperature in front of and behind the turbine Pressure of charge air Pressure drop in charge air cooler Lubricating oil pressure and lubricating oil temperature If provided Air temperature behind compressor and charge air cooler Turbocharger speed Pressure loss in air filter 4 2 3 Servicing work accordi...

Page 39: ...nd blow air through oil ports u Clean nozzle ring and check for cracks and erosion u Inspect and assess bearing parts and rotor 4 2 5 Service work every 24000 36000 hours The replacement of bearing parts and the inspection and assessment of the rotor must be carried out by an ABB Turbocharging Service Station u Disassemble turbocharger u Clearance measurement u Clean the turbine and compressor whe...

Page 40: ...eplacement intervals for non rotating components and bearing parts are extremely dependent upon system specific operating conditions see Influencing parameters When the specified periodic inspections are carried out the individual components are inspected for wear and tear and replaced if necessary In this way trouble free operation is ensured Influencing parameters The following parameters influe...

Page 41: ...ent GAS MDO HFO Gas inlet casing 50000 100000 25000 50000 Gas outlet casing 50000 100000 35000 100000 Nozzle ring 35000 50000 25000 50000 Turbine diffuser cover ring 35000 50000 25000 50000 Other casings 100000 100000 Axial bearing components 24000 36000 24000 36000 Radial bearing components 24000 36000 24000 36000 Turbine blades due to wear 12000 Recommended replace ment intervals h Rotor compone...

Page 42: ...o not use cables as a climbing aid If you pull the speed measurement cables too hard contacts can be pulled out u Do not tension the speed measurement cables Part number Description 42047 Screw plug 86505 Speed sensor 86515 Cable connector for 86505 86526 F I converter 86528 Tachometer 4 4 1 Speed differences with multiple turbochargers per engine The speeds of all turbochargers on one engine diff...

Page 43: ...res in the air and gas lines to and from the tur bochargers and compare them with standard values If the engine can be stopped for a short time u Inspect the air and gas lines as well as the turbocharger and eliminate any problems u In any event it is recommended that you contact the nearest ABB Tur bocharging Service Station 4 4 2 Assembly If the speed sensor is not fitted on the turbocharger the...

Page 44: ... then stop the engine u Switch off the lubricating oil supply to the turbocharger u Disconnect the cable connector from the speed sensor u Screw out defective speed sensor u Screw in a new speed sensor to the stop u Observe the tightening torque see the table of tightening torques in the chapter entitled Disassembly and assembly NOTICE Sealing of the speed sensor The speed sensor is designed with ...

Page 45: ...0 All rights reserved HZTL2498_EN Rev F December 2020 4 5 Stopping the engine CAUTION Stopping the engine Heat in the turbocharger must be dissipated by the further circulating lubricating oil u Allow the engine to continue running at idling speed for a further 10 minutes before stopping Page 43 123 ...

Page 46: ...isual checks and clean ing to ensure that the turbocharger and its attached units function trouble free The external condition and how dirty the cleaning points specified in this chapter are must be established by visual checks at the spe cified intervals The safety precautions must be observed during all maintenance and servicing work The cleaning points described in the following are Filter sile...

Page 47: ...98_EN Rev F December 2020 5 2 Cleaning the filter silencer 5 2 1 Filter silencer and connecting rod 81265 Filter ring if provided 81136 Absorption segment 81269 Connecting rods 81137 Sheet metal covering 81266 Cover grid 81135 Filter silencer body 81272 Screw 81273 Lock nut E Insert unit absorption segment sheetmetal covering Page 45 123 ...

Page 48: ...rawn in air is Clean filter strip every 500 hours of service or more frequently if necessary u Unscrew and remove lock nuts 81273 u Unscrew and remove screws 81272 for connecting rods 81269 u Remove connecting rods 81269 u Carefully remove cover grids 81266 u Pull out insert units E bend open sheet metal coverings 81137 and then remove absorption segments 81136 u Clean absorption segments 81136 Wh...

Page 49: ... through the lugs of cover grids 81266 CAUTION If connecting rods 81269 are not correctly positioned in their recesses on filter silencer body 81135 cover grid 81266 can twist and shift There is then a risk of foreign matter and contamination getting into the compressor u Join connecting rods 81269 using screws 81272 When tightening the screws 81272 ensure that connecting rods 81269 are located co...

Page 50: ...he flow channels if salt oil mist exhaust gas or dust are sucked in with the air Consequences of contamination Impaired compressor efficiency Higher exhaust gas temperatures Increased fuel consumption Increased rotor unbalance Periodic cleaning of the compressor during operation prevents or delays any major increase in contamination It does not however replace the regular service work during which...

Page 51: ... through an injection pipe fitted in the fil ter silencer or the suction branch The water does not act as a solvent but the contamination deposit is re moved by the mechanical impact of the droplets This is a very suitable process provided that the degree of contamination is not too high CAUTION Corrosion and deposits when cleaning Damage and impairment of turbocharger parts due to salt water and ...

Page 52: ... be present in the vicinity of the tur bocharger during compressor cleaning u Compressor cleaning must be activated from the engine control panel Wet cleaning procedure for compressor with XC2 u Trigger water injection according to the specifications of the en ginebuilder u The specified water pressure upstream of the connection to the tur bocharger must be maintained u Operate engine for at least...

Page 53: ...ich has been tested and is recommended by ABB Turbocharging the following pre requisites must be fulfilled u Engine load 50 85 u Start of cleaning cycle in accordance with following description for wet cleaning operation with XC3 Operating procedure for compressor wet cleaning with XC3 Operating the water pres sure vessel u The operating state prerequisites for compressor cleaning with XC3 must be...

Page 54: ... at least 5 minutes to allow turbocharger to dry NOTICE If the cleaning operation is not satisfactory it may be repeated up to two times If the cleaning result is still not satisfactory after three attempts and the engine values are also unsatisfactory we recommend that you have the turbocharger inspected and cleaned by an official ABB Turbochar ging Service Station Cleaning parameters per turboch...

Page 55: ...can cause a slight increase in char ging pressure because of narrowing of the turbine cross section The contamination causes a drop in turbine efficiency and the engine tem peratures downstream of the cylinder can increase The engine perform ance must therefore be reduced if necessary The contamination of the turbine also causes rotor unbalance Extremely heavy contamination can lead to non permiss...

Page 56: ...t use salt water for cleaning but only clean fresh water Components at the turbine end are not cleaned until the engine has been started or the engine load reduced The exhaust gas temperature must not exceed the value specified in the respective cleaning instructions see section PrerequisitesTPL A C Operating state prerequisites for wet cleaning turbine and nozzle ring 55 CAUTION Reduced service l...

Page 57: ...ollowing operating state and prerequisites have been tested and approved by ABB Turbocharging for the cleaning process u The engine has just been started or the engine load has been reduced as far as possible best cleaning is achieved at a load level of roughly 10 15 u As soon as the turbine inlet temperature is stable and below 430 C wait at least another 10 minutes for the charger parts to cool ...

Page 58: ... mode to water sup ply u Set the required volume of water on the flowmeter as shown in the table see table Cleaning parameters u Shut off the water supply again by switching the 3 way valve 04 to scavenging air mode after injecting the required volume of water u The injection process has been completed u Close drain hole if provided above drain pipe 08 09 u After cleaning wait with engine running ...

Page 59: ...l cases must be determined together with an ABB Turbocharging Service Station The influence of the cleaning water on peripheral equipment such as a boiler must be clarified by the operator Points to remember when cleaning The following points must be observed with regard to draining the gas outlet casing The exhaust gas temperature behind the turbocharger drops signi ficantly when cleaning typical...

Page 60: ...s are sensitive to mechanical damage The use of needle guns or other impact tools for example damages the components Depending on the specification nozzle rings have pro tective coatings which can also be damaged u Only use soft tools such as scouring cloths brushes or wire brushes u In the event of heavy contamination the cleaning methods de scribed in this chapter such as soaking can be repeated...

Page 61: ...l safety data sheet u Comply with local legislation Wear safety goggles Wear safety gloves to protect against chemical hazards Wear a respiratory mask to protect against gases CAUTION Damage to coated nozzle rings The coating of coated nozzle rings can be damaged if cleaned improp erly u Only insert the nozzle ring in water u Only clean the nozzle ring with soft brushes u Do not sandblast the nozz...

Page 62: ...see chapter Removal and in stallation u Remove cartridge group see chapter Disassembly and assembly First clean the compressor end and then the turbine end in accordance with the following description 5 5 4 Cleaning the cartridge group on the compressor end CAUTION Selection of the cleaning agent Cleaning agents that contain chlorine corrode metals u Only use pH neutral cleaning agents that do not...

Page 63: ...cur at the turbine end The contamination can be removed by soaking and brushing The procedure for soaking the layers of contamination as well as for cleaning the turbine are described in the following To soak the layers of contamination on the turbine the cartridge group can be immersed vertically in a container with fluid The cartridge group must be rotated to do this u Two cranes or chain blocks...

Page 64: ...e two lifting loops with swivel lifting eyes in the lower push off threads and suspend from a second crane 3 Rotate cartridge group horizontally by lifting the second crane 4 When the cartridge group is horizontal secure one chain block to one of the upper push off threads using a swivel lifting eye and suspend from the second crane 5 Tighten chain block until entire cartridge group is suspended f...

Page 65: ...ifting gear must not touch the compressor wheel at any time dur ing rotation u Choose appropriate lifting gear length 1 Suspend cartridge group from the two side suspension points on the crane using two lifting loops or Attach two swivel lifting eyes to the side and suspend the cartridge group from the crane using two lifting loops 2 Attach third lifting loop with swivel lifting eye to thread of o...

Page 66: ...n block until entire cartridge group is suspended from first crane 6 Remove loop from second crane CAUTION Selection of the cleaning agent Cleaning agents that contain chlorine corrode metals u Only use pH neutral cleaning agents that do not corrode metals u Observe the material safety data sheet u Observe country specific regulations regarding banned and restric ted substances u Fill the tank wit...

Page 67: ...ridge group If water or contamination gets into the cartridge group the turbochar ger function may be impaired and parts in the cartridge group may be damaged u Place cartridge group on suitable wooden or metal supports u Allow the layers of contamination on the turbine to soak for at least four hours Removing contamination WARNING Health hazard due to soot particles If soot particles enter the ey...

Page 68: ...al contamination deposits lead to rotor unbalance This can result in bearing or turbocharger damage u Remove all traces of contamination from the turbine u After brushing off the contamination fill the tank with clean water not salt water u Submerge the turbine of the cartridge group in clean water so that loose particles of contamination detach completely u Lift the cartridge group u Dry turbine ...

Page 69: ...har ger Rotor unbalance Contact an ABB Turbocharging Service Station Damaged turbine or com pressor Damaged bearing Rubbing of rotating parts Normal behaviour no malfunction Turbochar ger Minor uniform wear around the periphery of rotor components caused by slight local rubbing of adjacent components is per missible The compressor blades and turbine blades are then shortened somewhat Certain toler...

Page 70: ...eriodic surging Possible damage to components such as the compressor wheel tur bine blades bearings and filter silencer u Have the cause clarified immediately by an ABB Turbocharging ser vice station and rectified u Have components inspected for damage and if necessary replaced by an ABB Turbocharging service station Sporadic surge blows Surging of the turbocharger can occur during certain operati...

Page 71: ...bochar ger Rotor axial clearance too large Contact an ABB Turbocharging Service Station Reduction in speed Possible causes Elimination Engine Defects of connected cylinders when pulse charging Contact the enginebuilder Turbochar ger Heavy contamination of the turbine Clean it Damaged rotor components or bearing Contact an ABB Turbocharging Service Station Pipes Defects such as leaks in the ex haus...

Page 72: ...ir starvation for example filter silencer clogged with dirt Clean it Compressor turbine con taminated Exhaust counterpressure too high Clean or repair the boiler or ex haust silencer Enlarged flow cross section of the nozzle ring due to de formed blade trailing edges Contact an ABB Turbocharging Service Station Damaged or eroded turbine Charge air cooler Cooler contaminated Clean it Cooling water ...

Page 73: ...ace the manometer Line to manometer leaking Repair the leak Contaminated filter silencer causing excessive loss of pres sure Clean it Compressor turbine contam inated Damaged compressor tur bine Contact an ABB Turbocharging Service Station Exhaust counterpressure too high Clean or repair the boiler or ex haust silencer Charge air pressure too high Engine performance and engine speed unchanged air ...

Page 74: ... run down Possible causes Elimination Turbochar ger Turbocharger contaminated Clean it Damaged bearing Contact an ABB Turbocharging Service Station Rubbing rotor Foreign object in turbocharger Run down time too short Possible causes Elimination Turbochar ger Turbocharger contaminated Clean it Damaged bearing Contact an ABB Turbocharging Service Station Rubbing rotor Foreign object in turbocharger ...

Page 75: ...se prob lems for the evaluation electronics This problem is eliminated by removing the gasket Defective sensor Contact ABB Turbocharging service sta tion Measured speeds too high Dirty sensor tip The sensor tip is magnetic and can thus at tract metal particles As a result the dis tance to the auxiliary bearing decreases which can lead to amplification of the noise component and consequently to fau...

Page 76: ... u Disconnect all gas air and oil lines in accordance with engine manu facturer s instructions CAUTION Oil orifices There is an orifice for adjusting the oil pressure in each of the two oil supply pipes of the bearing casing When the cartridge group the bear ing casing or the turbocharger is being fitted to the engine it must be ensured that the orifices specified for the turbocharger are installe...

Page 77: ...ber 2020 u Fasten separate lifting gear to each of the two ribs on the bearing casing provided for this purpose w Ribs 01 not in the middle at the top u Completely remove the bearing casing insulation 02 and place a sling around the bearing casing u Loosen the fixing screws at the foot u Lift the turbocharger off the engine and set it down to one side Page 75 123 ...

Page 78: ...two bearing casing ribs provided for this purpose CAUTION Oil orifices There is an orifice for adjusting the oil pressure in each of the two oil supply pipes of the bearing casing When the cartridge group the bear ing casing or the turbocharger is being fitted to the engine it must be ensured that the orifices specified for the turbocharger are installed in both oil supply pipes u Check that the o...

Page 79: ...lified work on the cartridge group can lead to total system failure and void the warranty u Mark the casing position for assembly Identifying assembly devices Not all assembly devices are marked with a part number They can be identified using the tool list This list is enclosed in the toolbox WARNING Maintaining assembly devices Assembly devices must be checked for damage before and after use u Ch...

Page 80: ...argers assemblies or individual components only to lifting gear which is in technically perfect condition and has a suffi cient load limit u Make sure the load is suspended properly on the crane hook u Do not let anyone stand beneath a suspended load Wear safety gloves to protect against mechanical hazards Wear safety helmet Definition of terms Suspension point Defined load attachment point on a c...

Page 81: ... 01 Radial air suction branch 5050 70 02 Axial air suction branch 3535 03 Filter silencer 130130 220 04 Compressor casing 180180 260 05 Wall insert 4040 65 06 Diffuser 1919 35 07 Cartridge group 290290 360 08 Turbine diffuser 3030 50 09 Nozzle ring 1010 17 10 Gas inlet casing radial 5050 55 Complete compressor casing Weight kg TPL65 A32 A33 A36 TPL69 A32 A33 Complete compressor casing 240 360 NOTI...

Page 82: ...sconnect all air lines in accordance with the engine builder s instruc tions u Dismantle the insulation where necessary u Pass a lifting gear around the air suction branch It is permissible to pass the lifting gear through holes possibly provided in the ribs to im prove stability u Unscrew the nuts 72027 and remove them together with the wash ers 72018 u Remove the air suction branch and set it do...

Page 83: ...EN Rev F December 2020 Removing the filter silen cer u Remove insulation where necessary u Pass lifting gear through rib on filter silencer u Pass lifting gear through lugs on back u Unscrew nuts 72027 and remove them together with washers 72018 u Remove filter silencer and set it down to one side Installing the filter silen cer u Install filter silencer in reverse order Page 81 123 ...

Page 84: ...loves Wear safety gloves to protect against mechanical hazards w The axial clearance A must be measured before removing and after fitting the cartridge group u Measure and note the axial clearance A Clearance A mm TPL65 A32 A33 A36 TPL69 A32 A33 0 31 0 49 0 33 0 50 CAUTION Clearances out of tolerance Clearances out of tolerance and excessively worn components can be the cause of serious damage to ...

Page 85: ...djusting the oil pressure in each of the two oil supply pipes of the bearing casing When the cartridge group the bear ing casing or the turbocharger is being fitted to the engine it must be ensured that the orifices specified for the turbocharger are installed in both oil supply pipes u Check that the oil orifices have been correctly installed u Remove three studs 72029 at top u Attach lifting dev...

Page 86: ...all insert and diffuser and set them down with surface F on an underlay WARNING Tipping the compressor casing Make sure the underlay does not shift u Allow the compressor casing to rest only on surface F u Check the underlay and adjust it if necessary u Remove the screws 72002 u Remove the diffuser 79000 u Remove the wall insert 77000 using swivel lifting eyes 90235 u Remove the O ring 77005 from ...

Page 87: ...p washers 61058 TPL69 A32 33 u Unscrew and remove two nuts 61037 Undo screw 61059 and re move together with Verbus Ripp washer 61058 u Fasten separate lifting gear to each of the two ribs on the bearing casing provided for this purpose u Press off cartridge group evenly using the press off screws 90900 in the holes provided CAUTION If the blades have insufficient or no clearance between the rotor ...

Page 88: ... assembly 8 5 Removing cartridge group Copyright 2020 All rights reserved HZTL2498_EN Rev F December 2020 u Withdraw cartridge group and fit supports 90450 u Remove screws 42064 flange 42044 and gasket 42045 and clean oil space u Cover the oil connections Page 86 123 ...

Page 89: ...December 2020 8 6 Dismantling and installing the turbine diffuser and nozzle ring CAUTION Falling nozzle ring The nozzle ring hangs only loosely on the positioning pins u Before removing the turbine diffuser secure the nozzle to prevent it from falling u Before disassembling the turbine diffuser if possible secure the nozzle ring against falling with a lashing strap and a wooden block Page 87 123 ...

Page 90: ...yright 2020 All rights reserved HZTL2498_EN Rev F December 2020 u Position clamp 90921 over stud 61036 until it lies flat against inner radius of gas outlet casing u Insert extension A of torque spanner B through clamp hole and only loosen screws 61056 one after another u Do not yet remove the screws 61056 and Verbus Ripp washers 61057 Page 88 123 ...

Page 91: ...remaining screws 61056 and Verbus Ripp washers 61057 u Press the turbine diffuser 63000 free using the press off screws 90901 and pull it out until the clamp 90921 is touching the nut 61037 u Loop the lifting gear around the turbine diffuser 63000 and secure it to a crane u Remove nuts 61037 and clamps 90921 u Withdraw the turbine diffuser all the way and remove it u Remove guide stud 90320 u Pull...

Page 92: ...d for the turbocharger are installed in both oil supply pipes u Check that the oil orifices have been correctly installed Fig 3 u Remove cover from oil connection u Secure separate lifting gear to each of two ribs on bearing casing provided for this purpose u Remove supports 90450 and carefully insert cartridge group TPL65 A32 33 36 u Evenly tighten the three screws 61059 together with Verbus Ripp...

Page 93: ...ck that blades do not rub against turbine diffuser u Remove the lifting gear u Screw in the speed sensor 86505 along with the O ring 86506 and plug in the cable connector 86515 u Fit the O ring 77005 to the wall insert 77000 u Fit the lifting gear and the swivel lifting eye 90235 u Align and fit the wall insert 77000 using the centring screw 90187 u Place the diffuser 79000 in position using the s...

Page 94: ...compressor casing 72000 by tightening to specified torque See chapter Table of tight ening torques u Remove lifting device 90190 u Measure and note the axial clearance A see the section on axial clearance CAUTION Clearances out of tolerance Clearances out of tolerance and excessively worn components can be the cause of serious damage to machinery and property u Have components assessed and if nece...

Page 95: ...t casing 51001 u Loop rope around gas inlet casing and secure with lifting gear CAUTION When looping the securing rope around the casing make sure that no cleaning pipes are squashed or damaged Do not fasten the lifting gear to cleaning pipes under any circumstances u Remove two hexagon head screws 61044 together with Verbus Ripp washers 61043 from the bottom section and replace them with two stud...

Page 96: ...ot to damage the brackets of the insulation u Remove optional gasket 61050 Nozzle ring assembly If present u Insert optional gasket 61050 into slot in gas inlet casing 61001 u Align gas inlet casing and secure using hexagon nuts 90178 on studs 90177 u Insert nozzle ring 56001 and position it u Brush screw threads 61044 with high temperature grease u Fit the gas inlet casing flange to the gas outle...

Page 97: ...ation Manual TPL65 A32 A33 A36 TPL69 A32 A33 8 Disassembly and assembly 8 8 Dismantling and fitting nozzle ring at turbine end Copyright 2020 All rights reserved HZTL2498_EN Rev F December 2020 Page 95 123 ...

Page 98: ...n Manual TPL65 A32 A33 A36 TPL69 A32 A33 8 Disassembly and assembly 8 9 Table of tightening torques Copyright 2020 All rights reserved HZTL2498_EN Rev F December 2020 8 9 Table of tightening torques Page 96 123 ...

Page 99: ...Tightening torques Nm Position Part number TPL65 A32 A33 A36 TPL69 A32 A33 01 82005 M16x1 5 45 M16x1 5 45 04 72027 with washer M14 95 M16 125 05 72029 M14 30 M16 30 06 61044 61059 61071 TPL69 A32 33 M14 160 M16 260 61056 M14 150 M16 260 07 61036 M12 80 M16 105 10 61037 M14 75 M16 105 11 61090 M14 10 M16 10 14 86505 M18x1 5 150 M18x1 5 150 103 72002 M10 50 M12 80 Page 97 123 ...

Page 100: ...N Machine damage in emergency operation The assembly of the locking device on the turbocharger is only permiss ible in emergencies It is not permitted to lock the rotor for an engine test Serious damage to engine or property can be caused by non com pliance with the regulations in the event of an emergency u The permissible turbocharger speed for the unlocked turbocharger may not exceed nBmax Take...

Page 101: ...s is sometimes requested by customers As operation with a locked rotor is only brief and the loads are low in these cases subsequent removal of the rotor is not necessary CAUTION During operation of the engine with a blocked turbocharger the lubric ating oil system must remain connected to this turbocharger also and be turned on if the gas inlet cannot be blocked See section Further measures and i...

Page 102: ... of compressor wheel and tighten them as specified in following Table of tightening torques CAUTION Do not remove any balancing screws from compressor wheel Use only unoccupied threaded holes to fit lifting spigot u Position assembly disassembly device 90020 over studs 72026 and locking flange 94003 u Turn compressor wheel so that locking flange hexagon aligns with hexagon in assembly disassembly ...

Page 103: ...h NOTICE Carry out work as described in chapter Removing and fitting u Insert locking flange 94003 into compressor wheel u Position screws 94007 in unused threaded holes of compressor wheel and tighten them as specified in the following Table of tighten ing torques CAUTION Don t remove any balancing screws from compressor wheel Use only unoccupied threaded holes to fit lifting device u Push interm...

Page 104: ...htening torques tighten inter mediate ring assembly disassembly device 90020 and locking flange 94003 using screws 94006 u Tighten nuts 74027 complete with washers 72018 on compressor casing as specified in following Table of tightening torques Table of tightening torques Part number TPL69 A32 A33 72027 M16 105 Nm 94006 M6 10 Nm 94007 M6 10 Nm CAUTION Make sure all components are clean and free fr...

Page 105: ...m aged turbocharger must be removed and the air duct on the engine side must be closed off If this is not done the undamaged turbocharger can race under no load and run at overspeed Depending on the engine turbocharging system more or less powerful pulses from the exhaust gas system act on the locked rotor The locking device is then heavily stressed particularly in the case of pulse charging turbi...

Page 106: ... The cover plate material General structural steel in accordance with DIN EN 10025 2 must be manufactured in house according to the drawing Cover plate dimensions mm Product B1 B2 B3 B4 B5 B6 B7 B8 TPL65 13 325 30 30 8 10 6 70 TPL69 13 385 30 30 8 10 6 84 Product Ø 1 Ø 2 Ø 3 Ø 4 Ø 5 Ø 6 TPL65 616 694 660 16 22 15 TPL69 726 818 779 18 25 15 Product α 1 α 2 α 3 TPL65 TPL69 4 x 90 37 5 24 x 15 Page 1...

Page 107: ... A33 9 Taking out of operation at short notice 9 3 Fit cover plate Copyright 2020 All rights reserved HZTL2498_EN Rev F December 2020 NOTICE Carry out the work as described in the chapter Removal and fitting u Remove cartridge group Page 105 123 ...

Page 108: ...tice 9 3 Fit cover plate Copyright 2020 All rights reserved HZTL2498_EN Rev F December 2020 u Close off opening in gas outlet casing using cover plate u Fasten cover plate using spacer sleeves and nuts 61037 CAUTION Shut off the supply of lubricating oil to the turbocharger Page 106 123 ...

Page 109: ...er s instructions 4 stroke engine with several turbochargers Separate receivers No further measures are necessary on engines with separate air and ex haust gas receivers The engine can be operated as a naturally aspirated engine according to the engine builder s instructions Common receiver The air line must be closed off at the engine end because the undam aged turbochargers build up a receiver p...

Page 110: ...arger u Shut off compressor casing outlet gas inlet and gas outlet by fitting cover plates NOTICE In this respect refer to the engine manufacturer s instructions 9 5 Bypass the turbocharger CAUTION Shut off the lubricating oil supply to the turbocharger w This applies to engines with one turbocharger only w The connections are ready and pipes for the bypass are available u Fit bypass around turboc...

Page 111: ...peration and this is circulated by the pre lubrica tion pump no measures have to be taken Any remaining old engine oil will therefore be flushed away and the bearing sections largely protected against corrosion Mothballing measures WARNING Handling operating materials and supplies Swallowing or inhaling vapours of operating materials and supplies or contact with them may be harmful to health u Do ...

Page 112: ...y after taking an engine out of opera tion u Dismantle the turbocharger u The rotor and the bearing parts must be removed by an official ABB Turbocharging service station and refitted afterwards u Clean all parts u Machined bright surfaces of steel and cast parts must be oiled with anticorrosive oil u Reassemble complete turbocharger Rotor turning in stack draught If the rotor turns as a result of...

Page 113: ... in indi vidual parts See the section Taking out of operation for up to 12 months under Mothballing measures for the measures always necessary when moth balling turbocharger parts If the turbocharger remains mounted on the engine refer to the section Taking out of operation for up to 12 months under Rotor turning in stack draught If the entire turbocharger is removed or if the turbocharger is re a...

Page 114: ...spiratory mask to protect against dusts Wear safety gloves to protect against mechanical hazards Disposal must be environmentally compatible professional and in com pliance with locally applicable regulations The turbocharger consists largely of metal cast iron materials steel nickel steel alloys aluminium and bearing brass Further components are Non metallic materials filter components of felt an...

Page 115: ... please contact an ABB Turbocharging service station CAUTION Storage of spare parts All spare parts ordered with the turbocharger must be kept complete and ready for use u Parts showing signs of rust should be carefully cleaned and greased u Dispose of replaced and unusable parts in a professional and environ mentally compatible way Required customer spare part set 97070 TPL65 A32 A33 A36 Quantity...

Page 116: ...59 42064 61044 61056 61059 3 Hexagon nut 61037 1 Gasket 77005 1 O ring speed sensor 86506 Spare part set 97078 for turbine cleaning system if provided CAUTION Leaks Improper assembly of the cleaning pipe and the nozzles can lead to leaks and failure of the turbine cleaning system u Have work on the turbine cleaning system carried out by an ABB Tur bocharging Service Station Quantity Description Pa...

Page 117: ...Operation Manual TPL65 A32 A33 A36 TPL69 A32 A33 12 Spare parts 12 1 Ordering spare parts Copyright 2020 All rights reserved HZTL2498_EN Rev F December 2020 Page 115 123 ...

Page 118: ...L65 A32 A33 A36 TPL69 A32 A33 12 Spare parts 12 2 View of the turbocharger with part numbers Copyright 2020 All rights reserved HZTL2498_EN Rev F December 2020 12 2 View of the turbocharger with part numbers Page 116 123 ...

Page 119: ...stomer spare part set Verbus Ripp Washer 61044 in customer spare part set Hexagon head screw 61050 only TPL65 A32 A33 Spiral gasket 61056 in customer spare part set Hexagon head screw 61057 in customer spare part set Verbus Ripp Washer 61058 in customer spare part set Verbus Ripp Washer 61059 in customer spare part set Hexagon head screw 63000 Turbine diffuser 68000 Foot 72000 Compressor casing 72...

Page 120: ...8_EN Rev F December 2020 12 3 View of turbine cleaning system with part numbers optional Part number Description 51229 Cleaning pipe 52249 Holder complete 51255 in spare parts set Locking plate 52208 in spare parts set Nozzle 52212 in spare parts set Bush 52213 in spare parts set Locking plate 52217 in spare parts set Strain bolt 52218 in spare parts set Nut Page 118 123 ...

Page 121: ...ration Manual TPL65 A32 A33 A36 TPL69 A32 A33 12 Spare parts 12 3 View of turbine cleaning system with part num bers optional Copyright 2020 All rights reserved HZTL2498_EN Rev F December 2020 Page 119 123 ...

Page 122: ... A33 A36 TPL69 A32 A33 12 Spare parts 12 4 View of cartridge group with part numbers TPL65 A Copyright 2020 All rights reserved HZTL2498_EN Rev F December 2020 12 4 View of cartridge group with part numbers TPL65 A Page 120 123 ...

Page 123: ... customer spare part set Floating disc 32106 in customer spare part set Axial bearing 32107 Bearing bush 42001 Bearing casing 42002 Hood 42011 in customer spare part set O ring 42012 in customer spare part set O ring 42015 Sealing cover 42041 in customer spare part set Gasket 42045 in customer spare part set Gasket 42058 in customer spare part set Verbus Ripp washer 42059 in customer spare part se...

Page 124: ... A33 A36 TPL69 A32 A33 12 Spare parts 12 5 View of cartridge group with part numbers TPL69 A Copyright 2020 All rights reserved HZTL2498_EN Rev F December 2020 12 5 View of cartridge group with part numbers TPL69 A Page 122 123 ...

Page 125: ...iliary bearing 32105 Floating disc 32106 Axial bearing 32107 Bearing bush 42001 Bearing casing 42002 Hood 42011 O ring 42012 in customer spare part set O ring 42015 Sealing cover 42041 in customer spare part set Gasket 42045 in customer spare part set Gasket 42058 in customer spare part set Verbus Ripp washer 42059 in customer spare part set Hexagon head screw 42063 in customer spare part set Verb...

Page 126: ...ABB Switzerland Ltd Turbocharging Bruggerstrasse 71a CH 5401 Baden Switzerland ...

Reviews: