Note/Illustration
Action
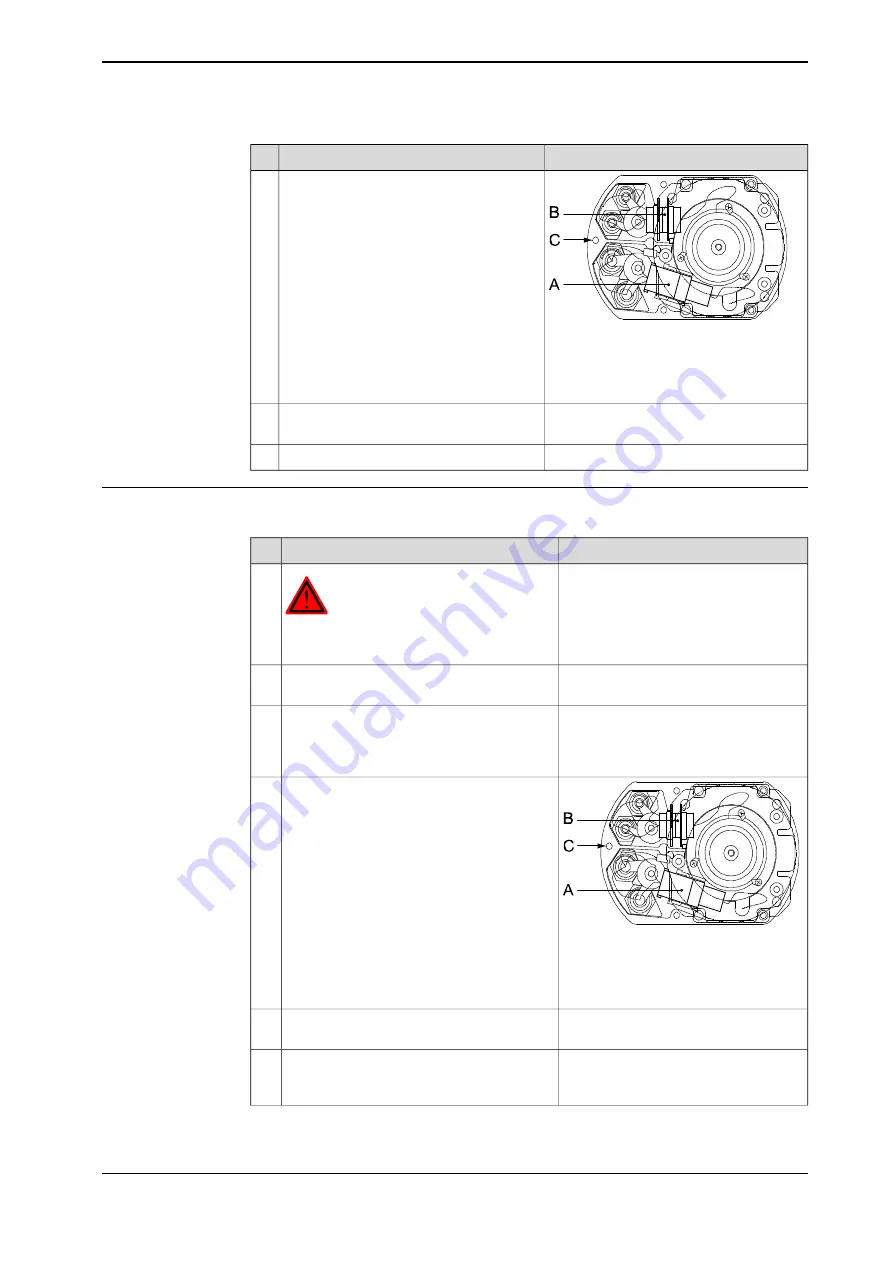
xx0200000401
Disconnect all the connectors at the motors
of axes 1, 2 and 3.
12
R3.MP1-3
R3.FB1-3
Connection box
Remove the three screws of the connection
box for the motors of axes 1, 2 and 3.
13
Gently pull the cable harness out.
14
Refitting, cable unit, axes 1-3
The procedure below details how to refit the cabling of axes 1-3 to the robot.
Note/Illustration
Action
DANGER
Turn off all electric power, hydraulic and
pneumatic pressure supplies to the robot!
1
Gently pull down the cable harness through
the center hole of axis 1.
2
The gasket is included in the spare part
of the cable unit, spare part no. is spe-
cified in
.
Fit a new
gasket
and fit the connection box
on motor 1, 2 and 3, using the three attach-
ment screws.
3
xx0200000401
Reconnect all the connectors at motors 1, 2
and 3.
4
R3.MP1-3
R3.FB1-3
Connection box
Refit the cover of the motors, axes 1, 2 and
3, with the five attachment screws.
5
Refit the upper bracket securing the cables
to the arm house, using the two attachment
screws.
6
Continues on next page
Product manual - IRB 2400
123
3HAC022031-001 Revision: P
© Copyright 2004-2018 ABB. All rights reserved.
4 Repair
4.3.1 Replacement of cable unit, axes 1-3
Continued
Summary of Contents for IRB 2400 Series
Page 1: ...ROBOTICS Product manual IRB 2400 ...
Page 8: ...This page is intentionally left blank ...
Page 18: ...This page is intentionally left blank ...
Page 204: ...This page is intentionally left blank ...
Page 220: ...This page is intentionally left blank ...
Page 232: ...This page is intentionally left blank ...
Page 234: ...This page is intentionally left blank ...
Page 240: ......
Page 241: ......

