background image

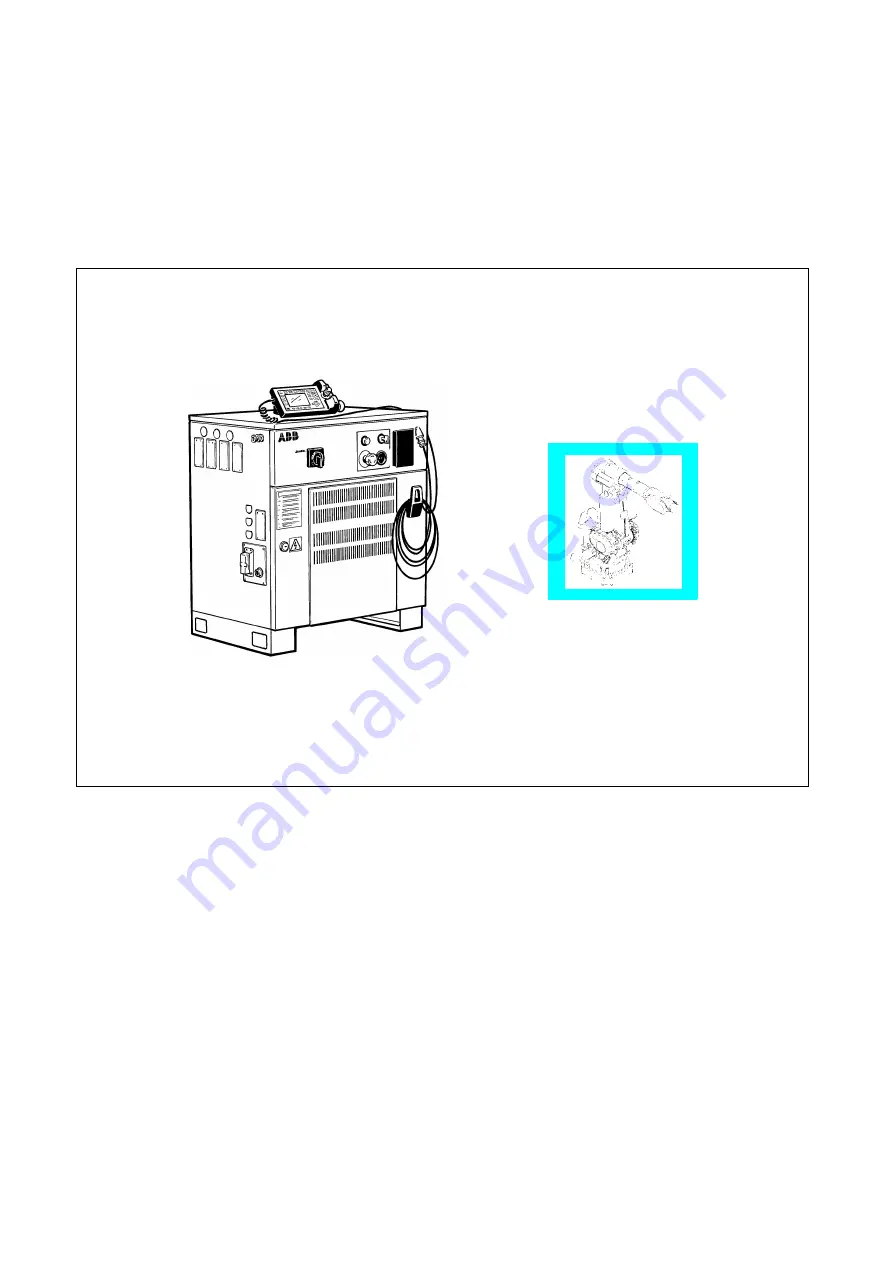
ABB Flexible Automation

Product On-line Manual

IRB 6400R

Please Click the Picture

to continue

3HAC 6264-1
M99

Summary of Contents for IRB 6400R

Page 1: ...ABB Flexible Automation Product On line Manual IRB 6400R Please Click the Picture to continue 3HAC 6264 1 M99 ...

Page 2: ...e of this document or of the software and hardware described in this document This document and parts thereof must not be reproduced or copied without ABB Robotics Products AB s written permission and contents thereof must not be imparted to a third party nor be used for any unauthorized purpose Contravention will be prosecuted Additional copies of this document may be obtained from ABB Robotics P...

Page 3: ...B 6400R Maintenance Product Specification RobotWare Troubleshooting Tools Safety Fault tracing guide CE declaration Circuit Diagram Configuration List Repairs System Description Spare parts ABB Flexible Automation AB Product Manual IRB 6400R M99 On line Manual MAIN MENU ...

Page 4: ...Description 20 Product Specification IRB 1400 M97A BaseWare OS 3 0 ...

Page 5: ...Introduction CONTENTS Page Product Manual 1 1 How to use this Manual 3 2 What you must know before you use the Robot 3 3 Identification 4 ...

Page 6: ...Introduction 2 Product Manual ...

Page 7: ...ages in the User s Guide It is very helpful to have a copy of the circuit diagram at hand when trying to locate cabling faults Servicing and maintenance routines are described in the chapter on Maintenance 2 What you must know before you use the Robot Normal maintenance and repair work usually only require standard tools Some repairs however require specific tools These repairs and the type of too...

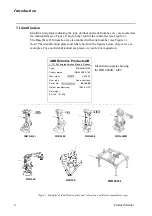
Page 8: ...he figures below only serves as examples For exact identification see plates on your robot in question Figure 1 Examples of identification plate and its location on different manipulator types IRB 6400R Made in Sweden S 721 68 Västerås Sweden ABB Robotics Products AB Type Robot version Man order Nom load Serial No Date of manufacturing Net weight 2 5 150 1910 kg IRB 6400R M99 IRB 6400 2 5 150 XXXX...

Page 9: ...manufacturing Net weight IRB 6400R M99 IRB 6400R 2 5 150 Frequency 50 60 Hz 7 2 kVA XXXXXX RXXXXXXXXXX 64 XXXXX 1998 XX XX 240 kg ABB Robotics Products AB 64 00000 System Key S4C 3 1 Program No 3 HAB2390 1 03 Boot disk 1 1 Property of ABB Västerås Sweden All rights reserved Reproduction modification use or disclosure to third parties without express authority is strictly forbidden Copyright 1993 R...

Page 10: ...Introduction 6 Product Manual ...

Page 11: ...ot Motion 14 2 9 External Axes 16 2 10 Inputs and Outputs 17 2 11 Communication 17 2 12 Spotweld Harness option 18 3 Technical specification 19 3 1 Structure 19 3 2 Safety Standards 21 3 3 Operation 22 3 4 Installation 23 3 5 Programming 35 3 6 Automatic Operation 39 3 7 Maintenance and Troubleshooting 39 3 8 Robot Motion 40 3 9 External Axes 42 3 10 Inputs and Outputs 43 3 11 Communication 47 3 1...

Page 12: ...Product Specification IRB 6400R 2 Product Specification IRB 6400R M99 BaseWare OS 3 2 ...

Page 13: ...e OS controls every aspect of the robot like motion control development and execution of application programs communication etc The functions in this document are all included in BaseWare OS if not otherwise specified For additional functionality the robot can be equipped with optional software for application support spot welding gluing etc communication features network communication and advance...

Page 14: ...e ordered a robot with the correct functionality see Chapter 4 Specification of Variants and Options In Chapter 5 you will find accessories for the robot Chapter 6 contains an Index to make things easier to find Other manuals The User s Guide is a reference manual with step by step instructions on how to perform various tasks The programming language is described in the RAPID Reference Manual The ...

Page 15: ...IRB 6400R manipulator has 6 axes Figure 2 The controller is specifically designed to control robots which means that optimal performance and functionality is achieved The controller contains the electronics required to control the manipulator external axes and peripheral equipment Axis 6 Axis 5 Axis 4 Axis 3 Axis 2 Axis 1 Teach pendant Operator s panel Disk drive Mains switch ...

Page 16: ...bot Three position enabling device The enabling device on the teach pendant must be used to move the robot when in manual mode The enabling device consists of a switch with three positions meaning that all robot movements stop when either the enabling device is pushed fully in or when it is released completely This makes the robot safer to operate Safe manual movement The robot is moved using a jo...

Page 17: ...rs are in the MOTORS ON state 2 3 Operation All operations and programming can be carried out using the portable teach pendant see Figure 3 and the operator s panel see Figure 5 Figure 3 The teach pendant is equipped with a large display which displays prompts information error messages and other information in plain English Information is presented on a display using windows pull down menus dialo...

Page 18: ...more slowly The robot supports different user tasks with dedicated windows for Production Programming System setup Service and installation Operator s panel Figure 5 The operating mode is selected using the operator s panel on the controller Inputs Outputs File Value 1 0 1 0 1 1 13 Edit View 1 0 4 6 Name di1 di2 grip1 grip2 clamp3B feeder progno 1 Goto 2 Goto Top 3 Goto Bottom Menu keys I O list M...

Page 19: ...nd or transferred to other robots that have the same characteristics All the versions of IRB 6400R are designed for floor mounting Depending on the robot version an end effector of max weight 100 to 200 kg including payload can be mounted on the mounting flange axis 6 Load diagram see chapter 3 4 Extra loads valve packages transformers can be mounted on the upper arm On all versions an extra load ...

Page 20: ...n The size of the deviation is defined independently for the TCP the tool orientation and the external axes Figure 6 The fly by point reduces the cycle time since the robot does not have to stop at the programmed point The path is speed independent The velocity may be specified in the following units mm s seconds time it takes to reach the next programmed position degrees s for reorientation of th...

Page 21: ...ng numeric values To prevent unauthorised personnel from making program changes passwords can be used Testing programs Several helpful functions can be used when testing programs For example it is possible to start from any instruction execute an incomplete program run a single cycle execute forward backward step by step simulate wait conditions temporarily reduce the speed change a position tune ...

Page 22: ... where you left off Digital outputs are also set automatically to the value prior to the power failure 2 7 Maintenance and Troubleshooting The robot requires only a minimum of maintenance during operation It has been designed to make it as easy to service as possible The controller is enclosed which means that the electronic circuitry is protected when operating in a normal workshop environment Ma...

Page 23: ...s the background for any downtime The log can be read on the teach pendant display stored in a file or printed on a printer There are commands and service programs in RAPID to test units and functions Most errors detected by the user program can also be reported to and handled by the standard error system Error messages and recovery procedures are displayed in plain language ...

Page 24: ... have to be adjusted to achieve correct path orientation and velocity Maximum acceleration is always obtained acceleration can be reduced e g when handling fragile parts The number of adjustments that have to be made to achieve the shortest possible cycle time is minimized The TrueMoveTM concept means that the programmed path is followed regardless of the speed or operating mode even after an emer...

Page 25: ...nd orientation The user coordinate system specifies the position of a fixture or workpiece manipulator The object coordinate system specifies how a workpiece is positioned in a fixture or workpiece manipulator The coordinate systems can be programmed by specifying numeric values or jogging the robot through a number of positions the tool does not have to be removed Each position is specified in ob...

Page 26: ...ne of the following ways Axis by axis i e one axis at a time Linearly i e the TCP moves in a linear path relative to one of the coordinate systems mentioned above Reoriented around the TCP It is possible to select the step size for incremental jogging Incremental jogging can be used to position the robot with high precision since the robot moves a short distance each time the joystick is moved Dur...

Page 27: ...rom an external panel or PLC The robot can work as a PLC by monitoring and controlling I O signals I O instructions can be executed concurrent to the robot motion Inputs can be connected to trap routines When such an input is set the trap routine starts executing Following this normal program execution resumes In most cases this will not have any visible effect on the robot motion i e if a limited...

Page 28: ...ed spot welding harness as well as a mechanical support for externally mounted process solutions The integrated spotwelding harness is used to supply primary current and cooling water to the upper arm Connections at the manipulator base and the upper arm housing For more information see section 3 12 on page 48 and Figure 31 and Figure 32 ...

Page 29: ...IRB 6400R 2 8 150 2240 kg IRB 6400R 2 8 200 2390 kg IRB 6400R 3 0 100 2250 kg Controller 240 kg Volume Controller 950 x 800 x 540 mm Airborne noise level The sound pressure level outside 70 dB A Leq acc to the working space Machinery directive 98 37 EEC Figure 10 View of the controller from the front from above and from the side dimensions in mm 200 50 540 950 980 500 500 800 Lifting points Castor...

Page 30: ...00 2 8 150 2 8 200 and 3 0 100 Figure 11 View of the manipulator from the side rear and above dimensions in mm 2240 332 R 530 2 5 120 2 5 150 R 630 2 5 200 2 8 150 3 0 100 R 700 2 8 200 225 2285 2 5 X 800 1050 240 1070 400 1175 2 5 X 200 400 1520 2 8 X 1725 3 0 X 250 765 780 1050 Rmax 700 1280 Fork lift device ...

Page 31: ...option Standard for Industrial Robots and Robotic Equipment CAN CSA Z 434 94 option Industrial Robots and Robot Systems General Safety Requirements Safeguarded space stops via inputs External safety equipment can be connected to the robot s two channel emergency stop chain in several different ways see Figure 12 Figure 12 All safeguarded space stops force the robot s motors to the MOTORS OFF state...

Page 32: ...pull down menus Function keys Select the commands used most often Window keys Display one of the robot s various windows These windows control a number of different functions Jog manual operation Program edit and test a program Manual input output management File management System configuration Service and troubleshooting Automatic operation User defined keys P1 P5 Five user defined keys that can ...

Page 33: ...ertain options 10 15 Mains frequency 48 5 to 61 8 Hz Rated power IRB 6400R 7 8 kVA transformer size External axes drives in separate cabinet 7 2 kVA transformer size Absolute measurement backup 1000 h rechargeable battery Configuration The robot is very flexible and can by using the teach pendant easily be configured to suit the needs of each user Authorisation Password protection for configuratio...

Page 34: ...ng space limitations External axes Number type common drive unit mechanical units Brake delay time Time before brakes are engaged I O signal Logical names of boards and signals I O mapping cross connections polarity scaling default value at start up interrupts group I O Serial communication Configuration For a detailed description of the installation procedure see the Product Manual Installation a...

Page 35: ...ate system Endurance load Max load at in operation emergency stop Force xy 14000 N 38000 N Force z 22000 8000 N 22000 19000 N Torque xy 34000 Nm 61000 Nm Torque z 7000 Nm 15000 Nm Figure 14 Hole configuration dimensions in mm 0 4 R 400 317 34 A A A A B B B B 4x 243 5 4x 317 34 4x 243 5 4x 3 7 5 4 x 53 8x 28 8x 45 H9 4x 15 2 100 Y X Z 15 4x 0 0 5 0 ...

Page 36: ...pacity limited to 100 kg Figure 15 Maximum weight permitted for load mounted on the mounting flange at different positions centre of gravity The load diagram is valid for J0 100 kgm2 J0 the maximum component JX0 JY0 JZ0 of the moment of inertia of the handling weight at its centre of gravity 0 1 0 2 0 3 0 1 0 2 0 3 0 4 0 5 0 6 0 7 0 4 Z m L m 0 5 0 6 0 7 0 8 0 9 75 kg 100 kg 30 kg 45 kg 60 kg 120 ...

Page 37: ...eight permitted for load mounted on the mounting flange at different positions centre of gravity 0 1 0 2 0 3 0 1 0 2 0 3 0 4 0 5 0 6 0 7 0 4 Z m L m 0 5 0 6 0 7 0 8 0 9 100 kg 125 kg 75 kg 150 kg The load diagram is valid for J0 100 kgm2 J0 the maximum component JX0 JY0 JZ0 of the moment of inertia of the handling weight at its centre of gravity ...

Page 38: ...t permitted for load mounted on the mounting flange at different positions centre of gravity 0 1 0 2 0 3 0 1 0 2 0 3 0 4 0 5 0 6 0 7 0 4 Z m L m 0 5 0 6 0 7 0 8 0 9 125 kg 150 kg 100 kg 175 kg The load diagram is valid for J0 100 kgm2 J0 the maximum component JX0 JY0 JZ0 of the moment of inertia of the handling weight at its centre of gravity 200 kg ...

Page 39: ...m Moment of inertia A movement Axis 5 Ja5 105 kgm2 Axis 6 Ja6 120 kgm2 B movement Axis 4 Jb4 105 kgm2 Axis 5 Jb5 120 kgm2 Approximations of M and J can be calculated using the following formula Ma5 9 81 mg r mp s Nm Mb4 9 81 mg r 0 2 mp s 0 2 Nm Ja5 mg 12 c2 mg r2 mp 12 a2 mp s2 kgm2 Ja6 mg 12 c2 mg r2 mp 12 a2 b2 mp s2 kgm2 Jb4 mg 12 c2 mg r 0 2 2 mp 12 a2 mp s 0 2 2 kgm2 Jb5 mg 12 c2 mg r 0 2 2 ...

Page 40: ...ion IRB 6400R M99 BaseWare OS 3 2 Figure 20 Distances r and s m Gripper mg r s mp A movement gripper perpendicular to axis 6 Part B movement gripper parallel to axis 6 Gripper r s mp mg Dimensions of gripper and part TCP 0 c a Gripper b Part Part ...

Page 41: ...ght for 2 5 150 is only 120 kg M2 can be 80 kg IRB 6400R 3 0 100 Permitted extra load on upper arm See Figure 21 M1 50 kg with distance a 500 mm centre of gravity in axis 3 extension or M2 20 kg with distance b 400 mm or M3 5 kg with distance c 300 mm Upper arm Balancing unit type B IRB 6400R 2 5 120 2 5 150 2 5 200 and 2 8 150 Permitted extra load on upper arm plus the maximum handling weight See...

Page 42: ...s the radius m from the centre of axis 1 M4 is the total mass kg of the equipment including bracket and harness 320 kg Figure 22 Extra load on frame of IRB 6400R dimensions in mm Mounting of hip load The extra load can be mounted either on the fork lift device or on the frame Holes for mounting see Figure 24 When mounting on the frame all the six holes 2x3 18 on one side must be used 400 R R M4 JH...

Page 43: ...g extra equipment on the upper arm dimensions in mm A A B B D D E E 282 93 260 75 150 150 180 M10 2x See E E 104 for Hole 1 C C F F 93 for Hole 2 See E E Hole 1 Hole 2 112 A A B B C C 175 690 2 5 X 50 M10 4x 1035 2 8 X 1240 3 0 X M10 2x 25 M10 4x Depth 20 E E D D View F F see Figure 25 M10 2x 80 378 M10 2x ...

Page 44: ... mm Figure 25 The mechanical interface mounting flange ISO 9409 1 A125 dimensions in mm As an option there is an electrically insulated tool flange For more information see page 54 and Figure 35 50 84 100 18 2x3 212 572 134 254 361 120 65 M10 Depth min 20 8x on both sides View from above on both sides 30o 60o D 10 H7 Depth 10 M10 6x Depth 18 D 160 h7 D 80 H7 D 125 8 8 F F ...

Page 45: ...onsisting of a sequence of standard instructions Note that the lists below only cover BaseWare OS For instructions and functions associated with optional software see Product Specification RobotWare Miscellaneous Assigns a value WaitTime Waits a given amount of time WaitUntil Waits until a condition is met comment Inserts comments into the program OpMode Reads the current operating mode RunMode Re...

Page 46: ...veL Moves the TCP linearly MoveAbsJ Moves the robot to an absolute joint position MoveXDO Moves the robot and set an output in the end position SearchC Searches during circular movement SearchL Searches during linear movement ActUnit Activates an external mechanical unit DeactUnit Deactivates an external mechanical unit Offs Displaces a position RelTool Displaces a position expressed in the tool c...

Page 47: ...llowing an error TRYNEXT Skips the instruction that has caused the error RETURN Returns to the routine that called the current routine Communication TPErase Erases text printed on the teach pendant TPWrite Writes on the teach pendant TPReadFK Reads function keys TPReadNum Reads a number from the teach pendant ErrWrite Stores an error message in the error log System Time ClkReset Resets a clock use...

Page 48: ...ts a part of a string StrToVal Converts a string to a numeric value ValToStr Converts a value to a string For more information on the programming language see RAPID Reference Manual Memory Memory size Instructions1 Program memory Standard 2 5 MB2 7500 Extended memory 8 MB 6 0 MB2 18000 Mass storage3 RAM memory Standard 0 5 MB 3000 Extended 8 MB 4 0 MB 31000 Diskette 1 44 MB 15000 1 Depending on ty...

Page 49: ...ents which tell the operator what is happening Displace a position also during program execution can be blocked 3 7 Maintenance and Troubleshooting The following maintenance is required Changing filter for the transformer drive unit cooling every year Changing grease and oil every third year Changing batteries every third year Some additional checks every year The maintenance intervals depends on ...

Page 50: ...e positions of the robot arm 909 1083 1229 2469 2800 2999 305 645 848 2600 2762 2859 1 2 3 4 5 6 0 2 5 X 2 8 X 3 0 X pos axis 2 ϕ2 axis 3 ϕ3 0 1 2 3 4 5 6 0 70 70 43 85 85 37 0 28 3 110 110 20 28 Min 23o Max 155o 90o at pos 0 1415 185 415 766 1096 2467 1804 2075 1909 1445 387 290 701 2389 1760 490 760 648 978 2791 2108 2075 2071 1463 63 614 583 2551 1965 671 964 578 908 2984 2289 0 1 2 3 4 5 6 Pos...

Page 51: ...120 2 5 150 2 8 200 3 0 100 2 5 200 2 8 150 Axis no 1 110 s 100 s 90 s 2 100 s 90 s 70 s 3 100 s 90 s 70 s 4 210 s 120 s 110 s 5 150 s 120 s 110 s 6 210 s 190 s 110 s There is a supervision function to prevent overheating in applications with intensive and frequent movements Resolution Approx 0 01o on each axis ...

Page 52: ... backed resolver revolution counters in the serial measurement board SMB The SMB is located close to the motor s according to Figure 27 or inside the cabinet For more information on how to install an external axis see the Product Manual Installation and Commissioning When more than one external axis is used the drive units for external axis 2 and upwards must be placed in a separate cabinet accord...

Page 53: ...fication release 1 2 Data rate fixed 500 Kbit s Max four units can be mounted inside the cabinet Type of unit Option no Digital Analog Power supply In Out Voltage inputs Voltage output Current output Digital I O 24 VDC 20x 16 16 Internal External1 1 The digital signals are supplied in groups each group having 8 inputs or outputs Digital I O 120 VAC 25x 16 16 Internal External Analog I O 22x 4 3 1 ...

Page 54: ...pply 19 to 35 V Rated voltage 24 V DC Logical voltage levels 1 18 to 34 V 0 7 V Output current max 0 5 A Potential difference max 500 V Time delays hardware 1 ms software 2 ms Time variations 2 ms Relay outputs option 205 Single pole relays with one make contact normally open Rated voltage 24 V DC 120 VAC Voltage range 19 to 35 V DC 24 to 140 V AC Output current max 2 A Potential difference max 50...

Page 55: ...ohm Resolution 0 61 mV 14 bits Accuracy 0 2 of input signal Analog outputs option 202 Voltage Output voltage 10 V Load impedance min 2 kohm Resolution 2 44 mV 12 bits Current Output current 4 20 mA Load impedance min 800 ohm Resolution 4 88 µA 12 bits Accuracy 0 2 of output signal Analog outputs option 203 Output voltage galvanically isolated 0 to 10 V Load impedance min 2 kohm Resolution 2 44 mV ...

Page 56: ...s Motors on off Starts program from where it is Motors on and program start Starts program from the beginning Stops program Stops program when the program cycle is ready Stops program after current instruction Executes trap routine without affecting status of stopped regular program1 Loads and starts program from the beginning1 Resets error Resets emergency stop System reset Analog output TCP spee...

Page 57: ...9200 bit s max 1 channel with speed 19200 bit s For high speed and or network communication the robot can be equipped with Ethernet interface see Figure 29 Transmission rate is 10 Mbit s Figure 29 Serial network communication Character based or binary information can be transferred using RAPID instructions This requires the option Advanced functions see Product Specification RobotWare In addition ...

Page 58: ...e 25 Power 2 x 25 mm2 Earth 1 x 25 mm2 Water 3 max 10 bar innerhose diameter 13 mm Max current 2 5 kA 1s Short circuit current 1 5 kA 3s Max average current 135 A at 20o C 68o F ambient temperature 100 A at 50o C 122o F ambient temperature Max voltage 600 V Frequency 50 1000 Hz Lifetime 4 years of 3 shift 1800000 cycles 180o ...

Page 59: ...6400R 3 0 100 IRB 6400R Reach Handling capacity Reach Specifies the max reach at the wrist centre Handling capacity Specifies the max handling capacity Manipulator colour The manipulator is painted with ABB orange if no colour is specified 310 Colours according to RAL codes 320 Protection 035 Standard 036 Foundry Robot adapted for foundry environments Degree of protection as in Chapter 3 4 The man...

Page 60: ... housing upper arm and G 1 2 14 at the base For connection of extra equipment on the manipulator there are cables running parallel to the manipulator s cable harness with connectors on the upper arm axis 4 or on the upper arm housing The connectors are one Burndy 12 pin UT071412 SHT one Burndy 4 pin UT07104 SHT one fieldbus options 053 055 041 At upper arm housing 042 At upper arm axis 4 Figure 30...

Page 61: ...n the controller see Figure 41 The cable between R1 CP CS and the controller is supplied Connectors type Type of fieldbus connector on the upper arm 053 Canbus R3 CANBUS 5 pin Mini style female contact with 7 8 16 UN 2A THD female connection thread Rotation Required Meets ANSI B93 55M 1981 design and intermateability requirements Connection to cabinet Cable lengths Canbus 660 7m 661 15m 662 22m 66...

Page 62: ...hosen Figure 32 Mounted Spotweld harness 050 Process media conduit An external flexible condiut for supplying process media from the base up to the upper arm housing The flexible hose has the diameter of 80 67 mm The harness remains within the manipulators max envelope for axis 1 of 530 mm The flexibel hose is attached to the base frame and lower arm See Figure 33 The hoses cables inside the condu...

Page 63: ...nit Always included for Foundry versions 090 Cooling for axis 1 motor Extra cooling of axis 1 motor is recommended in heavy duty application e g in press tending application Figure 34 Location of the fan on the manipulator 092 Fork lift device Lifting device on the manipulator for fork lift handling is mounted at delivery Lifting eyes for use with an overhead crane are integrated as standard 0 5 1...

Page 64: ...e in order to check on the sync position or any displacement of the screwed joints in the structure following a collision seizure with a tool when one of the motors on axes 1 4 is changed etc In connection with major repairs and changing structural components or the wrist DynaCal must be used instead The equipment comprises four sensors fixed on the manipulator axes 1 4 A calibration tool is also ...

Page 65: ... switches BNS according to EN 60947 5 1 and EN 60947 5 2 Connection to 075 Manipulator Connection on the manipulator base with one Burndy 23 pin connector 076 Cabinet Connection on the cabinet wall Position switch cables are included Position switches axis 1 069 Three position switch functions are available 071 Note With 3 functions the connection of the switch no 5 and 6 is limited to normal clos...

Page 66: ...iters Laboratories Inc has tested and examined the finished complete product i e manipulator and controller and determined that the product fulfils the stipulated safety standards Some options marked with are inconstistent with UL Listed Option 112 Standard cabinet without upper cover can not be UL Listed at delivery it may be ordered as UL Recognized 696 UR Recognized certificate on component lev...

Page 67: ... Mounting plate for mounting of equipment dimensions in mm 126 Cabinet on wheels OPERATOR S PANEL The operator s panel and teach pendant holder can be installed either 181 Standard i e on the front of the cabinet or 182 External i e in a separate operator s unit See Figure 37 for required preparation All necessary cabling including flange connectors sealing strips screws etc is supplied External e...

Page 68: ...a box See Figure 38 Figure 38 Operator s panel mounted in a box all dimensions in mm 184 224 180 140 193 196 70 62 45o External panel enclosure not supplied M8 x4 Connection to Holes for flange Holes for operator s panel Holes for teach pendant holder the controller 90 155 5 x2 Teach pendant connection 200 240 Required depth 200 mm M4 x4 96 223 337 370 M5 x4 for fastening of box Connection flange ...

Page 69: ...well at temperatures up to 40o C 104o F At higher temperatures a cooling device for the drive is necessary to ensure good functionality The disk drive will not deteriorate at higher temperatures but there will be an increase in the number of reading writing problems as the temperature increases TEACH PENDANT 601 Teach pendant with back lighting Teach pendant language 611 English 612 Swedish 613 Ge...

Page 70: ...nnector on the cabinet s left hand side The cable is not supplied If option 133 136 is chosen the female connector cable part is included 131 Cable gland for inside connection Diameter of cable 11 12 mm 132 32 A 380 415 V 3p PE see Figure 39 133 32 A 380 415 V 3p N PE see Figure 39 Figure 39 CEE male connector 134 Connection via an industrial Harting 6HSB connector in accordance with DIN 41640 35 ...

Page 71: ... cables in the cabinet Interrupt capacity 50 kA I O INTERFACES The standard cabinet can be equipped with up to four I O units For more details see Technical Specification 3 10 Note The use of I O units and field buses can be limited because of CPU overload in the controller during motions Figure 41 I O unit and screw terminal locations 201 Digital 24 VDC I O 16 inputs 16 outputs 202 Analog I O 4 i...

Page 72: ...re details see Technical Specification 3 10 241 Allen Bradley Remote I O Up to 128 digital inputs and outputs in groups of 32 can be transferred serially to a PLC equipped with an Allen Bradley 1771 RIO node adapter The unit reduces the number of I O units that can be mounted in cabinet by one The field bus cables are connected directly to the A B RIO unit in the upper part of the cabinet see Figu...

Page 73: ...he board front EXTERNAL I O UNITS I O units can be delivered separately The units can then be mounted outside the cabinet or in the cabinet extension These are connected in a chain to a connector CAN 3 or CAN 2 see Figure 41 in the upper part of the cabinet Connectors to the I O units and a connector to the cabinet Phoenix MSTB 2 5 xx ST 5 08 but no cabling is included Measures according to Figure...

Page 74: ...ale connector in accordance with DIN 43652 on the left hand side of the cabinet Male connector is also supplied 391 Drive unit C The drive unit is part of the DC link Recommended motor type see Figure 44 397 Drive unit U The drive unit is part of the DC link Recommended motor types see Figure 44 EXTERNAL AXES MEASUREMENT BOARD The resolver can either be connected to a serial measurement board outs...

Page 75: ...m on the left hand side of the robot controller Door interlock mains connection mains voltage and mains filter according to the robot controller One transformer and one mains switch are included 371 372 Drive unit GT for 4 or 6 motors Recommended motor types see Figure 44 373 Drive unit ECB for 3 or 6 motors Recommended motor types see Figure 44 374 Drive unit GT ECB 375 Drive unit GT GT ECB Figur...

Page 76: ...LY 431 Connection from the main transformer The voltage is switched on off by the mains switch on the front of the cabinet 432 Connection before mains switch without transformer Note this only applies when the mains voltage is 400 V three phase with neutral connection and a 230 V service socket Note Connection before mains switch is not in compliance with some national standards NFPL 79 for exampl...

Page 77: ...sories There is a range of tools and equipment available specially designed for the robot Software options for robot and PC For more information see Product Specification RobotWare Robot Peripherals Track Motion Tool System Motor Units Spot welding system for transformer gun ...

Page 78: ...Accessories 68 Product Specification IRB 6400R M99 BaseWare OS 3 2 ...

Page 79: ...Interface 3 2 20 3 5 RAP Communication 3 2 22 3 6 Ethernet Services 3 2 23 3 7 Profibus DP 3 2 24 3 8 Interbus S 3 2 25 3 9 Load Identification and Collision Detection 3 2 LidCode 27 3 10 ScreenViewer 3 2 28 3 11 Conveyor Tracking 3 2 30 3 12 I O Plus 3 2 31 4 ProcessWare 33 4 1 ArcWare 3 2 33 4 2 ArcWare Plus 3 2 36 4 3 SpotWare 3 2 37 4 4 SpotWare Plus 3 2 41 4 5 GlueWare 3 2 42 4 6 DispenseWare...

Page 80: ...Product Specification RobotWare 2 Product Specification RobotWare for BaseWare OS 3 2 ...

Page 81: ...e RobotWare family BaseWare OS provides all the necessary features for fundamental robot programming and operation It is an inherent part of the robot but can be provided separately for upgrading purposes BaseWare Options These products are options that run on top of BaseWare OS of the robot They represent functionality for robot users that need additional functionality for example run multitaskin...

Page 82: ...Introduction 4 Product Specification RobotWare for BaseWare OS 3 2 ...

Page 83: ...support structured programming and reuse Routines can be Functions or Procedures Local or global data and routines Data typing including structured and array data types User defined names shop floor language on variables routines and I O Extensive program flow control Arithmetic and logical expressions Interrupt handling Error handling for exception handling in general see Exception handling User ...

Page 84: ...Characteristic is that the error recovery features are easy to adapt to a specific installation in order to minimise down time Examples Error Handlers automatic recovery often possible without stopping produc tion Restart on Path Power failure restart Service routines Error messages plain text with remedy suggestions user defined messages Diagnostic tests Event logging ...

Page 85: ...ot or fixed in the cell Stationary TCP Note that also joint coordinate movements MoveJ are recalculated when a coordinate system is adjusted Singularity handling The robot can pass through singular points in a controlled way i e points where two axes coincide Motion Supervision The behaviour of the motion system is continuously monitored as regards position and speed level to detect abnormal condi...

Page 86: ...Motion Control 8 Product Specification RobotWare for BaseWare OS 3 2 Soft Servo Any axis also external can be switched to soft servo mode which means that it will adopt a spring like behaviour ...

Page 87: ...TCP and one user defined point attached to the upper arm to 250 mm s can be set lower This limitation also works in joint system motion Motion Supervision See Motion Control Authorisation It is possible to limit the access to certain commands by assigning different passwords to four different user levels operator service programmer service programmer It is possible to define the commands available...

Page 88: ...ngle DI or DO group of DI or DO AI or AO Grouping of signals to form integer values Sophisticated error handling Selectable trust level i e what action to take when a unit is lost Program controlled enabling disabling of I O units Scaling of analog signals Filtering Polarity definition Pulsing TCP proportional analog signal Programmable delays Simulated I O for forming cross connections or logical...

Page 89: ...ogical conditions Interrupts from analog input or output signals Transferring information via serial channels Data in the form of character strings numeric values or binary information can be transferred between the robot and other peripheral equipment e g a PC bar code reader or another robot Information is transferred via an RS232 or RS485 serial channel Examples of applications Printout of prod...

Page 90: ...lay max 500 ms the output is set at the corresponding time before the robot reaches the specified position The distance can also be specified as a certain time before the programmed position This time must be within the deceleration time when approaching that position Examples of applications Handling press work to provide a safe signalling system between the robot and the press which will reduce ...

Page 91: ...of applications A volume is defining the home position of the robot When the robot is started from a PLC the PLC will check that the robot is inside the home volume i e the corresponding output is set The volume is defining where peripheral equipment is located within the work ing space of the robot This ensures that the robot cannot be moved into this volume A robot is working inside a box By def...

Page 92: ... occurred This is all automatic without any need to call the operator This requires options ArcWare or ArcWare Plus Via an input the robot can be ordered to interrupt program execution and go to a service position for example When program execution is later restarted manually or automatically the robot resumes the interrupted movement Cross connections with logical conditions Logical conditions fo...

Page 93: ...nder shaped world zone WZLimSup Activate world zone limit supervision WZSphDef Define a sphere shaped world zone WZDOSet Activate world zone to set digital output WZDisable Deactivate world zone supervision WZEnable Activate world zone supervision WZFree Erase world zone supervision StorePath Stores the path when an interrupt or error occurs RestoPath Restores the path after an interrupt error Tri...

Page 94: ... it back again Obviously this will reduce cycle times When arc welding the work object is often fitted to a rotating external axis If this axis is rotated more than one turn during welding the cycle time can be reduced because it is not necessary to rotate the axis back between welding cycles Coordinated motion with multi axis manipulators Coordinated motion with multi axis manipulators or robot c...

Page 95: ...al axes First a work object located at station 1 is welded When this operation is completed station 1 is moved to a position where it is easy to change the work object and at the same time the robot welds the work object at station 2 Station 1 is moved inde pendently of the robot s movement which simplifies programming and reduces the cycle time The work object is located on an external axis that ...

Page 96: ...t Atlas Copco Controls NOTE The DMC FBU must be equipped with Atlas Copco Controls option C RAPID instructions and functions included in this option IndReset Resetting the work area for an axis IndAMove Running an axis independently to an absolute position IndDMove Running an axis independently for a specified distance IndRMove Running an axis independently to a position within one revolution with...

Page 97: ...at the same time as the robot is doing for example welding By putting this operator dialogue into a background task the operator can specify input data for the next work cycle without having to stop the robot The robot is controlling a piece of external equipment in parallel with the nor mal program execution Performance When the various processes are programmed in the correct way no performance p...

Page 98: ...time This option will also work with RobView 3 2 1 or DDE Server 2 3 1 or later versions Older versions work only with RAP Communication In all cases RobView and DDE Server will require the hardware lock and password The Factory Ware Interface 3 2 includes the Robot Application Protocol RAP based on MMS functionality The Robot Application Protocol is used for computer communication The following f...

Page 99: ...many different programs are used in the robot the computer helps in keeping track of them and by doing back ups Programs can be transferred to the robot s ramdisk at the same time as the robot executes its normal program When execution of this program has finished the new program can be read very quickly from the ramdisk and program execution can continue In this way a large number of programs can...

Page 100: ...r DDE Server are used It includes the same functionality described for the option Factory Ware Interface 3 2 It also works for the FactoryWare products For RobView and DDE Server there is no difference from the FactoryWare Interface except that the price is higher For RobComm in this case a license protection requirement in the PC is added Note that both FactoryWare Interface and RAP Communication...

Page 101: ...TP The aspect of authorization differs between NFS and FTP Examples of applications All programs for the robot are stored in the PC When a new part is to be pro duced i e a new program is to be loaded the program can be read directly from the hard disk of the PC This is done by a manual command from the teach pen dant or an instruction in the program If the option RAP Communication or FactoryWare ...

Page 102: ... distributed I O signal The maximum number of I O units that can be defined in the S4C system is described in User s Guide Baseware chapter I O data specification As I O units counts all DP slave units connected to the S4C DP master the DP slave simulated I O units and other I O units connected to other S4C fieldbuses It is possible to connect digital and or analog in and output I O units on the D...

Page 103: ...sets of input output modules via the serial Inter Bus S field bus net The robot controller handles and addresses the InterBus S I O signals in the same way it manages any other S4C distributed I O signals It should be noted that this is a supplementary manual to the other robot manuals Detailed description of the InterBus S and different I O units will be found in the doc uments from e g Phoenix C...

Page 104: ...Interbus S 3 2 26 Product Specification RobotWare for BaseWare OS 3 2 ...

Page 105: ...er than 5 Collision Detection Abnormal torque levels on any robot axis not external axes are detected and will cause the robot to stop quickly and thereafter back off to relieve forces between the robot and environment Tuning is normally not required but the sensitivity can be changed from Rapid or manually the supervision can even be switched off completely This may be necessary when strong proce...

Page 106: ...ASCII and or horizontal or vertical strokes for underlining separating or framing 1 to 5 function keys 1 to 4 pop up menus containing from 1 to 10 choices 1 to 30 display and input fields defined by Their position and size Their type display input Their display format integer decimal binary hexadecimal text A possible boundary with minimum and maximum limits Example of a user defined screen The re...

Page 107: ...ific action or change the screen When a new value is entered in a field or when a new field is selected to exe cute some specific action The commands that can be executed on screen events are Reading writing RAPID or I O data Reading writing fields contents Arithmetical div or logical AND OR NOT XOR operations on the data read Comparing data read and carrying out a command or not depending on the ...

Page 108: ...bject queue which can be manipulated by RAPID instructions It is possible to define a start window in which an object must be before tracking can start A maximum tracking distance may be specified If the robot is mounted on a parallel track motion then the system can be con figured such that the track will follow the conveyor and maintain the relative position to the conveyor Tracking of a conveyo...

Page 109: ...se contact the supplier The communication between these units and S4C has been verified this does not however guarantee the internal functionality and quality of the units Configuration data for the units is included In I O Plus there is also support for a so called Welder This is a project specific spot welding timer and is not intended for general use In addition to the above units the I O Plus ...

Page 110: ...I O Plus 3 2 32 Product Specification RobotWare for BaseWare OS 3 2 ...

Page 111: ...oller uses parallel signals but a serial interface is also available Advanced process control Voltage wire feed rate and other process data can be controlled individually for each weld or part of a weld The process data can be changed at the start and finish of a welding process in such a way that the best process result is achieved Testing the program When testing a program welding weaving or wel...

Page 112: ...or off Wire feed on off Turns wire feed on or off Wire feed direction Feeds wire forward backward Weld error Weld error Error information Digital outputs for error identification Weld program number Parallel port for selection of program number or 3 bit pulse port for selection of program number or Serial CAN Devicenet communication Digital inputs Description Arc OK Arc established starts weld mot...

Page 113: ...nputs cont Description cont Voltage Weld voltage measurement for monitoring and supervision Current Weld current measurement for monitoring and supervision RAPID instructions included in this option ArcL Arc welding with linear movement ArcC Arc welding with circular movement ...

Page 114: ... this information at specific intervals Based on the input value the path can then be adjusted Adaptive process control Adaptive process control for LaserTrak and Serial Weld Guide systems The tool provides the robot system with changes in the shape of the seam These val ues can be used to adapt the process parameters to the current shape RAPID instructions and functions included in this option Ar...

Page 115: ...es of guns irrespective of the signal interface Adaptation to different weld timers The robot can handle different types of weld timers Normally communication with the weld timer uses parallel signals but a serial interface is also available for some types of weld timers Continuous supervision of the welding equipment If the option Multitasking is added supervision can be implemented irrespective ...

Page 116: ...pecific routines such as go to service position can be ordered manually When the appropriate routine has been performed the weld cycle continues from where it was interrupted Manual welding independent of positioning A spot weld can be ordered manually at the current robot position This is implemented in a similar way as for program execution i e with gun control and process supervision It is also...

Page 117: ...eld flow OK no problem with the water supply temp OK no over temperature current OK the weld current is within permissible tolerances User defined routines The following routines are predefined but can be adapted to suit the current installation Routine Description preweld supervision supervision to be done before welding postweld supervision supervision to be done after welding init supervision s...

Page 118: ...SpotWare 3 2 40 Product Specification RobotWare for BaseWare OS 3 2 RAPID instructions included in this option SpotL Spot welding with linear movement ...

Page 119: ...or BaseWare OS 3 2 41 4 4 SpotWare Plus 3 2 In addition to the SpotWare functionality the robot can weld with up to four stationary welding guns simultaneously RAPID instructions included in this option SpotML Multiple spot welding with linear movement ...

Page 120: ...fied time Two gluing guns One or two gluing guns can be controlled Up to two analog outputs can be controlled for each gun Velocity independent glue string thickness The thickness of the glue string can be made independent on the robot s velocity by controlling the gluing gun with a signal that reflects the robot s velocity When the robot velocity is reduced the flow of glue will be automatically ...

Page 121: ...rror error during gluing User defined routines The following routines are predefined but can be adapted to suit the current installation Routine Description preglue actions activity to be carried out in the beginning of the glue string postglue actions activity to be carried out at the end of the glue string power on action activity to be carried out at power on restart action activity to be carri...

Page 122: ...e following features Fast and accurate positioning Handling of on off guns as well as proportional guns Speed proportional or constant analog outputs Up to five different guns can be handled simultaneously controlled by 1 5 digital output signals for gun on off control and 1 2 analog output signals for flow control Four different gun equipment each controlled by 1 5 digital output signals and 1 2 ...

Page 123: ... possible to select different brushes during a linear paint instruction A brush can contain up to five parameters Paint The Paint flow reference Atom_air The Atomising air reference Fan_air The Fan air reference Voltage The Electrostatic voltage reference Rotation The Rotation speed reference for rotational applicators The five parameters may go directly to analog outputs controlling the spray gun...

Page 124: ...or BaseWare OS 3 2 RAPID instructions included in this option PaintL Paint along a straight path w paint events PaintC Paint along a circular path UseBrushTab Used to activate select a brush table SetBrush Select a brush from the activated brush table ...

Page 125: ...cle may further be broken down into a number of pick place cycles where each pick place cycle is the task to pick one or several parts and place them on the pallet Within each pick place cycle there may be several pick operations if parts must be picked in many separate operations Similarly there may be several place operations in each pick place cycle Each layer may be either an in feeder layer w...

Page 126: ...for the approach positions relative to the pick or place position may be individually defined per product or station In addition the approach direction may be individually defined per pick or place position These approach data may be changed in run time The picking and placing movements and the sequence to search different stacks for empty pallets or tier sheets may be customised if necessary User...

Page 127: ...etWizard PAL_CELL sys PAL_CYC sys Templates to be completed by the system integrator concerning work object data tool data user routines including communication with external equipment etc PAL_USRR sys PAL_USRT sys Modules and code not included in PalletWare In addition to the modules listed above there are some modules which are not included in the PalletWare delivery but which must be written by...

Page 128: ...PalletWare 50 Product Specification RobotWare for BaseWare OS 3 2 ...

Page 129: ... options 2 5 MB ram disk 0 5 MB 6 0 MB ram disk 4 0 MB Option Program memory Ram disk Remark Base system 335 kB 145 kB 225 kB if memory option 403 is chosen Multitasking 80 kB task includ ing task 1 Advanced Functions 20 kB GlueWare DispenseWare 125 kB 30 kB Including Advanced Functions SpotWare 370 kB 55 kB Including Multitask ing with two spot ware tasks one process and one supervision task Spot...

Page 130: ...other languages are also delivered and can be installed 5 3 Robot Documentation A complete set of documentation consisting of User s Guide with step by step instructions on how to operate and program the robot This manual also includes a chapter called Basic Operation which is an introduction to the basic operation and programming of the robot and is suita ble as a tutorial RAPID Reference Manual ...

Page 131: ... Hold to run control 8 7 6 General Mode Safeguarded Stop GS connection 9 7 7 Automatic Mode Safeguarded Stop AS connection 10 7 8 Limiting the working space 10 7 9 Supplementary functions 10 8 Safety Risks Related to End Effectors 10 8 1 Gripper 10 8 2 Tools workpieces 11 8 3 Pneumatic hydraulic systems 11 9 Risks during Operation Disturbances 11 10 Risks during Installation and Service 11 11 The ...

Page 132: ...Safety 2 Product Manual ...

Page 133: ...bots must be familiar with the operation and handling of the industrial robot described in applicable documents e g Users s Guide and Product Manual The diskettes which contain the robot s control programs must not be changed in any way because this could lead to the deactivation of safety functions such as reduced speed 1 1 Introduction Apart from the built in safety functions the robot is also s...

Page 134: ... the necessary connections for the safeguards and interlocks associated with this circuit It is necessary to reset the power to the machine actuators before any robot motion can be initiated However if only the power to the machine actuators is reset this should not suffice to initiate any operation Reduced speed ISO 10218 EN 775 3 2 17 A single selectable velocity provided by the robot supplier w...

Page 135: ...e robot s work envelope the following points must be observed The operating mode selector on the controller must be in the manual mode position to render the enabling device operative and to block operation from a computer link or remote control panel The robot s speed is limited to max 250 mm s 10 inches s when the operating mode selector is in position 250 mm s This should be the normal position...

Page 136: ...reverts to MOTORS OFF mode MOTORS OFF mode means that drive power is removed from the robot s motors and the brakes are applied The status of the switches is indicated by LEDs on top of the panel module in the con trol cabinet and is also displayed on the teach pendant I O window After a stop the switch must be reset at the unit which caused the stop before the robot can be ordered to start again ...

Page 137: ... means of control devices and with clear cut positions One automatic and two manual modes are available The manual mode 250 mm s or 100 must be selected whenever anyone enters the robot s safeguarded space The robot must be operated using the teach pendant and if 100 is selected using Hold to run control In automatic mode the operating mode selector is switched to and all safety arrangements such ...

Page 138: ...safety instructions and the operator must always be outside the safeguarded space 7 4 Enabling device When the operating mode selector is in the MANUAL or MANUAL FULL SPEED position the robot can be set to the MOTORS ON mode by depressing the enabling device on the teach pendant Should the robot revert to the MOTORS OFF mode for any reason while the enabling device is depressed the latter must be ...

Page 139: ... the next instruction is run by releasing and activating the Hold to run button It is possible to change execution mode when the Hold to run button is released and then continue the program execution with the new execution mode by just activating the Hold to run button again i e no alert box is shown If the program execution was stopped with the Stop button on the teach pendant the program executi...

Page 140: ...electrical limit switches If the working space is limited by means of stops or switches the corresponding software limitation parameters must also be changed If necessary movement of the three wrist axes can also be limited by the computer soft ware Limitation of movement of the axes must be carried out by the user 7 9 Supplementary functions Functions via specific digital inputs A stop can be act...

Page 141: ...a care must be taken due to risks other than those associated with regular operation Such an interruption may have to be rectified manually Remedial action must only ever be carried out by trained personnel who are familiar with the entire installation as well as the special risks associated with its different parts The industrial robot is a flexible tool which can be used in many different indust...

Page 142: ...erations must make sure that safety instructions are available for the installation in question Those who install the robot must have the appropriate training for the robot system in question and in any safety matters associated with it Although troubleshooting may on occasion have to be carried out while the power supply is turned on the robot must be turned off by setting the mains switch to OFF...

Page 143: ...ciated with the following parts The mains supply mains switch The power unit The power supply unit for the computer system 55 V AC The rectifier unit 260 V AC and 370 V DC NB Capacitors The drive unit 370 V DC The service outlets 115 230 VAC The power supply unit for tools or special power supply units for the machin ing process The external voltage connected to the control cabinet remains live ev...

Page 144: ...e the brakes are applied and therefore manpower might not be sufficient for any robot Before releasing the brakes be sure that the weight of the arms does not enhance the pressure on the trapped person 14 Limitation of Liability The above information regarding safety must not be construed as a warranty by ABB Robotics that the industrial robot will not cause injury or damage even if all safety ins...

Page 145: ... in particular EN 292 1 Safety of machinery basic terminology EN 292 2 Safety of machinery technical principles specifications emergency stop EN 418 Safety of machinery emergency stop equipment EN 563 Safety of machinery temperatures of surfaces EN 614 1 Safety of machiney ergonomic design principles EN 775 Robot safety EN 60204 Electrical equipment for industrial machines prEN 574 Safety of machi...

Page 146: ...M ROBOT SYSTEM Date Delivery from factory Delivery to customer Acceptance by customer Customer information Customer Address OPTIONS DOCUMENTATION QTY OPTION PARTNO REVISION DESCRIPTION To the User The Configuration List is an individual specification of the robot system delivered regarding configuration and extent On delivery the complete document is placed in the robot controller ...

Page 147: ...ervo System 15 3 1 Principle function 15 3 2 Regulation 15 3 3 Controlling the robot 15 3 4 Overload protection 16 4 I O System 17 5 Safety System 19 5 1 The chain of operation 19 5 2 MOTORS ON and MOTORS OFF modes 20 5 3 Safety stop signals 20 5 4 Limitation of velocity 21 5 5 ENABLE 21 5 6 24 V supervision 21 5 7 Monitoring 21 6 External Axes 23 ...

Page 148: ...System Description CONTENTS Page 2 Product Manual ...

Page 149: ...nical brakes The brakes lock the motors when the robot is inoperative for more than 1000 hours The time is configurabble for the user The following figures shows the various ways in which the different manipulators moves and its component parts Figure 1 The motion patterns of the IRB 1400 and IRB 140 Motor axis 5 Motor axis 6 Motor axis 4 Axis 2 Axis 1 Motor axis 1 Axis 3 Motor axis 2 Motor axis 3...

Page 150: ...t axis 4 Motor unit axis 5 Upper arm Motor unit and gearbox axis 2 Base Motor unit and gearbox axis 3 Lower arm Axis 1 Axis 2 Axis 3 Axis 4 Axis 5 Axis 6 Motor unit axis 6 Motor unit and gearbox axis 1 Motor axis 4 Motor axis 5 Motor axis 6 Axis 2 Axis 1 Motor axis 1 Axis 3 Motor axis 2 Motor axis 3 Axis 4 Axis 5 Axis 6 Upper arm Lower arm Base ...

Page 151: ...anual 5 Figure 4 The motion patterns of the IRB 6400 Figure 5 The motion patterns of the IRB 6400R M99 Base Axis 1 Lower arm Axis 2 Motor axis 2 Motor axis 6 Axis 5 Axis 3 Upper arm Motor axis 5 Motor axis 4 Motor axis 1 Motor axis 3 Axis4 ...

Page 152: ...Structure System Description 6 Product Manual Figure 6 The motion patterns of the IRB 640 Axis 1 Axis 2 Axis 3 Axis 6 Upper arm Lower arm Motor axis 2 Motor axis 6 Motor axis 1 Motor axis 3 ...

Page 153: ...System Description Structure Product Manual 7 Figure 7 The motion patterns of the IRB 840 A 4 C axis 1 X axis 2 Y axis 3 Z axis Motor 1 X axis Motor 4 C axis Motor 3 Z axis Motor 2 Y axis ...

Page 154: ...e System Description 8 Product Manual Figure 8 The motion patterns of the IRB 340 Axis 2 Axis 1 Axis 3 Axis 4 Bars x3 Upper arm x3 telescopic shaft Swivel Axis 2 Axis 3 X Y Z Base box option Motors encapsulated ...

Page 155: ...pheral equipment is specifically designed for robot control and consequently provides optimal performance and functionality Figure 9 shows the location of the various components on the cabinet Figure 9 The exterior of the cabinet showing the location of the various units Teach pendant Operator s panel Disk drive Mains switch Manipulator connection ...

Page 156: ...here are three sizes 8 and 16 MB Main computer board contains 8 MB RAM memory and the main computer which controls the entire robot system Optional boards Communication boards containing circuits for network and field bus commu nication Supply unit 4 regulated and short circuit protected output voltages Drive system DC link converts a three phase AC voltage to a DC voltage Drive module controls th...

Page 157: ...puts and outputs analog signals or field buses I O units can alternatively be located outside the cabinet Communication with robot data is implemented via a stranded wire CAN bus which allows the units to be positioned close to the process Serial measurement board in the manipulator gathers resolver data and transfers it serially to the robot computer board The serial measurement board is battery ...

Page 158: ...Structure System Description 12 Product Manual ...

Page 159: ... robot axes To find out where the various boards are located see Electronics unit on page 10 The computers are the data processing centre of the robot They possess all the func tions required to create execute and store a robot program They also contain func tions for coordinating and regulating the axis movements Figure 12 shows how the computer system communicates with the other units Figure 12 ...

Page 160: ...Computer System System Description 14 Product Manual ...

Page 161: ...en for the pose and velocity of the robot The system also contains a model of the robot which continuously calculates the opti mal regulator parameters for the gravitation the moment of inertia and the interaction between axes See Figure 13 3 3 Controlling the robot An digital current reference for two phases is calculated on the basis of the resolver sig nal and a known relationship between the r...

Page 162: ...ads The PTC sensors are connected to an input on the panel unit which is sensitive to resistance level and which check that low resistance is maintained The robot computer checks the motors for overloading at regular intervals by reading the panel unit register In the event of an overload all motors are switched off V W Computer DC link Drive Unit M R Serial measurement board Torque reference AC O...

Page 163: ...ut and output signals Figure 14 Overview of the I O system I O unit s Panel unit Field bus slave unit s RS 422 SIO2 RS 232 SIO1 General Serial ports I O I O I O Customer connections 16 16 Safety signals I O computer Teach pendant Disk drive Distributed I O bus CAN DeviceNet Main computer VME bus Communication board Ethernet ...

Page 164: ...I O System System Description 18 Product Manual ...

Page 165: ... on the teach pendant and external emergency stop buttons are included in the two channel chain of operation A safeguarded stop AUTO STOP which is active in the AUTO operating mode can be connected by the user In any of the MANUAL modes the enabling device on the teach pendant overrides the AUTO STOP The safeguarded stop GENERAL STOP is active in all operating modes and is connected by the user Th...

Page 166: ... change to MOTORS OFF the ENABLE chain will break and the ENABLE relay is opened The safety circuit can thus be broken in two places by the robot computer In any of the MANUAL modes you can start operating again by pressing the enabling device on the teach pendant If the circuit is OK the robot computer then closes the MOTORS ON relay to complete the circuit The function of the safety circuit can ...

Page 167: ...y to the safety circuits drops out the MOTORS ON contactors will drop out causing the motors to switch off 5 7 Monitoring Monitoring is carried out using both hardware and software and comprises the external part of the safety circuits including switches and operating contacts The hardware and software parts operate independently of each other The following errors may be detected All inputs from t...

Page 168: ...Safety System System Description 22 Product Manual ...

Page 169: ...de the controller is one or two depending on robot type In addition to drive units from ABB it is also possible to communicate with external drive units from other vendors See Product Specification RobotWare for BaseWare OS 3 1 Figure 16 Outline diagram external axes IRB Not supplied on delivery Alt Not supplied on delivery Measurement System 1 Drive System 2 inside external axes cabinet Measureme...

Page 170: ...External Axes System Description 24 Product Manual ...

Page 171: ...6 1 Axis 1 19 2 6 2 Axes 2 and 3 21 2 6 3 Position switch 22 2 7 Mounting holes for equipment on the manipulator 24 2 7 1 Quality of screws for fitting extra equipment 25 2 8 Loads 25 2 8 1 Break Times 25 2 9 Connecting the controller to the manipulator 27 2 9 1 Connection on left hand side of cabinet 27 2 10 Dimensioning the safety fence 27 2 11 Mains power connection 28 2 11 1 Connection to the ...

Page 172: ... 3 11 External safety relay 54 3 12 Safeguarded space stop signals 55 3 12 1 Delayed safeguarded space stop 55 3 13 Available voltage 55 3 13 1 24 V I O supply 55 3 13 2 115 230 V AC supply 56 3 14 External 24 V supply 56 3 15 Connection of extra equipment to the manipulator 57 3 15 1 Connection of signal lamp on upper arm option 61 3 16 Distributed I O units 61 3 16 1 General 61 3 16 2 Sensors 62...

Page 173: ...inks and balancing units 96 4 2 Calibration of the manipulator 97 4 3 Cold start 97 4 4 How to change language options and IRB types 97 4 5 How to use the disk Manipulator Parameters 98 4 5 1 Robot delivered with software installed 98 4 5 2 Robot delivered without software installed 98 4 6 Saving the parameters on the Controller Parameter disk 99 5 External Axes 101 5 1 General 101 5 2 Easy to use...

Page 174: ...Installation and Commissioning CONTENTS Page 4 Product Manual IRB 6400R ...

Page 175: ...ive cover on axis four housing to protect it during transport Operating conditions Ambient temperature 5 to 45 C manipulator 5 to 52 C controller Relative humidity Max 95 at constant temperature Storage conditions If the equipment is not going to be installed straight away it must be stored in a dry area at an ambient temperature between 25 C and 55 C When air transport is used the robot must be l...

Page 176: ...n with axis 2 at an angle of 35 and axis 3 at an angle of 0 there is no risk of the manipulator tipping All other axes should have an angle of 0 no stable yes risk of tipping For Foundry F version see corresponding non F version 1 2 System diskettes The diskettes in the box fixed to the shelf for the teach pendant should be copied in a PC before they are used Never work with the original diskettes...

Page 177: ...a traverse crane Attach the straps to the integrated lifting eyes on both sides of the frame see Figure 1 The lifting strap dimensions must comply with the applicable standards for lifting It is also possible to use two lifting devices option for use with a fork lift truck see Figure 2 The following lifting instructions are valid for a naked robot Whenever additional equipment is put on the robot ...

Page 178: ...IRB 6400R Figure 2 Lifting the manipulator using a fork lift truck Crane lifting is not permitted using the fork lift arrangement 675 Fork lift for 2 5 120 2 5 150 2 5 200 2 8 150 2 8 200 3 0 100 1280 467 View from above View from the rear 400 754 914 View from the side ...

Page 179: ... devices on the cabinet or a fork lift when lifting the controller see Figure 3 Figure 3 The maximum angle between the lifting straps when lifting the controller Min 60 A A A A If the controller is supplied without its top cover lifting devices must not be used A fork lift truck must be used instead ...

Page 180: ... with a flatness within the specification Use shims if necessary The rest of the surface must be flat within 2 mm Footprint diagram see Figure 4 Floor mounted models can be tilted max 5o The levelness requirement for the surface is as follows Figure 4 Bolting down the manipulator 0 5 0 2 R 400 317 34 A A A A B B B B 4x 243 5 4x 317 34 4x 243 5 4x 1 5 4 x 3 7 5 4 x 50 8x 28 8x 45 H9 4x 15 0 2 120 0...

Page 181: ... is recommended that the robot is mounted with M24x140 8 8 Socket screws 3 on two base plates 1 with four locator bushings 2 that allows the same manipulator to be re mounted without program adjustment see Figure 5 For Base Plate measures see Figure 6 For locator bushing measures see Figure 4 When bolting a mounting plate or frame to a concrete floor follow the general instructions for expansion s...

Page 182: ...To orient the robot when attaching it to the floor three guide pins can be fitted in the appropriate holes Ø 8 5 mm see Figure 5 Figure 7 Orientation holes A A 0 82 66 156 5 64 35 717 34 800 153 84 80 0 773 597 203 27 0 0 27 70 127 M24 x4 M16 x2 Ø24 x6 15 2 0 Ø 45 H9 0 062 0 3x45º R max 1 2 A A M24 x4 Ø 8 5 3x ...

Page 183: ...e Installation Product Manual IRB 6400R 13 2 2 2 Controller The controller may be secured to the floor using M10 screws see the footprint drawing below See also Chapter 2 4 Amount of space required before assembling the control ler 400 720 ...

Page 184: ...founda tion with the robot weight must be higher than 22 Hz TuneServo can be used for adapting the robot tuning to a non optimal foundation 2 3 2 All versions Endurance load Max load In operation Emergency stop Force xy 14 000 N 38 000 N Force z 22 000 8 000 N 22 000 19 000 N Torque xy 34 000 Nm 61 000 Nm Torque z 7 000 Nm 12 000 Nm 15 000 Nm Force xy and torque xy are vectors that can have any di...

Page 185: ...ler is illustrated in Figure 9 and Figure 10 The working range for axis 1 is 180 NB There are no software or mechanical limits for the working space under the base of the manipulator 2 4 1 Manipulator Figure 9 The working space required for the manipulator 2 5 150 All dimensions refer to the wrist centre mm 2 5 2 8 3 0 909 1083 1229 2469 2800 2999 305 645 848 2762 2859 2600 1083 1229 ...

Page 186: ...ommissioning 16 Product Manual IRB 6400R 2 4 2 Controller Figure 10 The space required for the controller 200 50 540 950 980 500 500 800 Lifting points for forklift Castor wheels 800 250 Extended cover Option 114 Cabinet extension Option 115 ...

Page 187: ... the pins 37 0V and 33 24V are used to supply power for releasing the brakes Figure 11 Connection of external voltage to enable disengagement of the brakes External power must be connected as shown in Figure 11 Incorrectly connected power can release all brakes causing immediate movement of all axes When the controller or the voltage device is connected as illustrated above the brakes can be relea...

Page 188: ...oduct Manual IRB 6400R WARNING Be very careful when disengaging the brakes The axes become acti vated very quickly and may cause damage or injury Figure 12 The robot axes and motion patterns Axis 2 Axis 4 Axis 5 Axis 6 Axis 3 Axis 1 Brake release 4 2 1 6 3 5 ...

Page 189: ...apter System Param eters in the User s Guide If a Process Media cabling is mounted on the manipulator the area between 100 and 180 must not be used as the main working space due to the risk of extreme warned out and shortened life span on the cabling see Figure 13 Figure 13 Restricted Work Space 2 6 1 Axis 1 The range of rotation for axis 1 can be limited mechanically by fitting extra mechanical s...

Page 190: ...On Site Installation Installation and Commissioning 20 Product Manual IRB 6400R Figure 14 Mechanically limiting axes1 Movable stop Holes for extra stops Fixed stop ...

Page 191: ...d can be reduced by adding up to six fixed mechanical stops with 15º graduation The stops are fitted on the inside of the frame to each axis Extra stops must be fitted in a row starting at the fixed stop When fitting extra stops the cams for the position switch should not be mounted in position Figure 15 Mechanically limiting axes 2 and 3 Holes for extra stops Cams ...

Page 192: ...tch see Figure 16 The ends of the cam that are in the channel of the profile must be cut at an angle of 90 so that the contact area for the stop is as large as possible see Figure 17 When fitting the cam it is important that the edges on the openings at the ends of the profile are properly chamfered The cam stop comprises an M5 nut with an M5 x 6 stop screw When the screw is tighten into the mater...

Page 193: ...Installation and Commissioning On Site Installation Product Manual IRB 6400R 23 Figure 17 Cutting the cam Remove 90 30 ...

Page 194: ...ting maintenance staff or the design department at ABB Flexible Automation Figure 18 Holes for mounting extra equipment dimensions in mm A A B B D D E E M10 2x 282 93 260 75 50 150 180 M10 2x See E E 104 for Hole 1 C C 80 M10 2x 378 F F 93 for Hole 2 See E E Hole 1 Hole 2 112 A A B B C C 175 685 2 5 X 50 M10 4x 1030 2 8 X 1235 3 0 X M10 2x 25 M10 4x Depth 20 E E D D View F F on the next page ...

Page 195: ... 2 8 Loads It is important to define the loads properly with regard to the position of centre of grav ity and inertia factor in order to avoid jolting movements and unnecessary stops due to overloaded motors For more information see chapter 3 4 in Product Specification IRB 6400R Technical specification for load diagrams permitted extra loads equipment and their positions The loads must also be def...

Page 196: ...On Site Installation Installation and Commissioning 26 Product Manual IRB 6400R ...

Page 197: ...nnector is designated XP when it has pins male and XS when it has sockets female A screwed connection is desig nated XT Figure 20 Connections on the cabinet wall 2 10 Dimensioning the safety fence A safety fence must be fitted around the robot to ensure a safe robot installation The fence must be dimensioned to withstand the force created if the load being handled by the robot is dropped or releas...

Page 198: ... Remove the left cover plate under the top lid Pull the mains cable outer diam 10 20 mm through the gland see Figure 21 located on the left cabinet wall Figure 21 Mains connection inside the cabinet Connect as below also see chapter 11 Circuit Diagram 1 Release the connector from the knob by pressing in the red button located on the upper side of the connector see Figure 21 2 Connect phase 1 to L1...

Page 199: ...ponds to the identification plate on the controller 4 The teach pendant and peripheral equippment are properly connected 5 That limiting devices that establish the restricted space when utilized are installed 6 The physical environment is as specified 7 The operating mode selector on the operator s panel is in Manual mode position When external safety devices are used check that these have been co...

Page 200: ...On Site Installation Installation and Commissioning 30 Product Manual IRB 6400 For more information see Chapter 3 8 The MOTORS ON MOTORS OFF circuit and Chapter 3 9 Connection of safety chains ...

Page 201: ...e message is shown on the teach pendant display 4 To switch from MOTORS OFF to MOTORS ON press the enabling device on the teach pendant 5 Update the revolution counters according to 2 13 2 6 Check the calibration position according to section 2 13 3 7 When the controller with the manipulator electrically connected are powered up for the first time ensure that the power supply is connected for at l...

Page 202: ...ndant telling you that the revolution counters are not updated When such a message appears the revolution counter of the manipulator must be updated using the calibration marks on the manipulator see Figure 28 Examples of when the revolution counter must be updated when one of the manipulator axes has been manually moved with the control ler disconnected when the battery on the manipulator is disc...

Page 203: ...and Commissioning On Site Installation Product Manual IRB 6400 33 1 Press the Misc window key see Figure 24 Figure 24 The Misc window key from which the Service window can be chosen 2 1 2 3 0 1 4 5 6 7 8 9 P3 P1 P2 ...

Page 204: ... Counter Update The window in Figure 26 appears Figure 26 The dialog box used to select axes whose revolution counters are to be updated 6 Press the function key All to select all axes if all axes are to be updated Otherwise select the desired axis and press the function key Incl the selected axis is marked with an x IRB Not rev counter update File Edit View Calib 1 1 Service Calibration Unit Stat...

Page 205: ...ectly updated it will cause incorrect positioning Thus check the calibration very carefully after each update Incorrect updating can damage the robot system or injure someone 9 Check the calibration as described in Chapter 2 13 3 Checking the calibration posi tion 10 Save the system parametrs on floppy disk Figure 28 Calibration marks on the manipulator Cancel OK Rev Counter Update IRB The Rev Cou...

Page 206: ... If they are not the setting of the revolution counters must be repeated Using the Jogging window on the teach pendant Open the Jogging window and choose running axis by axis Using the joystick move the robot so that the read out of the positions is equal to zero Check that the cal ibration marks for each axis are at the same level see Figure 28 If they are not the set ting of the revolution count...

Page 207: ... that any local standards and regulations concerning insulation and area must always be complied with Control signals Shielded cable Measuring signals Shielded cable with twisted pair conductors Data communication signals Shielded cable with twisted pair conductors A spe cific cable should be used for Gateway Field bus connections CAN bus with DeviceNet for distributing I O units Thin cable accord...

Page 208: ...pecially if a diode is connected across the coil Varistors give shorter turn off times Neutralising the coils lengthens the life of the switches that control them Figure 29 Examples of clamping circuits to suppress voltage transients 3 4 Connection types I O external emergency stops safety stops etc can be supplied on screwed connec tions or as industrial connectors Designation X T Screwed termina...

Page 209: ...e found on the left hand side or front of the cabinet depending on the customer order See Figure 30 and Figure 21 In each industrial connector there is space for four rows of 16 conductors with a max imum conductor area of 1 5 mm2 The pull relief clamp must be used when connecting the shield to the case The manipulator arm is equipped with round Burndy Framatome connectors customer connector not i...

Page 210: ... Positions for connections on the left hand side of the controller XS 3 safety XS 8 Position switch 1 XS 5 CP CS CANBUS XS 7 external axes Space for cable glands Prepared for further connectors XS 1 Motor cable XS 2 Measurement system cable XS17 CAN bus connector XS 58 Position switch 2 3 ...

Page 211: ... the upper arm and G 1 2 at the base For connection of extra equipment on the manipulator there are cables running parallel to the manipulator s cable harness with one Burndy 12 pin UTD 71412 SHT and one Burndy 4 pin UTD 7104 SHT connector on the movable part of the upper arm and arm housing Number of signals with CANBUS 10 signals 50 V 250 mA 2 power signals 250 V 8 A Figure 31 Location of custom...

Page 212: ...e 32 Location of customer connections on upper arm arm housing Figure 33 Location of customer connections on base R2 CAIR R3 IBUS PBUS R2 CAIR R2 CS R2 CS R2 CP R2 CP With INTERBUS S PROFIBUS R3 IBUS PBUS R1 CP CS R1 WELD R1 PROC3 R1 PROC2 R1 PROC1 R1 CAIR R1 SW2 3 R1 SMB R1 MP R1 SW1 ...

Page 213: ... 29 3 Compression gland 3HAC 5680 1 Hellerman PG 29 4 Socket housing D Sub 3 pole 3HAC 5119 3 DIN 43 652 5 Socket housing D Sub 9 pole 3HAC 5119 7 DIN 43 652 6 Socket housing D Sub 25 pole 3HAC 5119 9 DIN 43 652 Connector R2 CS Signal and on the upper arm Regarding Item No see Figure 35 Item Name ABB art no Type Comments 1 Socket con 12p 3HAB 7290 12 UT 0714 12 SHT Burndy 3 Socket See Pin and Sock...

Page 214: ...MC Burndy 7 Cable clamp 5217 649 78 UTG 10 PG Burndy Name ABB part no Type Comments Pin 5217 649 72 5217 649 25 5217 649 70 5217 649 3 5217 649 68 5217 649 10 5217 649 31 24 26 24 26 20 22 20 22 16 20 24 26 16 20 Burndy Machine tooling Burndy Hand tooling Burndy Machine tooling Burndy Hand tooling Burndy Machine tooling Burndy Ground Burndy Ground Socket 5217 649 73 5217 649 26 5217 649 71 5217 64...

Page 215: ...Installation and Commissioning Connecting Signals Product Manual IRB 6400R 45 Figure 34 Customer connector Figure 35 Burndy connector 2 1 5 6 3 4 Customer side Manipulator side 6 8 1 3 4 5 7 ...

Page 216: ...lane X1 X2 CAN1 internal unit Panel unit X9 CAN 2 manipulator I O units Backplane X16 CAN 3 external I O units Backplane X10 24 V supply 2 A fuse XT31 115 230 V AC supply XT21 Location of socket terminals are shown below See also circuit diagram View of con trol cabinet for more details Figure 36 Screw terminal locations I O units x4 XT5 customer signals XT6 customer power XT8 XT58 position switch...

Page 217: ...e not identical the robot will remain in MOTORS OFF mode Figure 37 shows an outline principal diagram of the available customer connections AS GS and ES Figure 37 MOTORS ON MOTORS OFF circuit Manual LS Limit switch AS Automatic mode safeguarded space Stop TPU En Enabling device teach pendant unit GS General mode safeguarded space Stop ES Emergency Stop 2nd chain interlock AS GS Auto M Drive unit C...

Page 218: ... 1 Opto isol Opto isol 24 V 24 V CONT1 CONT2 Supply from internal 24V X3 X4 12 and 0 V X3 X4 7 is displayed When external supply of GS and AS X3 X4 10 11 is connected to 24 V and X3 X4 8 9 is connected to external 0 V X1 X4 connection tables see section 3 10 24V X4 7 0 V 0 V 0 V X3 12 X4 12 Technical data per chain Limit switch load max V drop 300 mA 1 V External contactors load max V drop 10 mA 4...

Page 219: ...2 2 X2 1 Technical data ES1 and 2 out max voltage 120 VAC or 48 VDC ES1 and 2 out max current 120 VAC 4 A 48 VDC L R 50 mA 24 VDC L R 2 A 24 VDC R load 8 A External supply of ES relays min 22 V between ter minals X1 9 8 and X2 9 8 respectively Rated current per chain 40 mA Max potential relative to the cabinet earthing and other groups of signals 300 V Signal class control signals External Supply ...

Page 220: ... K1 Motor On Off 1 Technical data Max voltage 48V DC Max current 4A Max potential rela tive to the cabinet earthing and other groups of signals 300V Signal class control X3 3 X4 3 4 5 6 4 5 6 100 100 MAN2 MAN1 Auto2 Auto1 Technical data Max voltage 48V DC Max current 4A Max potential rela tive to the cabinet earthing and other groups of signals 300V Signal class control X1 12 11 K3 Brake Technical...

Page 221: ...ernal limit switch chain 1 0V 5 0V external contactor 1 CONT1 6 External contactor 1 Int 0V ES1 7 Internal supply 0V of emergency stop chain 1 Ext 0V ES1 8 External supply 0V of emergency stop chain 1 Ext ES1 IN 9 External emergency stop in chain 1 Ext ES1 OUT 10 External emergency stop out chain 1 Ext BRAKE B 11 Contactor for external brake Ext BRAKE A 12 Contactor for external brake AS2 AS1 GS1 ...

Page 222: ...chain 2 Ext 24V ES2 8 External supply 24V of emergency stop chain 2 Ext ES2 IN 9 External emergency stop in chain 2 Ext ES2 OUT 10 External emergency stop out chain 2 11 Not used 12 Not used X3 Signal name Pin Comment Ext MON 1 B 1 Motor contactor 1 Ext MON 1 A 2 Motor contactor 1 Ext com 1 3 Common 1 Ext auto 1 4 Auto 1 Ext man 1 5 Manual 1 Ext man FS 1 6 Manual full speed 1 0V 7 0V to auto stop ...

Page 223: ...Ext MON 2 A 2 Motor contactor 2 Ext com 2 3 Common 2 Ext auto 2 4 Auto 2 Ext man 2 5 Manual 2 Ext man FS 2 6 Manual full speed 2 0V 7 0V to auto stop and general stop GS2 8 General stop minus chain 2 AS2 9 Auto stop minus chain 2 GS2 10 General stop plus chain 2 AS2 11 Auto stop plus chain 2 24V panel 12 24V to auto stop and general stop ...

Page 224: ...ernal relays are used Two examples are shown below Figure 43 Diagram for using external safety relays K2 K1 X1 6 X1 5 X3 1 X3 2 X4 1 X4 2 X2 5 X2 6 0 V CONT1 Ext MON 1 Ext MON 2 24 V CONT2 24 V 0 V Panel unit Relays with positive action Safety relay To other equipment ES out AS GS AS GS ES out External supply External supply Robot 1 Robot 2 Safety gate Cell ES only one channel displayed ...

Page 225: ...obot s safety stops are as default category 0 stops Safety stops of category 1 can be obtained by activating the delayed safeguarded space stop together with AS or GS A delayed stop gives a smooth stop The robot stops in the same way as a normal program stop with no deviation from the programmed path After approx 1 second the power supply to the motors is shut off The function is activated by sett...

Page 226: ...13 N connected to cabinet structure 3 14 External 24 V supply An external supply must be used in the following cases When the internal supply is insufficient When the emergency stop circuits must be independent of whether or not the robot has power on for example When there is a risk that major interference can be carried over into the internal 24 V supply An external supply is recommended to make...

Page 227: ...nections Customer Power CP Conductor area 1 0 mm2 Max voltage 250 V AC Max current 8 A Customer Signals CS Conductor area 0 241 mm2 Max voltage 50 V AC DC Max current 250 mA Figure 44 Location of customer connections on upper arm arm housing R2 CAIR R2 CAIR R2 CS R2 CS R2 CP R2 CP With CANBUS R3 INTERBUS S R3 PROFIBUS R3 CANBUS R3 INTERBUS S R3 PROFIBUS R3 CANBUS ...

Page 228: ...P C Signals CSA XT5 1 R1 CP CS 1 25p D Sub R3 CS A CSB XT5 2 R1 CP CS 2 25p D Sub R3 CS B CSC XT5 3 R1 CP CS 3 25p D Sub R3 CS C CSD XT5 3 R1 CP CS 4 25p D Sub R3 CS D CSE XT5 5 R1 CP CS 5 25p D Sub R3 CS E CSF XT5 6 R1 CP CS 6 25p D Sub R3 CS F CSG XT5 7 R1 CP CS 7 25p D Sub R3 CS G CSH XT5 8 R1 CP CS 8 25p D Sub R3 CS H CSJ XT5 9 R1 CP CS 9 25p D Sub R3 CS J CSK XT5 10 R1 CP CS 10 25p D Sub R3 C...

Page 229: ... CS 1 25p D Sub R3 CS A CSB XT5 2 R1 CP CS 2 25p D Sub R3 CS B CSC XT5 3 R1 CP CS 3 25p D Sub R3 CS C CSD XT5 3 R1 CP CS 4 25p D Sub R3 CS D CSE XT5 5 R1 CP CS 5 25p D Sub R3 CS E CSF XT5 6 R1 CP CS 6 25p D Sub R3 CS F CSG XT5 7 R1 CP CS 7 25p D Sub R3 CS G CSH XT5 8 R1 CP CS 8 25p D Sub R3 CS H CSJ XT5 9 R1 CP CS 9 25p D Sub R3 CS J CSK XT5 10 R1 CP CS 10 25p D Sub R3 CS K InterBus S DRAIN R3 IBU...

Page 230: ...ls CSA XT5 1 R1 CP CS 1 25p D Sub R3 CS A CSB XT5 2 R1 CP CS 2 25p D Sub R3 CS B CSC XT5 3 R1 CP CS 3 25p D Sub R3 CS C CSD XT5 3 R1 CP CS 4 25p D Sub R3 CS D CSE XT5 5 R1 CP CS 5 25p D Sub R3 CS E CSF XT5 6 R1 CP CS 6 25p D Sub R3 CS F CSG XT5 7 R1 CP CS 7 25p D Sub R3 CS G CSH XT5 8 R1 CP CS 8 25p D Sub R3 CS H CSJ XT5 9 R1 CP CS 9 25p D Sub R3 CS J CSK XT5 10 R1 CP CS 10 25p D Sub R3 CS K Profi...

Page 231: ...to the same controller but only four of these can be installed inside the controller Normally a distributed I O unit is placed outside the control ler The maximum total length of the distributed I O cable is 100 m from one end of the chain to the other end The controller can be one of the end points or be placed somewhere in the middle of the chain For setup parameters see User s Guide section Sys...

Page 232: ...ed inside the control cabinet this is standard when choosing the options on the Specification form its CAN bus is connected to CAN1 X9 on the panel unit see 3 7 No termination is required when only CAN1 is used 2 When the I O unit is fitted outside the control cabinet its CAN bus must be connected to CAN3 X10 on the backplane of the control cabinet 3 When the I O unit is fitted on the manipulator ...

Page 233: ...he cabinet or externally by a power supply unit Figure 47 CAN connections on back plane DeviceNet Connector X5 Input and ID Signal name Pin Description V 0V 1 Supply voltage GND CAN_L 2 CAN signal low DRAIN 3 Shield CAN_H 4 CAN signal high V 5 Supply voltage 24VDC GND 6 Logic GND MAC ID 0 7 Board ID bit 0 LSB MAC ID 1 8 Board ID bit 1 MAC ID 2 9 Board ID bit 2 MAC ID 3 10 Board ID bit 3 MAC ID 4 1...

Page 234: ... 0 9 Figure 48 Examples of address keying 3 16 4 Digital I O DSQC 328 optional The digital I O unit has 16 inputs and outputs divided up into groups of eight All groups are galvanically isolated and may be supplied from the cabinet 24 V I O supply or from a separate supply Technical data See Product Specification IRB 6400 chapter 3 10 Further information For setup parameters see User s Guide secti...

Page 235: ... pro gram OUT IN NS MS 16 15 14 13 12 11 10 9 8 7 6 5 4 3 2 1 OUT IN X1 X3 X2 X4 10 1 10 1 10 1 10 1 Status LED s X5 1 12 CAN connection see 3 16 3 X1 X2 Unit function Signal name Pin Customer conn Signal name Pin Out ch 1 1 Out ch 9 1 Out ch 2 2 Out ch 10 2 Out ch 3 3 Out ch 11 3 Out ch 4 4 Out ch 12 4 Out ch 5 5 Out ch 13 5 Out ch 6 6 Out ch 14 6 Out ch 7 7 Out ch 15 7 Out ch 8 8 Out ch 16 8 0V ...

Page 236: ...when setting the input When connecting outputs sensitive to pre oscillation current a serial resistor 100 Ω may be used X3 X4 Unit function Signal name Pin Customer conn Signal name Pin In ch 1 1 In ch 9 1 In ch 2 2 In ch 10 2 In ch 3 3 In ch 11 3 In ch 4 4 In ch 12 4 In ch 5 5 In ch 13 5 In ch 6 6 In ch 14 6 In ch 7 7 In ch 15 7 In ch 8 8 In ch 16 8 0V for in 1 8 9 0V for in 9 16 9 Not used 10 No...

Page 237: ...pplied from the cabinet 24 V I O supply or from a separate supply The two analog outputs belong to a common group which is galvanically isolated from the electronics of the controller The supply to the two analog outputs is generated from 24 V_CAN with galvanically isolated DC AC converter Technical data See Product Specification IRB 6400 chapter 3 10 Further information For setup parameters see U...

Page 238: ...rogram OUT IN NS MS 16 15 14 13 12 11 10 9 8 7 6 5 4 3 2 1 OUT IN X1 X3 X2 X4 X6 1 10 10 1 1 6 10 1 10 1 Status LED s X5 1 12 CAN connection see 3 16 3 X1 X2 Unit function Signal name Pin Customer conn Signal name Pin Out ch 1 1 Out ch 9 1 Out ch 2 2 Out ch 10 2 Out ch 3 3 Out ch 11 3 Out ch 4 4 Out ch 12 4 Out ch 5 5 Out ch 13 5 Out ch 6 6 Out ch 14 6 Out ch 7 7 Out ch 15 7 Out ch 8 8 Out ch 16 8...

Page 239: ...serial resistor 100 Ω may be used X6 Signal name Pin Explanation AN_ICH1 1 For test purpose only AN_ICH2 2 For test purpose only 0V 3 0V for In 1 2 0VA 4 0V for Out 1 2 AN_OCH1 5 Out ch 1 AN_OCH2 6 Out ch 2 X3 X4 Unit function Signal name Pin Customer conn Signal name Pin In ch 1 1 In ch 9 1 In ch 2 2 In ch 10 2 In ch 3 3 In ch 11 3 In ch 4 4 In ch 12 4 In ch 5 5 In ch 13 5 In ch 6 6 In ch 14 6 In...

Page 240: ...ed for analog sensors etc 4 analog outputs 3 for 10 10V and 1 for 4 20mA for control of analog functions such as controlling gluing equipment etc 24V to supply external equipment wich return signals to DSQC 355 Technical data See Product Specification IRB 6400 chapter 3 10 Further information For setup parameters see User s Guide section System Parameters Topic Controller Circuit diagram see chapt...

Page 241: ...BLE Customer contacts X1 X3 X 5 X8 Figure 49 Analog I O unit Connector X5 DeviceNet connectors See section 3 16 3 on page 62 DSQC 355 ABB flexible Automation Bus status LED s Analog I O X8 S3 S2 X3 X5 X2 X7 X8 Analog inputs X7 Analog outputs X5 DeviceNet input and ID connector Not to be used ...

Page 242: ...ut 3 10 10V ANOUT_4 4 Analog output 4 4 20 mA Not to be used 5 Not to be used 6 Not to be used 7 Not to be used 8 Not to be used 9 Not to be used 10 Not to be used 11 Not to be used 12 Not to be used 13 Not to be used 14 Not to be used 15 Not to be used 16 Not to be used 17 Not to be used 18 GND 19 Analog output 1 0 V GND 20 Analog output 2 0 V GND 21 Analog output 3 0 V GND 22 Analog output 4 0 V...

Page 243: ...to be used 7 Not to be used 8 Not to be used 9 Not to be used 10 Not to be used 11 Not to be used 12 Not to be used 13 Not to be used 14 Not to be used 15 Not to be used 16 24V out 17 24VDC supply 24V out 18 24VDC supply 24V out 19 24VDC supply 24V out 20 24VDC supply 24V out 21 24VDC supply 24V out 22 24VDC supply 24V out 23 24VDC supply 24V out 24 24VDC supply GND 25 Analog input 1 0V GND 26 Ana...

Page 244: ...t is used for external start signal conveyor synchronization point Further information User Reference Description Conveyor Tracking For setup parameters see User s Guide section System Parameters Topic Controller Circuit diagram see chapter 11 Customer terminals Figure 50 Encoder unit DSQC 354 Device Net connector X5 see section 3 16 3 on page 62 X5 DeviceNet input X3 Not to be used and ID connect...

Page 245: ...er unit As can be seen from the illustration the encoder is supplied with 24 VDC and 0V The encoder output 2 channels and the on board computer uses quadrature decoding QDEC to compute position and direction Encoder unit 1 2 3 4 5 6 7 8 9 10 11 12 13 14 15 16 Opto Opto Opto Opto Opto Opto Galvanic insulation 24 V I O 0 V Encoder B A 24 V DC 0 V 24 V DC 0 V Synch switch 10 16 not to be used or exte...

Page 246: ...gnal name Pin Description 24 VDC 1 24 VDC supply 0 V 2 0 V ENC 3 Encoder 24 VDC ENC 4 Encoder 0 V ENC_A 5 Encoder Phase A ENC_B 6 Encoder Phase B DIGIN 7 Synch switch 24 VDC DIGIN 8 0V DIGIN 9 Synch switch digital input Not to be used 10 Not to be used 11 Not to be used 12 Not to be used 13 Not to be used 14 Not to be used 15 Not to be used 16 1 16 ...

Page 247: ...upply to customer switches can be taken either from the cabinet 24 V I O or from a separate supply Technical data See Product Specification IRB 6400 chapter 3 10 Further information For setup parameters see User s Guide section System Parameters Topic Controller Circuit diagram see chapter 11 CONNECTION TABLE Customer contacts X1 X4 OUT IN NS MS 16 15 14 13 12 11 10 9 8 7 6 5 4 3 2 1 OUT IN X1 X3 ...

Page 248: ...Out ch 9b 2 Out ch 2a 3 Out ch 10a 3 Out ch 2b 4 Out ch 10b 4 Out ch 3a 5 Out ch 11a 5 Out ch 3b 6 Out ch 11b 6 Out ch 4a 7 Out ch 12a 7 Out ch 4b 8 Out ch 12b 8 Out ch 5a 9 Out ch 13a 9 Out ch 5b 10 Out ch 13b 10 Out ch 6a 11 Out ch 14a 11 Out ch 6b 12 Out ch 14b 12 Out ch 7a 13 Out ch 15a 13 Out ch 7b 14 Out ch 15b 14 Out ch 8a 15 Out ch 16a 15 Out ch 8b 16 Out ch 16b 16 supply ...

Page 249: ...lation current a serial resistor 100 Ω may be used X3 X4 Unit function Signal name Pin Customer conn Signal name Pin In ch 1 1 In ch 9 1 In ch 2 2 In ch 10 2 In ch 3 3 In ch 11 3 In ch 4 4 In ch 12 4 In ch 5 5 In ch 13 5 In ch 6 6 In ch 14 6 In ch 7 7 In ch 15 7 In ch 8 8 In ch 16 8 0V for in 1 8 9 0V for in 9 16 9 Not used 10 Not used 10 Not used 11 Not used 11 Not used 12 Not used 12 Not used 13...

Page 250: ...ecification IRB 6400 chapter 3 10 Further information For setup parameters see User s Guide section System Parameters Topic Controller Circuit diagram see chapter 11 CONNECTION TABLE Customer contacts X1 X4 OUT IN NS MS 16 15 14 13 12 11 10 9 8 7 6 5 4 3 2 1 OUT IN X1 X3 16 1 X2 X4 16 1 16 1 16 1 Status LED s X5 1 12 CAN connection see 3 16 3 ...

Page 251: ...9b 2 Out ch 2a 3 Out ch 10a 3 Out ch 2b 4 Out ch 10b 4 Out ch 3a 5 Out ch 11a 5 Out ch 3b 6 Out ch 11b 6 Out ch 4a 7 Out ch 12a 7 Out ch 4b 8 Out ch 12b 8 Out ch 5a 9 Out ch 13a 9 Out ch 5b 10 Out ch 13b 10 Out ch 6a 11 Out ch 14a 11 Out ch 6b 12 Out ch 14b 12 Out ch 7a 13 Out ch 15a 13 Out ch 7b 14 Out ch 15b 14 Out ch 8a 15 Out ch 16a 15 Out ch 8b 16 Out ch 16b 16 isol Opto AC supply ...

Page 252: ... ch 1b 2 In ch 9b 2 In ch 2a 3 In ch 10a 3 In ch 2b 4 In ch 10b 4 In ch 3a 5 In ch 11a 5 In ch 3b 6 In ch 11b 6 In ch 4a 7 In ch 12a 7 In ch 4b 8 In ch 12b 8 In ch 5a 9 In ch 13a 9 In ch 5b 10 In ch 13b 10 In ch 6a 11 In ch 14a 11 In ch 6b 12 In ch 14b 12 In ch 7a 13 In ch 15a 13 In ch 7b 14 In ch 15b 14 In ch 8a 15 In ch 16a 15 In ch 8b 16 In ch 16b 16 isol Opto AC N ...

Page 253: ... 6400 chapter 3 10 and Allen Bradley RIO specifica tion Further information For setup parameters see User s Guide section System Parameters Topic Controller Circuit diagram see chapter 11 Customer terminals X8 and X9 Figure 52 RIO unit X8 X9 Signal name Pin Remote I O in Signal name Pin Remote I O out LINE1 blue 1 blue 1 LINE2 clear 2 clear 2 shield 3 shield 3 cabinet ground 4 cabinet ground 4 Dev...

Page 254: ...and 128 outputs A rack may also be shared by 2 3 or 4 robots Each of these robots will then have the same rack address but different starting quarters must be specified The illustration above shows an example where Robot 1 uses a full rack while robot 2 and robot 3 share 1 rack The rack address starting quarter and other required parameters such as baud rate LED Status etc are entered in the confi...

Page 255: ...Topic Controller Circuit diagram see chapter 11 Unit ID to be entered in the Interbus S master is 3 The length code depends on the selected data Width between 1 and 4 Customer terminals see figure below regarding locations Figure 54 Interbus S DSQC 351 Device Net connector X5 see section 3 16 3 on page 62 X5 DeviceNet input X3 Interbus S supply DSQC 351 ABB Flexible Automation Interbus S X3 X5 X21...

Page 256: ... a link between pin 5 and 9 in the plug on interconnection cable which is connected to the OUT connector for each unit The link is used to inform the Inter bus S unit that more units are located further out in the chain The last unit in the chain does not have cable connected and thereby no link X20 Interbus S IN Signal name Pin Description TPDO1 1 Communication line TPDO1 TPDI1 2 Communication li...

Page 257: ...ication line TPDO2 TPDI2 2 Communication line TPDI2 GND 3 Ground connection NC 4 Not connected 5V 5 5VDC TPDO2 N 6 Communication line TPDO2 N TPDI2 N 7 Communication line TPDI2 N NC 8 Not connected RBST 9 Synchronization X3 Interbus S supply Signal name Pin Description 0 V DC 1 External supply of Interbus S NC 2 Not connected GND 3 Ground connection NC 4 Not connected 24 V DC 5 External supply of ...

Page 258: ...setup parameters see User s Guide section System Parameters Topic IO Signals Circuit diagram see chapter 11 Customer connections Figure 56 DSQC352 location of connectors Communication concept X20 Profibus connection X5 DeviceNet connector X3 Power connector DSQC 352 ABB Flexible Automation CAN Tx MS POWER CAN Rx PROFIBUS ACTIVE X20 X5 X3 Profibus NS 3 7 1 11 2 128 in 128 out 256 in 256 out Robot 2...

Page 259: ...ion data refer to Profibus DP International Standard DIN 19245 Part 3 1 Note that the Profibus cable must be terminated in both ends Device Net connector X5 see section 3 16 3 on page 62 X20 Profibus DP Signal name Pin Description Shield 1 Cable screen NC 2 Not connected RxD TxD P 3 Receive Transmit data P Control P 4 GND 5 Ground connection 5V DC 6 NC 7 Not connected Rxd TxD N 8 Receive Transmit ...

Page 260: ...N transmission speed 300 19 200 baud Further information For setup parameters see User s Guide section System Parameters Topic Controller Circuit diagram see chapter 11 Product Specification IRB 2400 chapter 3 10 Separate documentation is included when the option RAP Serial link is ordered Figure 58 Serial channels SLIP outline diagram Customer terminals on controller backplane X1 SIO1 and X2 SIO2...

Page 261: ...TR Data Terminal Ready DSR Data Set Ready DATA Data Signals in Half Duplex Mode DCLK Data Transmission Clock X1 X2 Pin Signal Pin Signal 1 TXD 1 TXD 2 RTS N 2 TXD N 3 0V 3 0V 4 RXD 4 RXD 5 CTS N 5 RXD N 6 0V 6 0V 7 DTR 7 DATA 8 DSR 8 DATA N 9 0V 9 0V 10 10 DCLK 11 11 DCLK N 12 12 0V X1 X2 Pin Signal Pin Signal 1 1 TXD 2 RXD 2 TXD N 3 TXD 3 RXD 4 DTR 4 RXD N 5 0 V 5 0 V 6 DSR 6 DATA 7 RTS N 7 DATA ...

Page 262: ...nsceivers with AUI Attachment Unit Interface Typical use of this connector is connection of transceivers for 10BASE2 CheaperNet Thinnet Thinwire Enet 0 2 inch 50 ohm coax with BNC connector or optical fibre net Note the environmental conditions for the transceiver inside the controller i e 70o C Technical data See Ethernet specification Further information For setup parameters see User s Guide sec...

Page 263: ... 4 Not connected NC 5 Not connected TPRX 6 Receive data line NC 7 Not connected NC 8 Not connected X11 Signal name Pin Description GND 1 Ground connection COLL 2 Collision detection line TXD 3 Transmit data line GND 4 Ground connection RXD 5 Receive data line GND 6 Ground connection NC 7 Not connected GND 8 Ground connection COLL 9 Collision detection line TXD 10 Transmit data line GND 11 Ground c...

Page 264: ...ed in a housing which satisfies protection class IP 54 in accordance with IEC 144 and IEC 529 Figure 60 Required preparation of external panel enclosure 184 224 180 140 193 196 70 62 45o External panel enclosure not supplied M8 x4 Connection to Holes for flange Holes for operator s panel Holes for teach pendant holder the controller 90 155 5 x2 100 Teach pendant connection 200 240 Required depth 2...

Page 265: ...iguration according to order specification At commissioning all parameters are stored Manipulator parameters one disk Includes sync offsets from manufacturing calibration 4 1 1 Installation procedure 1 Perform a cold start on the system 2 Insert the Key disk when displayed on the teach pendant 3 Follow information displayed on the teach pendant Keep attention to prompted System pack disk number al...

Page 266: ...e place in accordance with the general rules for diskette storage Do not store the diskettes inside the controller to avoid damaged from heat and magnetic fields 6 Conclude the installation with updating the revolution counters according to section 2 13 2 4 1 2 Query mode questions about used DC links and balancing units If query installation is selected you will get a question about used DC link ...

Page 267: ...to C Start Cold start 5 Press the key C Start It will take quite some time to perform a Cold start Just wait until the robot starts the Installation dialog see 4 1 1 Do not touch any key joystick enable device or emergency stop until you are prompted to press any key 4 4 How to change language options and IRB types Valid for robots within the same family 1 Select the Service window 2 Select File R...

Page 268: ... In this case the basic parameters are already installed Load the calibration offset values from the disk Manipulator Parameters 1 Select File Add or Replace Parameter Do not select Add new or Load Saved Parameters 2 Press OK 3 Save the new parameters according to section 4 6 4 5 2 Robot delivered without software installed In this case a complete cold start is necessary remember to connect the ba...

Page 269: ...ram Product Manual IRB 6400R 99 4 6 Saving the parameters on the Controller Parameter disk 1 Insert the disk Controller Parameter 2 Select File Save All As For more detailed information regarding saving and loading parameters see User s Guide System Parameters ...

Page 270: ...Installing the Control Program Installation and Commissioning 100 Product Manual IRB 6400R ...

Page 271: ...ed in a separate cabinet cannot be combined with external drive units The drive and measurement systems each consist of two systems Each system is connected to the CPU boards via a serial communication link A number of template configuration files are supplied with the system The configura tion files are optimum designed concerning system behaviour and performance of the axes When installing exter...

Page 272: ... the DC link Up to six external axes can be connected to Drive System 2 Drive System 2 is in most cases located in a separate external cabinet For robots using only two drive units as IRB1400 and IRB2400 a drive system 2 can be located in the robot cabinet This mixed system is called Drive System 1 2 Two axes can be connected to the drive module In this case no external drive units or internal dri...

Page 273: ...operate external axes The kit contains Motor motors with brake and resolver Different sizes of motors available Gear boxes Connection box with serial measurement board manual brake release and ter minal block for limit switches All cables with connectors Configuration file for easy software installation Documentation For more information see Product Specification Motor Unit from ABB Flexible Auto ...

Page 274: ...DMC C can be connected to Drive System 2 see Figure 62 Total of max 6 external axes can be installed Figure 62 Servo amplifier DMC Atlas Copco Controls provides the information on suitable motors and how to make installation and commissioning Atlas DMC Atlas Copco Atlas DMC Atlas Copco Atlas DMC Atlas Copco Serial measurement board Drive System 2 Mesurement System 2 ...

Page 275: ...to 3 external drive units see Figure 63 Figure 63 Field bus unit FBU The drive units can be connected to analog speed reference outputs 10 V or a field bus For further information about DMC C and FBU contact Atlas Copco Controls Atlas DMC Atlas Copco Serial measurement board S E R V O S E R V O S E R V O Drive System 2 Mesurement System 2 ...

Page 276: ...le the node number is the same as physical connection the physical connection node must also be unique Each SMB has 6 connection nodes for resolvers A battery supplies the SMB with power during power fail If the axes move during power fail the internal revolution counters are automatically updated After power on the system is ready for operation without any synchronization procedure A special conf...

Page 277: ...esolver must be approved by ABB for reliable operation Motor to resolver gear ratio 1 1 direct drive Resolver cable length max 30 m X Y for each resolver total max 70 m for EXC signals MEASUREMENT SYSTEM 1 only external axes no robot Measurement serial System 1 communication Serial Measurement Board 1 Serial Measurement Board 2 Max 6 resolvers Measurement System 2 may not be used together with thi...

Page 278: ...ground connections of cables measurement boards and resolvers is essential The cabling must comply with signal class measurement signals see chapter 3 1 Signal classes The enclosure for external serial measurement board s must comply with enclosure class IP 54 in accordance with IEC 144 and IEC 529 Resolver connector on robot cabinet wall option 386 External Axes Measurement Board mounted inside r...

Page 279: ...1 2 3 4 5 BAT 0V BAT GND BATLD 0V SDO N SDI N GND 0V EXC1 0V EXC1 Y2 X2 GND X1 Y1 X2 Y2 GND X4 Y4 X5 Y5 6 7 8 9 10 BATSUP 24V SDO SDI Y1 X1 EXC1 EXC1 0V EXC1 0V EXC1 0V EXC1 X3 Y3 0V EXC2 0V EXC2 0V EXC2 X6 Y6 11 12 13 14 15 0V Y2 0V X2 0V Y1 0V X1 X4 Y4 0V EXC2 0V X1 0V Y1 X3 Y3 0V EXC1 0V X4 0V Y4 16 17 18 19 20 0V X2 0V Y2 EXC1 EXC1 EXC1 0V X5 0V Y5 EXC2 EXC2 EXC2 21 22 23 24 25 0V X3 0V Y3 0V ...

Page 280: ...n all S4C robot cabinets except for those robots needing the DSQC 345D rectifier For robots using two drive units an extra drive unit can be placed in the S4C robot cab inet This drive unit is connected to the Drive System 2 serial communication link but use the Drive System 1 rectifier This combined system is called Drive System 1 2 If drive unit with three drive inverters nodes are used axes wit...

Page 281: ... while the brakes are activated for the robot the max allowed power con sumption of these axes are 0 5 kW Note For safety reasons the power supply to the external motor must be switched off when the robot is in the MOTORS OFF mode Drive system configuration with one external axis at Drive System 1 in S4C robot cab inet and five to six axes at Drive System 2 installed in external cabinet Figure 67 ...

Page 282: ... Figure 69 Rectifier units Max current A Rated current A Max bleeder power kW Rated bleeder power kW Min voltage V DSQC 345C DC2 DSQC 358C DC2T DSQC 358E DC2C 80 14 6 15 3 0 9 275 DSQC 345D DC3 70 16 7 15 3 0 9 370 External axis drive system 1 External axis drive system 2 0 0 2 1 Robot axes Unit number Transformer 1 DRIVE SYSTEM 1 2 Drive System 2 serial communication Drive System 1 serial communi...

Page 283: ...QC 346A 3 25 1 6 A 3 25 1 6 A 1 5 1 0 D 8 0 4 2 DSQC 346B 6 7 3 2 B 3 25 1 6 A 1 5 1 0 D 11 45 5 8 DSQC 346C 11 3 5 3 C 11 3 5 3 C 6 7 4 0 B 29 3 12 1 DSQC 346G 29 7 16 5 G 36 8 20 0 T 66 5 30 0 DSQC 358C 36 8 20 0 T 36 8 20 0 DSQC 358E 11 3 5 3 C 11 3 5 3 C Pin Node Phase 1 2 3 4 5 6 7 8 9 10 11 12 13 14 15 1 1 1 3 3 3 2 2 2 W V U W V U W V U Pin Node Phase 1 2 3 4 5 6 7 8 9 10 11 12 13 14 15 1 1...

Page 284: ...Automation can supply further information EXT PTC This signal monitors the temperature of the motor A high resistance or open circuit indicates that the temperature of the motor exceeds the rated level If a temperature sen sor is not used the circuit must be strapped If more than one motor is used all PTC resistors are connected in series Figure 74 Connections of motor Controller R U S V T W XS7 E...

Page 285: ... node Node type M7 2 0 2 T M8 2 0 1 G OPTION 394 Drive system Drive Unit Drive node Node type M7 1 0 2 T M8 2 0 1 G M9 2 0 2 T Conn Point D C B A 1 0V EXT PTC M7 T M7 S M7 R 2 EXT PTC M7 T M7 S M7 R 3 M7 T M7 S M7 R 4 PTC jumper 1 PTC jumper 2 LIM 2A LIM 1A 5 PTC jumper 1 PTC jumper 2 LIM 2B LIM 1B 6 M8 T M8 S M8 R 7 M8 T M8 S M8 R 8 BRAKE REL BRAKE REL 9 0V BRAKE BRAKE REL 10 0V BRAKE 0V BRAKE BR...

Page 286: ... 3 2 T M12 2 3 1 G Conn Point D C B A 1 0V EXT PTC M7 T M7 S M7 R 2 EXT PTC M7 T M7 S M7 R 3 M7 T M7 S M7 R 4 PTC jumper 1 PTC jumper 2 LIM 2A LIM 1A 5 PTC jumper 1 PTC jumper 2 LIM 2B LIM 1B 6 M10 R M8 T M8 S M8 R 7 M10 R M8 T M8 S M8 R 8 M10 S M10 T BRAKE REL BRAKE REL 9 M10 S M10 T 0V BRAKE BRAKE REL 10 0V BRAKE 0V BRAKE BRAKE PB 11 M12 R M9 T M9 S M9 R 12 M12R M9 T M9 S M9 R 13 M12 S M9 T M9 S...

Page 287: ...n order to simplify installation of external axes a number of configuration files are delivered with the system The configuration files are optimum designed concerning system behaviour and performance of the axes When installing external axes it is important to design installations so a combination of existent files can be used Four types of configuration files are delivered Utility files for defi...

Page 288: ... IRB 6400R For installing and change of parameter data see the User s Guide section System Parame ters Topic Manipulator In order to have the possibility to read and change most of the parameters from the teach pendent unit the system must be booted in service mode ...

Page 289: ... 1 4 7 1 0 2 MN4M1D2 7 1 4 7 2 1 2 MN4M1D12 7 1 4 7 2 0 2 MN1M2D1 8 2 1 1 0 2 MN1M2D2 8 2 1 2 1 1 MN1M2D12 8 2 1 2 0 1 MN2M2D1 9 2 2 1 0 2 MN2M2D2 9 2 2 2 2 2 MN2M2D12 9 2 2 2 0 2 MN3M2D1 10 2 3 1 0 2 MN3M2D2 10 2 3 2 2 1 MN3M2D12 10 2 3 2 0 1 MN4M2D1 11 2 4 1 0 2 MN4M2D2 11 2 4 2 3 2 MN4M2D12 11 2 4 2 0 2 MN5M2D1 12 2 5 1 0 2 MN5M2D2 12 2 5 2 3 1 MN5M2D12 12 2 5 2 0 1 MN6M2D1 7 2 6 1 0 2 MN6M2D2 ...

Page 290: ...re used note the limitation described under drive system Figure 77 Configuration files with default data Figure 78 Configuration files with default data Incorrect definitions of the system parameters for brakes or external axes may cause damage to the robot or personal injury Configura tion file Logical axis Measuring system Drive system System Node System Unit position Node AC1M1D1 7 1 1 1 1 2 AC...

Page 291: ... bearings balancing units axis 2 10 2 5 Lubricating piston rod balancing unit axis 2 11 2 6 Oil change gear box axes 2 and 3 12 2 7 Oil change gearbox axis 4 13 2 8 Oil change gearbox axis 5 14 2 9 Lubricating gearbox axis 6 15 2 10 Checking mechanical stop axis 1 16 2 11 Changing the battery in the measuring system 17 2 12 Changing filters vacuum cleaning the drive system cooling 19 2 13 Changing...

Page 292: ...Maintenance CONTENTS Page 2 Product Manual IRB 6400R ...

Page 293: ...wipe it with a cloth Compressed air and harsh solvents that can damage the sealing joints bearings lacquer or cabling must not be used The control system is completely encased which means that the electronics are protected in a normal working environment In very dusty environments however the interior of the cabinet should be inspected at regular intervals Use a vacuum cleaner if necessary Change ...

Page 294: ...see Figure 1 Diagram 1 X3 3 Inspect all visible cabling Change if damaged valid for all cabling except cabling on axes 1 and 4 Mechanical stop axis 1 X4 4 Check the mechanical stop devices for deformation and damage If the stop pin or the adjustable stop arm is bent it must be replaced See section 2 10 Gearbox 6 Grease changing X5 5 For press tending refers to grease changing and operating life fo...

Page 295: ...5mm2 SW cabling internal Diagram 1 Cabling Life Time Diagram 2 Oil Axis 1 3 Shift 2 4 6 8 4 1 2 1 3 Cycle time 10s PT 40s SW Min Life time Years Min Lift time Years Rotation Angle 3 Shift 500 000 cycles per year 90 150 250 Note The rest of the manipulator and customer cabling 8 years SW Spot Welding PT Press Tending or 5 000 h per year ...

Page 296: ...te of operating life of gearbox axis 6 as a function of the moment of inertia Ja6 Ja6 according to the Product Specification chapter 3 12 000 11 000 10 000 9 000 8 000 7 000 6 000 5 000 4 000 50 100 120 Operation h Moment of inertia Ja6 kgm2 Moment of inertia Ja6 kgm2 50 100 120 40 000 30 000 20 000 10 000 Life time operation h ...

Page 297: ...e wrist is not damaged If damage is discovered call for service personnel Cleaning Clean the robot exterior with a cloth when necessary Do not use aggressive solvents which may damage paint or cabling 2 2 Checking the oil and grease levels Axis 6 The level in the gearbox is checked by adding new grease until grease comes out through the special draining hole See Chapter 2 9 Lubricating gearbox axi...

Page 298: ...he hose Refit the plug to the hose Remove the filling plug 2 Fill up with new oil until the oil level reaches the lower edge of the filling hole 2 See Volume below Refit all plugs Volume 11 5 litres 3 35 US gallon Type of oil BP ABB 1171 2016 604 Equivalents BP Energol GR XP 320 Castrol Alpha SP 320 Esso Spartan EP 320 Klüber Lamora 320 Mobil Mobilgear 632 Optimol Optigear 5180 Shell Omala Oil 320...

Page 299: ...Maintenance Product Manual IRB 6400R 9 Figure 4 Lubricating gearbox axis 1 4 3 1 2 ...

Page 300: ... is quite normal for the bearing races to have a darker colour than the surrounding material 6 Inspect the support washers and sealing rings 7 Push in the cylinder make sure the inner support washers and sealing rings gets in correct position 8 Remove the auxiliary shafts Lubrication 8 Fit the lubricating tool 3HAC 5222 1 The tool should be tightened to the bottom position using hand power only 9 ...

Page 301: ...n where the balancing units are in the horizontal position Wear Check the guide ring for wear If there is a risk of metallic contact between the piston rod and the end cover the guide ring must be replaced For replacement see Repairs The article number of the guide ring is 3HAC 3476 1 Lubrication The piston rods should be lubricated Clean the piston rod and apply new grease when necessary Type of ...

Page 302: ... with new oil until the oil level reaches the lower edge of the filling hole 2 See Volume below Refit the filler and air plugs Volume 12 litres 3 50 US gallon Type of oil BP ABB 1171 2016 604 Equivalents BP Energol GR XP 320 Castrol Alpha SP 320 Esso Spartan EP 320 Klüber Lamora 320 Mobil Mobilgear 632 Optimol Optigear 5180 Shell Omala Oil 320 Texaco Meropa 320 Statoil Loadway EP Figure 5 Drain ho...

Page 303: ...lug A Fill up with new oil until the oil level reaches the lower edge of the filling hole B Volume approx 6 litres 1 75 US gallon Correct oil level for axis 4 is to the lower edge of the upper oil level plug B Figure 6 Drain hole axis 4 Type of oil ABB 1171 2016 604 Equivalents BP Energol GR XP 320 Castrol Alpha SP 320 Esso Spartan EP 320 Klüber Lamora 320 Mobil Mobilgear 632 Optimol Optigear 5180...

Page 304: ...gnetic drain before refitting Turn axis 4 through 90o before filling oil Fill oil through hole 2 until the oil is level with the lower edge of the filler hole Volume approx 6 litres 1 75 US gallon Correct oil level for axis 5 is to the lower edge of the oil level plug Figure 7 Oil change axis 5 Type of oil ABB 1171 2016 604 Equivalents BP Energol GR XP 320 Castrol Alpha SP 320 Esso Spartan EP 320 ...

Page 305: ...e Volume below Move axis 6 backwards and forwards a couple of times before the plugs are replaced so that excess grease is pressed out This is to prevent over pressure in the gearbox with risks for leakage Volume 0 30 litres 0 085 US gallon About 0 4 litres 0 11 US gallon should be used when changing the grease Type of grease Teijin Seiki Molywhite RE No 00 ABB 3HAC 2331 1 Figure 8 Greasing axis 6...

Page 306: ...ers on axes 2 and 3 will be deformed in the event of a mechanical stop and should be replaced by new ones WARNING 1 If the fixed stop arm is bent no attempt must be made to straightened it 2 If the pin is bent a collision between the swinging stop arm and the stop pin has probably occurred A bent stop pin must always be replaced by a new one 3 If any of the adjustable stops are bent they must be r...

Page 307: ...never be thrown away It must always be handled as hazardous waste Set the robot to the MOTORS OFF operating mode This means that it will not have to be coarse calibrated after the change Loosen the battery terminals from the serial measuring board and remove the 4 screws that keeps the battery in place see Figure 10 Install a new battery and connect the terminals to the serial measuring board Figu...

Page 308: ...s on how frequently the user switches off the power The estimated max service life in years for the different types of lithium battery and the recommended exchange intervals are shown below Because of material ageing the maximum service life is 5 years Voltage of batteries measured at power off User type Exchange 3 cell Exchange 6 cell 1 Vacation 4 weeks power off every 5 years every 5 years 2 Wee...

Page 309: ... 1 The batteries two are located under the top cover to the right at the top of the rear wall see Figure 11 Figure 11 The location of the batteries Note from the teach pendant which of the two batteries has expired and needs replacement Loosen the expired battery terminal from the backplane Front view Plan view Warning Do not charge the batteries An explosion could result or the cells could overhe...

Page 310: ...the length of time the system is without power The following table indicates the minimum time in months that memory will be held if the system is without power A battery test is performed on the following occasions 1 System diagnostics before software installation Failing the test will result in one of the following messages on the display Warning Battery 1 or 2 3 3V i e one of the batteries is em...

Page 311: ...C 336 16 2 6 Power supply units 17 2 7 Panel unit DSQC 331 19 2 8 Digital and Combi I O units 20 2 9 Analog I O DSQC 355 21 2 10 Remote I O DSQC 350 Allen Bradley 22 2 11 Interbus S slave DSQC 351 23 2 12 Profibus DP DSQC352 24 2 13 Encoder unit DSQC354 25 2 14 Status LEDs description 27 3 Measuring Points 30 3 1 Back plane 30 3 2 Signal description RS 232 and RS 485 31 3 3 X1 and X2 Serial links ...

Page 312: ...Troubleshooting Tools CONTENTS Page 2 Product Manual ...

Page 313: ...vailable are listed in User s Guide The diagnostic programs are stored in flash PROM on the robot computer board The diag nostic programs are executed by the I O computer The control system runs through various tests depending on the start up mode Cold Start Cold starts occur normally only when the control system is started the first time or when any computer board has been replaced or when the ba...

Page 314: ... tests can be run whenever there is a time slot The background tests are not seen in normal circumstances but will give an indication when an error occurs Flow Chart of Diagnostic Software Operating mode Cold start Rudimentary Run PROM tests System boot Set start up mode Warm RESET Release system Set flag for warm start System in operation Warm start Rudimentary Service mode PROM memory code I O C...

Page 315: ...ill flash the NS and MS front LEDs and stop the program running T1504 IOC Red LED off T1005 IOC Memory test RWM Non Destructive T1018 IOC Battery test T1053 IOC IOC AXC Access test T1062 IOC IOC AXC AM test T1067 IOC IOC AXC Memory test RWM T1068 IOC IOC AXC Memory test RWM R6 Global T1069 IOC IOC AXC Memory test RWM DSP T1070 IOC Enable AXC IOC Interrupts T1061 IOC IOC AXC Load AXC T3001 AXC RWM ...

Page 316: ...4 IOC LED off T1005 IOC Memory test RWM Non Destructive T1018 IOC Battery test 1 2 Monitor Mode 2 When the system is in Monitor Mode 2 a large number of tests can be run These tests must be performed only by authorised service personnel It should be noted that some of the tests will cause activity on customer connections and drive systems which can result in damage accidents etc unless suitable pr...

Page 317: ...th terminal emulation see PC manual The PC shall be set up for 9600 baud 8 bits no parity and shall be connected to the Console terminal on the front of the robot computer board Connection table Console terminal on robot and main computer Start up 1 Connect the PC 2 Turn on the power to the robot Entering the test mode from a PC terminal 1 Press the backplane TEST button see section 3 2 Keep the b...

Page 318: ...nal memory boards 7 System tests MISC System related tests 8 Auxiliary Special tests Not yet implemented 9 Specific test Specific tests that can be run separately 10 T1060 IOC System reset Select test group and the test group menu will be displayed 1 T9901 Memory IO 1 Up one level 2 FLOPPY 1 Up one level 2 T1039 IOC Floppy Format Test 3 T1040 IOC Floppy Write Read Test 3 IOC RWM 1 Up one level 2 T...

Page 319: ...Up one level 2 T1029 IOC SIO2 RS422 loopback test 3 T1033 IOC SIO2 RS422 JUMPER test Requires special hardware jumpers 4 CONSOLE Not yet implemented 5 TPUNIT Not yet implemented 3 T9903 Elementary I O Not yet implemented 4 T9911 DSQC 3xx IOC 1 Up one level 2 IOC CPU Not yet implemented 3 PROM Not yet implemented 4 RWM 1 Up one level 2 T1516 IOC RWM size 3 T1005 IOC Memory test RWM Non Destructive ...

Page 320: ...2 T1018 IOC Battery test startup 3 T1060 IOC System Reset 11 LED 1 Up one level 2 T1503 IOC LED on 3 T1504 IOC LED off 4 T1518 IOC CAN LEDs sequence test 5 DSQC 3xx AXC 1 Up one level 2 AXC CPU Not yet implemented 3 RWM 1 T9800 Up one level 2 T1067 IOC IOC AXC Memory test RWM 3 T1068 IOC IOC AXC Memory test RWM R6 Global 4 T1069 IOC IOC AXC Memory test RWM DSP 5 T3001 AXC RWM test Dstr 6 T3002 AXC...

Page 321: ...3 RWM 1 Up one level 2 T1517 MC ERWM RWM size 3 T1047 IOC IOC MC Memory test Destructive 4 T2002 MC Memory test RWM Destructive 5 T2010 MC Memory test RWM BM Destructive 4 LED 1 Up one level 2 T1505 IOC IOC MC LED on 3 T1506 IOC IOC MC LED off 4 T1507 IOC IOC ERWM LED on 5 T1508 IOC IOC ERWM LED off 6 T2501 MC LED on 7 T2502 MC LED off 5 Duart Not yet implemented 6 VME 1 Up one level 2 T1048 IOC I...

Page 322: ...501 MC LED on 12 T2502 MC LED off 4 IOC AXC 1 T9800 Up one level 2 T1062 IOC IOC AXC AM test 3 T1053 IOC IOC AXC Access test 4 T1072 IOC IOC AXC Reset AXC 5 T1070 IOC Enable AXC IOC Interrupts 6 T1061 IOC IOC AXC Load AXC 7 T3018 AXC ASIC ID number 8 T3019 AXC Board ID number 9 T3020 AXC VME interrupt test 10 T3023 AXC Test channels output test 11 T1071 IOC Disable AXC IOC Interrupts 5 MC AXC Not ...

Page 323: ...bleshooting Tools Product Manual 13 9 Specific test Specific test Txxxx Q q or to quit Enter test number Txxxx T 10 IOC System reset Not yet implemented All available tests have been defined in Chapter 1 1 ...

Page 324: ...ellow See section 2 14 NS Green red See section 2 14 MS Green red See section 2 14 Transformer DC link Drive unit 3 Drive unit 2 Drive unit 1 Supply unit Robot computer Main computer Optional board Optional board Memory board IRB 1400 IRB 2400 IRB 4400 IRB 6400 IRB 640 IRB 840 A IRB 340 Drive unit Axes Axes Axes Axes Axes Axes Axes 1 1 2 4 1 2 4 1 6 1 6 1 6 1 X 6 C 2 1 2 3 5 6 3 5 6 2 4 2 4 2 3 2 ...

Page 325: ...QC 361 Designation Colour Description Remedy F Red Turns off when the board approves the initialisation 2 4 Memory board DSQC 324 16Mb 323 8Mb Designation Colour Description Remedy F Red Turns off when the board approves the initialisation DSQC 361 F DSQC 3xx F ...

Page 326: ...so system boards in rack RxD Yellow Indicates data receive activity If no light check network and connections NS Green red See section 2 14 MS Green red See section 2 14 F Red Lit after reset Thereafter controlled by the CPU Light without message on display indicates a hardware fault preventing system from strating By light and message on display check message DSQC 336 LAN TXD RXD CAN NS MS A U I ...

Page 327: ...ts DSQC 334 Designation Colour Description Remedy AC OK Green 3 x 55V supply OK start of ENABLE chain DSQC 374 365 New standard power supply unit DSQC 374 introduced week 826 M98 rev 1 New extended power supply unit DSQC 365 introduced week 840 AC OK X1 X5 X2 X3 ...

Page 328: ...Troubleshooting Tools 18 Product Manual Designation Colour Description Remedy AC OK Green 3 x 55V supply OK start of ENABLE chain 24 V I O Green 24 V I O OK AC OK X1 X5 X2 X3 24 V I O X7 Only DSQC 365 ...

Page 329: ...wer supply and computers MS NS Green red See section 2 14 ES1 and 2 Yellow Emergency stop chain 1 and 2 closed GS1 and 2 Yellow General stop switch chain 1 and 2 closed AS1 and 2 Yellow Auto stop switch chain 1 and 2 closed AS2 AS1 GS1 ES2 ES1 GS2 NS MS EN WARNING REMOVE JUMPERS BEFORE CONNECTING ANY EXTERNAL EQUIPMENT Status LED s ...

Page 330: ...O DSQC 320 Designation Colour Description Remedy IN Yellow Lights at high signal on an input The higher the applied voltage the brighter the LED will shine This means that even if the input voltage is just under the voltage level 1 the LED will glow dimly OUT Yellow Lights at high signal on an output The higher the applied voltage the brighter the LED will shine MS NS Green red See section 2 14 OU...

Page 331: ...en tranceiving data If no light when transmission is expected check error messages and check also system boards in rack 5VDC 12VDC 12VDC Green Indicates that supply voltage is present and at correct level Check that voltage is present on power unit Check that power is present in power connector If not check cables and connectors If power is applied to unit but unit does not work replace the unit D...

Page 332: ...t does not work replace unit NS MS Green red See section 2 14 CAN Tx CAN Rx Yellow See section 2 14 NAC STATUS Green Steady green indicates RIO link in operation If no light check network cables and connections Check that PLC is operational Flashing green communication established but INIT_COMPLETE bit not set in NA chip or configuration or rack size etc not matching configuration set in PLC If LE...

Page 333: ...t when both 5 VDC supplies are within limits and no reset is active RBDA Red Lit when this Interbus S station is last in the Interbus S network If not as required check parameter setup BA Green Lit when Interbus S is active If no light check network nodes and connections RC Green Lit when Interbus S communication runs without errors Bus status LED s DSQC 351 ABB Flexible Automation POWER CAN Tx CA...

Page 334: ...en red See section 2 14 POWER 24 VDC Green Indicates that a supply voltage is present and has a level above 12 VDC If no light check that voltage is present in power unit Check that power is present in the power connector If not check cables and connectors If power is available at the unit but the unit does not function replace the unit Profibus active Power NS MS CAN Rx CAN Tx Bus status LED s DS...

Page 335: ...NC 1A 1B Green Indicates phase 1 and 2 from encoder Flashes by each Encoder pulse By frequencies higher than a few Hz flashing can no longer be observed light will appear weaker If no light faulty power supply for input circuit internal or external Defective input circuit on board External wiring or connectors short circuit or broken wire Internal error in unit Constant light indi cates constant h...

Page 336: ...nput is active The input is used for external start signal conveyor synchronization point If no light faulty limit switch photocell etc External wiring or connectors short circuit or broken wire Faulty power supply for input circuit internal or external Defective input circuit on board ...

Page 337: ... is operating properly The LED is controlled by software The table below shows the different states of the MS LED Description Remedy Source of fault Off No power applied to the device Check power supply Green Device is operating in a normal condition If no light check other LED modes Flashing green Device needs commissioning due to configuration missing incomplete or incorrect The device may be in...

Page 338: ...p 2 only device it means that the device is not allocated to a master For a UCMM capable device it means that the device has no established connections Check that other nodes in network are operative Check parameter to see if module has correct ID Green The device is on line and has connection in the established state For a group 2 only device it means that the device is allocated to a master For ...

Page 339: ...en for approx 0 25 seconds NS LED is switched On red for approx 0 25 seconds NS LED is switched On red If a device has other LEDs each LED is tested in sequence CAN Tx CAN network transmit CAN Rx CAN network receive Description Remedy Source of fault Green LED Physically connected to the Can Tx line Flashes when the CPU is receiving data on the CAN bus If no light when transmission is expected che...

Page 340: ...IT button S2 TEST button Accessible from cabinet top Maintenance plug X9 Battery 1 2 Serial ports SIO 1 RS 232 SIO2 RS 422 CAN3 ext I O CAN2 manip I O CAN1 panel unit Disk drive data supply Drive units X14 ext axes Serial meas board 2 X12 ext axes Serial meas board 1 X23 manipulator Power supply Drive units X22 manipulator Test points X5 X8 Accessible by cabinet door alt SIO1 and SIO 2 can also be...

Page 341: ...transmission pattern can be single or bursts of 10 bit words with one start bit 0 eight data bits MSB first and lastly one stop bit 1 Signal Explanation TXD Transmit Data RXD Receive Data DSR Data Set Ready DTR Data Terminal Ready CTS Clear To Send RTS Request To Send Start bit 0 Stop bit 1 f 9600 19200 baud Byte 1 Byte 2 10 V 0 V ...

Page 342: ...y looking at the true channel it is possible to read the data If the types of signal as shown in the above diagram are obtained when measuring this means that the drive circuits and lines are OK If one or both of the signals do not move it is likely that one or several line s or one or several drive circuit s is are faulty Signal Explanation TXD4 TXD4 N Transmit Data in Full Duplex Mode RXD4 RXD4 ...

Page 343: ... interfaces SIO 1 X1 is an RS232 interface and SIO 2 X2 is an RS422 interface Explanation of signals see 3 2 Screw terminals X1 X2 Pin Signal Pin Signal 1 TXD 1 TXD 2 RTS N 2 TXD N 3 0V 3 0V 4 RXD 4 RXD 5 CTS N 5 RXD N 6 0V 6 0V 7 DTR 7 DATA 8 DSR 8 DATA N 9 0V 9 0V 10 10 DCLK 11 11 DCLK N 12 12 0V ...

Page 344: ... vent damage by a short circuit ACOK Follows the AC power input without delay High 5V when power is OK DCOK Follows the supply unit energy buffer After power on DCOK goes high 5 V when output voltages are stable X1 X2 Pin Signal Pin Signal 1 1 TXD 2 RXD 2 TXD N 3 TXD 3 RXD 4 DTR 4 RXD N 5 0 V 5 0 V 6 DSR 6 DATA 7 RTS N 7 DATA N 8 CTS N 8 DCLK 9 9 DCLK N X9 Pin Row A Row C 28 ACOK DCOK 29 5V_TST 0V...

Page 345: ...h means that signal transmission is differential See 3 2 Figure 3 The DRCO signals travel from the robot computer to the drive units The DRCI signals enter the robot computer from the drive units DRCI1 DRCO1 signals are connected to the internal drive system backplane connec tor X22 see 3 1 DRCI2 DRCO2 are connected to external placed drive units backplane connector X14 see 3 1 X9 Pin Row A Row C ...

Page 346: ...erential see 3 2 Figure 3 The MRCO signals travel from the robot computer to the measuring boards The MRCI signals enter the robot computer from the measuring boards MRCI1 MRCO1 signals are connected to the IRB axes backplane connector X23 see 3 1 MRCI2 MRCO2 are used for external axes backplane connector X12 see 3 1 X9 Pin A C 20 0V 21 MRCI1 MRCI1 N 22 MRCO1 MRCO1 N 23 MRCI2 MRCI2 N 24 MRCO2 MRCO...

Page 347: ...to the diskette 13 SSO N Side Select static active low Indicates which side of the diskette is active 14 DIRC N Direction in static active low Indicates that the heads are to move inwards 15 0V X9 Pin C Explanation 9 IP N Index pulses One pulse per cycle c every 200 mil liseconds 10 TR00 N Track 00 active low Indicates that the heads are located at track 0 of the diskette 11 MO N Motor on static l...

Page 348: ...requencies 3 4 6 Teach pendant The data transmission signal complies with the EIA RS 422 standard see 3 2 Figure 3 X9 Pin A C 6 DATA4 TP DATA4 N TP N Write frequency Read frequency MOTOR ON WRITE DATA MOTOR ON DRIVE SELECT STEP WRITE GATE READ DATA WRITE GATE STEP DRIVE SELECT ...

Page 349: ...n and Commissioning section 3 17 3 In this case the backplane fixed termination resistor is connected in 3 4 8 Safety ENABLE 9 5V when supply voltage is OK and the computers are OK output from the robot com puter to the panel unit LED EN SPEED 5V when one of the modes AUTO or MANUAL FULL SPEED is active input to the robot computer from the panel unit X9 Pin A C 25 CANRLY2 N CANRLY3 N 26 CAN_H CAN_...

Page 350: ...Troubleshooting Tools 40 Product Manual ...

Page 351: ...ystem 4 1 3 Main computer DSQC 361 and memory board DSQC 323 324 4 1 4 Robot computer DSQC 363 5 1 5 Panel unit DSQC 331 5 1 5 1 Status of the Panel unit inputs and outputs displayed on the teach pendant 6 1 6 Distributed I O 8 1 7 Serial Communication 9 1 8 Drive System and Motors 9 1 9 Teach Pendant 10 1 10 Measurement System 10 1 11 Disk Drive 11 1 12 Fuses 11 ...

Page 352: ...Fault tracing guide 2 Product Manual ...

Page 353: ...ller must be used to avoid ESD damage 1 1 1 Intermittent errors Unfortunately intermittent errors sometimes occur and these can be difficult to rem edy This problem can occur anywhere in the robot and may be due to external interference internal interference loose connections dry joints heating problems etc To identify the unit in which there is a fault note and or ask a qualified operator to note...

Page 354: ...d or warm start is performed the robot computer releases the main computer when the robot computer s diagnostics allows it and following this the main computer takes over the control of the system The read and write memories of the main computer are battery backed If the red LEDs on the main computer light up or do not turn off at initialisation either a critical system failure has occurred or the...

Page 355: ...bably in the robot computer 1 5 Panel unit DSQC 331 The DSQC 331 Panel unit controls and monitors the dual operation chain Its status is also indicated by LEDs at the upper part of the unit Over temperature of the motors is monitored by PTC inputs to the board LED indications for DSQC 331 The LEDs are very useful when trying to locate errors in the operation chain Unlit LEDs indicate the whereabou...

Page 356: ...rding Panel unit where outputs are marked with and inputs with See the table below Outputs DO Name Meaning when 1 is displayed BRAKE Energise brake contactor i e release brakes and turn on duty time counter MONLMP Turn on LED in motor on push button RUN CH1 Energise motor contactor chain 1 RUN CH2 Energise motor contactor chain 2 SOFT ASO Choose delayed turn off of auto stop SOFT ESO Choose delaye...

Page 357: ...osed GS2 General stop chain 2 closed K1 Motor contactor chain 1 closed K2 Motor contactor chain 2 closed LIM1 Limit switch chain 1 closed LIM2 Limit switch chain 2 closed MAN2 Mode selector chain 2 Manual operation MANFS2 Mode selector chain 2 Manual full speed operation MANORFS1 Mode selector chain 1 Manual or manual full speed operation MON PB Motor On push button pressed PTC Over temperature in...

Page 358: ...atus using the I O menu on the tech pendant display 4 Check the I O unit s LED for the current input or output If the output LED is not lit check that the 24 V I O power supply is OK 5 Check on all connectors and cabling from the I O unit to the process connection MS LED is To indicate Action Off No power Check 24 V CAN Green Normal condition Flashing green Software configuration miss ing standby ...

Page 359: ... which consists of rectifier drive unit and motor is controlled by the axis computer located on the robot computer board Figure 1 A schematic description of the drive system The drive system is equipped with internal error supervision An error is sent on via the robot computer and can be read on the teach pendant display as an error message An explanation of the available error messages can be fou...

Page 360: ...sly updated during operation If the resolver connections are disconnected or if the battery goes dead after the robot has been stationary for a long period of time the manipulator s axis positions will not be stored and must be updated The axis positions are updated by manually jogging the manipulator to the synchro nised position and then using the teach pendant setting the counters to zero If yo...

Page 361: ...ng is set correctly on the unit Compare with the faulty drive being replaced 1 12 Fuses There is one automatic three phase 20 A fuse that supplies the DC link in the MOTORS ON state on the transformer There is also a automatic three phase 10 A fuse that supplies the power supply unit There are also two fuses for customer AC supplies one 3 15 A and one 6 3 A The backplane has four PTC resistance fu...

Page 362: ...Fault tracing guide 12 Product Manual ...

Page 363: ...ABB Flexible Automation AB Product Manual IRB 6400R This chapter is not included in the On line Manual Click on the Main menu button below to continue to the front page Main menu ...

Page 364: ...13 3 2 Motor axes 2 and 3 14 4 Motors and Gears Axes 4 6 15 4 1 Motor axis 4 15 4 2 Intermediate gear 16 4 3 Axes 5 and 6 17 4 4 Wrist 18 4 5 Arm extender 19 4 6 Dismounting Motor axis 5 20 4 7 Motor gear axis 6 21 4 8 Checking play in axes 5 and 6 22 4 9 Adjusting play in axis 5 23 4 9 1 Adjusting the intermediate gear unit 23 4 9 2 Adjusting the intermediate gear unit bearings 24 5 Balancing uni...

Page 365: ... Lamp 48 8 5 Process Media Conduit 49 8 6 Fork Lift Device 50 9 Calibration 51 9 1 General 51 9 2 Calibration procedure 51 9 2 1 Calibrating axis 1 without the DynaCal System 52 9 3 Calibrating the robot with the DynaCal system 53 10 Onboard Calibration 58 10 1 General 58 10 2 Setup Onboard Calibration Equipment 59 10 3 Load the program on_board prg 61 10 4 Check of Measurement System Calibration ...

Page 366: ...is routed through the entire robot and consists of two major sys tems power cabling and signal cabling The power cabling feeds the robot axes motor units The signal cabling feeds the various controlling parameters like axis positions motor revs etc The AC type Motor Units provide the motive power for the various robot axes via gears Mechanical brakes electrically released lock the motor units when...

Page 367: ...omer tools at the front end of the wrist in the Turn Disc The tool or manipulator can be equipped with pneumatic control via an external air supply option The signals to from the tool can be supplied via internal customer connections option The Control Cabinet must be switched off during all service work on the robot Before doing any work on the robot measurement system measurement board cabling t...

Page 368: ...required for various service jobs involving dismantling on the one hand conventional tools like socket and ratchet spanners etc on the other hand special tools may be necessary depending on what type of service is being car ried out The conventional tools are not dealt with in this manual based on the assump tion that the service personnel have sufficient technical basic competence However service...

Page 369: ... roller elements must under no circumstances be subjected to direct impact Also the roller elements must not be exposed to any stresses during the assembly work Tapered Bearings 4 The bearing should be tensioned gradually until the recommended pre tension is achieved 5 It is important to note that the roller elements must be rotated a specified number of turns before pre tensioning is carried out ...

Page 370: ...st be inspected before mounting If scratches or damage are found that may result in future leakage the seal must be replaced 5 Seals should also be checked before mounting to ensure that there is no damage to the sealing edge feel with a fingernail the seal is of the correct type provided with cutting edge there is no other damage 6 Grease the seal just before fitting it but not too early as there...

Page 371: ...erly cleaned in accordance with ABB Flexible Automation recommendations 14 Distribute the sealing compound evenly over the surface preferably with a brush 15 Tighten the screws evenly when fastening the flange joint O rings 16 Check the O ring grooves The grooves must be geometrically correct and free from pores and contamination 17 Check the O ring with regard to surface defects burrs shape accur...

Page 372: ...ber type should be used Screws treated with Gleitmo can be unscrewed and screwed in again 3 4 times before the slip coating disappears Screws can also be treated with Molycote 1000 When screwing in new screws that are not Gleitmo treated these should first be lubri cated with Molycote 1000 and tightened to the specified torque Assembly Lubrication with molybdenum disulphide grease Molycote 1000 sh...

Page 373: ...d head 1 5 2 Screws with hexagon socket head Tightening torque Nm Dimension class 4 8 Dry M 2 5 0 25 M 3 0 5 M 4 1 2 M 5 2 5 M 6 5 0 Tightening torque Nm Dimension class 8 8 Dry class 10 9 Molycote 1000 Gleitmo 610 class 12 9 Molycote 1000 Gleitmo 610 M 5 6 M 6 10 M 8 24 28 35 M 10 47 55 70 M 12 82 95 120 M 16 200 235 300 ...

Page 374: ...e Power and signal connections to the motor units are via separate cables between connections points inside the manipulator and each motor The cables are connected to the motor units with connectors The feedback unit is fitted by the motor manufacturer and must never be sep arated from the motor The communication angle is 90 COMOFF 2048 The motors never need commutating The motor resolver and brak...

Page 375: ...Motor units Repairs 12 Product Manual IRB 6400R ...

Page 376: ...e pinion and gear 5 Attach a hoist and the lifting device 3HAC 6875 1 to the motor The weight of the motor is 17 kg 6 Pull and turn out the motor In case of difficulty use two screws in the threaded holes M8 on the motor flange to push out the motor from its attachment Mounting 7 Ensure that sealing surfaces are clean and not scratched 8 Apply oil to the sealing surfaces to ensure that the O ring ...

Page 377: ...power supply 24V DC to release the breaks pin no 11 24V and pin no 12 0V so it is possible to pull and turn the motor out and minimise the risk of damaging the pinion and gear 7 Attach a hoist and the lifting device 3HAC 6876 1 to the motor The weight of the motor is 17 kg 8 Pull and turn out the motor in case of difficulty use two screws in the threaded holes M8 on the motor flange to push out th...

Page 378: ...ar of the motor and place support 3HAA 7601 070 under the motor shaft to avoid axial loading of the bearings in the motor 10 Clean the pinion hole on the motor with Ethanol art no 1177 1012 205 and dry with a clean piece of paper 11 Clean the pinion shaft in the same way 12 Apply some mineral oil BP CS 320 on the pinion shaft and in the pinion hole on the motor Wipe off any surplus with paper leav...

Page 379: ...e intermediate wheel to obtain the minimum play between the final gear and the motor gear at four points by turning axis 4 Ensure that when axis 4 is turned the gears do not scrape together 11 Tighten screws 15 14 with a torque of 69 Nm 12 Insert the 3 wedges 17 with 12 tension washers 43 and the nut 18 on studs 16 apply Loctite 39 and tighten with a torque of 8 Nm Note Fit the tension washers wit...

Page 380: ...supplied and for article numbers Some maintenance and repair work can be carried out by your own service personnel Oil change as described in the Maintenance Manual IRB 6400 Change of motor and gear axis 6 Change of motor axis 5 Checking play axes 5 and 6 Adjusting play in axis 5 When a complete service of the wrist is required including mounting adjusting of gear axis 5 the wrist should be sent t...

Page 381: ...6 4 Pull out the wrist from the upper arm if an arm extender is mounted the cables must be dismounted before pulling out the wrist see chapter 4 5 Arm extender 5 Dismount cables to motor axis 5 Mounting 6 Mount cables to motor axis 5 7 Lubricate screws 6 with Molycote 1000 and tighten with a torque of 120 Nm 8 Mount cabling to axis 6 9 Pressure test Foundry robots as described in Chapter 7 3 Cabli...

Page 382: ... Chapter 4 4 Wrist 2 Connect a hoist to the extender 3 3 Unscrew screws 2 8 6 for the extender and remove it Mounting 4 Lift the extender in position 5 Lubricate the screws 2 8 6 with Molycote 1000 and tighten with a torque of 120 Nm 6 Mount the wrist as described in Chapter 4 4 Wrist Tightening torque Screw joint extender tube shaft item 2 9 3 120 Nm ...

Page 383: ... injector is filled with oil N B This gear is matched with the other parts of the bevel gear 5 for axis 5 If the motor is changed the gear must be moved over to the new motor axis If the gear is damaged the complete bevel gear set unit must be replaced Please contact ABB Flexible Automation when replacement of the bevel gear set unit is necessary 6 Press the gear on to the new motor Use tools 3HAA...

Page 384: ...the shaft axially in any way as this could give rise to an incorrect air gap in the brake 9 Mount the gear on the motor tighten with screws 2 12 5 Use a new O ring 2 12 2 Turn the gear so that the screw hole and magnetic oil plug come in the right position Torque 35 Nm 10 Move the sync plates and connector holder on the resolver side over to the new motor When dismounting the gear the sync plate 2...

Page 385: ...e Figure 4 How to measure the play in the wrist 4 Use tool 6896 134 CD or mounted equipment to check the total play in axis 5 The brake must be on Max play 0 30 mm at a distance of 196 mm from the centre of axis 5 Max play for a new wrist is 0 25 mm Adjustment See Chapter 4 9 1 Adjusting the intermediate gear unit Axis 6 1 Check the play in axis 6 with tool 6896 134 CF 2 Measure with a PEK dial in...

Page 386: ... Adjust the bearing as described in Chapter 4 9 2 Adjusting the interme diate gear unit bearings and adjust to the correct play as described in Chapter 4 9 1 Adjusting the intermediate gear unit 4 9 1 Adjusting the intermediate gear unit Refer to foldout 2 11 1 Remove the wedges 2 11 21 Check that they are not damaged 2 Adjust the intermediate gear unit 2 11 105 with the centre screw 2 11 18 The g...

Page 387: ... Clean the threads in the hub 4 and the locknut 3 3 Apply Loctite 290 on the threads in the hub and the locknut 4 Tighten the locknut 3 Torque 85 Nm 5 for a replacement bearing Use the tool 3HAB 1022 1 together with the torque wrench Note If the same bearing is fitted again the torque should be 70 75 Nm 5 Fit the stop screw 2 extra locking Apply Loctite 243 Tightening torque Locking nut in the int...

Page 388: ...l the auxiliary shafts on the upper and lower shafts Upper shaft auxiliary shaft 3HAB 5275 1 lower shaft auxiliary shaft 3HAB 5276 1 7 Hang up the new balancing unit on the upper auxiliary shaft adjust the length with the M12 screw while pushing the balancing cylinder in place by hand force and carefully install the balancing unit on to the upper and lower shafts do not use a hamer of any type the...

Page 389: ...ual IRB 6400R 13 Remove the M10x50 screw at the top of the cylinder Remove the M16x140 screw on the lower arm Figure 6 Mounting the balancing unit 1 2 Inner race 3 4 5 6 1 2 3 4 5 6 Loctite 243 50 Nm min 0 1 min 0 1 Aux shaft 3HAB 5275 1 7 ...

Page 390: ...3 Remove the worn out guide ring and clean the piston rod See Figure 7 4 With the smallest outer diameter facing outwards force the new guide ring over the piston rod Use tool 3HAC 0879 1 Locate the ring in the end cover See Figure 7 5 Install the circlip 6 Lubricate the piston rod see Maintenance Chapter 2 5 Lubricating piston rod balancing unit axis 2 Figure 7 Guide ring balancing unit Circlip G...

Page 391: ...ut the old bearing using tool 3HAC 1981 1 See Figure 8 Figure 8 Dismounting of bearing 3 Turn the tool upside down Place the new bearing on the tool with the bearing number upwards facing the tool Push the new bearing down as shown inFigure 9 Figure 9 Mounting bearing 4 Mount the balancing unit according to Chapter 5 1 Dismounting balancing unit Press Old bearing Tool 3HAC 1981 1 Support Press New...

Page 392: ...s and air hose inside the upper arm as in 7 2 Robot Harness Customer Harness 3 Attach a hoist and the lifting device 3HAC 6878 1 to the upper arm See Fig ure 10 Figure 10 Lifting the upper arm 4 Remove the parallel arm 2 1 3 see 6 5 Parallel Arm 5 Remove the KM nut 1 on each shaft See Figure 11 6 Remove the stop screws 2 in the lower arm See Figure 11 7 Remove the protective plates 2 3 10 on the i...

Page 393: ...meter inwards 15 Mount and grease the bearing 7 16 Insert the NILOS ring 8 17 Insert the distance ring 9 18 Mount the KM nut 1 Apply Loctite 243 and tighten the nut to 180 Nm then loosen the nut again and tighten with a torque of 90 Nm 19 Then mount the right side paragraphs 12 18 similar to the left side except for the distance ring 6 20 Mount the parallel bar 21 Mount the cabling as described Ch...

Page 394: ...o the parallel bar 2 Dismount screw and washer 2 1 224 223 by the parallel arm 3 Dismount screw and washer 2 1 224 223 by the upper arm Lift the bar away Mounting 4 Lift the parallel bar in position 5 Place the axial washer and cover washer on each side of the bearing 6 Place and centre the parallel bar 7 Apply a thin coat of grease on the shaft 8 Press the shaft with a hydraulic press and tool 3H...

Page 395: ...afts out with a hydraulic press and tool no 3HAC 5026 1 and lift the parallel bar away 4 Remove the harness on the upper and lower arms as described in 7 Cabling 5 Dismount the upper arm as described in Chapter 6 1 Upper Arm 6 Dismount the two balancing units 2 1 4 as described in 5 1 Dismounting bal ancing unit or 5 2 Replacing guide ring balancing unit 7 Dismount the M16x70 screws between the pa...

Page 396: ...reverse order 6 5 Parallel Arm Refer to foldout 2 7 Dismounting 1 Remove the lower arm as in 6 4 Lower Arm 2 Place the arm on a workbench 3 Attach a hoist to the parallel arm 4 Place the Cylinder NIKE CHF 612 1 and tools 3HAC 5526 1 2 and 3HAC 5523 1 3 see Figure 12 4 Force the parallel arm to the right seen from the rear 5 Lift the parallel arm away Mounting 6 Place the parallel arm in position 7...

Page 397: ...arings 6 6 Inner Bearing Dismounting 1 Place the cylinder NIKE CHF 612 1 and tools 3HAC 5526 1 2 3HAC 5523 1 3 and 3HAC 5522 1 4 see Figure 12 2 Press the bearing off Mounting In Reverse Order Dismount Parallel arm Lower arm Dismount inner bearing Dismount outer bearing 1 1 1 2 2 2 3 3 5 4 ...

Page 398: ...tem Product Manual IRB 6400R 35 6 7 Outer Bearing Dismounting 1 Place the cylinder NIKE CHF 612 1 and tools 3HAC 5526 1 2 3HAC 5523 1 3 and 3HAC 5522 2 5 see Figure 12 2 Press the bearing off Mounting In Reverse Order ...

Page 399: ...and 7 1 2 Dismount the balancing weight see chapter 6 3 3 Place the robot in the position as shown below and tie the upper and lower arms together with a strap see Figure 13 Lifting position 4 Attach a hoist and the lifting device 3HAC 6878 1 to the upper arm 5 Dismount lower arm see chapter 6 4 Lower Arm 4 Dismount Motors axes 1 3 see chapters 3 1 and 3 2 5 Dismount the Break release unit and the...

Page 400: ...l Measurement Board Refer to foldout 2 6 Dismounting 1 Remove the cover 17 located in the frame 2 Disconnect connectors R2 SMB R2 SMB 1 4 R2 SMB 3 6 3 Disconnect connector R2 G battery connector from the SMB Mounting 4 In reverse order 6 11 Replace Stop pin Refer to foldout 2 5 Dismounting 1 Remove the cover on top of the housing 2 Dismount the M20x90 bolt 102 and the compression spring 101 3 Lift...

Page 401: ...Arm System Repairs 38 Product Manual IRB 6400R ...

Page 402: ... see Figure 14 5 Pull the harness up through the base from the front side of the robot air hoses first 6 Unsnap the harness from the lower 2 and upper 3 fixtures on the gearbox axis 3 and from the fixture on the lower arm 4 On robots with truck lifts fitted there is a hose clamp underneath the truck lift see Figure 15 7 Remove the connector and air connections from the connector fixture on the upp...

Page 403: ...el arms 12 Fit the connector and air connections to the fixture on the upper arm housing 13 Fit the connector and air connections in the base 14 Replace the plate that covers the harness in the base Figure 15 Attachment points for spotwelding harness Mounting 15 Mount in reverse order R2 WELD R2 PROC3 R2 PROC2 R2 PROC1 Upper weld interface Mounting of the flexible hose when the fork lift device is...

Page 404: ...the connectors R1 MP and R1 SMB from the attaching plate 2a Remove the connectors R1 SW1 R1 SW2 3 R1 CP CS from the attaching plate applies only when a customer harness is fitted 3 Unscrew the 3 screws on motors 1 2 and 3 and remove the covers Remove the connectors from the motors 4 Remove the brake release units 2 5 6 and the cover of the series measuring board 2 6 17 and remove the connectors 5 ...

Page 405: ... out of the tubular axle and down through the lower arm It should be remembered that connectors and wiring are sensitive parts of a har ness and must be treated with care Mounting 14 Start by pulling the harness up through the lower arm and pre fit the attachment plate for the fixture in the arm housing there is insufficient space to do this when the harness is in position 15 The cables to motor 4...

Page 406: ...Repairs Cabling Product Manual IRB 6400R 43 Figure 17 Location of harnesses in holder Welding harness Customer harness Robot harness ...

Page 407: ...on Note Foundry robots must be tested for leakage after cable replacement Test procedure for IRB6400 Foundry axis 6 1 Remove the plug on the back of the axis 6 motor 2 Install test device 3HAC 0207 1 and 3HAC 4618 1 which consists of a gauge valve and adapter connected to the compressed air supply 3 The chamber is pressurised to 0 2 bar and the valve is then closed Note Be careful not to over pres...

Page 408: ... leak is found take the following action s In the back cover of the motor apply latex under the back cover s flange Around any screw apply latex under the screw head Leakage through cable exit joints in cup of axis 6 cable assembly replace the cable ...

Page 409: ...Cabling Repairs 46 Product Manual IRB 6400R ...

Page 410: ...Replace the fan and the cover Mounting 5 Mount in reverse order 8 2 Position Switch axis 1 Refer to foldout 2 15 Dismounting 1 Dismount the protective plates 2 Dismount the Rail bracket 5 and the 12 screws 8 from the under side of the base 3 If the cams run into and overlaps on both rail sections the cams must be dismounted before the rails 4 Dismount the connector from the bracket on the left sid...

Page 411: ...ed it must be removed before the position switch 4 Disconnect the connector Mounting 5 In reverse Order 8 4 Signal Lamp Refer to foldout no 2 1 2 10 2 18 Dismounting 1 Remove cover on axis 4 2 1 7 2 Dismount the two screws that attach the signal lamp 2 1 117 to the bracket cover axis 4 2 1 12 3 Dismount the three screws on the cover on motor axis 4 2 10 1 and remove the cover 4 Dismount the cable ...

Page 412: ...the snap attachments and dismount the cables 4 Dismount the upper rail by undoing the two fixtures underneath the base frame two M6x20 screws per fixture 5 Dismount the lower rails by undoing the two fixtures on the side of the manipula tor foot one M6x20 screw per fixture 6 Dismount the brackets on the base frame and foot one M8x40 screw per bracket 7 Dismount the snap attachments see Figure 18 L...

Page 413: ...nual IRB 6400 8 6 Fork Lift Device Refer to foldout no 2 1 Dismounting 1 Attach a hoist to the lifting device 100 2 Loosen the screws 100 1 and washers 100 2 Mounting 3 Mount in reverse order Tightening torque M16x60 screws 300 Nm ...

Page 414: ...happens when parts affecting the calibration position have been replaced on the robot The system needs to be roughly calibrated as described in Chapter 11 1 Setting the calibration marks on the manipulator if the contents of the revolution counter memory are lost This may happen when the battery is discharged a resolver error occurs the signal between a resolver and measurement board is interrupte...

Page 415: ...calibrated according to section 9 2 1 If the robot at installation has been calibrated with the DynaCal system continue according to section 9 3 9 2 1 Calibrating axis 1 without the DynaCal System 1 Position the manipulator approximately in calibration position 0 2 Select the MOTORS OFF mode 3 Remove the cover plate on the reference surface on gearbox 1 4 Attach the synchronisation bracket 3HAC 46...

Page 416: ...t cable is the most fragile part of the system So always be careful when manipulating it Damaging the cable might compromise the overall accuracy of the system When transporting the DynaCal system avoid hitting the calibration unit against other objects After every use put both the DynaCal unit and the Adaptor back in the black case 1 Mount the DynaCal Calibration unit inside the working range of ...

Page 417: ...the unit see Figure 23 Figure 23 Mounting hole patterns on unit 3 Hook up the system together with a PC according to Figure 19 The axis of rotation of the pul ley should be parallel with robot axis 1 5o Mounting holes holes for dowel pins View A View B View A View B 25 4 25 4 46 10 32 tap hole 3 175 4x 22 225 9 525 22 225 9 525 3 32 tap hole ...

Page 418: ...rist with the joy stick 8 Click on the Start button in Windows Select Programs and then select DynaCal Calibration System Software from the list of programs 9 The menu shown on the screen is similar to all Windows products The DynaCal Software requires every robot to be associated to a project i e every new robot to be calibrated has to have a new project associated with it 10 To create a new proj...

Page 419: ...Measuring Screen The number of positions should be between 20 30 The calibration positions should cause as much change as possible in the tool orientation and the robot should move to its extremes minimum reach and maximum reach For convenience you may select positions in a 1x1x1 m cube Note that the angle at the joint coupling of the calibration adapter at the end of the cable should not exceed 9...

Page 420: ...rogram mod Check that the TCP information are correct If not enter the correct TCP values Click OK 38 Click the Robot button in the window Calibrate 39 Check that the box Nominal is selected than click OK 40 Start the calibration by clicking the button Start calibration 41 Now click the button Remove worst point and Recalibrate a couple of times The figures in Calibration results should not change...

Page 421: ...ad before shipment from SEROP When checking the calibration position with a load tool the Onboard Calibration have to be performed with the same load as in the original measurement and during installation new sensor positions should be measured and stored when the load tool is mounted If unacceptable deviations in the measurement system is discovered during Onboard calibration enter the old calibr...

Page 422: ...ed off during installation off the Onboard Calibration equipment With CANBUS See Figure 25 Connection with CANBUS 1 Dismount the customer CANBUS cable from the R2 CANBUS connector on the upper arm or on axis 4 housing 2 Mount the Tap 3 way connector to the connector R2 CANBUS and the 6 m cable from the Tap to the I O box 3 Reconnect the customer CANBUS cable to the Tap Note The terminating resisto...

Page 423: ...d the program on_board prg load program 6 Remove the calibration plate and cover on motor axis 6 7 Remove the cover axis 4 8 Attach the tool for calibration on axes 5 and 6 9 Remove the protective cap from the sensors on axes 1 4 10 Connect the cables from the box to the sensors on axes 1 6 see Figure 25 Connection with CANBUS During Onboard calibration will the robot or the axes that is going to ...

Page 424: ... Choose OK to confirm When a program is already loaded into the system but has not been saved and you wish to open another program a dialog box appears and you will be asked whether you want to save the old program or not 1 Remove the calibration plate and cover on motor axis 6 2 Remove the cover axis 4 3 Attach the tool for calibration on axes 5 and 6 4 Remove the protective cap from the sensors ...

Page 425: ...got large deviations from delivered calibration on some or all axes then the axes have to be course calibrated before program start use the calibrations plates to adjust the axes Do not recalibrate axes with correct calibration offset If a new update of the calibration offset has been done always make a course check of the new calibration offset by jogging the axis to the sync plates and read the ...

Page 426: ...elf If the default values are used Press the function key Yes and con tinue to Select All Axes or One by One If the default values not are used Press the function key No and con tinue to Load Values The default Load value is 100 kg and center of gravity values is x 0 y 353 mm z 353 mm Enter Load values Enter a value in kg and press the function key OK Enter a value for center of gravity choose a v...

Page 427: ...xes one by one continue to chapter Test the axes One by One The sensor positions for all axes are measured and displayed Press the function key continue to enter old sensor positions When calibrating the sensor positions at installation with customer load mounted note the sensor position values and after program finished the values are feed into the system parameters Press the Misc key Sellect the...

Page 428: ... function key Exit and the test is finished 1 123456 6 123456 3 123456 3 123456 9 123456 7 123456 6 123456 2 123456 3 123456 When the axes is to be tested one by one chose one axis see Select All Axes or One by One Select the axis to be measured Press the function key OK A window appear that says Robot starts moving only the axis to be measured will be moved to its sensor position Press the functi...

Page 429: ...alib Enter value Restart system Save the new calibration offset value on the parameter disk and write the value down on the lable The difference between old and new sensor pos is now displayed If you want to calculate the new cal offset value enter the old calibration offset value Press function key Yes or if you want to exit the calib program Press function key Exit 3 225679 2 113432 1 112247 The...

Page 430: ...ration status can be any of the following Synchronized All axes are calibrated and their positions are known The unit is ready for use Not updated Rev Counter All axes are fine calibrated but one or more of the axes has a counter that is NOT updated That axis or those axes must therefore be updated as described in Chapter 11 1 Setting the calibration marks on the manipulator Not calibrated One or ...

Page 431: ... window in Figure 31 appears Figure 31 The dialog box used to start the calibration 8 Start the calibration by pressing OK An alert box is displayed during calibration The Status window appears when the fine calibration is complete The revolution counters are always updated at the same time as the calibration is performed Calibration plate and calibration marks Incl All Cancel OK 1 6 Calibration R...

Page 432: ... the calibration position as described in Chapter 11 2 Checking the calibra tion position 11 Change to the new calibration offset on the label located The new calibra tion offset values can be found as follows Select the window SYSTEM PARAMETERS Types Motor Select axes in question Press Enter Note the Cal offset value 12 Save system parameters on a floppy disk axis number ...

Page 433: ...thout the con troller being connected It takes 36 hours operation to recharge the battery unit without any power interruptions If the resolver values must be calibrated this should be done as described in the chapter on Repairs in the IRB 6400 Product Manual WARNING Working in the robot work cell is dangerous Press the enabling device on the teach pendant and using the joystick move the robot manu...

Page 434: ...alib Rev Counter Update The window in Figure 35 appears Figure 35 The dialog box used to select axes whose revolution counter is to be updated 6 Press the function key All to select all axes if all axes are to be updated Other wise select the desired axis and press the function key Incl the selected axis is marked with an x Robot Unsynchronized File Edit View Calib 1 4 Service Calibration Mech Uni...

Page 435: ...orrectly updated it will cause incorrect position ing Thus check the calibration very carefully after each update Incorrect updating can damage the robot system or injure someone 9 Check the calibration as in Chapter 11 2 Checking the calibration position Figure 37 Calibration marks on the manipulator 10 Save system parameters on a floppy disk Cancel OK Rev Counter Updating Robot The Rev Counter f...

Page 436: ...ning axis by axis Using the joystick move the robot so that the read out of the positions is equal to zero Check that the calibration marks for each axis are at the same level see Figure 37 If they are not the setting of the revolution counters must be repeated 11 3 Alternative calibration positions Before it can be calibrated in one of the two alternative positions the robot must have been calibr...

Page 437: ...e new calibration offset on the label located on the frame to the left of motor axis 1 remove the cover between axes 2 and 3 The new calibration off set values can be found as follows Select the window SYSTEM PARAMETERS Types Motor Select axis 1 Press Enter Note the Cal offset value 5 Change to the new calibration position on axis 1 as follows Select the window SYSTEM PARAMETERS Topics Manipulator...

Page 438: ... Pinion Press 3HAC 4850 1 Dismount Pinion SKF Oil injector 226 270 SKF Nipple 101 82 19 Motors Gears Axes 4 6 Rem Pump 6369 901 286 Dismounting gear motor axis 4 SKF oil injector 226 270 Pressing tool gear on motor axis 4 6896 134 AC Pressing tool final gear 6896 134 AT AN Valve SKF 234 063 Hydraulic cylinder NIKE I CH 612 Holding tool tube shaft end 6896 134 BU Holding tool final gear 6896 134 FK...

Page 439: ... 134 GN Pressing tool 3HAC 5025 1 Lifting device Upper Arm 3HAC 1817 1 KM 12 Socket 3HAC 5347 1 Mouting tool Lower Arm 3HAC 5216 1 Demounting tool Lower Arm 3HAC 5302 1 Tightening tool 3HAB 1022 1 Mounting Demounting tool Parallel Bar 3HAC 5021 1 Mounting tool Roller Bearing Sealing Complete 3HAC 2246 1 Mounting tool Roller Bearing Sealing Front 3HAC 1893 1 Mounting tool Roller Bearing Sealing Bac...

Page 440: ...1 Measure pin 6896 0011 YN Calibration tool 3HAB 7477 1 Calibration tools axis 2 6 1 DynaCal equipment Calibration tool 3HAC 4083 1 Onboard calibration tools OnBoard Calib Set Complete 3HAC 6809 1 I O Box with sensors and sensor cables 3HAC 7006 1 Calibration tool for axis five and six 3HAC 6004 1 Documentation Onboard User s Guide 3HAC 8063 1 ...

Page 441: ...Special Tools List Repairs 80 Product Manual IRB 6400R ...

Page 442: ...omplete 13 2 7 Wrist Complete 15 2 8 Motor incl gearbox axis 6 17 2 9 Balancing Unit 18 2 10 Fan Axis 1 Complete 19 2 11 Position Switch Axis1 20 2 12 Position Switch Axes 2 21 2 13 Position Switch Axes 3 21 2 14 Signal Lamp 22 2 15 Forklift Set 22 2 16 Onboard Calibration 23 2 17 Process Media Conduit 23 2 18 Harness 24 3 Spare Part List Manipulator 25 3 1 Manipulator 25 3 2 Axis 1 3 Complete 25 ...

Page 443: ...Part List and Spare Parts Page 2 Product Manual IRB 6400R 4 6 Teach Pendant 32 4 7 Cables to Manipulator 33 4 8 I O Interfaces 35 4 9 Computers and Disk Drive 36 ...

Page 444: ...ed 1 1 IRB 6400R 2 5 120 Foldout 1 1 1 2 IRB 6400R 2 5 200 Foldout 1 1 1 3 IRB 6400R 2 8 150 Foldout 1 2 Item Qty Article No Name of Item Rem 1 1 3HAC 3599 1 Motor Axis 3 Item Qty Article No Name of Item Rem 2 1 3HAC 3602 1 Motor Axis 2 3 1 Upper arm complete 4 1 3HAC 4103 1 Balancing weight 309 kg Item Qty Article No Name of Item Rem 1 1 3HAC 5441 1 Arm extension set 2 1 3HAC 4327 1 Harness axis ...

Page 445: ...ty Article No Name of Item Rem 6 1 3HAC 3602 1 Motor Axis 2 4 1 Upper arm complete 7 1 3HAC 4129 1 Balancing weight 458 kg Item Qty Article No Name of Item Rem 8 1 3HAC 3599 1 Motor Axis 3 1 1 3HAC 3964 1 Arm Extension 2 1 3HAC 4327 1 Harness axis 5 680 3 1 3HAC 4328 1 Harness axis 6 1340 4 1 3HAC 4103 1 Balancing weight 309 kg ...

Page 446: ...no 4 2 3HAC 4219 1 Balance unit type B Spare part no 5 1 3HAC 3902 1 Balancing weight 154 kg Spare part no 5 1 3HAC 4103 1 Balancing weight 309 kg Spare part no 5 1 3HAC 4129 1 Balancing weight 458 kg Spare part no 6 1 3HAC 4724 1 Labels and plate set 7 1 3HAC 4807 1 Cover axis 4 8 1 3HAB 7070 1 Cover Spare part no 9 1 3HAC 4349 1 Cover 10 2 3HAA 1001 164 Protective plate 11 30 3HAB 3537 1 Bearing...

Page 447: ... 4804 1 Signal Lamp 118 1 3HAC 4702 1 Pos SW ax1 compl 1 funct 118 1 3HAC 4702 3 Pos SW ax1 compl 3 funct 118 1 3HAC 4702 2 Pos SW ax1 compl 2 funct 119 1 3HAC 4716 1 Pos SW ax 2 compl 120 1 3HAC 4723 1 Pos SW ax 3 compl 121 1 3HAC 4811 1 Fan axis 1 compl 122 1 3HAC 4813 1 Cover push button guard 123 1 3HAC 6360 1 Onboard calibration 200 2 3HAC 4545 1 Shaft 201 2 9ADA 205 75 Set screw cup point M1...

Page 448: ...eguide 252 1 3HAC 4757 1 Cableguide 253 8 9ADA 629 56 Torx pan head roll screw M6x16 254 5 9ADA 312 6 Plain washer 6 4x12x1 6 260 2 9ADA 624 56 Torx counters head screw M6x16 261 12 9ADA 629 56 Torx pan head roll screw M6x16 262 4 9ADA 629 55 Torx pan head roll screw M6x16 263 2 9ADA 629 55 Torx pan head roll screw M6x16 264 2 9ADA 629 55 Torx pan head roll screw M6x16 265 4 9ADA 629 55 Torx pan h...

Page 449: ...ed energy 2 4 3HAC 4431 1 Warning label High temp 3 2 3HAC 4517 1 Warning label Risk of squeezing 4 1 3HAC 4591 1 Instruction label Safety provisions 7 1 3HAC 5089 1 ABB logotype Logotype 9 3 3HAC 5127 1 ABB logotype Logotype 12 1 3HAC 6029 1 Warning label Brake release 14 1 3HAC 4725 1 Instruction label Lifting of robot 15 2 3HAC 5020 1 Warning label Risk of tipping 16 5 3HAC 1589 1 Warning sign ...

Page 450: ...1 Mech stop ax 1 9 1 3HAC 3491 1 Harness manipulator 10 1 3HAC 4532 1 Harness protecting cap 11 1 3HAC 4553 1 Cover harness cap axis 1 12 32 3HAB 3409 86 Hex socket head cap screw M16x60 13 32 3HAA 1001 186 WASHER 14 1 3HAC 4241 1 Connector plate complete 15 1 3HAC 4680 1 Cover R1 Spare part no 16 1 3HAC 4621 1 SMB and battery unit 17 1 3HAC 4605 1 Cover unit SMB Spare part no 30 1 3HAC 4810 4 Syn...

Page 451: ...A 183 108 Hex socket head cap screw M20x90 102 1 3HAC 3668 1 Compression spring 103 1 3HAC 3669 1 Washer 104 12 9ADA 183 50 Hex socket head cap screw M10x25 105 12 9ADA 312 8 Plain washer 10 5x20x2 106 15 3HAB 7116 1 Adhesive 108 1 3HAC 4670 1 Hose clamp 120 140mm 109 10 9ADA 618 32 Torx pan head screw M4x8 110 10 9ADA 312 4 Plain washer 4 3x9x0 8 Item Qty Article No Name of Item Dimensions Rem ...

Page 452: ...ower arm Spare part no 2 1 3HAC 3898 1 Parallel arm 3 1 3HAB 4169 1 Sealed spherical bearing 4 1 3HAC 4310 1 Sealed spherical bearing 5 2 3HAC 4444 1 Damper 6 2 3HAC 4442 1 Damper axis 2 7 2 3HAC 4443 1 Damper axis 3 8 10 9ADA 629 56 Torx pan head roll screw M6x16 10 1 1269 0014 429 Locking liquid 11 1 3HAC 4435 1 Spacing sleeve 12 1 3HAC 4458 1 Spacing sleeve 13 10 3HAB 3537 1 Bearing grease ...

Page 453: ... 3 104 1 9ABA 142 92 Spring pin slotted 10x30 3 105 2 3HAA 1001 297 Friction Washer 3 1 1 3HAC 3963 1 Arm extension 345 Spare part no 3 2 1 3HAC 3964 1 Arm extension 550 Spare part no 4 1 3HAC 3492 1 Harness axis 5 4 1 3HAC 4327 1 Harness axis 5 680 5 1 3HAC 3493 1 Harness axis 6 790 5 1 3HAC 4328 1 Harness axis 6 1340 6 8 3HAB 7700 69 Hex socket head cap screw M12x50 7 8 3HAA 1001 134 Washer 8 1 ...

Page 454: ...215x4 8 1 3HAB 4317 1 SEALING 9 1 3HAA 1001 628 Sealing 10 1 2216 261 18 Sealing 170x200x15 11 1 3HAA 1001 24 Gear 11 1 3HAB 8460 1 Gear Z4 4 12 1 3HAB 8508 1 Spacer 13 1 3HAC 4209 1 Interm wheel unit Z2 3 4 14 3 3HAB 3409 62 Hex socket head cap screw M10X100 15 3 2154 2033 10 Spring washer 10 5x23x2 5 16 3 2122 2011 465 Studs M8X70 17 3 3HAA 1001 99 Wedge 18 3 9ADA 267 7 Hexagon nut M8 19 8 9ADA ...

Page 455: ...te with nonie 35 4 9ADA 629 32 Torx pan head roll screw M4x8 36 4 9ADA 312 4 Plain washer 4 3x9x0 8 37 600 0 1171 2016 604 Lubricating oil 38 2 2522 726 3 Protective hood D 7 6 9 3 39 1 1269 0014 429 Locking liquid 40 1 1269 0014 407 Locking liquid 41 30 3HAB 3537 1 Bearing grease 42 1 3HAB 3772 27 O ring 170x5 43 12 2154 2033 9 Spring washer 8 4x18x2 44 1 3HAC 3242 4 Fixing plate axis 3 45 4 9ADA...

Page 456: ...et unit Z1 2 3 5 6 4 3HAB 3409 53 Hex socket head cap screw M10x25 7 1 3HAA 0001 AE Set of Shims 8 1 3HAB 4335 1 Set of shims 10 1 3HAA 2167 15 Spherical roller bearing D 52 25 B 18 11 1 3HAA 1001 132 Deep Groove Ball Bearing 12 1 3HAB 4333 1 Shaft 13 6 9ADA 183 38 Hex socket head cap screw M8x30 14 1 3HAB 7299 1 SEALING Di 115 Dy 140 B 12 16 1 2158 0399 4 End lid D 120 17 8 3HAA 1001 106 Washer 1...

Page 457: ...2x70 34 1 3HAC 4085 1 Gear unit Z6 5 35 2 9ADA 312 4 Plain washer 4 3x9x0 8 36 11 2154 2022 4 Spring washer 6 4x12x0 5 37 1 3HAC 4084 1 Interm Wheel Unit Z4 5 5 38 1 3HAB 4384 1 Cover axis 5 anodized Spare Part no 38 1 3HAB 9326 1 Cover anodized Spare Part no 39 1 1269 0014 429 Locking liquid 40 1 1269 0014 413 Locking liquid 41 6 1171 2016 604 Lubricating oil 41 6 5 1171 2016 604 Lubricating oil ...

Page 458: ...151 99x3 53 3 1 3HAB 5593 1 Reduction gear RV 30E 81 3 1 3HAC 4594 1 Reduction gear RV 30E 81 4 8 3HAB 3409 40 Hex socket head cap screw M8x40 5 1 9ADA 183 21 Hex socket head cap screw M5x50 6 8 3HAA 1001 172 Washer 7 1 2522 122 1 Magnetic plug R1 4 8 1 2152 0441 1 Washer 13 5x18x1 5 9 1 3HAA 1001 77 Sync plate axis 5 10 1 3HAA 1001 78 Sync plate axis 6 11 1 3HAA 1001 174 Sync plate 12 4 9ADA 629 ...

Page 459: ... attachment 2 1 3HAC 3574 1 Piston 3 1 3HAC 3565 1 Flange 4 1 3HAC 3611 1 Compression spring A B 5 1 3HAC 3883 1 Compression spring innerB 6 1 3HAC 3476 1 Guiding ring 7 1 3HAC 3532 1 Lining 8 2 3HAC 3311 1 Adjust Needle Bearing 9 4 3HAC 3567 1 Protective hood 10 1 3HAC 3530 1 Circlip 11 1 3HAC 3614 1 Marking plate B 12 2 2522 2101 5 Protection hood D 9 2 10 8 13 1 9ADA 618 55 Torx pan head screw ...

Page 460: ...t List 2 14 Item Qty Article No Name of Item Dimension Rem 1 1 3HAC 4106 1 Radial fan 2 1 3HAC 5213 1 Holder 3 1 3HAC 5180 1 Housing 4 7 9ADA 629 56 Torx pan head roll screw M6x16 5 3 9ADA 629 59 Torx pan head roll screw M6x30 6 1 3HAA 1001 607 GASKET 7 1 3HAC 6255 1 Fan cable 8 2 2166 2055 3 Cable straps outdoors 4 8x208 ...

Page 461: ...706 1 Pos SW 3 functions 2 1 3HAC 5183 1 Rail axis 1 entrance 3 1 3HAC 5184 1 Rail axis 1 4 1 3HAC 5414 1 Cam kit ax1 1 5 6 3HAC 4735 1 Rail bracket axis 1 6 1 3HAC 4766 1 Connector bracket R1 SW1 7 4 3HAC 4798 1 Tension pin 8 26 9ADA 618 56 Torx pan head screw M6x16 9 1 3HAC 5437 1 Mitre box 30deg 10 1 3HAC 5439 1 Cable bracket R1 SW1 11 2 3HAC 4839 1 Protection sheet axis 1 12 1 9ADA 183 81 Hex ...

Page 462: ... 1 3HAC 5185 1 Rail axis 2 5 2 3HAC 4398 1 Bracket 6 4 9ADA 618 56 Torx pan head screw M6x16 7 4 9ADA 618 57 Torx pan head screw M6x20 8 4 9ADA 618 65 Torx pan head screw M6x60 9 1 3HAC 5437 1 Mitre box 30deg Article No Name Foldout No 3HAC 4723 1 Part List 2 17 Item Qty Article No Name of Item Dimension Rem 1 1 3HAC 5436 1 Pos SW 1 functions axis 3 2 1 3HAC 5186 1 Rail axis 3 3 1 3HAC 5423 1 Cam ...

Page 463: ...72 2 Cable gland tabular dr Pg7 Pr12 5 4 0 7 0 6 1 3HAC 4772 3 Cable gland tabular dr Pg9 Pr15 2 4 0 6 0 7 2 5217 649 87 Connector 8 2 5217 649 70 Pin 0 5 0 75 mm2 9 1100 3HAC 3198 1 Cable 3 x AWG20 10 2 9ADA 629 56 Torx pan head roll screw M6x16 11 2 2166 2055 3 Cable straps outdoors 4 8x208 Article No Name Foldout No 3HAC 4765 1 Part List 2 1 Item Qty Article No Name of Item Dimension Rem 100 2 ...

Page 464: ...C 6018 10 Part List 2 21 Item Qty Article No Name of Item Dimension Rem 1 1 3HAC 6018 1 Lower process media guide 2 1 3HAC 6018 8 Attachment p media guide 3 1 3HAC 6018 9 Attachment p media guide 4 18 9ADA 629 56 Torx pan head roll screw M16x16 5 8 9ADA 312 6 Plain washer 6 4x12x1 6 6 4 3HAC 6018 13 Spacer 7 1 3HAC 6018 2 Upper process media guide 8 2 3HAC 6018 3 Attachment profile 9 1 3HAC 6018 1...

Page 465: ...guide 22 4400 m m 3HAC 5320 1 Protection hose Di 67mm Dy 80mm 23 2 s t 9ADA 183 49 Hex socket head cap screw M10x20 24 5 s t 3HAC 4127 8 Counters hex head screw M8x25 25 2 s t 3HAC 4738 1 Welding Cable Clamp Item Qty Article No Name of Item Dimension Rem 4 1 3HAC 3492 1 Harness axis 5 4 1 3HAC 4327 1 Harness axis 5 680 5 1 3HAC 3493 1 Harness axis 6 790 5 1 3HAC 4328 1 Harness axis 6 1340 9 1 3HAC...

Page 466: ...7 1 3HAC5089 1 Screw pos 240 and pos 241 3HAC 7019 1 Balancing Weight 309 kg 3HAC 4103 1 Painted Labels 3HAC 4517 1 3HAC5089 1 Screw pos 240 and pos 241 3HAC 7020 1 Balancing Weight 458 kg 3HAC 4129 1 Painted Labels 3HAC 4517 1 3HAC5089 1 Screw pos 240 and pos 241 3HAC 7021 1 Item Number Actions and Supplements Spare P Number Gear Box 3HAC 4367 1 Painted 3HAC 7149 1 Gear Box 3HAC 4367 1 Sealings V...

Page 467: ...nion 3HAC 4520 1 3HAC 6936 1 Motor Ax 4 200 kg 3HAC 4070 1 Painted Labels Motor 3HAC 3606 1 Pinion 3HAC 8418 1 3HAC 6937 1 Axis 4 Housing 3HAC 3938 1 Painted Axis 4 Housing 3HAC 4399 1 Painted 3HAC 7126 1 Cover Axis 4 3HAC 4807 1 Painted pos 253 and pos 254 3HAC 7015 1 Upper Arm 3HAC3774 1 Painted Arm Extender 345 3HAC 3963 1 Painted pos 102 105 3HAC 7134 1 Arm Extender 550 3HAC 3964 1 Painted pos...

Page 468: ... 5927 1 3HAC 6942 1 Motor Axis 6 Pinion 200 kg Insulated Painted Motor 3HAC 3610 1 3HAC 5928 1 3HAC 6943 1 Motor Axis 6 3HAC 3609 1 Painted 3HAC 7156 1 Motor Axis 6 3HAC 3610 1 Painted 3HAC 7157 1 Cover Axis 5 100 150 kg 3HAB 4384 1 Painted Label 3HAC 5127 1 3HAC 7016 1 Cover 200 kg 3HAB 9326 1 Painted Label 3HAC 5127 1 3HAC 7017 1 Item Number Actions and Supplements Spare P Number Cover 3HAB 7070...

Page 469: ...e No Name 3HAC 3803 1 Part List Item Qty Article No Name of Item Rem 2 1 3HAC 0927 2 Air filter clips Article No Name 3HAC 3011 1 Part List Item Qty Article No Name of Item Rem 5 1 3HNM 00032 1 Holder for Teach Pendant 6 1 3HAB 2480 1 Floppy Disc Drive 9 1 3HAB 7215 1 Panel board set DSQC 331 11 1 3HAC 6647 1 Duty time counter ...

Page 470: ...tranparent 5 1 5911 069 10 Filament lamp Article No Name 3HAC 2355 1 Part List Item Qty Article No Name of Item Rem 1 1 3HAC 2349 1 Filament lamp 7 1 3HAB 5171 1 Emergency stop 9 1 SK 616 003 A Lamp block 10 2 SK 616 001 A Contact block 16 1 3HAB 5171 1 Emergency pushbutton Article No Name 3HAC 3132 1 Part List Item Qty Article No Name of Item Rem 1 1 3HAC 3116 1 Cam Switch ...

Page 471: ...1 3HAC 3577 1 Circuit breaker Article No Name 3HAC 2834 1 Part List Item Qty Article No Name of Item Rem 1 1 3HAB 5142 1 3 phase main switch 10 1 3HAB 8037 1 Door Interlock Article No Name 3HAC 4803 1 Part List Item Qty Article No Name of Item Rem 2 3 3HAC 4802 1 Fuse Article No Name 3HAC 0831 1 Part List Item Qty Article No Name of Item Rem 1 1 3HAB 2017 7 Miniature circuit breaker ...

Page 472: ...f Item Rem 2 1 3HAB 8101 1 Modules Drive System DSQC 346U Article No Name 3HAC 4815 1 Part List Item Qty Article No Name of Item Rem 2 1 3HAB 8101 14 Modules Drive System DSQC 345E 9 1 3HAB 7362 1 Fan unit 1 3HAB 7311 1 Fan Article No Name 3HAC 3873 1 Part List Item Qty Article No Name of Item Rem 1 1 3HAB 4951 1 Transformer unit T5 T5 200 440V 1 1 3HAC 3876 1 Transformer unit T5 T5 400 500V 1 1 3...

Page 473: ...1 Part List Item Qty Article No Name of Item Rem 1 1 3HAB 1475 1 Mains line filter IRB 4400 64XX Article No Name 3HAC 7067 1 Part List Item Qty Article No Name of Item Rem 1 1 3HAB 7067 1 Electronic Time Relay Article No Name 3HAC 3901 1 Part List Item Qty Article No Name of Item Rem 1 1 3HNE 00313 1 Prog Unit W Backlight 2 1 3HNE 00133 1 Extension Cable for TPU 10 m 1 3HNE 00188 1 Teach pendant c...

Page 474: ...art List Item Qty Article No Name of Item Rem 1 1 3HAC 4417 4 Control cable power L 15 m 2 1 3HAC 2530 1 Control cable signal L 15 m Article No Name 3HAC 4936 1 Part List Item Qty Article No Name of Item Rem 1 1 3HAC 5548 2 Control cable power L 15 m Braided 2 1 3HAC 3345 1 Control cable signal L 15 m Braided Article No Name 3HAC 4937 1 Part List Item Qty Article No Name of Item Rem 1 1 3HAC 4417 ...

Page 475: ...ontrol cable power L 7 m Braided 2 1 3HAC 3344 1 Control cable signal L 7 m Braided Article No Name 3HAC 3836 1 Part List Item Qty Article No Name of Item Rem 1 1 3HAC 3379 1 Pos switch cable L 15 m 1 1 3HAC 3380 1 Pos switch cable L 22 m 1 1 3HAC 3381 1 Pos switch cable L 30 m 1 1 3HAC 3378 1 Pos switch cable L 7 m 3 1 3HAC 4948 2 Pos switch cable Axes2 3 L 15 m 3 1 3HAC 4948 3 Pos switch cable A...

Page 476: ...icle No Name 3HAC 4048 1 Part List Item Qty Article No Name of Item Rem 1 3HAC 9742 1 Dig 24VDC I O Modul DSQC 328 2 3HAC 1512 1 Analog I O Unit 3 3HAC 9741 1 A D Combi I O Modul DSQC 327 4 3HAB 9746 1 Dig 120VAC I O Unit DSQC 320 5 3HAB 9745 1 Dig with relays I O Unit DSQC 332 Article No Name 3HAC 4104 1 Part List Item Qty Article No Name of Item Rem 1 1 3HAC 0070 1 RIO Unit 2 3HAC 1495 1 Interbu...

Page 477: ...tem Qty Article No Name of Item Rem 2 1 3HAB 5957 1 Memory Expansion DSQC 324 16 MB 2 1 3HAB 5956 1 Memory Expansion DSQC 323 8 MB Article No Name 3HAC 4664 1 Part List Item Qty Article No Name of Item Rem 1 1 3HNE 00001 1 Circuit board NIOC DSQC 336 Article No Name 3HAC 4568 1 Part List Item Qty Article No Name of Item Rem 2 1 3HAC 2424 1 BackPlane DSQC 369 14 1 3HAC 1620 1 Power supply DSQC 365 ...

Page 478: ...st and Spare Parts Product Manual IRB 6400R 37 Article No Name 3HAC 4568 1 Part List Item Qty Article No Name of Item Rem 1 3HAC 6478 1 Floppy disk cable DSQC 369 14 1 3HAC 7239 3 1 Cover with cooler DSQC 365 ...

Page 479: ...Part List and Spare Parts Product Manual IRB 6400R 38 ...

Page 480: ...Part List and Spare Parts Product Manual IRB 6400R 39 ...

Page 481: ...Part List and Spare Parts Product Manual IRB 6400R 40 ...

Reviews: