4 Repair
4.3.5. Replacement of complete arm system
233
3HAC020993-001 Revision: G
©
Co
py
rig
h
t 200
4-
200
8 ABB. All righ
ts reser
v
ed.
Refitting, arm system
The procedure below details how to lift and refit the complete arm system.
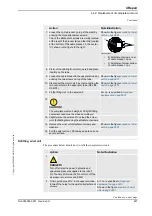
3. Drain the oil from gearbox axis 1.
Detailed in section
4. Loosen the cable connectors from the base
and pull up the cabling from the base,
through the hole in the center of the frame.
5. Remove the motor, axis 1.
Detailed in section
6. Run the overhead crane to a position above
the robot.
7. Fit the
lifting device
and adjust it as detailed
in the enclosed
instructions
.
Art. no. is specified in
Make sure the lift is done completely level!
How to adjust the lift is described in the
enclosed instruction to the lifting device!
Follow the instructions before lifting!
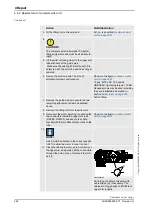
8. Remove the
block for calibration
from the
bottom of the frame.
Shown in the figure
9. Unfasten the arm system from the base by
unscrewing its 24
attachment screws.
Shown in the figure
10. Fit the two
guide pins
in two opposite screw
holes.
11.
CAUTION!
The complete arm system weighs 1250 kg!
All lifting equipment used must be sized
accordingly!
12. Lift the arm system carefully and secure it
in a safe area.
Always move the robot at very low speeds,
making sure it does not tip.
Continue lifting even if the arm system turns
out to be unbalanced despite earlier adjust-
ments! The risk of damaging the interfaces
is bigger if the load is lowered unbalanced!
Make sure all hooks and attachments stay
in the correct position while lifting the arm
system and that the lifting device does not
wear against sharp edges.
Action
Note/Illustration
Action
Note/Illustration
1.
DANGER!
Turn off all electric power, hydraulic and
pneumatic pressure supplies to the robot!
For Foundry Prime robots: Do not turn off the
air pressure to motors and SMB.
Continued
Continues on next page


