Note
Action
xx1400000208
If used, open the DressPack axis-6 cable
support and remove the DressPack cable
package from the process turning disk.
Note
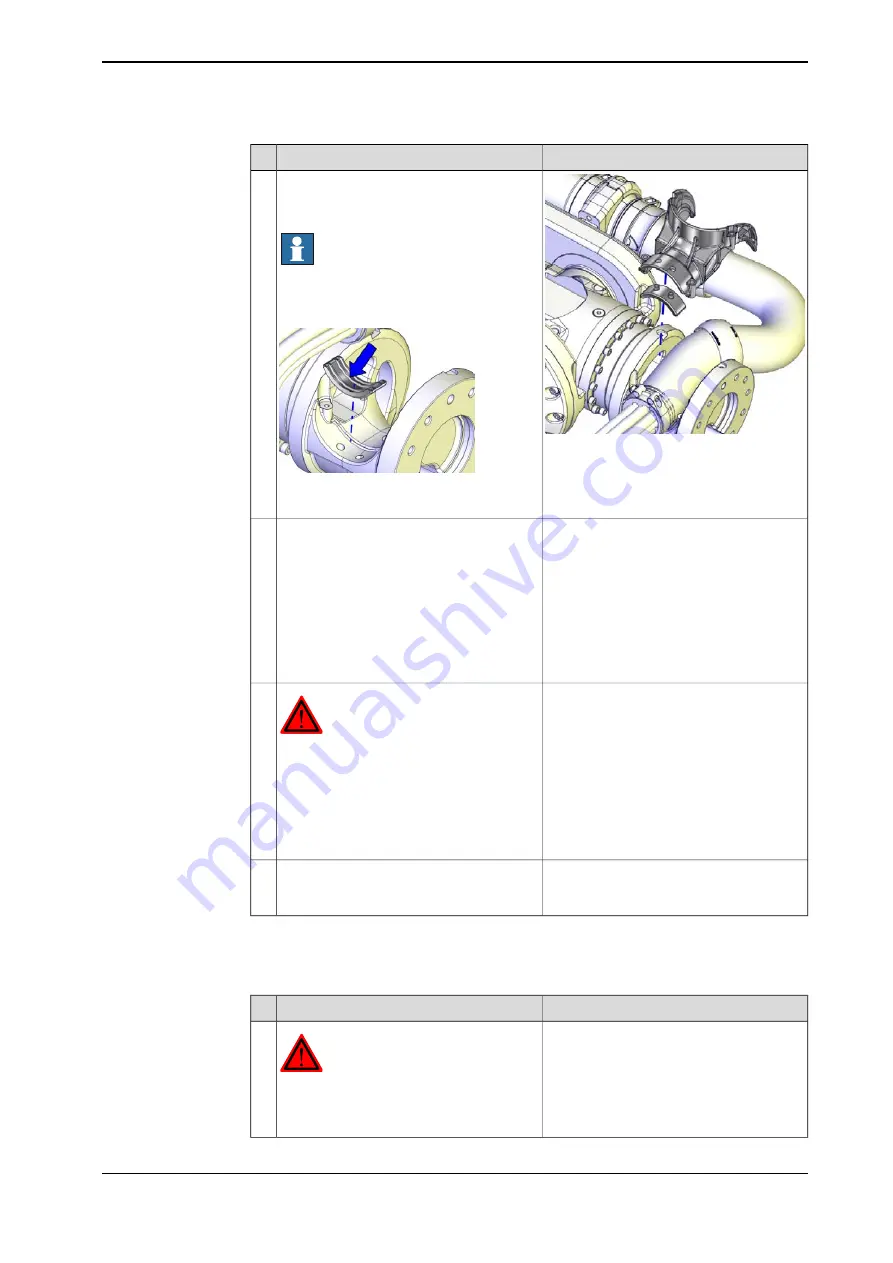
Use caution not to lose the two clamp jaws
on either side of the DressPack cable
package.
xx1400000223
3
Clamp jaw
Jog the robot into position:
•
Axis 1: no significance (as long as
the robot is secured to the founda-
tion)
•
Axis 2: -60°
•
Axis 3: +60°
•
Axis 4: +90°
•
Axis 5: +90°
•
Axis 6: no significance
4
DANGER
Turn off all:
•
electric power supply
•
hydraulic pressure supply
•
air pressure supply
to the robot, before entering the robot
working area.
5
Prepare a pallet with cardboard in front of
the robot or where it is possible, to be used
for putting down the wrist unit on.
6
Retrieving access to the wrist cabling
Use this procedure to remove the wrist cover to retrieve access to the axis-5 and
axis-6 motor cables.
Note
Action
DANGER
Make sure that all supplies for electrical
power, hydraulic pressure, and air pressure
are turned off.
1
Continues on next page
Product manual - IRB 6700
343
3HAC044266-001 Revision: N
© Copyright 2013 - 2018 ABB. All rights reserved.
4 Repair
4.5.2 Replacing the wrist
Continued
Summary of Contents for IRB 6700 Series
Page 1: ...ROBOTICS Product manual IRB 6700 ...
Page 46: ...This page is intentionally left blank ...
Page 110: ...This page is intentionally left blank ...
Page 786: ...This page is intentionally left blank ...
Page 812: ...This page is intentionally left blank ...
Page 836: ...This page is intentionally left blank ...
Page 838: ...This page is intentionally left blank ...
Page 845: ......


