Note
Action
Make sure that the cover is tightly sealed.
7
Connecting the axis-6 motor cables - Step 1
Note
Since this procedure requires the axis-5 to be put in -90° position, the connecting
and refitting of the axis-6 motor cables must be done in two steps. This procedure
describes the first of these steps.
Note
Action
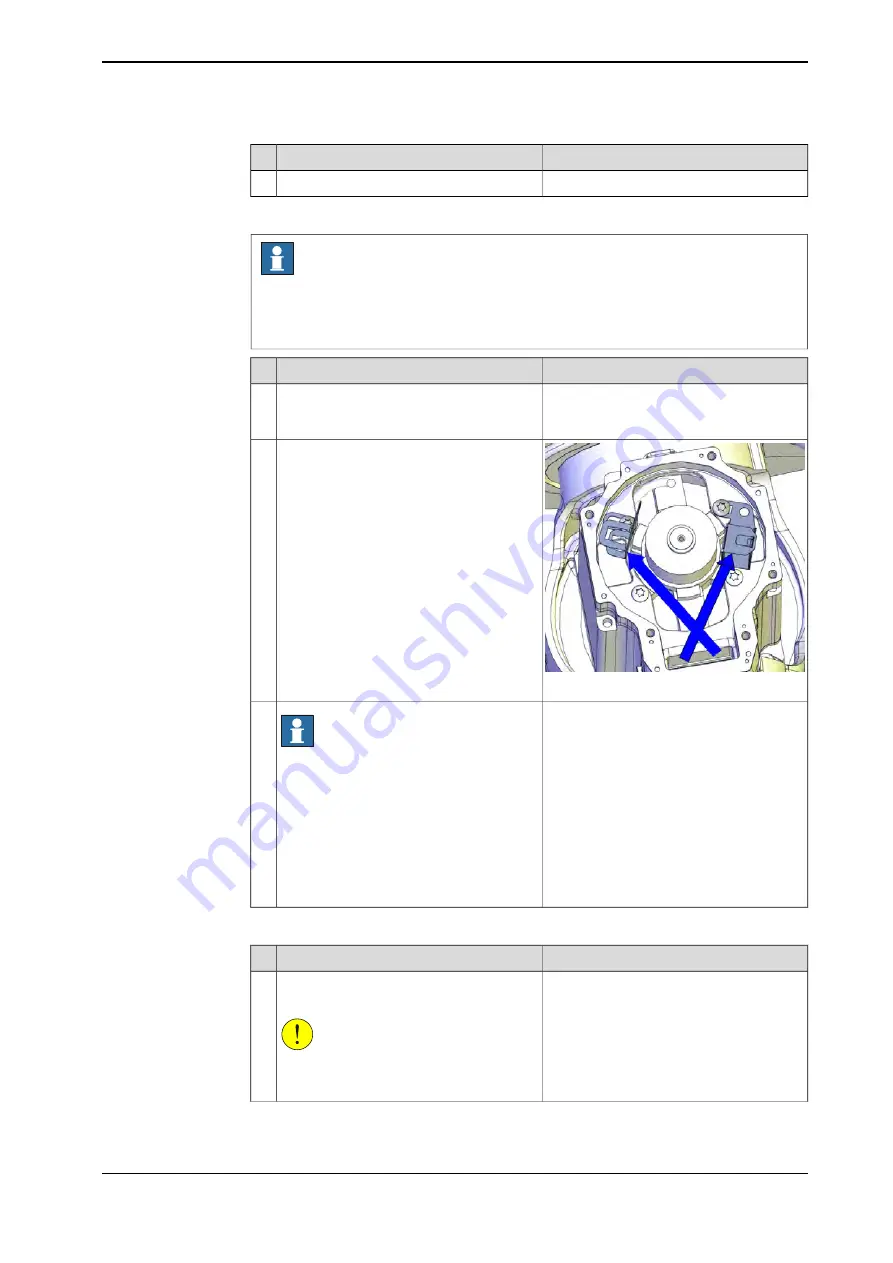
With axis-5 in -90° position, use caution
and temporarily connect the axis-6 motor
cables outside the motor.
1
xx1300000488
Reconnect the connectors to the axis-6
motor.
2
Note
Do not refit anything else of the axis-6 mo-
tor cables at this point. The remaining refit-
ting must wait until the axis-5 has been
moved into +90° position.
Axis-5 must be in +90° position when the
carrier and cable bracket are refitted. If not,
the spiral of the cable harness will be in the
wrong position and it will be damaged when
axis-5 is moving.
3
Robot position when refitting the axis-6 motor cables
Note
Action
Turn on the power, use caution and jog
axis-5 slowly to +90° position.
CAUTION
Make sure not to touch or damage any of
the axis-6 motor cables.
1
Continues on next page
Product manual - IRB 8700
503
3HAC052853-001 Revision: F
© Copyright 2015-2018 ABB. All rights reserved.
4 Repair
4.5.7 Replacing the parallel arm
Continued
Summary of Contents for IRB 8700 Series
Page 1: ...ROBOTICS Product manual IRB 8700...
Page 16: ...This page is intentionally left blank...
Page 824: ...This page is intentionally left blank...
Page 838: ...This page is intentionally left blank...
Page 840: ...This page is intentionally left blank...
Page 846: ......
Page 847: ......


