OI-LLT100-EN Rev. D |
User Guide
41
13 Troubleshooting and service
13.1 Identifying the problem
If the LLT100 is malfunctioning in any way, the LCD displays
specific error messages destined to help you identify and
solve the problem.
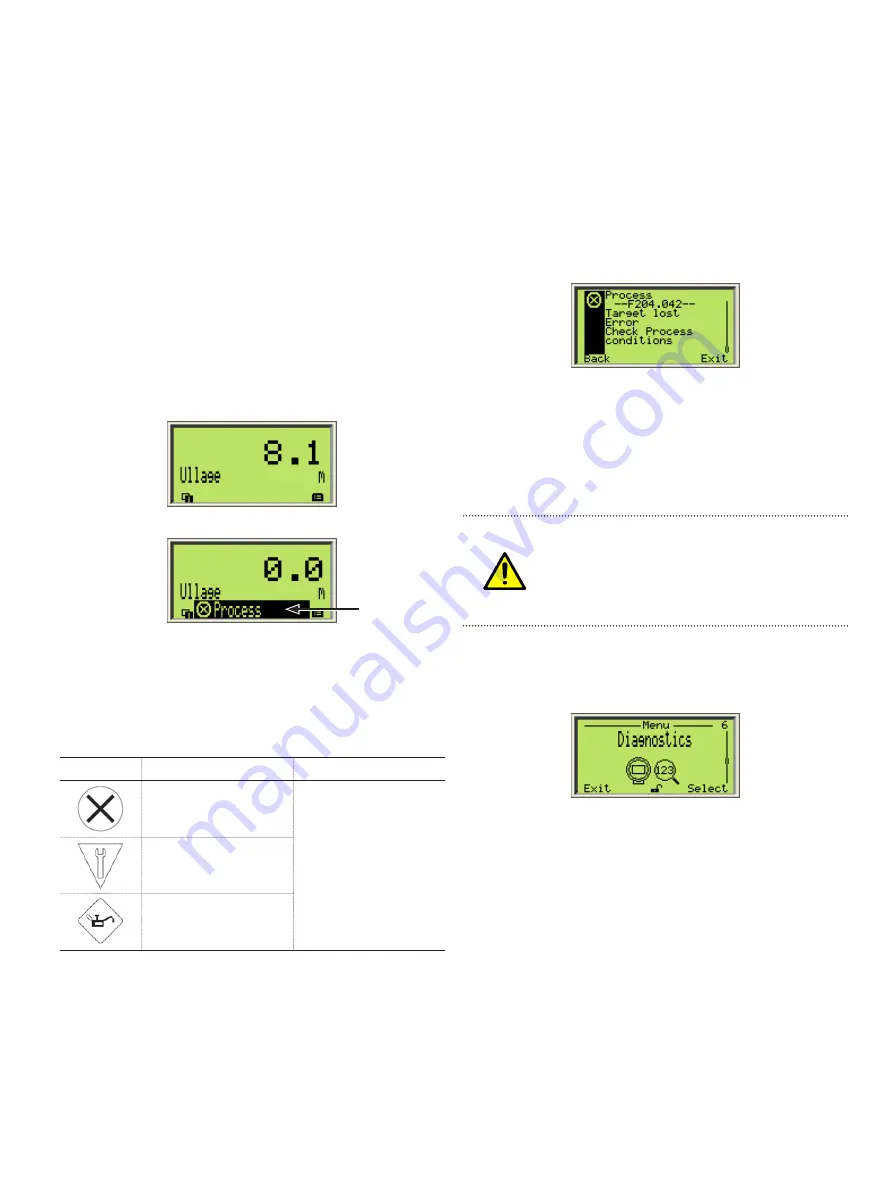
When an error happens, a message consisting of an icon and
text appears at the bottom of the LCD.
Figure 32
LCD before and during an error
This short message gives you a quick indication of the nature
of the problem at hand. The error text beside the icon provides
information about the potential location of the error.
The following table gives you a quick way to identify the basic
problem.
Icon
Description
Error text
Error/Failure
Electronic
Transmitter
Configuration
Operation
Process
Functional check
(e.g. during simulation)
Maintenance required
To obtain more information about the currently diagnosed
error, you need to access the
Diagnostics
operator menu.
To do so:
1. Press the Left arrow key to access
Operator
menus.
2. Press
Select
to access the
Diagnostics
screen, where you
gain access to a more complete error description and some
help text.
In the error description, the error number is displayed in the
second line (for example:
F204.042
). The next two lines are
used to describe the error.
The two last digits of the error number correspond to the
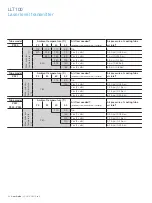
error code described in Table 4 on page 45. In the example
above,
F204.042
, “42” refers to the target lost error, as also
indicated by the error message.
WARNING Permanent Namur Process Error
When “
F204.042 – Target Lost Error
” is
permanently
displayed on the LCD, a safety inspection of the sensor
must be performed without delay. This error may
announce failure of the primary process seal.
Please contact ABB for service.
13.2 Configuring diagnostic tools
Most troubleshooting data available is configured from the
Diagnostics
configuration menu.
13.3 Accessing diagnostic history
The LLT100 keeps historical records of the various diagnostic
incidents. To access these records, select
History >
Diagnostic History
from the
Diagnostics
menu.
A series of diagnostic records becomes available on screen,
where you can scroll through them.
13.3.1 Erasing diagnostic history
When the list of diagnostic records becomes too long, you can
clear that history:
To do so:
1. From the
Diagnostics
menu, select
History > Clear Diag
History
.
2. From the
Clear Diag History
menu, press
OK
.
All the diagnostic history is deleted.
During
Error text
and icon
Before
Summary of Contents for LLT100
Page 8: ...This page intentionally left blank ...
Page 10: ...This page intentionally left blank ...
Page 18: ...This page intentionally left blank ...
Page 22: ...This page intentionally left blank ...
Page 26: ...This page intentionally left blank ...
Page 44: ...This page intentionally left blank ...
Page 50: ...This page intentionally left blank ...
Page 66: ...This page intentionally left blank ...
Page 67: ......


