40
PositionMaster EDP300
DIGITAL POSITIONER | CI/EDP300-EN REV. D
… 8 Operation
… Parameterization of the device
Start automatic adjustment
The Auto Adjust function of the device can be configured and
started in the ‘Operating mode’ menu.
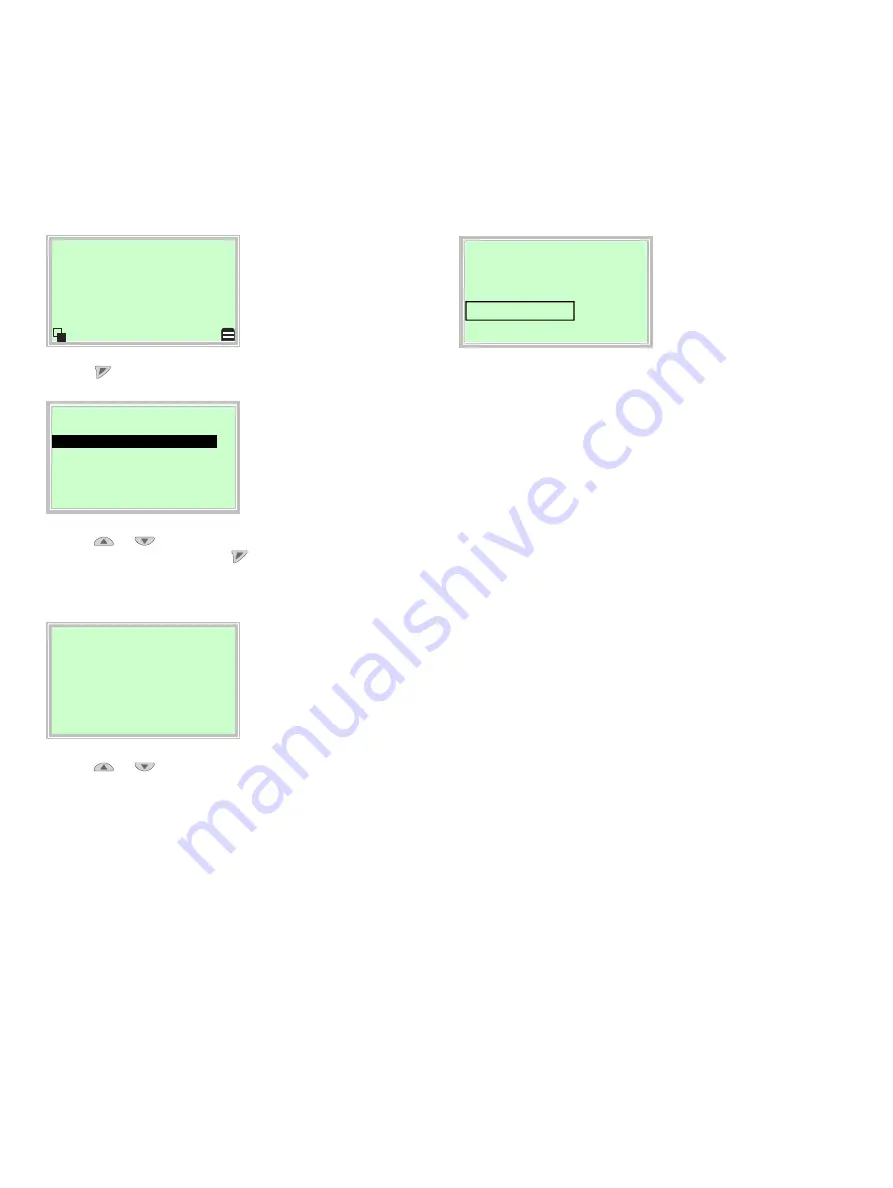
Process display
1. Use
to switch to the Operating Mode menu.
Operating mode
Auto
Adjust
O
Adaptive
O
Control
O
Manual SP
O
Manual Sensor
Back
OK
2. Use
or
to select the ‘Adaptive’ operating mode.
3.
Confirm the selection with
. Press and hold down the
control button for at least 4 seconds (wait for the time to
count down on the top left of the display).
Auto Adjust
Full Auto Adjust
Rotary
Linear
Exit
4. Use
or
to select ‘Actuator type’.
Select ‘Rotary’ for rotary actuators.
Select ‘Linear’ for linear actuators.
Note
The ‘Autoadjust Mode’ can be preset at the configuration level in
‘... / Easy Setup / Autoadjust Mode’.
Auto Adjust
Full Auto Adjust
Exhaust
Abort
The progress of the Auto Adjust function is shown in a bar
graph. The function can be terminated with ‘Abort’ if necessary.
Once Auto Adjust has been completed successfully, ‘Auto Adjust
Complete’ is displayed. The device then switches to the process
display automatically.
Note
Auto Adjust does not always result in optimum control
conditions.
When Auto Adjust is started via shortcut keys, the position of
the valve is determined automatically.
Summary of Contents for PositionMaster EDP300
Page 45: ...PositionMaster EDP300 DIGITAL POSITIONER CI EDP300 EN REV D 45...
Page 47: ...PositionMaster EDP300 DIGITAL POSITIONER CI EDP300 EN REV D 47...
Page 49: ...PositionMaster EDP300 DIGITAL POSITIONER CI EDP300 EN REV D 49...
Page 51: ...PositionMaster EDP300 DIGITAL POSITIONER CI EDP300 EN REV D 51 Note...


