I.L. 40-386.3
(10/94)
5-11
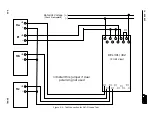
This test is to verify the dual polarizing or fourth current transformer input (Ip). For a
dual polarizing ground directional unit test, connect the test circuit shown in Figure
5-7. Apply I
P
= 1.0A
∠
-90
°
to terminals 13 (+) and 12 (-), and apply a balanced 3-phase
voltage (V
a
= V
b
= V
c
= 70 Vac). Apply If = 4A to terminals 15 (+) and 15 (-) The relay
should trip at the following angles to the system under test. Observe tripping at all of
the following angles of I
P
:
• All angles between -3
°
and -177
°
• Or -90
° ±
87
°
, where -90
°
could be referred to as the maximum torque angle
When the relay trips, remove the fault current. OTHER and AG LEDs will light. The
LCD display will indicate the fault distance. Using the RAISE and LOWER push-but-
tons the complete fault record can be reviewed.
See Table 4-3 for a description of the
displayed fault data.
The significant quantities to review are:
Fault Type – “FLT Type” “AG”
Targets – “GB Trip” “Yes”
Fault Voltages (VA, VB, VC, 3V0) and Currents (IA, IB, IC, IP)
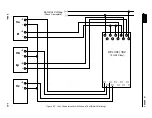
Using the same test connection, as above, the system
should not trip
at any of the fol-
lowing angles of I
P
:
• All angles between -3
°
and -177
°
• Or +90
° ±
87
°
, where +90
°
could be referred to as the zero torque angle
5.1.7
Output Contact and Input Circuit Verification Test
STEP 11
The purpose of this test is to check the hardware connections, output relay contact
operation, and input circuit verification.
To perform these tests, jumper #5 (JP5) on the microprocessor module, must be in
place.
(Refer to Step 1 for details.)
Jumper #3 (JP3) is a spare jumper which is moved
to the JP5 position for this test. Upon test completion, if front panel output contact
operation is not desired, remove JP5 and return it to the JP3 position.
Press the SELECT push-button and scroll to the “TEST” display. The display should
read “STATUS” “0” indicating the self-checking/startup/initialization routine was
completed successfully and the system is continuously passing the self-checking rou-
tine. Press the RAISE push-button and scroll to contact output to be tested. All contact
outputs can be tested.
See the “CONNECTION SPECIFICATION CHART” in Chapter 4,
page 4-2 for contact listing and terminal references.
After scrolling to the contact output to be tested, for example “Trip” “Relay”, pressing
the ENTER push-button will cause the trip relay to operate and hence the trip contacts
to close. A similar procedure is used to test any contact output.
Summary of Contents for REL 301
Page 1: ......
Page 8: ......
Page 17: ...I L 40 386 3 1 10 10 94 2682F39 Sheet 1 of 2 Sub 2 Figure 1 2 REL 301 302 Layout Vertical...
Page 18: ...I L 40 386 3 10 94 1 11 2682F39 Sheet 2 of 2 Sub 2 Figure 1 3 REL 301 302 Layout Horizontal...
Page 19: ......
Page 20: ......
Page 44: ......
Page 46: ......
Page 48: ......
Page 49: ......
Page 51: ......
Page 53: ......
Page 54: ......
Page 55: ......
Page 56: ......
Page 57: ......
Page 60: ......
Page 62: ...I L 40 386 3 10 94 2 41 Figure 2 32 CO 2 Curve Characteristics 619596 Sub 2...
Page 63: ...I L 40 386 3 2 42 10 94 Figure 2 33 CO 5 Curve Characteristic 619597 Sub 2...
Page 64: ...I L 40 386 3 10 94 2 43 Figure 2 34 CO 6 Curve Characteristic 619598 Sub 2...
Page 65: ...I L 40 386 3 2 44 10 94 Figure 2 35 CO 7 Curve Characteristic 619599 Sub 2...
Page 66: ...I L 40 386 3 10 94 2 45 Figure 2 36 CO 8 Curve Characteristic 619600 Sub 2...
Page 67: ...I L 40 386 3 2 46 10 94 Figure 2 37 CO 9 Curve Characteristic 619601 Sub 2...
Page 68: ...I L 40 386 3 10 94 2 47 Figure 2 38 CO 11 Curve Characteristic 619602 Sub 2...


