MODEM COMMUNICATION TO ABB RELAYS
Page 36 of 47
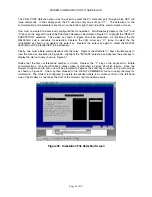
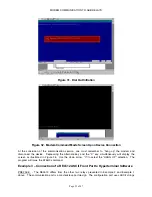
Step 2:
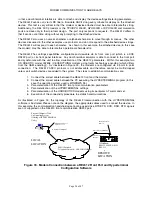
Construct and attach the cable as illustrated in Figure 42 above for the personal computer to modem
connection. (LOCAL LOCATION)
Step 3:
Configure the rear port interface of the REL512 with the correct parameters. The default parameters for
all ports are 9600 baud, 8 data bits, No parity, 2 Stop bits. However, with the standard configuration, the
port cannot be used with a 10 bit modem as previously explained. The Serial port 2 (located at the back
side of the REL512) must be configured following the attached procedure. Configure the font port with
these parameters which are compatible for operation with a 10 bit modem:
19200 Baud
8 Data Bits
No Parity
1 Stop Bit
The procedure to configure the REAR port interface is as follows:
When connecting a device to the front port of the relay, the communication parameters for the port must
be changed to reflect those of the device to which it is connecting. To change the parameters via the
REL512 front panel interface one could follow the procedure as follows:
1.
From the screen of the Front Panel Interface viewing the meter readings, Depress the “E” key to get
the menu :
E
Fault Records
→
Device Info
←
Edit Settings
C
Metering
2.
Depress the Left Arrow Key “
←
” to Display the Menu
E
Edit Settings
→
Fault Records
←
View Settings
C
Metering
3.
Depress the “E” Key to display the menu
E
Password
********
C
Edit Settings
One must enter the CORRECT password to change the relay settings for this procedure. The default
password for the REL512 is “ABB” (without the quotation marks). If the password has been changed,
please enter the correct password as follows:
•
Depress the up arrow “
↑
” or down arrow “
↓
” to page through the numeric and alphabet
selections for the password.
•
Depress the left arrow “
←
” or the right arrow ”
→
” to move through the different positions of
the password.
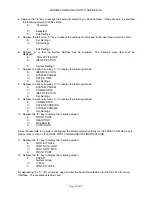
4. Depress the “ E” key to accept the password selection you have entered. If the password is accepted
the following screen shall be visible.
E
Password
←
Accepted
C
Edit Settings
Summary of Contents for REL 356
Page 23: ...ABB REL 356 Current Differential Protection 1 10 Product Overview and Specifications ...
Page 83: ...ABB REL 356 Current Differential Protection 3 36 Settings and Application ...
Page 127: ...ABB REL 356 Current Differential Protection 5 28 Testing ...
Page 186: ...LINE SECTIONALIZING USING A PLC AND ABB PROTECTIVE RELAY Page 49 of 53 ...
Page 187: ...LINE SECTIONALIZING USING A PLC AND ABB PROTECTIVE RELAY Page 50 of 53 ...
Page 188: ...LINE SECTIONALIZING USING A PLC AND ABB PROTECTIVE RELAY Page 51 of 53 ...
Page 189: ...LINE SECTIONALIZING USING A PLC AND ABB PROTECTIVE RELAY Page 52 of 53 ...

