background image

Relion

®

 670 series

Transformer protection RET670

Installation and commissioning manual

Summary of Contents for RELION RET670

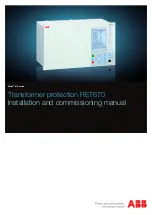
Page 1: ...Relion 670 series Transformer protection RET670 Installation and commissioning manual...

Page 2: ......

Page 3: ...Document ID 1MRK 504 088 UEN Issued June 2010 Revision C Product version 1 1 Copyright 2010 ABB All rights reserved...

Page 4: ...ed or disclosed only in accordance with the terms of such license Trademarks ABB and Relion are registered trademarks of ABB Group All other brand or product names mentioned in this document may be tr...

Page 5: ...roduct failure would create a risk for harm to property or persons including but not limited to personal injuries or death shall be the sole responsibility of the person or entity applying the equipme...

Page 6: ...Directive 2004 108 EC and concerning electrical equipment for use within specified voltage limits Low voltage directive 2006 95 EC This conformity is proved by tests conducted by ABB AB in accordance...

Page 7: ...ng delivery unpacking and checking 21 Section 5 Installing the IED 23 Overview 23 Dimensions 24 Case without rear cover 24 Case with rear cover 26 Flush mounting dimensions 28 Side by side flush mount...

Page 8: ...s 63 Connecting station communication interfaces 63 Connecting remote communication interfaces LDCM 64 Installing the serial communication cable for RS485 65 RS485 serial communication module 65 Insta...

Page 9: ...calculation for serial communication with SPA IEC 92 Section 10 Establishing connection and verifying the LON communication 93 Communication via the rear ports 93 LON communication 93 The LON Protocol...

Page 10: ...l protection 113 Transformer differential protection T2WPDIF and T3WPDIF 113 Verifying the settings 113 Completing the test 114 Restricted earth fault protection low impedance REFPDIF 115 Verifying th...

Page 11: ...vercurrent protection PHPIOC 135 Measuring the operate limit of set values 135 Completing the test 135 Four step phase overcurrent protection OC4PTOC 135 Verifying the settings 135 Completing the test...

Page 12: ...easuring the operate and time limit of set values 155 Completing the test 155 Voltage protection 156 Two step undervoltage protection UV2PTUV 156 Verifying the settings 156 Completing the test 156 Two...

Page 13: ...g the test 170 Secondary system supervision 170 Current circuit supervision CCSRDIF 170 Verifying the settings 170 Completing the test 171 Fuse failure supervision SDDRFUF 171 Checking that the binary...

Page 14: ...ting the current reversal logic 195 Testing the weak end infeed logic 195 Completing the test 197 Logic 197 Tripping logic SMPPTRC 197 Three phase operating mode 198 1ph 3ph operating mode 198 1ph 2ph...

Page 15: ...ce tests 215 Preparation 216 Recording 216 Secondary injection 216 Alarm test 216 Self supervision check 216 Trip circuit check 217 Measurement of service currents 217 Restoring 218 Section 16 Fault t...

Page 16: ...10...

Page 17: ...Installation and Engineeringmanual Commissioning manual manual Technical reference IEC09000744 V1 EN The Application Manual AM contains application descriptions setting guidelines and setting paramet...

Page 18: ...ngineering of protection and control functions LHMI functions as well as communication engineering for IEC 61850 and DNP3 1 1 2 About the installation and commissioning manual The installation and com...

Page 19: ...d commissioning manual 1MRK 504 088 UEN Technical reference manual 1MRK 504 086 UEN Application manual 1MRK 504 089 UEN Buyer s guide 1MRK 504 091 BEN Sample specification SA2005 001283 Connection dia...

Page 20: ...514 012 BEN Getting started guide IED 670 1MRK 500 080 UEN SPA and LON signal list for IED 670 ver 1 1 1MRK 500 083 WEN IEC 61850 Data objects list for IED 670 ver 1 1 1MRK 500 084 WEN Generic IEC 61...

Page 21: ...ic electricity ESD Lethal high voltage circuits are also exposed when covers are removed Always use suitable isolated test pins when measuring signals in open circuitry Potentially lethal voltages and...

Page 22: ...lways handle modules using a conductive wrist strap connected to protective ground and on a suitable antistatic surface Electrostatic discharge ESD may cause damage to the module since electronic circ...

Page 23: ...2 3 Note signs The protection assembly is designed for a maximum continuous current of four times rated value 1MRK 504 088 UEN C Section 2 Safety information 17 Installation and commissioning manual...

Page 24: ...18...

Page 25: ...tart A configuration done in the configuration and programming tool must also be available if the IED does not have a factory configuration downloaded The IED is unpacked and visually checked It is pr...

Page 26: ...20...

Page 27: ...the delivery 4 Check for transport damages If transport damage is discovered appropriate action must be taken against the latest carrier and the nearest ABB office or representative should be informed...

Page 28: ...22...

Page 29: ...variations powerful vibrations and shocks surge voltages of high amplitude and fast rise time strong induced magnetic fields or similar extreme conditions should be avoided Sufficient space must be a...

Page 30: ...imensions 5 2 1 Case without rear cover xx08000164 vsd C B D E A IEC08000164 V1 EN Figure 1 Case without rear cover Section 5 1MRK 504 088 UEN C Installing the IED 24 Installation and commissioning ma...

Page 31: ...2 x 19 265 9 223 7 201 1 252 9 205 7 190 5 203 7 187 6 6U 3 4 x 19 265 9 336 0 201 1 252 9 318 0 190 5 316 0 187 6 6U 1 1 x 19 265 9 448 3 201 1 252 9 430 3 190 5 428 3 465 1 187 6 482 6 The H and K...

Page 32: ...5 2 2 Case with rear cover xx08000163 vsd C B D E A IEC08000163 V1 EN Figure 3 Case with rear cover Section 5 1MRK 504 088 UEN C Installing the IED 26 Installation and commissioning manual...

Page 33: ...size mm A B C D E F G H J K 6U 1 2 x 19 265 9 223 7 242 1 255 8 205 7 190 5 203 7 228 6 6U 3 4 x 19 265 9 336 0 242 1 255 8 318 0 190 5 316 0 228 6 6U 1 1 x 19 265 9 448 3 242 1 255 8 430 3 190 5 428...

Page 34: ...ce Cut out dimensions mm A 1 B 1 C D 6U 1 2 x 19 210 1 254 3 4 0 10 0 12 5 6U 3 4 x 19 322 4 254 3 4 0 10 0 12 5 6U 1 1 x 19 434 7 254 3 4 0 10 0 12 5 E 188 6 mm without rear protection cover 229 6 mm...

Page 35: ...V1 EN Figure 7 A 1 2 x 19 size 670 series IED side by side with RHGS6 xx05000505 vsd B A C G D E F IEC05000505 V1 EN Figure 8 Panel cut out dimensions for side by side flush mounting 1MRK 504 088 UEN...

Page 36: ...9 4 272 8 390 0 243 0 6U 1 1 x 19 516 0 491 1 272 8 390 0 243 0 5 3 Mounting methods and details 5 3 1 Mounting the IED The IED can be rack wall or flush mounted with the use of different mounting kit...

Page 37: ...the ordering sheet in Accessories for 670 series IED see section Related documents IEC02000684 V1 EN Generally all the screws included in delivered mounting kits are of Torx type and a screwdriver of...

Page 38: ...for class IP54 protection Flush mounting cannot be used for side by side mounted IEDs when IP54 class must be fulfilled Only IP20 class can be obtained when mounting two cases side by side in one 1 c...

Page 39: ...ty Type 1 Sealing strip used to obtain IP54 class The sealing strip is factory mounted between the case and front plate 2 Fastener 4 3 Groove 4 Screw self tapping 4 2 9x9 5 mm 5 Joining point of seali...

Page 40: ...crews Repeat the procedure with the remaining two fasteners 5 3 3 19 panel rack mounting 5 3 3 1 Overview All IED sizes can be mounted in a standard 19 cubicle rack by using the for each size suited m...

Page 41: ...hich can be mounted either to the left or right side of the case 2 2 Screw 8 M4x6 Procedure 1 Carefully fasten the mounting angles 1a 1b to the sides of the IED Use the screws 2 supplied in the mounti...

Page 42: ...he PCBs inside the IED If fiber cables are bent too much the signal can be weakened Wall mounting is therefore not recommended for communication modules with fiber connection Serial SPA IEC 60870 5 10...

Page 43: ...plasterboard walls or threading metal sheet wall 2 Make all electrical connections to the IED terminal It is much easier to do this without the unit in place 3 Mount the side plates to the IED 4 Mount...

Page 44: ...protection 5 3 5 Side by side 19 rack mounting 5 3 5 1 Overview IED case sizes 1 2 x 19 or 3 4 x 19 and RHGS cases can be mounted side by side up to a maximum size of 19 For side by side rack mounting...

Page 45: ...g plate Use the remaining four screws 5 Carefully fasten the mounting angles 4 to the sides of the IED Use the screws available in the mounting kit 6 Place the IED assembly in the rack 7 Fasten the mo...

Page 46: ...e mounting details kit and the 19 panel rack mounting kit must be used The mounting kit has to be ordered separately The maximum size of the panel cut out is 19 With side by side flush mounting instal...

Page 47: ...6 4 Mounting angle 2 Procedure 1 Make a panel cut out For panel cut out dimension see section Side by side flush mounting dimensions 2 Carefully press the sealing strip around the IED collar Cut the e...

Page 48: ...s all internal signals between modules in an IED Only the TRM when included is not connected directly to this board Universal backplane module UBM A backplane PCB that forms part of the IED backplane...

Page 49: ...unication modules SLM Used for SPA LON IEC 60870 5 103 communication Optical ethernet module OEM PMC board for IEC 61850 based communication mA input module MIM Analog input module with 6 independent...

Page 50: ...connector 2 Ethernet cable with RJ45 connectors The cable between PC and the IED serial communication port shall be a crossed over Ethernet cable with RJ45 connectors If the connection are made via a...

Page 51: ...SLM X301 A B C D IRIG B 1 X302 OEM X311 A B C D RS485 or LDCM 2 3 X312 LDCM 2 X313 TRM X401 1 IRIG B installation when included in seat P30 2 2 LDCM installation sequence P31 2 or P31 3 3 RS485 insta...

Page 52: ...4 X311 A B C D RS485 or LDCM 2 3 X312 LDCM 2 X313 TRM X401 1 IRIG B installation when included in seat P30 2 2 LDCM installation sequence P31 2 P31 3 P30 2 and P30 3 3 RS485 installation when include...

Page 53: ...CM 2 X323 TRM 1 X401 TRM 2 X411 1 IRIG B installation when included in seat P30 2 2 LDCM installation sequence P31 2 P31 3 P32 2 P32 3 P30 2 and P30 3 3 RS485 installation when included in seat P31 2...

Page 54: ...SOM IOM MIM or GSM X161 and X162 SLM X301 A B C D IRIG B X302 LDCM 1 X313 and X303 OEM 2 X311 A B C D RS485 X312 X313 TRM X401 Note 1 2 LDCM can be included First LDCM always in position X313 second L...

Page 55: ...X322 LDCM 2 X323 TRM 1 X401 TRM 2 X411 1 IRIG B installation when included in seat P30 2 2 LDCM installation sequence P31 2 P31 3 P32 2 P32 3 P30 2 and P30 3 3 RS485 installation when included in sea...

Page 56: ...A 1A 1A 1A 1A 5A 5A 5A 5A 110 220 V 110 220 V 110 220 V 7I 5U 1A 1A 1A 1A 1A 1A 1A 1A 110 220 V 110 220 V 110 220 V 110 220 V 110 220 V 7I 5U 5A 5A 5A 5A 5A 5A 5A 5A 110 220 V 110 220 V 110 220 V 110...

Page 57: ...tacts named XA corresponds to rear position X31 X41 and so on and input contacts named XB to rear position X32 X42 and so on IEC08000484 BG V1 EN Figure 21 mA input module MIM 1MRK 504 088 UEN C Secti...

Page 58: ...rminal block 4 Time synchronization port IRIG B BNC connector 5 Time synchronization port PPS or Optical IRIG B ST connector 6 Rear communication port IEC 61850 8 1 for X311 A B C D ST connector 7 Rea...

Page 59: ...0481 BG V1 EN Figure 25 Binary output module BOM Output contacts named XA corresponds to rear position X31 X41 and so on and output contacts named XB to rear position X32 X42 and so on 1MRK 504 088 UE...

Page 60: ...BG V1 EN Figure 27 Binary in out module IOM Input contacts named XA corresponds to rear position X31 X41 and so on and output contacts named XB to rear position X32 X42 and so on Section 5 1MRK 504 08...

Page 61: ...re shown in figure 28 L1 A L2 B L3 C Protected Object CT 1200 1 Star Wye Connected L1 A L2 B L3 C CT 1200 1 Star Wye Connected 7 8 9 1 0 1 1 1 2 1 2 3 4 5 6 AI01 I AI02 I AI03 I AI04 I AI05 I AI06 I 7...

Page 62: ...n CTs with 5A secondary rating the following setting values shall be entered CTprim 5A and CTsec 5A The parameter CTStarPoint shall be always left to the default value ToObject 9 Three connections mad...

Page 63: ...are applicable for both types of one phase plate 4 Position of optional test switch for secondary injection into the high impedance differential IED 5 Necessary connection for setting resistor Shown...

Page 64: ...point in the cubicle Electrical codes and standards require that protective earth cables are green yellow conductors with a cross section area of at least 2 5 mm2 AWG14 There are several protective ea...

Page 65: ...gure 19 Use a solid conductor with a cross section area between 2 5 6 mm2 AWG14 10 or a stranded conductor with a cross section area between 2 5 4 mm2 AWG14 12 If the IED is equipped with a test switc...

Page 66: ...orresponding male connector see figure 32 located at the rear of the IED For location of BIM BOM and IOM refer to section Rear side connectors Connection diagrams for BIM BOM and IOM are shown in figu...

Page 67: ...2 Plug the connector to the corresponding back side mounted male connector 3 Lock the connector by fastening the lock screws xx02000742 vsd IEC02000742 V1 EN Figure 31 A female connector IEC04000167...

Page 68: ...ens are earthed and connected according to applicable engineering methods This may include checking for appropriate earthing points near the IED for instance in the cubicle and or near the source of m...

Page 69: ...e earth 5 5 Making the optical connections 5 5 1 Connecting station communication interfaces The IED can be equipped with an optical ethernet module OEM see figure 22 needed for IEC 61850 communicatio...

Page 70: ...nsmit back side connectors The fiber optical cables are very sensitive to handling Do not bend too sharply The minimum curvature radius is 15 cm for the plastic fiber cables and 25 cm for the glass fi...

Page 71: ...2 soft ground x1 1 RS485 TX Receive transmit high or transmit high x1 2 RS485 TX Receive transmit low or transmit low x1 3 Term T Term Termination resistor for transmitter and receiver in 2 wire case...

Page 72: ...X1 1 6 5 4 3 2 IED 1 6 5 4 3 2 X1 PE PE IEC07000141 V1 EN Figure 36 Communication cable installation 2 wire Where 1 The inner shields shall be connected together with an isolated terminal block and o...

Page 73: ...pment PC The outer shield shall be connected to Protective Earth PE in every cable end that is to PE at all IED terminals and to PE at External equipment PC The first IED will have only one cable end...

Page 74: ...IA standard RS 485 specifies the RS485 network An informative excerpt is given in section Installing the serial communication cable for RS485 SPA IEC 5 6 2 Installing the serial communication cable fo...

Page 75: ...therwise c The RS485 chip can include built in isolation 2 3 Bus excitation and signal conveyance 2 3 1 Requirements a The RS485 specification requires the Signal A and Signal B wires b Each node also...

Page 76: ...odule cable Type Twisted pair S STP Screened Screened Twisted Pair Shield Individual foil for each pair with overall copper braid Length Maximum 1200 m 3000 ft from one system earth to the next system...

Page 77: ...ildings walls roofs and windows to avoid signal reflections If necessary protect the antenna from animals and birds which can affect signal strength Also protect the antenna against lightning Always p...

Page 78: ...section Rear side connectors Connection diagram for GPS module is shown in figure 24 Make sure that the antenna cable is not charged when connected to the antenna or to the receiver Short circuit the...

Page 79: ...he supplied connection diagram Correct all errors before continuing to test circuitry Test the circuitry Polarity check VT circuit voltage measurement primary injection test Earthing check Phase relat...

Page 80: ...acy rating and that there are no shorted turns in the current transformer windings Manufacturer s design curves should be available for the current transformer to compare the actual results Earthing c...

Page 81: ...l connected signals so that both load and polarity are in accordance with IED specifications 6 6 Checking optical connections Check that the Tx and Rx optical connections are correct An IED equipped w...

Page 82: ...76...

Page 83: ...umber of ways from energizing a whole cubicle to energizing a single IED The user should re configure the IED to activate the hardware modules in order to enable the self supervision function to detec...

Page 84: ...d the green LED flashes an internal failure in the IED has been detected See section 3 3 Checking the self supervision function in this chapter to investigate the fault An example of the local HMI is...

Page 85: ...EN Figure 43 Medium size graphic HMI 1 Status indication LEDs 2 LCD 3 Indication LEDs 4 Label 5 Local Remote LEDs 6 RJ45 port 7 Communication indication LED 8 Keypad 1MRK 504 088 UEN C Section 7 Energ...

Page 86: ...me Use the Left and Right arrow buttons to move between the time and date values year month day hours minutes and seconds Use the Up and Down arrow buttons to change the value 3 Confirm the setting Pr...

Page 87: ...lem with the real time clock the time synchronization Set the clock If the problem persists contact your ABB representative for service ADC module OK No problem detected None ADC module Fail The AD co...

Page 88: ...82...

Page 89: ...have to be considered Direct point to point link between PCM600 and the IED front port The front port can be seen as a service port Indirect link via a station LAN or from remote via a network The phy...

Page 90: ...for point to point access to IEDs front port A special cable is requested to connect two physical Ethernet interfaces together without a hub router bridge or switch in between The Tx and Rx signal wi...

Page 91: ...indow see Figure 46 IEC09000356 1 en vsd IEC09000356 V1 EN Figure 46 Right click Local Area Connection and select Properties 3 Select the TCP IP protocol from the list of configured components using t...

Page 92: ...ure 48 The IP address must be different from the IP address chosen for the IED IEC09000658 1 en vsd IEC09000658 V1 EN Figure 48 Select Use the following IP address 5 Use the ping command to verify con...

Page 93: ...the IED via a network This task depends on the used LAN WAN network PC and IED must belong to the same subnetwork 1MRK 504 088 UEN C Section 8 Set up the PCM600 communication link per IED 87 Installat...

Page 94: ...88...

Page 95: ...en using the SPA protocol the rear SPA IEC port must be set for SPA use Procedure 1 Set the operation of the rear optical SPA IEC port to SPA The operation of the rear SPA port can be found on the loc...

Page 96: ...SLM configuration Rear optical SPA IEC port IEC60870 5 103 Set the same slave number and baud rate as set in the IEC master system for the IED 9 2 Verifying the communication To verify that the rear c...

Page 97: ...rify that the events and indications in the IEC master system are as expected 9 3 Fibre optic loop The SPA communication is mainly used for SMS It can include different numerical IEDs with remote comm...

Page 98: ...m plastic 620 nm 1mm 4 dB Margins for installation aging and so on 5 dB 1 dB Losses in connection box two contacts 0 5 dB contact 1 dB Losses in connection box two contacts 1 dB contact 2 dB Margin f...

Page 99: ...ally used in substation automation systems Optical fiber is used within the substation as the physical communication link The test can only be carried out when the whole communication system is instal...

Page 100: ...ectors Glass fibre Plastic fibre Cable connector ST connector snap in connector Cable diameter 62 5 125 m 1 mm Max cable length 1000 m 10 m Wavelength 820 900 nm 660 nm Transmitted power 13 dBm HFBR 1...

Page 101: ...sferred to LNT via the local HMI by setting the parameter ServicePinMsg Yes The node address is sent to LNT via the LON bus or LNT can scan the network for new nodes The communication speed of the LON...

Page 102: ...are identification number in hexadecimal code Location 0 6 No value Location of the node Can be viewed in the local HMI Path in the local HMI under Main menu Settings General settings Communication SL...

Page 103: ...plastic 620 nm 1mm 3 dB Margins for installation aging and so on 5 dB 2 dB Losses in connection box two contacts 0 75 dB contact 1 5 dB Losses in connection box two contacts 1dB contact 2 dB Margin f...

Page 104: ...98...

Page 105: ...61850 8 1 redundant communication both OEM port AB and CD are used exclusively To enable IEC 61850 station communication 1 Enable IEC 61850 8 1 substation bus communication for port AB 1 1 Set values...

Page 106: ...If it is possible to see all of them then they can see each other The best way to verify the communication up to the application layer is to use a protocol analyzer for example an Ethereal that is con...

Page 107: ...commissioning time After the commissioning is complete the configuration data is always stored to FLASH so that is not an issue But other things like objects states and the Local Remote switch positio...

Page 108: ...operator s manual is structured in a similar way to the local HMI and provides a detailed guide to the use of the local HMI including paths in the menu structure and brief explanations of most setting...

Page 109: ...ts For main CTs with 2A rated secondary current it is recommended to connect the secondary wiring to the 1A input and to set the rated primary current to one half times its true value For example a CT...

Page 110: ...104...

Page 111: ...especially for the configuration of all the binary inputs and outputs Therefore before testing check that the available terminal diagram corresponds to the IED The technical reference manual contains...

Page 112: ...curacy for both of them Please consider the configured logic from the function block to the output contacts when measuring the operate time 13 2 Preparing for test 13 2 1 Preparing the IED to verify s...

Page 113: ...ification In certain cases only modes with a high probability of coming into operation need to be checked when commissioned to verify the configuration and settings 13 2 2 Preparing the connection to...

Page 114: ...e yellow Start LED flashes Procedure 1 Browse to the TestMode menu and press E The TestMode menu is found on the local HMI under Main menu Test IED test mode TestMode 2 Use the up and down arrows to c...

Page 115: ...oltage and current at rated value 2 Compare the injected value with the measured values The voltage and current phasor menu in the local HMI is located under Main menu Measurements Analog primary valu...

Page 116: ...on Ensure that the logical status of the BLOCK input signal is equal to 0 for the function to be tested Event function blocks can also individually be blocked to ensure that no events are reported to...

Page 117: ...A Manual Trig can be started at any time This results in a recording of the actual values from all recorded channels The Manual Trig can be initiated in two ways 1 From the local HMI under Main menu...

Page 118: ...sion in future fault analysis All event in the IED can be cleared in the local HMI under Main Menu Reset Reset internal event list or Main menu Reset Reset process event list It is not possible to cle...

Page 119: ...s the active group Operating procedures for the PC aided methods of changing the active setting groups are described in the corresponding PCM600 documents and instructions for the operators within the...

Page 120: ...operate value 8 Connect the timer and set the current to twice the operate value 9 Switch on the current and note the operate time 10 Check in the same way the functioning of the measuring circuits co...

Page 121: ...ity corresponding to an internal fault 8 Increase the current injected in L1 and note the operate value Decrease the current slowly and note the reset value 9 Inject current into terminals L2 and L3 i...

Page 122: ...at another voltage Normally 2 U Trip is selected 7 If used measure the alarm level operating value Increase the voltage and make note of the operate value U Alarm This is done with manual test and wit...

Page 123: ...ry to check the setting To verify the settings with the shaped load encroachment characteristic the test should be carried out according to figures 52 and 53 and tables 20 and 21 In cases where the lo...

Page 124: ...n conjunction with figure 52 X1 XN R X loop 50 80 1 2 3 4 5 6 7 8 9 10 11 80 of RLdFw 40 of RLdFw RFPE 12 en05000369 vsd 13 a c b alt 80 of RFPE Load encroachment IEC05000369 V1 EN Figure 53 Distance...

Page 125: ...x tan ArgDir R 0 4 x RLdFw 10 X 0 5 x X1set Exact 0 5 x R1set x tan ArgNegRes 90 R 0 23 x X1set 11 X 0 8 x X1set Exact 0 5 x R1set x tan ArgNegRes 90 R 0 37 x X1 set 12 X 0 5 x X1set R 0 5 x R1set 13...

Page 126: ...ut shaped load encroachment characteristics OperationLdCmp off Procedure for phase to phase fault L1 L2 1 Subject the IED to healthy normal load conditions for at least two seconds 2 Apply the fault c...

Page 127: ...at steps 1 to 2 to find the operating time for all other used measuring zones Observe that the zones that are not tested have to be blocked and the zone that is tested has to be released When the load...

Page 128: ...according to figures 54 and 55 should be tested See also tables 22 and 23 for information ArgDir R X RFFwPE 1 3 1 XN X 5 2 4 ArgNegRes 85 ArgLd 50 of RLdFw 6 IEC09000734 2 en vsd phase W phase W 7 IEC...

Page 129: ...h loop L3 E Ohm loop Test point Value Comments 1 X X1 XN XN X0 X1 3 R 0 2 X 0 R RLdFw 3 X 0 85 X1 XN R 0 491 X1 XN RFFwPE R 0 85 X1 XN 1 tan 60 RFFwPE 4 X 0 85 X1 XN R 0 85 X1 XN tan AngNegRes 90 5 X...

Page 130: ...to figure 54 Compare the result of the measurement with the expected value according to table 22 The corresponding binary signals that inform about the operation of the phase selection measuring eleme...

Page 131: ...f the autorecloser function SMBRREC will determine if three phase or single phase trip will be initiated as result of the test Keep the current constant when measuring operating characteristics Keep t...

Page 132: ...AngPP 2 ZPP 2 R ZPP 2 1 cos ZAngPP ZPP 2 sin ZAngPP 3 ZPP 2 R ZPP 2 1 cos ZAngPP ZPP sin ZAngPP Change the magnitude and angle of phase to phase voltage to achieve impedances at test points p1 p2 and...

Page 133: ...1 ZPE cos ZAngPE ZPE sin ZAngPE 2 ZPE 2 R ZPE 2 1 cos ZAngPE ZPE 2 sin ZAngPE 3 ZPE 2 R ZPE 2 1 cos ZAngPE ZPE 2 sin ZAngPE Check also in the same way as for phase to earth fault for each test point t...

Page 134: ...and X1InRv See figure 58 The corresponding resistive boarder for the inner resistive boundary and outer resistive boundary is calculated automatically from the setting of kLdRFw and kLdRRv The inner...

Page 135: ...ters in italic Where RLdInFw RLdOutFw kLdRFw RLdInRv RLdOutRv kLdRRv X1OutFw X1InFw RLdOutFw RLdInFw X1OutRv X1InRv RLdOutFw RLdInFw 13 5 5 1 Verifying the settings Preconditions The following output...

Page 136: ...ease the measured impedance in all three phases until the START signal gets activated 2 Increase the measured voltages to their rated values 3 Decrease instantaneously voltages in all three phases to...

Page 137: ...g power swing can be done in the same way as for test of tR1 The inhibit of ZMRPSB shall be instantaneous if the input TRSP is activated at the same time as the input I0CHECK during power swing 13 5 5...

Page 138: ...t signal CR becomes a logical one 5 Configure the STPSD input to connect to the output START of the carrier accelerating zone Power swing overreaching zone 6 Initiate any kind of fault within the carr...

Page 139: ...move it into the zone 1 operate area with a time delay longer than the time set on the tDZ timer and faster than the time set on timer tZL 5 Observe the operate time which must be equal to the operate...

Page 140: ...one phase current are tested The result shall be according to table 26 It should be checked that the fault will give phase to phase voltage phase to earth voltage zero sequence voltage and phase curre...

Page 141: ...he Ln phase until the TRL n 1 3 signal appears 4 Switch the fault current off Observe Do not exceed the maximum permitted overloading of the current circuits in the IED 5 Compare the measured operatin...

Page 142: ...out of 3 currents for operation is chosen The voltage angle of phase L1 is the reference If reverse directional function is selected set the injection current to lag the polarizing voltage by an angl...

Page 143: ...verify the settings the following fault type should be tested Phase to earth fault Ensure that the maximum continuous current supplied from the current source used for the test of the IED does not ex...

Page 144: ...ion of current in phase L1 repeat the test when injecting current into terminals L2 and L3 with a polarizing voltage connected to terminals L2 respectively L3 6 Block lower set steps when testing high...

Page 145: ...t set during the test of the sensitive directional residual overcurrent protection Observe that the polarizing voltage is equal to 3U0 IEC09000021 1 en vsd IED test set NI IED NI L1U L2U L3U NU U1 U2...

Page 146: ...into consideration see figure 60 and figure 61 5 Measure the operate time of the timer by injecting a current two times the set INcosPhi value and the polarizing voltage 1 2 UNRel Tinv kSN Sref 3I co...

Page 147: ...2_en vsd o 0 RCADir 0 3I j 0 3 j I cos 0 3 ref U U IEC06000650 V2 EN Figure 60 Characteristic with ROADir restriction 1MRK 504 088 UEN C Section 13 Verifying settings by secondary injection 141 Instal...

Page 148: ...e set directional element Note that for operation both the injected current and voltage must be greater than the set values INRel and UNRel respectively The function activates the START and STDIRIN ou...

Page 149: ...eration both the injected current and voltage must be greater than the set values INRel and UNRel respectively The function activates the START and STDIRIN output 3 Measure with angles j around RCADir...

Page 150: ...Continue to test another function or complete the test by setting the test mode to Off Residual overvoltage release and protection Procedure 1 Measure that the operate voltage is equal to the UN setti...

Page 151: ...ame way as the operate and reset values of IBase1 for phases L2 and L3 5 Activate the digital input for cooling input signal to switch over to base current IBase2 6 Check for all three phases the oper...

Page 152: ...tion of settings as outlined in section Overview and section Preparing for test in this chapter The breaker failure protection function CCRBRF should normally be tested in conjunction with some other...

Page 153: ...1 Apply the fault condition including start of CCRBRF well above the set current value Measure time from START of CCRBRF 2 Check the re trip t1 and back up trip times t2 and t3 In applicable cases the...

Page 154: ...ained 6 Disconnect AC and START input signals 13 6 7 5 Verifying the back up trip mode In the cases below it is assumed that FunctionMode Current is selected Checking that back up tripping is not achi...

Page 155: ...hase currents with equal phase angle I0 component below IP but of such value that the residual earth fault current 3I0 will be above set value IN 5 Verify that back up trip is not achieved 6 Disconnec...

Page 156: ...and back up trip commands are achieved 5 Disconnect injected AC and START input signals Checking the case with fault current below set value I BlkCont The case shall simulate a case where the fault cu...

Page 157: ...hould appear 9 Reset both BLOCK and EXTPDIND binary inputs 10 If Internal detection logic Contact function selection ContSel setting equals Pole position from auxiliary contacts Then set inputs POLE1O...

Page 158: ...9 1 Verifying the settings The underpower protection shall be set to values according to the real set values to be used The test is made by means of injection of voltage and current where the amplitud...

Page 159: ...tage to the set values in of IBase and UBase converted to secondary current and voltage The angle between the injected current and voltage shall be set equal to the set direction Angle1 angle for stag...

Page 160: ...ent voltage test set is available the test set should be connected to a selected input for one phase current and voltage 2 Adjust the injected current and voltage to the set rated values in of IBase a...

Page 161: ...of the current circuits in the terminal 3 Switch on the fault current and measure the operating time of BRCPTOC Use the TRIP signal from the configured binary output to stop the timer 4 Compare the m...

Page 162: ...ured operate value 8 Measure the time delay for the TRIP signal and compare it with the set value Extended testing 1 The test above can now be repeated for step 2 2 The tests above can be repeated for...

Page 163: ...cation of settings as outlined in section Overview and section Preparing for test in this chapter 13 7 3 1 Verifying the settings 1 Apply the single phase voltage either to a single phase voltage inpu...

Page 164: ...Hz 7 Connect a trip output contact to the timer and temporarily set the time delay tMin to 0 5s 8 Increase the voltage and note the V Hz operate value 9 Reduce the voltage slowly and note the reset va...

Page 165: ...BlkDiffAtULow Yes Check of U1Low Procedure 1 Connect voltages to the IED according to valid connection diagram and figure 63 2 Apply voltage higher than the highest set value of UDTrip U1Low and U2Low...

Page 166: ...t until the START signal resets 4 Check U1 blocking level by comparing the voltage level at reset with the set undervoltage blocking U1Low 5 Repeat steps 2 to 4 to check U1Low for the other phases The...

Page 167: ...to one phase of the U2 inputs according to figure 64 The voltage differential START signal is set 3 Decrease slowly the voltage in phase UL3 of the test set until the START signal resets 4 Check U2 b...

Page 168: ...timer tAlarm 4 Check the alarm operation level by comparing the differential voltage level at ALARM with the set alarm level UDAlarm 5 Continue to slowly decrease the voltage until START signal is act...

Page 169: ...Diff PTOV 60 VDCx The IED voltage inputs should be connected to the VTs according to valid connection diagram 2 Record the differential voltages 3 Calculate the compensation factor RFLx for each phase...

Page 170: ...neously disconnect all the three phase voltages from the tRestore No TRIP signal should appear 10 Reset the VTSU binary input 11 Inject the measured voltages to their rated values for at least set tRe...

Page 171: ...priate especially the StartFrequency IntBlockLevel and the TimeDlyOperate 2 Supply the IED with three phase voltages at rated values 3 Slowly decrease the magnitude of the applied voltage until the BL...

Page 172: ...Frequency IntBlocklevel and the TimeDlyOperate 2 Supply the IED with three phase voltages at their rated values 3 Slowly decrease the magnitude of the applied voltage until the BLKDMAGN signal appears...

Page 173: ...e can be repeated to test the RESTORE signal when the frequency recovers from a low value 13 8 3 2 Completing the test Continue to test another function or end the test by changing the Test mode setti...

Page 174: ...gainst the set operate value 4 Decrease the current slowly and check the reset value 5 Block high set stage if the injection current will activate the high set stage when testing the low set stage acc...

Page 175: ...oltage restraining quantity 13 9 1 4 Overcurrent feature with directionality Please note that the directional characteristic can be set in two different ways either just dependent on the angle between...

Page 176: ...t set 3 Overall check in principal as above non directional overcurrent feature and correspondingly for the undervoltage feature 13 9 1 6 Completing the test Continue to test another function or end t...

Page 177: ...two main parts The first part is common to all fuse failure supervision options and checks that binary inputs and outputs operate as expected according to actual configuration In the second part the r...

Page 178: ...sure the operate value for the negative sequence function if included in the IED Procedure 1 Simulate normal operating conditions with the three phase currents in phase with their corresponding phase...

Page 179: ...d di dt based function Check the operation of the du dt and di dt based function if included in the IED Procedure 1 Simulate normal operating conditions with the three phase currents in phase with the...

Page 180: ...w to test the synchrocheck energizing check and synchronizing function SESRSYN for single and double CB and for 1 breaker arrangements This section contains instructions on how to test the synchrochec...

Page 181: ...f what is indicated below Figure 66 shows the general test connection principle which can be used during testing This description describes the test of the version intended for one bay Figure 67 shows...

Page 182: ...ction is included The voltage inputs used are UP3LN1 UL1 UL2 or UL3 line 1 voltage inputs on the IED UP3BB1 Bus1 voltage input on the IED Testing the frequency difference The frequency difference is i...

Page 183: ...ut on the IED U Bus Bus voltage input on the IED Testing the voltage difference Set the voltage difference at 15 UBase on the local HMI and the test should check that operation is achieved when the vo...

Page 184: ...ts are activated for a phase difference lower than the set value It should not operate for other values See figure 68 dj dj U Bus U Line operation U Bus No operation en05000551 vsd IEC05000551 V1 EN F...

Page 185: ...Change the U Line voltage connection to U Line2 without changing the setting on the local HMI Check that the two outputs are not activated 13 11 1 3 Testing the energizing check During the test of the...

Page 186: ...ettings AutoEnerg or ManEnerg to be Both 2 Apply a single phase voltage of 30 UBase to the U Line and a single phase voltage of 100 UBase to the U Bus 3 Check that the AUTOENOK and MANENOK outputs are...

Page 187: ...re generated 1 Connect the analog signals to the voltage inputs in pair of two for U1 and U2 Inputs U3P BB1 BB2 LN1 LN2 2 Activate the binary signals according to the used alternative Verify the measu...

Page 188: ...a transformer configuration that consists of one tap changer on a single two winding power transformer The automatic voltage control for tap changer parallel control TR8ATCC if installed may be set t...

Page 189: ...roup N Control TransformerTapControl YLTC 84 TCMx TCLx tPulseDur Transformer tap range LowVoltTap and HighVoltTap available on the local HMI underMain menu Settings General Settings Control Transforme...

Page 190: ...ad voltage UL against a voltage range defined by setting UDeadband with upper and lower limits U2 and U1 respectively The calculated load voltage UL represents the secondary transformer bus voltage UB...

Page 191: ...cause the alarm or blocking condition for undervoltage to reset 13 11 4 3 Check the normal voltage regulation function 1 Review the settings for UDeadband based on percentage of nominal bus voltage an...

Page 192: ...nder Main menu Settings General settings Control TransformerVoltageControl ATCC 90 VCSx VCPx UVPartBk and Main menu General Settings Control TransformerVoltageControl VCSx VCPx OVPartBk These conditio...

Page 193: ...MI 13 11 4 7 Single transformer Load drop compensation 1 Confirm that OperationLDC is set to On 2 Confirm settings for Rline and Xline 3 Calculate the expected load voltage UL displayed as a measured...

Page 194: ...gulating quantity to compare against USet and the voltage deadband limits UDeadband and UDeadbandInner 9 While injecting rated current I2Base into the IED inject a quantity for UB that is slightly hig...

Page 195: ...he issue of a raise command from the voltage control after the expiry of a constant or inverse time delay set by t1 Detection of this command will involve locating the allocated binary output for a ra...

Page 196: ...which a tap change command will be issued from the master transformer in the group 4 Review the expected time for first t1 and subsequent t2 tap change commands from the master transformer in the loca...

Page 197: ...2 Ci Icc i Xi U Uset EQUATION2096 V1 EN Equation 26 2 _ U Uset Icc i Ci Xi EQUATION2098 V1 EN Equation 27 10 Using the settings for USet UDeadband C Compensating factor and Xr2 transformer short circ...

Page 198: ...2Base and a load current for Transformer 2 that is 1 less than I2Base I2Base CircCurrLimit 7 Confirm that the automatic voltage control for tap changer for parallel control function TR8ATCC responds i...

Page 199: ...1 Scheme communication logic for residual overcurrent protection ECPSCH Prepare the IED for verification of settings as outlined in section Overview and section Preparing for test in this chapter Bef...

Page 200: ...of the set operating current and wait for a period longer than the set value tCoord No TRIP signal should appear 12 Switch the fault current and the polarizing voltage off 13 Reset the BLOCK digital i...

Page 201: ...protection function EF4PTOC and then the current reversal and weak end infeed logic according to the corresponding instructions Then continue with the instructions below 13 12 2 1 Testing the current...

Page 202: ...off the CRL binary input 7 Activate the BLOCK binary input 8 Activate the CRL binary input No ECHO and CS should appear 9 Switch off the polarizing voltage and reset the BLOCK and CRL binary input If...

Page 203: ...pleting the test Continue to test another function or end the test by changing the Test mode setting to Off Restore connections and settings to their original values if they were changed for testing p...

Page 204: ...with the autoreclose in full service with a test set connected to the distance protection function Consider using an adequate time interval between faults to overcome a reclaim time of which is activ...

Page 205: ...ach separate fault and only one of the trip outputs TRLn should be activated at a time Functional outputs TRIP and TR1P should be active at each fault No other outputs should be active 3 Initiate diff...

Page 206: ...hase tripping action 13 13 1 4 Circuit breaker lockout The following tests should be carried out when the built in lockout function is used in addition to possible other tests which depends on the com...

Page 207: ...section Preparing for test in this chapter During testing the IED can be set when in test mode from PST The functionality of the event reporting during test mode is set in the Parameter Setting tool i...

Page 208: ...al transfer function BinSignReceive BinSignTransm the hardware LDCM and binary input and output signals to transfer must be configured as required by the application There are two types of internal se...

Page 209: ...nal is configured to control a binary output BO Check at End2 that the BI signal is received and the BO operates Repeat the test for all the signals configured to be transmitted over the communication...

Page 210: ...204...

Page 211: ...between noise and real injected current Therefore it is recommended that the injection current should be at least 10 of rated CT primary current 14 1 1 Voltage control VCTR 14 1 1 1 Load drop compens...

Page 212: ...r than the first readings At load point it will be the system voltage and at the busbar the system voltage increased with the line voltage drop VCTR shall have also operated during these setting chang...

Page 213: ...corresponding binary output and in the event report If the RAISE output does not activate reset both Rline and Xline to Zero and set USet to a little lower value until the lower circuit is on the verg...

Page 214: ...configuration in the Parameter Setting tool and the Signal Matrix tool has occurred to enable data exchange between IEDs or between instances of voltage control in the same IED Procedure 1 Confirm or...

Page 215: ...or transformer T1 adjust the parameter Comp in the local HMI under Main menu Settings Setting group N Control TransformerVoltageControl ATCC 90 VCPx ParCtrl Comp so that the LOWER output is activated...

Page 216: ...up either shall one step down or the other step up depending on the voltage level at the VCTR 15 Before placing the VCTR into service confirm the correct settings of USet UDeadband the blocking settin...

Page 217: ...3 are available T1RXOP and T2RXOP shall be set to On in instance 3 of TR8ATCC and T2RXOP and T3RXOP shall be set to On in instance 1 of TR8ATCC and so on The parameter corresponding to the own IED mus...

Page 218: ...around USet Without allocating a new Master set T1 to Follower and note the Automatic block state on the local HMI for all parallel transformers 15 Restore T1 to Master of the parallel transformer gro...

Page 219: ...and their integral components have been subject to extensive laboratory testing during the development and design work Prior to series production of a specific IED it is type tested according to nati...

Page 220: ...tional functions have information about the measured direction and for example measured impedance These values must be checked and verified as correct with the export or import of power available Fina...

Page 221: ...tests To be made after the first half year of service then with the cycle as proposed above and after any suspected maloperation or change of the IED setting Testing of protection IEDs shall preferabl...

Page 222: ...n from a portable test set Each protection shall be tested according to the secondary injection test information for the specific protection IED Only the setting values adopted shall be checked for ea...

Page 223: ...ng tripping output terminals in the cubicle When the terminal is opened an alarm shall be achieved on the signal system after a delay of some seconds However remember to close the circuit directly aft...

Page 224: ...perate There is however little point in testing healthy equipment and then putting it back into service with an open terminal with a removed fuse or open miniature circuit breaker with an open connect...

Page 225: ...signals are active INT NUMFAIL INT LMDERROR INT WATCHDOG INT APPERROR INT RTEERROR INT FTFERROR or any of the HW dependent signals INT Warning OFF ON This signal will be active if one or more of the...

Page 226: ...signal will be active if the IEC61850 stack did not succeed in some actions like reading IEC61850 configuration startup etc LMD READY FAIL LON network interface MIP DPS is in an unrecoverable error s...

Page 227: ...ackage The PC can be connected either to the port at the front or at the rear of the IED These events are logged as internal events Table 28 Events available for the internal event list in the IED Eve...

Page 228: ...e the transformer and may cause injuries to humans Never connect or disconnect a wire and or a connector to or from a IED during normal service Hazardous voltages and currents are present that may be...

Page 229: ...ail are connected to the corresponding metallic area on the circuit board when the new module is inserted 10 Reassemble the IED If the IED has been calibrated with the system inputs the calibration pr...

Page 230: ...224...

Page 231: ...etting parameter ZD ASCT Auxiliary summation current transformer ASD Adaptive signal detection AWG American Wire Gauge standard BBP Busbar protection BFP Breaker failure protection BIM Binary input mo...

Page 232: ...s of with two are used for transmitting data in both directions and two pairs for transmitting clock signals CPU Central processor unit CR Carrier receive CRC Cyclic redundancy check CS Carrier send C...

Page 233: ...ed lines GCM Communication interface module with carrier of GPS receiver module GDE Graphical display editor within PCM600 GI General interrogation command GIS Gas insulated switchgear GOOSE Generic o...

Page 234: ...d but will have a different number in the IED user interfaces The word instance is sometimes defined as an item of information that is representative of a type In the same way an instance of a functio...

Page 235: ...aller than the apparent impedance to the fault applied to the balance point i e the set reach The relay sees the fault but perhaps it should not have seen it PCI Peripheral component interconnect a lo...

Page 236: ...connector with constant impedance SMT Signal matrix tool within PCM600 SMS Station monitoring system SNTP Simple network time protocol is used to synchronize computer clocks on local area networks Thi...

Page 237: ...PISA Process interface components that deliver measured voltage and current values UTC Coordinated universal time A coordinated time scale maintained by the Bureau International des Poids et Mesures...

Page 238: ...3UO Three times the zero sequence voltage Often referred to as the residual voltage or the neutral point voltage Section 17 1MRK 504 088 UEN C Glossary 232 Installation and commissioning manual...

Page 239: ...233...

Page 240: ...ct us ABB AB Substation Automation Products SE 721 59 V ster s Sweden Phone 46 0 21 32 50 00 Fax 46 0 21 14 69 18 www abb com substationautomation 1MRK 504 088 UEN C Copyright 2010 ABB All rights rese...

Reviews: