SACE Emax 2 | ABB
14
-
Operazioni finali -
Final tests
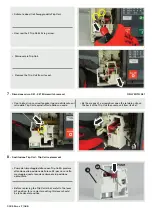
• ATTENZIONE!
Le parti di ricambio in eccesso a corredo del kit si intendono in sostituzione di quelle esistenti nel caso di usura o
consumo delle medesime. In tal caso accertarsi che i componenti sostituiti siano stati rimossi dall’impianto.
Rimuovere tutte le attrezzature utilizzate durante i lavori ed asportare i residui delle lavorazioni e dei materiali utilizzati.
Prima della messa in servizio dell’interruttore verificare il funzionamento delle meccaniche di inserzione ed estrazione
dell’interruttore dalla parte fissa eseguendo il movimento mediante la leva di manovra fornita a corredo e controllando
che gli otturatori per la segregazione delle parti in tensione siano chiusi ad estrazione avvenuta.
ATTENZIONE! Le parti di ricambio in eccesso a corredo del kit si intendono in sostituzione di quelle esistenti nel caso di
usura o consumo delle medesime. In tal caso accertarsi che i componenti sostituiti siano stati rimossi dall’impianto.
• WARNING!
The exceeding spare parts supplied with the kit must be considered as a replacement of the existing ones in case of
their usury or consumption. Then be sure that the replaced components have been removed from the apparatus.
Remove all the tools used for the work and eliminate any waste and scraps of the materials used.
Before putting the circuit-breaker into service, make sure that the mechanical components that rack the circuit-breaker
in and out of the fixed part function correctly. Do this by using the supplied operating lever and check to make sure that
the shutters that segregate the live parts are closed once the circuit-braker has been withdrawn.
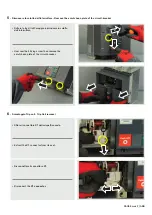
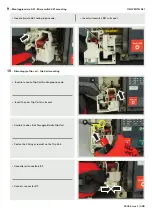
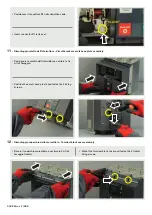
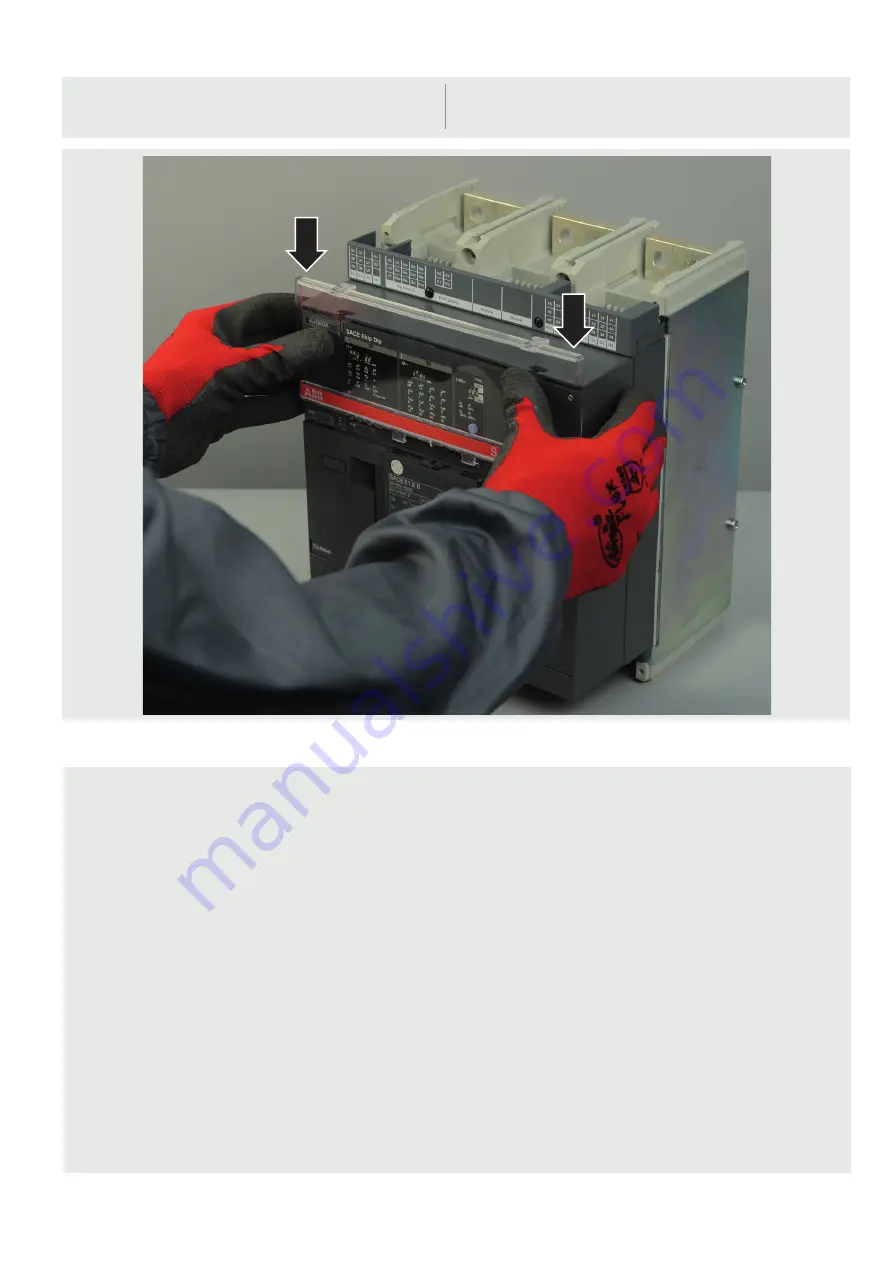
• Mount the transparent protection cover making it slide
downwards.
• Rimontare la protezione trasparente facendola scorrere
verso il basso.
13
-
Rimontaggio protezione trasparente
- Transparent protection cover assembly


