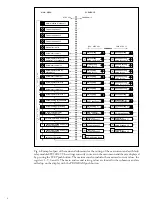
4
Selector switch-
groups SGF, SGB
and SGR
Part of the settings and the selections of the
operation characteristic of the relay modules in
various applications are made with the selector
switchgroups SG_ . The switchgroups are soft-
ware based and thus not physically to be found
in the hardware of the relay module. The indi-
cator of the switchgroup is lit when the checksum
of the switchgroup is shown on the display.
Starting from the displayed checksum and by
entering the setting mode, the switches can be
set one by one as if they were real physical
switches. At the end of the setting procedure, a
checksum for the whole switchgroup is shown.
The checksum can be used for verifying that the
switches have been properly set. Fig. 2 shows an
example of a manual checksum calculation.
When the checksum calculated according to the
example equals the checksum indicated on the
display of the relay module, the switches in the
concerned switchgroup are properly set.
Switch No
Pos.
Weigth
Value
1
1
x
1
=
1
2
0
x
2
=
0
3
1
x
4
=
4
4
1
x
8
=
8
5
1
x
16
=
16
6
0
x
32
=
0
7
1
x
64
=
64
8
0
x
128
=
0
Checksum
∑
=
93
Fig. 2. Example of calculating the checksum of
a selector switchgroup SG_.
The functions of the selector switches of the
different protection relay modules are described
in detail in the manuals of the different relay
modules.
Settings
Most of the start values and operate times are set
by means of the display and the push buttons on
the front panel of the relay modules. Each
setting has its related indicator which is lit when
the concerned setting value is shown on the
display.
In addition to the main stack of setting values
most D type relay modules allow a second stack
of settings. Switching between the main settings
and the second settings can be done in three
different ways:
1) By command V150 over the serial communi-
cation bus
2) By an external control signal BS1, BS2 or
RRES (BS3)
3) Via the push-buttons of the relay module, see
submenu 4 of register A.
Setting mode
Generally, when a large number of settings is to
be altered, e.g. during commissioning of relay
systems, it is recommended that the relay set-
tings are entered with the keyboard of a
personal computer provided with the necessary
software. When no computer nor software is
available or when only a few setting values need
to be altered the procedure described below is
used.
The registers of the main menu and the submenus
contain all parameters that can be set. The
settings are made in the so called setting mode,
which is accessible from the main menu or a
submenu by pressing the PROGRAM push
button, until the whole display starts flashing.
This position indicates the value of the param-
eter before it has been altered. By pressing the
PROGRAM push button the programming se-
quence moves forward one step. First the
rightmost digit starts flashing while the rest of
the display is steady. The flashing digit is set by
means of the STEP push button. The flashing
cursor is moved on from digit to digit by press-
ing the PROGRAM push button and in each
stop the setting is performed with the STEP
push button. After the parameter values have
been set, the decimal point is put in place. At the
end the position with the whole display flashing
is reached again and the data is ready to be
stored.
A set value is recorded in the memory by press-
ing the push buttons STEP and PROGRAM
simultaneously. Until the new value has been
recorded a return from the setting mode will
have no effect on the setting and the former
value will still be valid. Furthermore
any attempt
to make a setting outside the permitted limits for a
particular parameter will cause the new value to be
disqualified and the former value will be main-
tained.
Return from the setting mode to the
main menu or a submenu is possible by pressing
the PROGRAM push button until the green
digits on the display stop flashing.


