6
3C
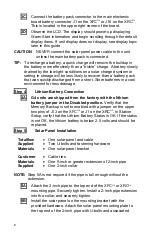
Connect the battery pack connector to the main electronic
board battery connector J1 on the XFC
G4
or J16 on the XRC
G4
.
This is located in the upper right corner of the board.
3D
Observe the LCD. The display should power up displaying
Warm Start information and begin scrolling through the default
display items. If unit display does not display, see display topic
later in this guide.
CAUTION
: NEVER connect the solar panel power cable to the unit
unless the main battery pack is connected.
TIP:
To recharge a battery, a quick charge will remove the buildup in
the battery more effectively than a “trickle” charge. A battery slowly
drained by the low light conditions on a solar charged system or
setting in storage will be less likely to recover than a battery pack
that was quickly discharged from a short. Store batteries in a cool
environment for less drainage.
Step 4
Lithium Battery Connection
4A
G4 units are shipped from the factory with the lithium
battery jumper in the Disabled position.
Verify that the
Memory Backup is set to enabled with a jumper on the upper
two pins of J13 on the XFC
G4
or J1 on the XRC
G4
. In Station
Setup, verify that the Lithium Battery Status is OK. If the status
is not OK, the lithium battery is below 2.5 volts and should be
replaced.
Step 5
Solar Panel Installation
Totalflow
Supplied
Materials
•
One solar panel and cable
•
Two U-bolts and fastening hardware
•
One solar panel bracket
Customer
Materials
Supplied
•
Cable
ties
•
One 9-inch or greater extension of 2-inch pipe
•
One 2-inch collar
NOTE:
Step 5A is not required if the pipe is tall enough without the
extension.
5A
Attach the 2-inch pipe to the top end of the XFC
G4
or XRC
G4
mounting pipe. Securely tighten. Install a 2-inch pipe extension
into the collar, and securely tighten.
5B
Install the solar panel on the mounting bracket with the
provided hardware. Attach the solar panel mounting plate to
the top end of the 2-inch pipe with U-bolts and associated
Summary of Contents for TOTALFLOW X G4 Series
Page 1: ......


